<?xml version="1.0" encoding="utf-8"?>
<feed xmlns="http://www.w3.org/2005/Atom">

  <title><![CDATA[iOS梦工厂]]></title>
  <link href="http://al1020119.github.io/atom.xml" rel="self"/>
  <link href="http://al1020119.github.io/"/>
  <updated>2017-01-19T16:36:52+08:00</updated>
  <id>http://al1020119.github.io/</id>
  <author>
    <name><![CDATA[iCocos]]></name>
    
  </author>
  <generator uri="http://octopress.org/">Octopress</generator>

  
  <entry>
    <title type="html"><![CDATA[初次见面-LLVM/Clang]]></title>
    <link href="http://al1020119.github.io/blog/2017/01/20/chu-ci-jian-mian-llvm-slash-clang/"/>
    <updated>2017-01-20T23:34:34+08:00</updated>
    <id>http://al1020119.github.io/blog/2017/01/20/chu-ci-jian-mian-llvm-slash-clang</id>
    <content type="html"><![CDATA[<p>做了几个小时的车，终于到了世界上最美的地方-《家》，虽然有点累，但是还是很开心，总有种说不出的激动。</p>

<ul>
<li>虽然过年，但是像我这么爱学习的孩子，肯定不会停止学习，因为在车上用电脑看了孙源将的Clang的视频，所以打算自己也去摸索一下，哪怕是瞎扯一番，希望以后也有机会能用到实战或者工作中。</li>
</ul>


<p>开始之前，祝大家新年快乐，身体健康，万事如意，也祝各位单身狗早日脱单（虽然我也是单身狗），相信过年都还坐在电脑前的不是单身狗就是技术狂。</p>

<p>好了，废话也不多说，come on&hellip;.</p>

<!--more-->


<h3>介绍</h3>

<pre><code>iOS 开发中 Objective-C 和 Swift 都用的是 Clang / LLVM 来编译的。LLVM是一个模块化和可重用的编译器和工具链技术的集合，Clang 是 LLVM 的子项目，是 C，C++ 和 Objective-C 编译器，目的是提供惊人的快速编译，比 GCC 快3倍，其中的 clang static analyzer 主要是进行语法分析，语义分析和生成中间代码，当然这个过程会对代码进行检查，出错的和需要警告的会标注出来。LLVM 核心库提供一个优化器，对流行的 CPU 做代码生成支持。lld 是 Clang / LLVM 的内置链接器，clang 必须调用链接器来产生可执行文件。

LLVM 比较有特色的一点是它能提供一种代码编写良好的中间表示 IR，这意味着它可以作为多种语言的后端，这样就能够提供语言无关的优化同时还能够方便的针对多种 CPU 的代码生成。
</code></pre>

<h3>总结一句</h3>

<pre><code>LLVM是编译器和工具链技的集合，Clang才是真正的编译器，Clang必须调用链接器(内置lldb)来产生可执行文件。
</code></pre>

<p>摘自<a href="https://linuxtoy.org/archives/llvm-and-clang.html">https://linuxtoy.org/archives/llvm-and-clang.html</a></p>

<pre><code>LLVM（Low Level Virtual Machine）：编译器的后台——进行程序语言的编译期优化、链接优化、在线编译优化、代码生成（优化以任意程序语言编写的程序的编译时间(compile-time)、链接时间(link-time)、运行时间(run-time)以及空闲时间(idle-time)）
Clang:：编译器（LLVM）的前端— 是一个 C++ 编写、基于 LLVM、发布于 LLVM BSD 许可证下的 C/C++/Objective C/Objective C++ 编译器，其目标（之一）就是超越 GCC
</code></pre>

<h6>LLVM其他用途</h6>

<pre><code>LLVM 还被用在 Gallium3D 中进行 JIT 优化，Xorg 中的 pixman 也有考虑使用 LLVM 来优化执行速度，llvm-lua 使用 LLVM 来编译 Lua 代码，gpuocelot 使用 LLVM 可以令 CUDA 程序无需重新编译即可运行在多核 X86CPU、IBM Cell、支持 OpenCL 的设备之上... 

LLVM，做语法树分析，实现语言转换、字符串加密。编写ClangPlugin，扩展功能。编写Pass，代码混淆优化。
</code></pre>

<h3>区别于优势：</h3>

<h6>总结：Clang 具有如下优点：</h6>

<pre><code>编译速度快：在某些平台上，Clang 的编译速度显著的快过 GCC。
占用内存小：Clang 生成的 AST 所占用的内存是 GCC 的五分之一左右。
模块化设计：Clang 采用基于库的模块化设计，易于 IDE 集成及其他用途的重用。
诊断信息可读性强：在编译过程中，Clang 创建并保留了大量详细的元数据 (metadata)，有利于调试和错误报告。
</code></pre>

<h6>Clang缺陷：</h6>

<pre><code>支持更多语言：GCC 除了支持 C/C++/Objective-C, 还支持 Fortran/Pascal/Java/Ada/Go 和其他语言。Clang 目前支持的语言有 C/C++/Objective-C/Objective-C++。
加强对 C++ 的支持：Clang 对 C++ 的支持依然落后于 GCC，Clang 还需要加强对 C++ 提供全方位支持。
支持更多平台：GCC 流行的时间比较长，已经被广泛使用，对各种平台的支持也很完备。Clang 目前支持的平台有 Linux/Windows/Mac OS。
</code></pre>

<h6>当然，GCC 也有其优势：</h6>

<pre><code>GCC 原名为GNU C语言编译器
支持 JAVA/ADA/FORTRAN
当前的 Clang 的 C++ 支持落后于 GCC，参见。（近日 Clang 已经可以自编译，见）
GCC 支持更多平台
GCC 更流行，广泛使用，支持完备
GCC 基于 C，不需要 C++ 编译器即可编译
</code></pre>

<h3>关于Clang</h3>

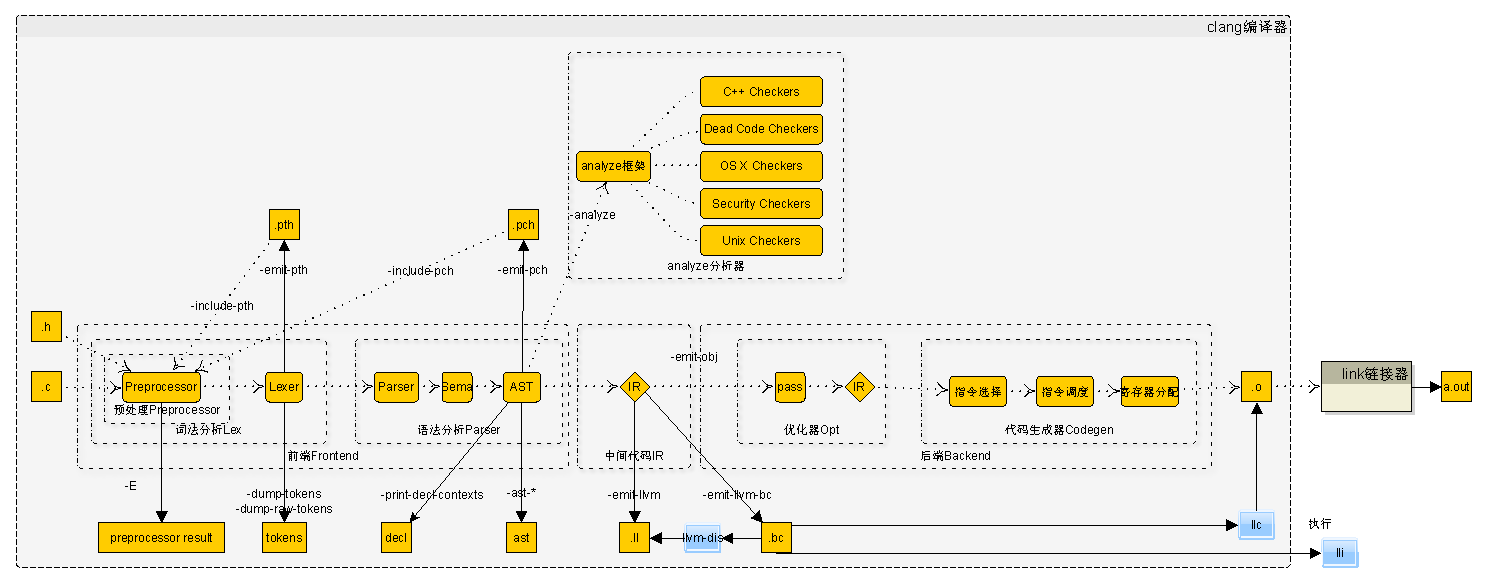
<h6>clang分三个实体概念：</h6>

<pre><code>clang驱动：利用现有OS、编译环境以及参数选项来驱动整个编译过程的工具。
clang编译器：利用clang前端组件及库打造的编译器，其入口为cc1_main; 参数为clang -cc1 或者 -Xclang；
clang前端组件及库：包括Support、Basic、Diagnostics、Preprocessor、Lexer、Sema、CodeGen等；
</code></pre>

<h5>Clang架构图</h5>

<p><img src="http://al1020119.github.io/images/clang0001.png" title="Caption" ></p>

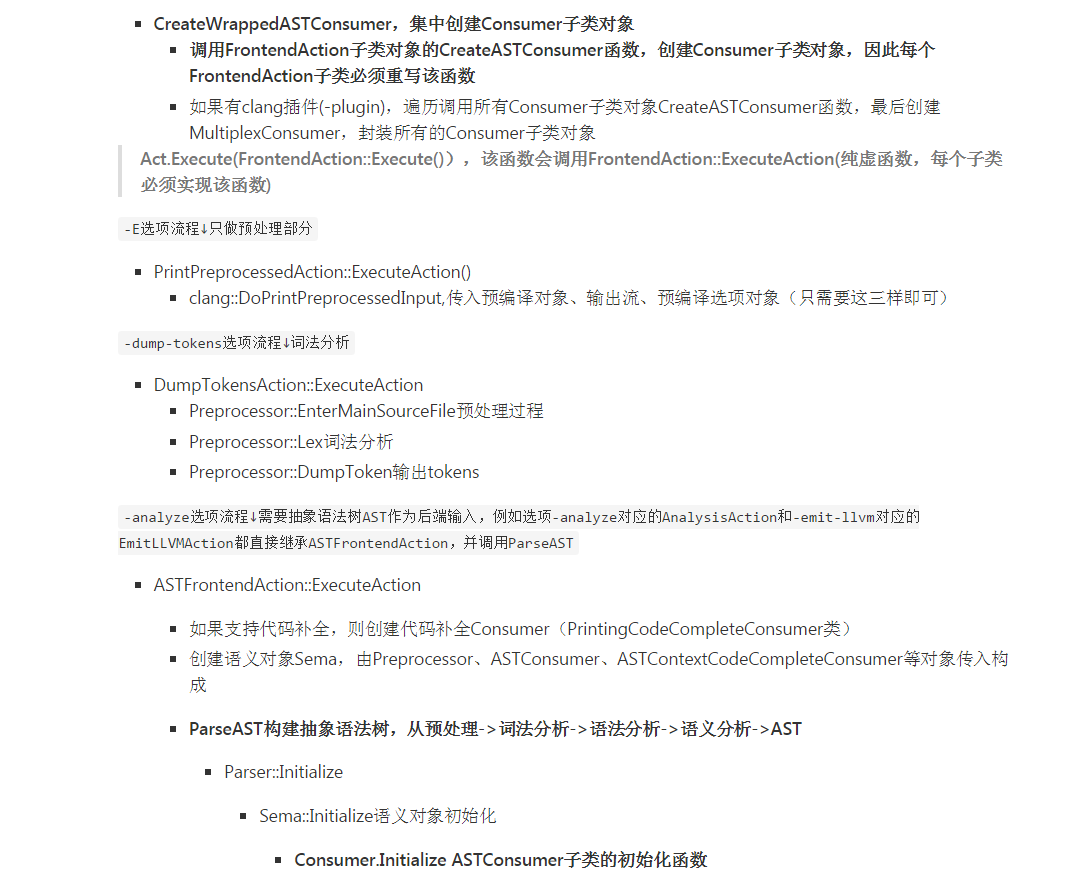
<h5>Clang流程图</h5>

<p><img src="http://al1020119.github.io/images/clang0002.png" title="Caption" ></p>

<h5>关于编译器：</h5>

<pre><code>编译器前端负责产生机器无关的中间代码
编译器后端负责对中间代码进行优化并转化为目标机器代码，
</code></pre>

<h3>编译过程：</h3>

<pre><code>预处理（Pre-process）：把宏替换，删除注释，展开头文件，产生 .i 文件。

编译（Compliling）：把之前的 .i 文件转换成汇编语言，产生 .s文件。

汇编（Asembly）：把汇编语言文件转换为机器码文件，产生 .o 文件。

链接（Link）：对.o文件中的对于其他的库的引用的地方进行引用，生成最后的可执行文件（同时也包括多个 .o 文件进行 link）。
</code></pre>

<h6>曾经看到有人对ios编译流程做了更加详细的理解</h6>

<pre><code>编译信息写入辅助文件，创建文件架构 .app 文件
处理文件打包信息
执行 CocoaPod 编译前脚本，checkPods Manifest.lock
编译.m文件，使用 CompileC 和 clang 命令
链接需要的 Framework
编译 xib
拷贝 xib ，资源文件
编译 ImageAssets
处理 info.plist
执行 CocoaPod 脚本
拷贝标准库
创建 .app 文件和签名
</code></pre>

<h6>期间包括了各种特性与底层</h6>

<ul>
<li>预处理(宏的替换，头文件的导入，#if的处理)</li>
<li>词法分析(把代码切成一个个 Token，大小括号，等于号,字符串)</li>
<li>语法分析(法是否正确,将所有节点组成抽象语法树 AST)</li>
<li>IR中间代码的生成</li>
<li>CodeGen 会负责将语法树自顶向下遍历逐步翻译成 LLVM IR(IR 是编译过程的前端的输出后端的输入,Pass 是 LLVM 优化工作的一个节点，一个节点做些事，一起加起来就构成了 LLVM 完整的优化和转化。)</li>
<li>开启了 bitcode 苹果会做进一步的优化，有新的后端架构还是可以用这份优化过的 bitcode 去生成。</li>
<li>生成汇编</li>
<li>生成目标文件</li>
<li>生成可执行文件</li>
</ul>


<h3>点击Run做了什么（上面的详细版）：</h3>

<pre><code>预处理 -&gt; 词法分析 （token ） -&gt;语法分析 -&gt;语义分析 -&gt;中间代码生成 -&gt; 生成字节码-&gt; 优化 -&gt; 生成汇编代码 -&gt; Link -&gt; 目标文件 -&gt;生层可执行文件。
</code></pre>

<h6>预处理</h6>

<pre><code>预处理：处理源文件中#开头的预编译命令，宏的替换
</code></pre>

<h6>编译</h6>

<pre><code>词法分析 （token ）：把代码切成一个个Token（词法/代码符号），大小括号，等于号,字符串
语法分析：符号化的字符串，转化抽象为可以被计算机存储的树形结构，即抽象语法树（AST），检测正确性 
语义分析：语义分析器就会发现类型不匹配，编译器提出相应的错误警告。主要是类型检查、以及符号表管理
中间代码生成：编译器前端负责产生机器无关的中间代码，编译器后端负责对中间代码进行优化并转化为目标机器代码
生成字节码/目标代码：编译器后端主要包括代码生成器、代码优化器。代码生成器将中间代码转换为目标代码，代码优化器主要是进行一些优化，比如删除多余指令，选择合适寻址方式等
</code></pre>

<h6>汇编</h6>

<p>目标代码需要经过汇编器处理，才能变成机器上可以执行的指令。生成对应的.o文件</p>

<h6>链接</h6>

<p>链接器（这里指的是静态链接器）将多个目标文件合并为一个可执行文件，在 OS X 和 iOS中的可执行文件是 Mach-O，对于Mach-O的文件格式可以参考这里，刚才所描述的过程其实可以用 sunnyxx的一页 ppt来进行总结</p>

<ul>
<li>动态：静态链接：在编译链接期间发挥作用，把目标文件和静态库一起链接形成可执行文件</li>
<li>静态：动态链接：链接过程推迟到运行时再进行。</li>
</ul>


<h6>区别</h6>

<pre><code>如果多个程序都用到了一个库，那么每个程序都要将其链接到可执行文件中，非常冗余，动态链接的话，多个程序可以共享同一段代码，不需要在磁盘上存多份拷贝，但是动态链接发生在启动或运行时，增加了启动时间，造成一些性能的影响。
静态库不方便升级，必须重新编译，动态库的升级更加方便
</code></pre>

<h6>签名（.app）</h6>

<p>.app目录中，有又一个叫_CodeSignature的子目录，这是一个 plist文件，里面包含了程序的代码签名，你的程序一旦签名，就没有办法更改其中的任何东西，包括资源文件，可执行文件等，iOS系统会检查这个签名。</p>

<pre><code>签名过程本身是由命令行工具 codesign 来完成的。如果你在 Xcode中build一个应用，这个应用构建完成之后会自动调用codesign 命令进行签名，这也是Link之后的一个关键步骤。
</code></pre>

<h6>启动</h6>

<p>启动过程中，dyld（动态链接器） 起了很重要的作用，进行动态链接，进行符号和地址的一个绑定</p>

<pre><code>加载所依赖的dylibs
Fix-ups：Rebase修正地址偏移，因为 OS X和 iOS 搞了一个叫 ASLR的东西来做地址偏移（随机化）来避免收到攻击
Fix-ups：Binding确定 Non-Lazy Pointer地址，进行符号地址绑定。
ObjC runtime初始化：加载所有类
Initializers：执行load 方法和__attribute__((constructor))修饰的函数
</code></pre>

<h3>扯在最后</h3>

<pre><code>    宏观的LLVM，指的是整个的LLVM的框架，它肯定包含了Clang，因为Clang是LLVM的框架的一部分，是它的一个C/C++的前端。虽然这个前端占的比重比较大，但是它依然只是个前端，LLVM框架可以有很多个前端和很多个后端，只要你想继续扩展。
    微观的LLVM指的是以实际开发过程中，包括实际使用过程中，划分出来的LLVM。比如编译LLVM和Clang的时候，LLVM的源码包是不包含Clang的源码包的，需要单独下载Clang的源码包。
    所以这里想讨论的就是微观的LLVM和Clang的关系。从编译器用户的角度，Clang使用了LLVM中的一些功能，目前所知道的主要就是对中间格式代码的优化，或许还有一部分生成代码的功能。从Clang和微观LLVM的源码位置可以看出，Clang是基于微观的LLVM的一个工具。而从功能的角度来说，微观的LLVM可以认为是一个编译器的后端，而Clang是一个编译器的前端，它们的关系就更加的明了了，一个编译器前端想要程序最终变成可执行文件，是缺少不了对编译器后端的介绍的。
</code></pre>

<hr />

<hr />

<h6>微信号：</h6>

<p>clpaial10201119（Q Q：2211523682）</p>

<h6>微博WB:</h6>

<p><a href="http://weibo.com/u/3288975567?is_hot=1">http://weibo.com/u/3288975567?is_hot=1</a></p>

<h6>gitHub：</h6>

<p><a href="https://github.com/al1020119">https://github.com/al1020119</a></p>

<h6>博客</h6>

<p><a href="http://al1020119.github.io/">http://al1020119.github.io/</a></p>

<hr />

<p><img src="http://al1020119.github.io/images/iCocosCoder.jpg" title="Caption" ></p>

<p><img src="http://al1020119.github.io/images/iCocosPublic.jpg" title="Caption" ></p>
]]></content>
  </entry>
  
  <entry>
    <title type="html"><![CDATA[Node.js是什么鬼？]]></title>
    <link href="http://al1020119.github.io/blog/2017/01/12/node-dot-jsshi-shi-yao-gui-%3F/"/>
    <updated>2017-01-12T11:18:13+08:00</updated>
    <id>http://al1020119.github.io/blog/2017/01/12/node-dot-jsshi-shi-yao-gui-?</id>
    <content type="html"><![CDATA[<h6>Node.js介绍</h6>

<pre><code>Node.js什么时候出现，2009年，Ryan Dahl(瑞恩·达尔)在GitHub上发布了最初版本的部分Node.js包，随后几个月里，有人开始使用Node.js开发应用
什么是Node.js,做过Javascript开发的，看到Node.js这个名字，初学者可能会误以为这是一个Javascript应用，事实上，Node.js采用C++语言编写而成，是一个Javascript的运行环境，意思就是底层使用c++编写，外层封装采用Javascript，需要使用Javascript解析执行。
比如OC底层也是c++，但是执行代码，只需要解析OC代码。
Node.js是一个后端的Javascript运行环境，这意味着你可以编写服务器端的Javascript代码，交给Node.js来解释执行。
</code></pre>

<!--more-->


<h6>Node.js工作原理与优缺点（了解一门语言的开始）</h6>

<pre><code>传统Web服务器原理(T):传统的网络服务技术，是每个新增一个连接（请求）便生成一个新的线程，这个新的线程会占用系统内存，最终会占掉所有的可用内存。

Node.js工作原理(T)：只运行在一个单线程中，使用非阻塞的异步 I/O 调用，所有连接都由该线程处理，也就是一个新的连接，不会开启新的线程，仅仅一个线程去处理多个请求。

优缺点：
    传统的比较消耗内存，Node.js只开启一个线程，大大减少内存消耗。
    假设是普通的Web程序，新接入一个连接会占用 2M 的内存，在有 8GB RAM的系统上运行时, 算上线程之间上下文切换的成本，并发连接的最大理论值则为 4000 个。这是在传统 Web服务端技术下的处理情况。而 Node.js 则达到了约 1M 一个并发连接的拓展级别
    Node.js弊端:大量的计算可能会使得 Node 的单线程暂时失去反应, 并导致所有的其他客户端的请求一直阻塞, 直到计算结束才恢复正常

疑问？Node.js是单线程的。单线程怎么开启异步?怎么工作的？ 需要了解事件驱动。

什么是事件驱动?
传统的web server多为基于线程模型。你启动Apache或者什么server，它开始等待接受连接。当收到一个连接，server保持连接连通直到页面或者什么事务请求完成。如果他需要花几微妙时间去读取磁盘或者访问数据库，web server就阻塞了IO操作（这也被称之为阻塞式IO).想提高这样的web server的性能就只有启动更多的server实例。
Node.Js使用事件驱动模型，当web server接收到请求，就把它关闭然后进行处理，然后去服务下一个web请求。当这个请求完成，它被放回处理队列，当到达队列开头，这个结果被返回给用户。这个模型非常高效可扩展性非常强，因为webserver一直接受请求而不等待任何读写操作。（这也被称之为非阻塞式IO或者事件驱动IO）
本质:当然最终处理事件还是需要底层开启线程，只不过接受请求只用一个线程去接收。
</code></pre>

<h6>Node.js使用介绍</h6>

<pre><code>Node.js使用Module模块去划分不同的功能，以简化App开发，Module就是库，跟组件化差不多，一个功能一个库。
NodeJS内建了一个HTTP服务器，可以轻而易举的实现一个网站和服务器的组合，不像PHP那样，在使用PHP的时候，必须先搭建一个Apache之类的HTTP服务器，然后通过HTTP服务器的模块加载CGI调用，才能将PHP脚本的执行结果呈现给用户
require() 函数，用于在当前模块中加载和使用其他模块；
</code></pre>

<h6>Express模块(框架)</h6>

<pre><code>Express是Node.JS第三方库
Express可以处理各种HTTP请求
Express是目前最流行的基于Node.js的Web开发框架，
Express框架建立在node.js内置的http模块上，可以快速地搭建一个Web服务器
</code></pre>

<h3>Node搭建服务器及使用</h3>

<h4>方案一：</h4>

<pre><code>打开终端，输入node -v，先查看是否已经安装
如果没有安装，就需要安装node软件。
mac上可以使用Homebrew，安装node
    Homebrew:Homebrew简称brew，是Mac OSX上的软件包管理工具，能在Mac中方便的安装软件或者卸载软件,相当于window上360管家，可以帮你下载软件。

先输入brew -v,查看mac是否安装了HomeBrew
    安装ruby教程(http://www.jianshu.com/p/daa92187621c)
    使用ruby安装Homebrew，前提是安装了ruby
    输入指令安装brew

   ruby -e "$(curl -fsSL https://raw.githubusercontent.com/Homebrew/install/master/install)"

使用Homebrew安装Node，输入指令

brew install node

安装完，输入`node -v``查看是否安装成功
</code></pre>

<h6>二、安装NPM</h6>

<pre><code>NPM是随同NodeJS一起安装的包管理工具，用于下载NodeJS第三方库。
类似iOS开发中cocoapods，用于安装第三方框架
新版的NodeJS已经集成了npm，所以只要安装好Node.JS就好
</code></pre>

<h6>三、利用NPM下载第三方模块（Express和Socket.IO）</h6>

<pre><code>package.json
    package.json类似cocoapods中的Podfile文件
    package.json文件描述了下载哪些第三方框架.
    可以使用npm init创建
    需要添加dependencies字段，描述添加哪些框架,其他字段随便填
    注意：不能有中文符号

     "dependencies": {
           "express": "^4.14.0",
           "socket.io": "^1.4.8"
         }
</code></pre>

<h6>四、执行npm install,就会自动下载依赖库</h6>

<pre><code>npm install
</code></pre>

<h4>方案二：</h4>

<h6>step1</h6>

<p>或者你如果不喜欢使用命令的话这个方案相信是最好的选择。</p>

<pre><code>访问nodejs官网，点击蓝色选框区域稳定版，并下载https://nodejs.org/en/
</code></pre>

<h6>step 2：</h6>

<pre><code>双击刚下载的文件，按步骤默认安装就行
</code></pre>

<h6>step 3：</h6>

<pre><code>安装完成后打开终端，输入
npm -v
node -v
两个命令，如下图出现版本信息，说明安装成功。
</code></pre>

<h4>使用</h4>

<p>使用上面任何一种种方式完成以后，就可以开始测试了。</p>

<p>新建一个js文件，nodejsTest.js , 输入下面的代码, 并保存</p>

<pre><code>var http = require("http");

http.createServer(function(request, response) {
    response.writeHead(200, {
        "Content-Type" : "text/plain"
    });
    response.write("Welcome to Nodejs");
    response.end();
}).listen(8000, "127.0.0.1");

console.log("Creat server on http://127.0.0.1:8000/");
</code></pre>

<h4>测试</h4>

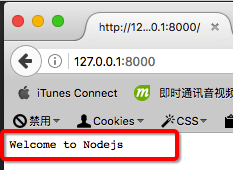
<p>打开终端进入 nodejsTest.js 所在目录， 输入 node nodejsTest</p>

<p><img src="http://al1020119.github.io/images/node0001.png" title="Caption" ></p>

<p>打开浏览器，点击或者输入<a href="http://127.0.0.1:8000/%EF%BC%8C">http://127.0.0.1:8000/%EF%BC%8C</a> 如果无法打开，可以去掉.listen(8000, “127.0.0.1”) 中得ip监听改成 .listen(8000)，然后点击或者输入<a href="http://localhost:8000/">http://localhost:8000/</a></p>

<p><img src="http://al1020119.github.io/images/node0002.png" title="Caption" ></p>

<p>关于Node.js其他的相关配置可以查看<a href="http://www.jianshu.com/p/d76ecf5ed690">http://www.jianshu.com/p/d76ecf5ed690</a>,笔者也就是好奇所以是了一下，希望不会被喷。</p>

<blockquote><p>后面有机会会结合客户端实现数据的交互相关处理。</p></blockquote>

<p>参考：
<a href="http://www.ruanyifeng.com/blog/2014/10/event-loop.html">http://www.ruanyifeng.com/blog/2014/10/event-loop.html</a></p>

<p><a href="http://www.csdn.net/article/a/2016-07-12/3358">http://www.csdn.net/article/a/2016-07-12/3358</a></p>

<p><a href="http://www.yiibai.com/nodejs/nodejs-quick-start.html">http://www.yiibai.com/nodejs/nodejs-quick-start.html</a></p>

<hr />

<hr />

<h6>微信号：</h6>

<p>clpaial10201119（Q Q：2211523682）</p>

<h6>微博WB:</h6>

<p><a href="http://weibo.com/u/3288975567?is_hot=1">http://weibo.com/u/3288975567?is_hot=1</a></p>

<h6>gitHub：</h6>

<p><a href="https://github.com/al1020119">https://github.com/al1020119</a></p>

<h6>博客</h6>

<p><a href="http://al1020119.github.io/">http://al1020119.github.io/</a></p>

<hr />

<p><img src="http://al1020119.github.io/images/iCocosCoder.jpg" title="Caption" ></p>

<p><img src="http://al1020119.github.io/images/iCocosPublic.jpg" title="Caption" ></p>
]]></content>
  </entry>
  
  <entry>
    <title type="html"><![CDATA[App打包发布———坑中之坑]]></title>
    <link href="http://al1020119.github.io/blog/2017/01/10/appda-bao-fa-bu-keng-zhong-zhi-keng/"/>
    <updated>2017-01-10T10:54:05+08:00</updated>
    <id>http://al1020119.github.io/blog/2017/01/10/appda-bao-fa-bu-keng-zhong-zhi-keng</id>
    <content type="html"><![CDATA[<blockquote><p>上线了这么多App，关于App上线的坑，也遇到了很多，但是这一次是最严重，也是最值得思考的，所以我打算翻云覆雨一番。</p></blockquote>

<h2>问题起源</h2>

<pre><code>构建版本中找不到提交的二进制文件
</code></pre>

<p>可能有人会说，这个一般等个20分钟就有了的，如果是这么简单，那我还在这里写个鬼啊！</p>

<p>所以，等待被咔嚓了，因为我等了一个晚上。。。。。</p>

<!--more-->


<pre><code>因为年前的最后第二个版本就在昨晚打包提交（不要问我为什么是最后第二个，因为放假的那天晚上还有一场奋斗），因为我一般的习惯是公司打包提交之后，回到家里再点提交以供审核，所以就直接回家了。
</code></pre>

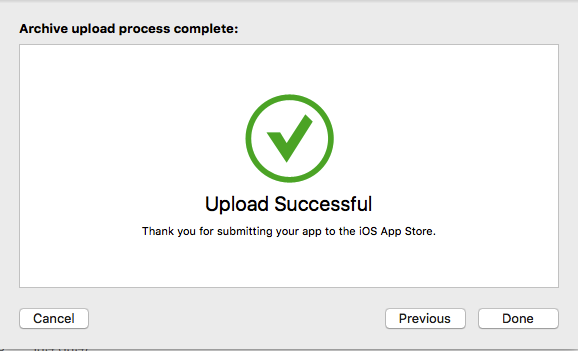
<p>成功上传提示</p>

<p><img src="http://al1020119.github.io/images/uploadSuccess.png" title="Caption" ></p>

<pre><code>回到家里撒野没管，该干撒干撒，看书，看电影，和家里视频。。。。10点钟的时候，被老大告知，itnues connect里面是空的，不应该，从没遇到过这种问题，我在想估计又是苹果的坑，网上一搜，原来还真有一大把类似问题发，其中大部分这样的是因为我或者UI不细心。
</code></pre>

<p>好了下面细数一下整个过程。</p>

<ul>
<li>网上找到了这么几种问题及分析方案。</li>
</ul>


<h4>图片错误提示</h4>

<pre><code>运行成功，打包也成功，但是打包的时候报了一个：pngcrush caught libpng error:类似错误（这里即时有错误还是成功打包）
</code></pre>

<h6>两种解决方法 ：</h6>

<pre><code>   1.  在build settings里把工程里的Compress PNG files设置为NO，问题解决，但这样设置以后，弄出来的ipa会很大，感觉不是很理想。

   2. mac上的preview(预览)打开出问题的png文件，然后重新导出为png文件或者用photoshop把png图片保存为NOT INTERLACED(不交错)的，这样真机调试时就没有错误了。
</code></pre>

<h6>还有一种类似的提示，当然大部分都会直接提示到对应的图片。</h6>

<pre><code> While reading /Volumes/data2/project/ChildStory/ChildStory/nav_bar.png pngcrush caught libpng error:


Could not find file: /Users/hopo/Library/Developer/Xcode/DerivedData/ChildStory-cwdwhztnszhpawbnlproivndbuvw/Build/Products/Debug-iphoneos/ChildStory.app/nav_bar.png

Command /Applications/Xcode.app/Contents/Developer/Platforms/iPhoneOS.platform/Developer/usr/bin/copypng emitted errors but did not return a nonzero exit code to indicate failure
</code></pre>

<h6>原因：</h6>

<p>该文件不是真正的png文件，可能是个jpg文件（被你手动更改的），实际的文件头信息是不一样的，造成不能识别。</p>

<p>解决方法有两种：</p>

<pre><code>1. 重新把图片文件处理成png文件

2. 修改文件名后缀，比如改成.jpg
</code></pre>

<h3>关于二进制</h3>

<pre><code>提交打包提交App，将包上传到iTunes Connect之后，以为就能发布了，便点击构建版本，发现没有刚刚上传的包，于是就点击"预发行"看一下,会看到"已上传"，过不久再刷新一次再看，就变成了二进制无效，无比的郁闷，上传了五六次都是二进制文件无效，
</code></pre>

<h6>原因：</h6>

<p>自2015年2月份开始,新上传到iTunes上面审核的app,必须支持64位，新上传是指第一次上传，</p>

<p>或者没有审核通过过，总之就是在AppStore上面没有上架的app,必须支持64位，包括工程里面的代码和用到的静态库文件</p>

<pre><code>1. build setting中Archivecture指定arm64
2. Schemes的Analyze和Archive设置release模式
3. Build Active Architecture Only：是否只编译当前设备适用的指令集（如果这个参数设为YES，使用iPhone 6调试，那么最终生成的一个支持ARM64指令集的Binary。一般在DEBUG模式下设为YES，RELEASE设为NO）。
</code></pre>

<p>Valid architectures：即将编译的指令集。（Valid architectures 和 Architecture两个集合的交集为最终编译生成的版本）</p>

<p>Architectures：你想支持的指令集。（支持指令集是通过编译生成对应的二进制数据包实现的，如果支持的指令集数目有多个，就会编译出包含多个指令集代码的数据包，造成最终编译的包很大。）</p>

<p>温馨提示+警钟</p>

<p>上线的时候一定要切忌（作为一个好的程序员应有的习惯）</p>

<pre><code>1. 不要TMD直接修改jpg&lt;--&gt;png。
2. 一定要跑真机，一定要Analyze，一定要跑一下Profile里面常见的工具。
3. 编译，运行，打包的时候一定不能放过任何错误，一个都不行。
4. 编译，运行，打包（尤其是打包）的时候一定要尽量减少警告。
5. archive之前一定要细心检查相关配置，release/debug，API切换，脚本配置等等
6. Archive-Upload之后，最好等提交以供审核了之后再下班，或者带电脑回去，不然运气不好加班也白加了。
</code></pre>

<h6>最后来个喜讯，相信这之前是大部分iOS开发者苦恼的问题之一，所以你们懂。</h6>

<p><img src="http://al1020119.github.io/images/iCocosATS0001.png" title="Caption" ></p>

<hr />

<hr />

<h6>微信号：</h6>

<p>clpaial10201119（Q Q：2211523682）</p>

<h6>微博WB:</h6>

<p><a href="http://weibo.com/u/3288975567?is_hot=1">http://weibo.com/u/3288975567?is_hot=1</a></p>

<h6>gitHub：</h6>

<p><a href="https://github.com/al1020119">https://github.com/al1020119</a></p>

<h6>博客</h6>

<p><a href="http://al1020119.github.io/">http://al1020119.github.io/</a></p>

<hr />

<p><img src="http://al1020119.github.io/images/iCocosCoder.jpg" title="Caption" ></p>

<p><img src="http://al1020119.github.io/images/iCocosPublic.jpg" title="Caption" ></p>
]]></content>
  </entry>
  
  <entry>
    <title type="html"><![CDATA[保持初心继续前进-年终篇]]></title>
    <link href="http://al1020119.github.io/blog/2016/12/30/bao-chi-chu-cin-ji-xu-qian-jin/"/>
    <updated>2016-12-30T18:16:05+08:00</updated>
    <id>http://al1020119.github.io/blog/2016/12/30/bao-chi-chu-cin-ji-xu-qian-jin</id>
    <content type="html"><![CDATA[<p>今年一年可谓是我收获最多的一年，技术，圈子，交际，心态。唯一没有收获的就是：依然是条单身🐩😂😂😂😂😂😂😂😂😂😂😂😂。。。。。此处省去一万字！！！</p>

<p>因为我一直都是比较喜欢学习的，尤其是研究技术，关于非技术的的实在太多，而且很多需要自己亲身感受才能体会的。所以这里就先总结一下去年一年个人在技术上的发展。然后对接下来的一年和和以后的规划。</p>

<!--more-->


<ol>
<li><p>项目： 真正从零开始架构一个项目，并不像之前做外包那样瞎整一条。这其中考虑到了，设计模式，架构模式，多线程处理，音视频处理，性能处理，数据持久性优化等，都有综合考虑，虽然还有欠缺的地方，但是总之跟之前做的东西里面还是有一个很大的突破的。</p></li>
<li><p>直播：今年可谓是个直播元年，可以看到的是，各大公司和部分创业型公司都开始往直播的方向发展，很多女性，不管长的美不美，或者有没有才华，年不年轻，都有试着或者想做一下直播，有的是专业，有的是业余，或许为了娱乐，或许为了生活，甚至很多男性或者屌丝男都开始玩起直播了。</p>

<ul>
<li>所以我也专门花了一段时间研究了一下直播相关的技术，因为直播里面的技术可谓层出不穷，可以算是最难最广的一块。说实话我自己也不知道自己现在算不算是对这一块入门，因为有些东西实在太深入，或者牵扯的东西太多。如果有机会实战这样的一个项目，我觉得也是一件很有挑战性事情。</li>
</ul>
</li>
<li><p>前后端：这一年和往年不同的另一个热点就是，关于iOS行业，记得12年学习iOS的时候，几乎发现不到多少的人在学习iOS，或者苹果相关开发，做这个的也少之又少。基本上如果你会拖个界面或者写一些简单的逻辑都可以找到一份还可以的工作。但是，由于培训机构的大量兴起，各大高校大学毕业生的涌入，导致从2016年初开始市面上就开始流行一个词：iOS烂大街（自己体会）。</p>

<ul>
<li><p>所以在这样的背景下，我不得不在深入学习iOS的同时，在业余的时间或者抽出更多的时间学学习一些其他的技术，不管是因为趋势还是为了以后留一条后路，对于一个程序员来时，学习是无时无刻的。</p></li>
<li><p>因为之前有过一点H5的经验，而且去年下半年小程序的火热，我选择的深入研究一下JavaScript（没有研究CSS，Html5），网上买了几本高级的书有空就看看练练，还是蛮有收获的。</p></li>
<li><p>另一门技术就是php，我之所以选择学习php，有两个原因，在这个行业也有一段时间了，也不可能一辈子这样干下去，就算不创业，也要考虑或者向管理层发展，而几乎所有公司都不会让一个做iOS的带领整个技术部，至少我现在没有发现。还有一个原因是，后台目前用的最多的也就是java和php，因为大部分大学有学习java这本们语言，所以就是在大学学的不好，哪怕偶尔看一下书，也是比PHP有优势的，php基本上没有学校对这门课进行开设课程，唯一有的也就是一些爱好者，或者培训出来的人，所以导致php目前在市面上还是很紧缺的，网上不是传说一句话：php是世界上最好的语言。具体是不是我也不知道，只有深入学习过了才能体会这句话的真谛。</p></li>
<li><p>最后一个就是大部分程序员的通病，算法，数据结构，设计模式，这里就要感谢我。。。在开发的过程中，看到了我的代码，然后做了一下评价，并且给了一些很受益的建议，所以我也专门抽空学习了一些重要的算法，和大学欠下的债，现在也有空就会看看相关的东西或者尽量应用到实战，希望能提高自己在这一块的思维。</p></li>
</ul>
</li>
</ol>


<p>接下来的一年除了将 自己本分工作做好的同时，会专门而且不断的深入学习与实战PHP技术，希望能做到一个真正的转型，即时我暂时还不会靠这个吃饭。</p>

<p>我喜欢用笔记记录下这一过程，大概的内容有</p>

<ol>
<li>php基础与总结篇</li>
<li>php高级篇</li>
<li>php实战篇</li>
<li>php拓展，与面试篇</li>
<li>php综合篇</li>
</ol>


<p>希望能一步一步学好这门技术。至于未来，我曾说过每年都会学习并且入门一门语言，这个虽然有点夸张，不现实，而且没有必要，但是我总归去试试，我相信。。。。。。</p>

<p>关于以后的路，或者做管理，或者创业，拿都是以后的事情，谁也说不准，就看我有没有这种心并且为之付出应有的努力！</p>

<p>最后我也会抽空出来锻炼身体：身体才是革命的本钱，身体垮了学再多东西，转太多钱都没用
还会偶尔出去旅游一下，既能散心，又能看看风景，最主要的是还能看看外面的世界，提高一下自己眼界与对待人，事与对待生活的方式
最后争取今年提辆车，虽然有点困难，有点不现实，嘿嘿！</p>

<p>至于其他的就太多的，谁也不知会发生什么，得自己慢慢经历了。</p>

<p>不管怎么样，要用微笑面对生活，善待身边的每一个人，学会感恩，不忘初心的付出，我相信总有一天你能得到不一样的收获，即时没有什么成功，但是当你在回过头来看看这一切的时候，依然是很值得回忆，并且是一笔无价的财富。</p>

<p>。
。。
。。。
。。。。
。。。。。
。。。。。。
。。。。。。。
。。。。。。。。
。。。。。。。。。
。。。。。。。。。。
。。。。。。。。。。。
。。。。。。。。。。。。
。。。。。。。。。。。。。
。。。。。。。。。。。。。。
保持初心，继续前进。。。。。。
。。。。。。。。。。。。。。
。。。。。。。。。。。。。
。。。。。。。。。。。。
。。。。。。。。。。。
。。。。。。。。。。
。。。。。。。。。
。。。。。。。。
。。。。。。。
。。。。。。
。。。。。
。。。。
。。。
。。
。</p>

<hr />

<hr />

<h6>微信号：</h6>

<p>clpaial10201119（Q Q：2211523682）</p>

<h6>微博WB:</h6>

<p><a href="http://weibo.com/u/3288975567?is_hot=1">http://weibo.com/u/3288975567?is_hot=1</a></p>

<h6>gitHub：</h6>

<p><a href="https://github.com/al1020119">https://github.com/al1020119</a></p>

<h6>博客</h6>

<p><a href="http://al1020119.github.io/">http://al1020119.github.io/</a></p>

<hr />

<p><img src="http://al1020119.github.io/images/iCocosCoder.jpg" title="Caption" ></p>

<p><img src="http://al1020119.github.io/images/iCocosPublic.jpg" title="Caption" ></p>
]]></content>
  </entry>
  
  <entry>
    <title type="html"><![CDATA[自动打包上传代码]]></title>
    <link href="http://al1020119.github.io/blog/2016/12/26/ios-daobao/"/>
    <updated>2016-12-26T18:16:05+08:00</updated>
    <id>http://al1020119.github.io/blog/2016/12/26/ios-daobao</id>
    <content type="html"><![CDATA[<p>由于17年之前，也就是这个月30好要上线，所以就有了下面。。。。。</p>

<h2>封装</h2>

<h4>使用前：</h4>

<ol>
<li>安装pip</li>
<li>sudo easy_install pip</li>
<li>安装json-query</li>
<li>pip install json-query</li>
<li>安装 gym</li>
<li>pip install gym</li>
</ol>


<!--more-->


<h4>新建一个.sh文件，好了开始撸，，哒哒哒哒哒。。。。</h4>

<pre><code>#!/bin/sh
#LEPgyerApiKey 在Info.plist中配置蒲公英apiKey
#LEPgyerUKey 在Info.plist中配置蒲公英ukey

result=''
uploadToPgyer()
{
    echo "params" 
    echo "ipa路径:  " $1
    echo "UserKey: " $2
    echo "ApiKey:  " $3
    echo "Password:" $4
    result=$(curl -F "file=@$1" -F "uKey=$2" -F "_api_key=$3" -F "publishRange=2" -F "isPublishToPublic=2" -F "password=$4" 'https://www.pgyer.com/apiv1/app/upload' | json-query data.appShortcutUrl)
}

tempPath="$(pwd)" 
if [ ! -f pkgtopgy_path.config ] ; then 
    touch pkgtopgy_path.config
fi

lines=`sed -n '$=' pkgtopgy_path.config` 

if [[ $lines == '' ]]; then
    lines=0
fi  

echo "请选择你需要打包的目录："
for i in `cat pkgtopgy_path.config `
do
    echo  $((++no)) ":" $i
done
echo  $((++no)) ":" "${tempPath}"

echo "若没有符合需求的路径，请直接回车"
read -p "你的选择是：" pathselection
if [[ $pathselection &gt;0 ]] &amp;&amp; [[ $pathselection -le `expr $lines+1` ]] ; then
    if [[ $pathselection -le $lines ]] ; then
        project_path=`sed -n ${pathselection}p pkgtopgy_path.config` 
    else 
        echo "已选目录：${tempPath}" 
        read -p "请确认上述已选目录：(y/n)" checkPath
        if [[ $checkPath = "y" ]] ; then
            project_path=$tempPath
        fi
    fi 
else
    echo "未找到合适的路径"
fi  

if [[ $project_path == '' ]]; then 
    read -p "请手动输入打包工程的绝对路径:" inputPath
    project_path=$inputPath
    if [[ $project_path != '' ]]; then 
        echo $project_path &gt;&gt; pkgtopgy_path.config
        cat pkgtopgy_path.config
    fi
fi


if [[ -d "$project_path" ]]; then
    echo "当前路径为：" $project_path
else
    echo "路径："$project_path
    echo "当前路径有误，已终止!!!\n"
    exit
fi
SECONDS=0
#取当前时间字符串添加到文件结尾
now=$(date +"%Y_%m_%d_%H_%M_%S")
#工程名
cd ${project_path}
project=$(ls | grep xcodeproj | awk -F.xcodeproj '{print $1}')
#指定项目地址
workspace_path="$project_path/${project}.xcworkspace"
if [[ ! -d "$workspace_path" ]]; then
    echo "路径："$workspace_path
    echo "未找到.xcworkspace文件，已终止!!!"
    exit
fi
#工程配置文件路径
echo "检查蒲公英设置"
project_infoplist_path=${project_path}/${project}/Info.plist
pgyerApiKey=''
pgyerUKey=''
pgyerApiKey=$(/usr/libexec/PlistBuddy -c "print LEPgyerApiKey" ${project_infoplist_path})
pgyerUKey=$(/usr/libexec/PlistBuddy -c "print LEPgyerUKey" ${project_infoplist_path})
pgyPassword=$(/usr/libexec/PlistBuddy -c "print LEPgyerPassword" ${project_infoplist_path})
if [[ $pgyerUKey = '' ]] || [[ $pgyerApiKey = '' ]]; then
    read -p "发现尚未配置蒲公英上传的apiKey及ukey,是否配置?(y/n)" checkConfig
    if [[ $checkConfig = "y" ]] ; then
        read -p "请输入蒲公英上传的apiKey:" apikey
        pgyerApiKey=$apikey
        read -p "请输入蒲公英上传的ukey:" ukey
        pgyerUKey=$ukey
    else
        if [[ $pgyPassword = '' ]]; then
            echo '发现蒲公英下载密码，未在工程项目的Info.plist配置，配置名称为LEPgyerPassword'
        fi
        read -p "是否继续打包?(y/n)" checkPkg
        if [[ $checkPkg = "n" ]] ; then
            exit
        fi
    fi
fi

#指定项目的scheme名称
scheme=$project
#指定要打包的配置名
configuration="Release"
#指定打包所使用的输出方式，目前支持app-store, package, ad-hoc, enterprise, development, 和developer-id，即xcodebuild的method参数
export_method='development'
#export_method='app-store'

#指定输出路径
mkdir "${HOME}/Desktop/${project}_${now}"
output_path="${HOME}/Desktop/${project}_${now}"
echo $output_path
#指定输出归档文件地址
archive_path="$output_path/${project}_${now}.xcarchive"
#指定输出ipa地址
ipa_path="$output_path/${project}_${now}.ipa"
#指定输出ipa名称
ipa_name="${project}_${now}.ipa"
#获取执行命令时的commit message
commit_msg="$1"
#输出设定的变量值
echo "=================AutoPackageBuilder==============="
echo "begin package at ${now}"
echo "workspace path: ${workspace_path}"
echo "archive path: ${archive_path}"
echo "ipa path: ${ipa_path}"
echo "export method: ${export_method}"
echo "commit msg: $1"
#pod update
#pod update --no-repo-update
#先清空前一次build
#gym --workspace ${workspace_path} --scheme ${scheme} --clean --configuration ${configuration} --archive_path ${archive_path} --export_method ${export_method} --output_directory ${output_path} --output_name ${ipa_name}
gym --workspace ${workspace_path} --scheme ${scheme} --clean --configuration ${configuration} --export_method ${export_method} --output_directory ${output_path} --output_name ${ipa_name}
#输出总用时
echo "==================&gt;Finished. Total time: ${SECONDS}s" 

if [[ $pgyerUKey = '' ]] || [[ $pgyerApiKey = '' ]]; then
    echo "未在工程项目的Info.plist文件中配置LEPgyerApiKey（蒲公英apiKey）及LEPgyerUKey（蒲公英userKey），因此无法上传项目至蒲公英平台"
else 
    if [[ -f "$ipa_path" ]]; then
        uploadToPgyer $ipa_path $pgyerUKey $pgyerApiKey $pgyPassword 
        while [[ $result == '' ]]
        do
            read -p "上传失败，是否重新上传到蒲公英?(y/n)" reUploadToPgyer
            if [[ $reUploadToPgyer = "y" ]] ; then
                uploadToPgyer $ipa_path $pgyerUKey $pgyerApiKey $pgyPassword
            else
                echo "本次打包完成，ipa位置: ${ipa_path}" 
                exit
            fi
        done
        if [[ $result != '' ]]; then
            echo "请前往此处下载最新的app" http://www.pgyer.com/$result
            open http://www.pgyer.com/$result
        fi 
    fi
fi
echo "本次打包完成"
exit
</code></pre>

<h2>测试使用（DEV环境）</h2>

<ol>
<li>下载pkgtopgy.sh至任意目录</li>
<li>终端新建窗口 输入sh （sh+空格），</li>
<li>然后拖入文件 pkgtopgy.sh 回车 （也可以右击-显示简介-打开方式设置为终端，然后双击打开）</li>
</ol>


<hr />

<hr />

<h6>微信号：</h6>

<p>clpaial10201119（Q Q：2211523682）</p>

<h6>微博WB:</h6>

<p><a href="http://weibo.com/u/3288975567?is_hot=1">http://weibo.com/u/3288975567?is_hot=1</a></p>

<h6>gitHub：</h6>

<p><a href="https://github.com/al1020119">https://github.com/al1020119</a></p>

<h6>博客</h6>

<p><a href="http://al1020119.github.io/">http://al1020119.github.io/</a></p>

<hr />

<p><img src="http://al1020119.github.io/images/iCocosCoder.jpg" title="Caption" ></p>

<p><img src="http://al1020119.github.io/images/iCocosPublic.jpg" title="Caption" ></p>
]]></content>
  </entry>
  
  <entry>
    <title type="html"><![CDATA[PHP完美搭配之Mysql初探]]></title>
    <link href="http://al1020119.github.io/blog/2016/12/03/phpwan-mei-da-pei-mysql/"/>
    <updated>2016-12-03T13:36:37+08:00</updated>
    <id>http://al1020119.github.io/blog/2016/12/03/phpwan-mei-da-pei-mysql</id>
    <content type="html"><![CDATA[<h3>数据库概念</h3>

<h6>什么是数据库</h6>

<p>数据库就是用来存储和管理数据的仓库！</p>

<p>数据库存储数据的优先：</p>

<pre><code>可存储大量数据；

 方便检索；

 保持数据的一致性、完整性；

 安全，可共享；

 通过组合分析，可产生新数据。
</code></pre>

<p> <!--more--></p>

<h6>数据库的发展历程</h6>

<p> 没有数据库，使用磁盘文件存储数据；</p>

<pre><code> 层次结构模型数据库；

 网状结构模型数据库；

 关系结构模型数据库：

 使用二维表格来存储数据；

 关系-对象模型数据库；

 MySQL就是关系型数据库！
</code></pre>

<h6>常见数据库</h6>

<pre><code> Oracle（神喻）：甲骨文（最高！）；

 DB2：IBM；

 SQ Server：微软；

 Sybase：赛尔斯；

 MySQL：甲骨文；
</code></pre>

<h6>理解数据库</h6>

<pre><code> RDBMS = 管理员（manager）+仓库（database）

 database = N个table
</code></pre>

<p> table：</p>

<pre><code>表结构：定义表的列名和列类型！
表记录：一行一行的记录！
</code></pre>

<p>我们现在所说的数据库泛指“关系型数据库管理系统（RDBMS - Relationa database management system）”，即“数据库服务器”。</p>

<p>当我们安装了数据库服务器后，就可以在数据库服务器中创建数据库，每个数据库中还可以包含多张表。</p>

<pre><code>表头(header): 每一列的名称;
列(row): 具有相同数据类型的数据的集合;
行(col): 每一行用来描述某个人/物的具体信息;
值(value): 行的具体信息, 每个值必须与该列的数据类型相同;
键(key): 表中用来识别某个特定的人\物的方法, 键的值在当前列中具有唯一性。
</code></pre>

<p>数据库表就是一个多行多列的表格。在创建表时，需要指定表的列数，以及列名称，列类型等信息。而不用指定表格的行数，行数是没有上限的</p>

<h6>应用程序与数据库</h6>

<p>　　应用程序使用数据库完成对数据的存储！</p>

<h6>启动和关闭mysql服务器</h6>

<pre><code> 启动：net start mysql；

 关闭：net stop mysql；
</code></pre>

<h6>客户端登录退出mysql</h6>

<p>在启动MySQL服务器后，我们需要使用管理员用户登录MySQL服务器，然后来对服务器进行操作。</p>

<h6>登录：mysq -u root -p 123 -h localhost；</h6>

<pre><code>-u：后面的root是用户名，这里使用的是超级管理员root；
-p：后面的123是密码，这是在安装MySQL时就已经指定的密码；
-h：后面给出的localhost是服务器主机名，它是可以省略的，例如：mysq -u root -p 123；
</code></pre>

<h6>退出：quit或exit；</h6>

<h3>概述</h3>

<h6>什么是SQL</h6>

<p>SQL（Structured Query Language）是“结构化查询语言”，它是对关系型数据库的操作语言。它可以应用到所有关系型数据库中，例如：MySQL、Oracle、SQ Server等。SQ标准（ANSI/ISO）有：</p>

<pre><code> SQL-92：1992年发布的SQL语言标准；

 SQL:1999：1999年发布的SQL语言标签；

 SQL:2003：2003年发布的SQL语言标签；
</code></pre>

<p>这些标准就与JDK的版本一样，在新的版本中总要有一些语法的变化。不同时期的数据库对不同标准做了实现。</p>

<p>虽然SQL可以用在所有关系型数据库中，但很多数据库还都有标准之后的一些语法，我们可以称之为“方言”。例如MySQL中的LIMIT语句就是MySQL独有的方言，其它数据库都不支持！当然，Oracle或SQ Server都有自己的方言。</p>

<h3>语法要求</h3>

<pre><code> SQL语句可以单行或多行书写，以分号结尾；

 可以用空格和缩进来来增强语句的可读性；

 关键字不区别大小写，建议使用大写；
</code></pre>

<h3>分类</h3>

<pre><code> DDL（Data Definition Language）：数据定义语言，用来定义数据库对象：库、表、列等；

 DML（Data Manipulation Language）：数据操作语言，用来定义数据库记录（数据）；

 DCL（Data Contro Language）：数据控制语言，用来定义访问权限和安全级别；

 DQL（Data Query Language）：数据查询语言，用来查询记录（数据）。
</code></pre>

<h3>DDL</h3>

<h6>基本操作</h6>

<p> 查看所有数据库名称：</p>

<pre><code> SHOW DATABASES；　
</code></pre>

<p> 切换数据库：</p>

<pre><code> USE mydb1，切换到mydb1数据库；
</code></pre>

<h6>操作数据库</h6>

<p> 创建数据库：</p>

<pre><code> CREATE DATABASE [IF NOT EXISTS] mydb1；
</code></pre>

<p>创建数据库，例如：</p>

<pre><code>CREATE DATABASE mydb1，创建一个名为mydb1的数据库。如果这个数据已经存在，那么会报错。例如CREATE DATABASE IF NOT EXISTS mydb1，在名为mydb1的数据库不存在时创建该库，这样可以避免报错。
</code></pre>

<p> 删除数据库：</p>

<pre><code> DROP DATABASE [IF EXISTS] mydb1；
</code></pre>

<p>删除数据库，例如：</p>

<pre><code>DROP DATABASE mydb1，删除名为mydb1的数据库。如果这个数据库不存在，那么会报错。DROP DATABASE IF EXISTS mydb1，就算mydb1不存在，也不会的报错。
</code></pre>

<p> 修改数据库编码：</p>

<pre><code> ALTER DATABASE mydb1 CHARACTER SET utf8
</code></pre>

<p>修改数据库mydb1的编码为utf8。注意，在MySQL中所有的UTF-8编码都不能使用中间的“-”，即UTF-8要书写为UTF8。</p>

<h3>数据类型</h3>

<p>MySQL有三大类数据类型, 分别为数字、日期\时间、字符串, 这三大类中又更细致的划分了许多子类型:</p>

<h6>数字类型</h6>

<pre><code>    整数: tinyint、smallint、mediumint、int、bigint
    浮点数: float、double、real、decimal
</code></pre>

<h6>日期和时间:</h6>

<pre><code>    date、time、datetime、timestamp、year
</code></pre>

<h6>字符串类型</h6>

<pre><code>    字符串: char、varchar
    文本: tinytext、text、mediumtext、longtext
    二进制(可用来存储图片、音乐等): tinyblob、blob、mediumblob、longblob
</code></pre>

<p>MySQL与Java一样，也有数据类型。MySQL中数据类型主要应用在列上。</p>

<p>常用类型：</p>

<pre><code> int：整型

 double：浮点型，例如double(5,2)表示最多5位，其中必须有2位小数，即最大值为999.99；

 decimal：泛型型，在表单钱方面使用该类型，因为不会出现精度缺失问题；

 char：固定长度字符串类型；

 varchar：可变长度字符串类型；

 text：字符串类型；

 blob：字节类型；

 date：日期类型，格式为：yyyy-MM-dd；

 time：时间类型，格式为：hh:mm:ss

 timestamp：时间戳类型；
</code></pre>

<h3>组成</h3>

<p>与常规的脚本语言类似, MySQ 也具有一套对字符、单词以及特殊符号的使用规定, MySQ 通过执行 SQ 脚本来完成对数据库的操作, 该脚本由一条或多条MySQL语句(SQL语句 + 扩展语句)组成, 保存时脚本文件后缀名一般为 .sql。在控制台下, MySQ 客户端也可以对语句进行单句的执行而不用保存为.sql文件。</p>

<h3>标识符</h3>

<p>标识符用来命名一些对象, 如数据库、表、列、变量等, 以便在脚本中的其他地方引用。MySQL标识符命名规则稍微有点繁琐, 这里我们使用万能命名规则: 标识符由字母、数字或下划线(_)组成, 且第一个字符必须是字母或下划线。</p>

<p>对于标识符是否区分大小写取决于当前的操作系统, Windows下是不敏感的, 但对于大多数 linux\unix 系统来说, 这些标识符大小写是敏感的。</p>

<h6>关键字:</h6>

<pre><code>MySQL的关键字众多, 这里不一一列出, 在学习中学习。 这些关键字有自己特定的含义, 尽量避免作为标识符。
</code></pre>

<h6>语句:</h6>

<pre><code>MySQL语句是组成MySQL脚本的基本单位, 每条语句能完成特定的操作, 他是由 SQ 标准语句 + MySQ 扩展语句组成。
</code></pre>

<h6>函数:</h6>

<pre><code>MySQL函数用来实现数据库操作的一些高级功能, 这些函数大致分为以下几类: 字符串函数、数学函数、日期时间函数、搜索函数、加密函数、信息函数。
</code></pre>

<h3>操作</h3>

<h6>登录到MySQL</h6>

<p>当 MySQ 服务已经运行时, 我们可以通过MySQL自带的客户端工具登录到MySQL数据库中, 首先打开命令提示符, 输入以下格式的命名:</p>

<p>mysq -h 主机名 -u 用户名 -p</p>

<pre><code>-h : 该命令用于指定客户端所要登录的MySQL主机名, 登录当前机器该参数可以省略;
-u : 所要登录的用户名;
-p : 告诉服务器将会使用一个密码来登录, 如果所要登录的用户名密码为空, 可以忽略此选项。
</code></pre>

<p>以登录刚刚安装在本机的MySQL数据库为例, 在命令行下输入 mysq -u root -p 按回车确认, 如果安装正确且MySQL正在运行, 会得到以下响应:</p>

<pre><code>Enter password:
</code></pre>

<blockquote><p>若密码存在, 输入密码登录, 不存在则直接按回车登录, 按照本文中的安装方法, 默认 root 账号是无密码的。登录成功后你将会看到 Welecome to the MySQ monitor&hellip; 的提示语。</p></blockquote>

<p>然后命令提示符会一直以 mysql> 加一个闪烁的光标等待命令的输入, 输入 exit 或 quit 退出登录。</p>

<h6>创建一个数据库</h6>

<p>使用 create database 语句可完成对数据库的创建, 创建命令的格式如下:</p>

<pre><code>create database 数据库名 [其他选项];
</code></pre>

<p>例如我们需要创建一个名为 samp_db 的数据库, 在命令行下执行以下命令:</p>

<pre><code>create database samp_db character set gbk;
</code></pre>

<h6>选择所要操作的数据库</h6>

<p>要对一个数据库进行操作, 必须先选择该数据库, 否则会提示错误:</p>

<pre><code>ERROR 1046(3D000): No database selected
</code></pre>

<p>两种方式对数据库进行使用的选择:</p>

<p>一: 在登录数据库时指定, 命令: mysq -D 所选择的数据库名 -h 主机名 -u 用户名 -p</p>

<pre><code>例如登录时选择刚刚创建的数据库: mysq -D samp_db -u root -p
</code></pre>

<p>二: 在登录后使用 use 语句指定, 命令: use 数据库名;</p>

<pre><code>use 语句可以不加分号, 执行 use samp_db 来选择刚刚创建的数据库, 选择成功后会提示: Database changed
</code></pre>

<h6>创建数据库表</h6>

<p>使用 create table 语句可完成对表的创建, create table 的常见形式:</p>

<pre><code>create table 表名称(列声明);
</code></pre>

<p>以创建 students 表为例, 表中将存放 学号(id)、姓名(name)、性别(sex)、年龄(age)、联系电话(tel) 这些内容:</p>

<pre><code>create table students
（
    id int unsigned not nul auto_increment primary key,
    name char(8) not null,
    sex char(4) not null,
    age tinyint unsigned not null,
    te char(13) nul default "-"
);
</code></pre>

<h6>向表中插入数据</h6>

<p>insert 语句可以用来将一行或多行数据插到数据库表中, 使用的一般形式如下:</p>

<pre><code>insert [into] 表名 [(列名1, 列名2, 列名3, ...)] values (值1, 值2, 值3, ...);
</code></pre>

<p>其中 [] 内的内容是可选的, 例如, 要给 samp_db 数据库中的 students 表插入一条记录, 执行语句:</p>

<pre><code>insert into students values(NULL, "王刚", "男", 20, "13811371377");
</code></pre>

<h6>查询表中的数据</h6>

<p>select 语句常用来根据一定的查询规则到数据库中获取数据, 其基本的用法为:</p>

<pre><code>select 列名称 from 表名称 [查询条件];
</code></pre>

<p>例如要查询 students 表中所有学生的名字和年龄, 输入语句 select name, age from students; 执行结果如下:</p>

<pre><code>mysql&gt; select name, age from students;
+--------+-----+
| name   | age |
+--------+-----+
| 王刚   |  20 |
| 孙丽华 |  21 |
| 王永恒 |  23 |
| 郑俊杰 |  19 |
| 陈芳   |  22 |
| 张伟朋 |  21 |
+--------+-----+
6 rows in set (0.00 sec)
</code></pre>

<p>按特定条件查询:</p>

<pre><code>where 关键词用于指定查询条件, 用法形式为: select 列名称 from 表名称 where 条件;

以查询所有性别为女的信息为例, 输入查询语句: select * from students where sex="女";
</code></pre>

<h6>更新表中的数据</h6>

<p>update 语句可用来修改表中的数据, 基本的使用形式为:</p>

<pre><code>update 表名称 set 列名称=新值 where 更新条件;
</code></pre>

<p>使用示例:</p>

<pre><code>将id为5的手机号改为默认的"-": update students set tel=default where id=5;

将所有人的年龄增加1: update students set age=age+1;

将手机号为 13288097888 的姓名改为 "张伟鹏", 年龄改为 19: update students set name="张伟鹏", age=19 where tel="13288097888";
</code></pre>

<h6>删除表中的数据</h6>

<p>delete 语句用于删除表中的数据, 基本用法为:</p>

<pre><code>delete from 表名称 where 删除条件;
</code></pre>

<p>使用示例:</p>

<pre><code>删除id为2的行: delete from students where id=2;

删除所有年龄小于21岁的数据: delete from students where age&lt;20;

删除表中的所有数据: delete from students;
</code></pre>

<h3>创建后表的修改</h3>

<p>alter table 语句用于创建后对表的修改, 基础用法如下:</p>

<h6>添加列</h6>

<pre><code>基本形式: alter table 表名 add 列名 列数据类型 [after 插入位置];
</code></pre>

<p>示例:</p>

<pre><code>在表的最后追加列 address: alter table students add address char(60);

在名为 age 的列后插入列 birthday: alter table students add birthday date after age;
</code></pre>

<h6>修改列</h6>

<pre><code>基本形式: alter table 表名 change 列名称 列新名称 新数据类型;
</code></pre>

<p>示例:</p>

<pre><code>将表 te 列改名为 telphone: alter table students change te telphone char(13) default "-";

将 name 列的数据类型改为 char(16): alter table students change name name char(16) not null;
</code></pre>

<h6>删除列</h6>

<pre><code>基本形式: alter table 表名 drop 列名称;
</code></pre>

<p>示例:</p>

<pre><code>删除 birthday 列: alter table students drop birthday;
</code></pre>

<h6>重命名表</h6>

<pre><code>基本形式: alter table 表名 rename 新表名;
</code></pre>

<p>示例:</p>

<pre><code>重命名 students 表为 workmates: alter table students rename workmates;
</code></pre>

<h6>删除整张表</h6>

<p>基本形式: drop table 表名;</p>

<pre><code>示例: 删除 workmates 表: drop table workmates;
</code></pre>

<p>删除整个数据库</p>

<pre><code>基本形式: drop database 数据库名;
</code></pre>

<p>示例:</p>

<pre><code>删除 samp_db 数据库: drop database samp_db;
</code></pre>

<h3>附录</h3>

<h6>修改 root 用户密码</h6>

<p>按照本文的安装方式, root 用户默认是没有密码的, 重设 root 密码的方式也较多, 这里仅介绍一种较常用的方式。</p>

<p>使用 mysqladmin 方式:</p>

<pre><code>打开命令提示符界面, 执行命令: mysqladmin -u root -p password 新密码
</code></pre>

<p>执行后提示输入旧密码完成密码修改, 当旧密码为空时直接按回车键确认即可。</p>

<h3>总结：</h3>

<p>1、说明：创建数据库</p>

<pre><code>CREATE DATABASE database-name
</code></pre>

<p>2、说明：删除数据库</p>

<pre><code>drop database dbname
</code></pre>

<p>3、说明：备份sq server</p>

<p>&mdash; 创建 备份数据的 device</p>

<pre><code>USE master
EXEC sp_addumpdevice 'disk', 'testBack', 'c:\mssql7backup\MyNwind_1.dat'
</code></pre>

<p>&mdash; 开始 备份</p>

<pre><code>BACKUP DATABASE pubs TO testBack
</code></pre>

<p>4、说明：创建新表</p>

<pre><code>create table tabname(col1 type1 [not null] [primary key],col2 type2 [not null],..)
</code></pre>

<p>根据已有的表创建新表：</p>

<pre><code>A：create table tab_new like tab_old (使用旧表创建新表)
B：create table tab_new as select col1,col2… from tab_old definition only
</code></pre>

<p>5、说明：删除新表</p>

<pre><code>drop table tabname
</code></pre>

<p>6、说明：增加一个列</p>

<pre><code>Alter table tabname add column co type

注：列增加后将不能删除。DB2中列加上后数据类型也不能改变，唯一能改变的是增加varchar类型的长度。
</code></pre>

<p>7、说明：添加主键： Alter table tabname add primary key(col)</p>

<pre><code>说明：删除主键： Alter table tabname drop primary key(col)
</code></pre>

<p>8、说明：创建索引：create [unique] index idxname on tabname(col….)</p>

<pre><code>删除索引：drop index idxname
注：索引是不可更改的，想更改必须删除重新建。
</code></pre>

<p>9、说明：创建视图：create view viewname as select statement</p>

<pre><code>删除视图：drop view viewname
</code></pre>

<p>10、说明：几个简单的基本的sql语句</p>

<pre><code>选择：select * from table1 where 范围
插入：insert into table1(field1,field2) values(value1,value2)
删除：delete from table1 where 范围
更新：update table1 set field1=value1 where 范围
查找：select * from table1 where field1 like ’%value1%’ ---like的语法很精妙，查资料!
排序：select * from table1 order by field1,field2 [desc]
总数：select count as totalcount from table1
求和：select sum(field1) as sumvalue from table1
平均：select avg(field1) as avgvalue from table1
最大：select max(field1) as maxvalue from table1
最小：select min(field1) as minvalue from table1
</code></pre>

<h3>Mysql写出高质量的sql语句的几点建议</h3>

<h6>1 建议一：尽量避免在列上运算</h6>

<p>尽量避免在列上运算，这样会导致索引失效。
1.1 日期运算
优化前：</p>

<pre><code>select * from system_user where date(createtime) &gt;= '2015-06-01'
</code></pre>

<p>优化后：</p>

<pre><code>select * from system_user where createtime &gt;= '2015-06-01'
</code></pre>

<p>1.2 加，减，乘，除
优化前：</p>

<pre><code>select * from system_user where age + 10 &gt;= 20
</code></pre>

<p>优化后：</p>

<pre><code>select * from system_user where age &gt;= 10
</code></pre>

<h6>2 建议二：用整型设计索引</h6>

<p>用整型设计的索引，占用的字节少，相对与字符串索引要快的多。特别是创建主键索引和唯一索引的时候。 1）设计日期时候，建议用int取代char(8)。例如整型：20150603。 2）设计IP时候可以用bigint把IP转化为长整型存储。</p>

<h6>3 建议三：join时，使用小结果集驱动大结果集</h6>

<p>使用join的时候，应该尽量让小结果集驱动大的结果集，把复杂的join查询拆分成多个query。因为join多个表的时候，可能会有表的锁定和阻塞。如果大结果集非常大，而且被锁了，那么这个语句会一直等待。这个也是新手常犯的一个错误！ 优化前：</p>

<pre><code>select
    *
from table_a a
left join table_b b
    on a.id = b.id
left join table_c c
    on a.id = c.id
where a.id &gt; 100
    and b.id &lt; 200
</code></pre>

<p>优化后：</p>

<pre><code>select
    *
from (
    select  
        *
    from table_a
    where id &gt; 100
) a
left join(
    select  
        *
    from table_b
    where id &lt; 200
)b
    on a.id = b.id
left join table_c
    on a.id = c.id
</code></pre>

<h6>4 建议四：仅列出需要查询的字段</h6>

<p>仅列出需要查询的字段，新手一般都查询的时候都是*，其实这样不好。这对速度不会有明显的影响，主要考虑的是节省内存。 优化前：</p>

<pre><code>select * from system_user where age &gt; 10
</code></pre>

<p>优化后：</p>

<pre><code>select username,emai from system_user where age &gt; 10
</code></pre>

<h6>5 建议五：使用批量插入节省交互</h6>

<p>优化前：</p>

<pre><code>insert into system_user(username,passwd) values('test1','123456')
insert into system_user(username,passwd) values('test2','123456')
insert into system_user(username,passwd) values('test3','123456')
</code></pre>

<p>优化后：</p>

<pre><code>insert into system_user(username,passwd) values('test1','123456'),('test2','123456'),('test3','123456')
</code></pre>

<h6>6 建议六：多习惯使用explain分析sql语句</h6>

<h6>7 建议七：多使用profiling分析sql语句时间开销</h6>

<hr />

<hr />

<h6>微信号：</h6>

<p>clpaial10201119（Q Q：2211523682）</p>

<h6>微博WB:</h6>

<p><a href="http://weibo.com/u/3288975567?is_hot=1">http://weibo.com/u/3288975567?is_hot=1</a></p>

<h6>gitHub：</h6>

<p><a href="https://github.com/al1020119">https://github.com/al1020119</a></p>

<h6>博客</h6>

<p><a href="http://al1020119.github.io/">http://al1020119.github.io/</a></p>

<hr />

<p><img src="http://al1020119.github.io/images/iCocosCoder.jpg" title="Caption" ></p>

<p><img src="http://al1020119.github.io/images/iCocosPublic.jpg" title="Caption" ></p>
]]></content>
  </entry>
  
  <entry>
    <title type="html"><![CDATA[重整Linux一次就够了]]></title>
    <link href="http://al1020119.github.io/blog/2016/12/02/zhong-zheng-linux/"/>
    <updated>2016-12-02T13:35:16+08:00</updated>
    <id>http://al1020119.github.io/blog/2016/12/02/zhong-zheng-linux</id>
    <content type="html"><![CDATA[<h6>前言：</h6>

<p>因为之前学校有学过linux😂，而且这几年一直使用的Mac做开发，所以对Linux及相关命令还是有些接触的，只是没有机会，也没有刻意去专门研究或者整理，最近因为学习与工作的而需要开始了一次Linux之路，所以学习的过程中寻找资料并且整理了一下。</p>

<blockquote><p>目前几乎大部分的互联网公司公司都是使用Linux</p></blockquote>

<p>这里以Ubantu为例整理一套Linux命令，至于为什么是Ubantu，谁用谁知道，这里我是在Mac上面安装了一个VM然后直接安装Ubantu，相关教程请查看网上资料。好了废话不多说，开干🤔🤔🤔🤔🤔🤔🤔🤔</p>

<h3>目录</h3>

<!--more-->


<ul>
<li>系统</li>
<li>硬盘</li>
<li>内存</li>
<li>进程</li>
<li>查看当前有哪些进程#ps -A</li>
<li>网络</li>
<li>服务</li>
<li>设置</li>
<li>中文</li>
<li>文件</li>
<li>FTP</li>
<li>解压缩</li>
<li>Nautilus</li>
<li>程序</li>
<li>数据库</li>
<li>其它</li>
<li>Ubuntu命令行下修改网络配置</li>
<li>安装AMP服务</li>
<li>其他总结</li>
</ul>


<p>查看软件xxx安装内容</p>

<pre><code>#dpkg -L xxx
</code></pre>

<p>查找软件</p>

<pre><code>#apt-cache search 正则表达式
</code></pre>

<p>查找文件属于哪个包</p>

<pre><code>#dpkg -S filename apt-file search filename
</code></pre>

<p>查询软件xxx依赖哪些包</p>

<pre><code>#apt-cache depends xxx
</code></pre>

<p>查询软件xxx被哪些包依赖</p>

<pre><code>#apt-cache rdepends xxx
</code></pre>

<p>增加一个光盘源</p>

<pre><code>#sudo apt-cdrom add
</code></pre>

<p>系统升级</p>

<pre><code>#sudo apt-get update
#sudo apt-get upgrade
#sudo apt-get dist-upgrade
</code></pre>

<p>清除所以删除包的残余配置文件</p>

<pre><code>#dpkg -l |grep ^rc|awk ‘{print $2}’ |tr [”"n”] [” “]|sudo xargs dpkg -P -
</code></pre>

<p>编译时缺少h文件的自动处理</p>

<pre><code>#sudo auto-apt run ./configure
</code></pre>

<p>查看安装软件时下载包的临时存放目录</p>

<pre><code>#ls /var/cache/apt/archives
</code></pre>

<p>备份当前系统安装的所有包的列表</p>

<pre><code>#dpkg –get-selections | grep -v deinstall &gt; ~/somefile
</code></pre>

<p>从上面备份的安装包的列表文件恢复所有包</p>

<pre><code>#dpkg –set-selections &lt; ~/somefile sudo dselect
</code></pre>

<p>清理旧版本的软件缓存</p>

<pre><code>#sudo apt-get autoclean
</code></pre>

<p>清理所有软件缓存</p>

<pre><code>#sudo apt-get clean
</code></pre>

<p>删除系统不再使用的孤立软件</p>

<pre><code>#sudo apt-get autoremove
</code></pre>

<p>查看包在服务器上面的地址</p>

<pre><code>#apt-get -qq –print-uris install ssh | cut -d"’ -f2
</code></pre>

<h3>系统</h3>

<p>查看内核</p>

<pre><code>#uname -a
</code></pre>

<p>查看Ubuntu版本</p>

<pre><code>#cat /etc/issue
</code></pre>

<p>查看内核加载的模块</p>

<pre><code>#lsmod
</code></pre>

<p>查看PCI设备</p>

<pre><code>#lspci
</code></pre>

<p>查看USB设备</p>

<pre><code>#lsusb
</code></pre>

<p>查看网卡状态</p>

<pre><code>#sudo ethtool eth0
</code></pre>

<p>查看CPU信息</p>

<pre><code>#cat /proc/cpuinfo
</code></pre>

<p>显示当前硬件信息</p>

<pre><code>#lshw
</code></pre>

<h3>硬盘</h3>

<p>查看硬盘的分区</p>

<pre><code>#sudo fdisk -l
</code></pre>

<p>查看IDE硬盘信息</p>

<pre><code>#sudo hdparm -i /dev/hda
</code></pre>

<p>查看STAT硬盘信息</p>

<pre><code>#sudo hdparm -I /dev/sda
或
#sudo apt-get install blktool
#sudo blktool /dev/sda id
</code></pre>

<p>查看硬盘剩余空间</p>

<pre><code>#df -h
#df -H
</code></pre>

<p>查看目录占用空间</p>

<pre><code>#du -hs 目录名
</code></pre>

<p>优盘没法卸载</p>

<pre><code>#sync fuser -km /media/usbdisk
</code></pre>

<h3>内存</h3>

<p>查看当前的内存使用情况</p>

<pre><code>#free -m
</code></pre>

<h3>进程</h3>

<p>查看当前有哪些进程</p>

<pre><code>#ps -A
</code></pre>

<p>中止一个进程</p>

<pre><code>#kill 进程号(就是ps -A中的第一列的数字) 或者 killall 进程名
</code></pre>

<p>强制中止一个进程(在上面进程中止不成功的时候使用)</p>

<pre><code>#kill -9 进程号 或者 killall -9 进程名
</code></pre>

<p>图形方式中止一个程序</p>

<pre><code>#xkill 出现骷髅标志的鼠标，点击需要中止的程序即可
</code></pre>

<p>查看当前进程的实时状况</p>

<pre><code>#top
</code></pre>

<p>查看进程打开的文件</p>

<pre><code>#lsof -p
</code></pre>

<p>ADSL 配置 ADSL</p>

<pre><code>#sudo pppoeconf
</code></pre>

<p>ADSL手工拨号</p>

<pre><code>#sudo pon dsl-provider
</code></pre>

<p>激活 ADSL</p>

<pre><code>#sudo /etc/ppp/pppoe_on_boot
</code></pre>

<p>断开 ADSL</p>

<pre><code>#sudo poff
</code></pre>

<p>查看拨号日志</p>

<pre><code>#sudo plog
</code></pre>

<p>如何设置动态域名</p>

<pre><code>#首先去http://www.3322.org申请一个动态域名
#然后修改 /etc/ppp/ip-up 增加拨号时更新域名指令 sudo vim /etc/ppp/ip-up
#在最后增加如下行 w3m -no-cookie -dump
</code></pre>

<h3>网络</h3>

<p>根据IP查网卡地址</p>

<pre><code>#arping IP地址
</code></pre>

<p>查看当前IP地址</p>

<pre><code>#ifconfig eth0 |awk ‘/inet/ {split($2,x,”:”);print x[2]}’
</code></pre>

<p>查看当前外网的IP地址</p>

<pre><code>#w3m -no-cookie -dumpwww.edu.cn|grep-o‘[0-9]"{1,3"}".[0-9]"{1,3"}".[0-9]"{1,3"}".[0-9]"{1,3"}’
#w3m -no-cookie -dumpwww.xju.edu.cn|grep-o’[0-9]"{1,3"}".[0-9]"{1,3"}".[0-9]"{1,3"}".[0-9]"{1,3"}’
#w3m -no-cookie -dump ip.loveroot.com|grep -o’[0-9]"{1,3"}".[0-9]"{1,3"}".[0-9]"{1,3"}".[0-9]"{1,3"}’
</code></pre>

<p>查看当前监听80端口的程序</p>

<pre><code>#lsof -i :80
</code></pre>

<p>查看当前网卡的物理地址</p>

<pre><code>#arp -a | awk ‘{print $4}’ ifconfig eth0 | head -1 | awk ‘{print $5}’
</code></pre>

<p>立即让网络支持nat</p>

<pre><code>#sudo echo 1 &gt; /proc/sys/net/ipv4/ip_forward
#sudo iptables -t nat -I POSTROUTING -j MASQUERADE
</code></pre>

<p>查看路由信息</p>

<pre><code>#netstat -rn sudo route -n
</code></pre>

<p>手工增加删除一条路由</p>

<pre><code>#sudo route add -net 192.168.0.0 netmask 255.255.255.0 gw 172.16.0.1
#sudo route del -net 192.168.0.0 netmask 255.255.255.0 gw 172.16.0.1
</code></pre>

<p>修改网卡MAC地址的方法</p>

<pre><code>#sudo ifconfig eth0 down 关闭网卡
#sudo ifconfig eth0 hw ether 00:AA:BB:CC:DD:EE 然后改地址
#sudo ifconfig eth0 up 然后启动网卡
</code></pre>

<p>统计当前IP连接的个数</p>

<pre><code>#netstat -na|grep ESTABLISHED|awk ‘{print $5}’|awk -F: ‘{print $1}’|sort|uniq -c|sort -r -n
#netstat -na|grep SYN|awk ‘{print $5}’|awk -F: ‘{print $1}’|sort|uniq -c|sort -r -n
</code></pre>

<p>统计当前20000个IP包中大于100个IP包的IP地址</p>

<pre><code>#tcpdump -tnn -c 20000 -i eth0 | awk -F “.” ‘{print $1″.”$2″.”$3″.”$4}’ | sort | uniq -c | sort -nr | awk ‘ $1 &gt; 100 ‘
</code></pre>

<p>屏蔽IPV6</p>

<pre><code>#echo “blacklist ipv6″ | sudo tee /etc/modprobe.d/blacklist-ipv6
</code></pre>

<h3>服务</h3>

<p>添加一个服务</p>

<pre><code>#sudo update-rc.d 服务名 defaults 99
</code></pre>

<p>删除一个服务</p>

<pre><code>#sudo update-rc.d 服务名 remove
</code></pre>

<p>临时重启一个服务</p>

<pre><code>#/etc/init.d/服务名 restart
</code></pre>

<p>临时关闭一个服务</p>

<pre><code>#/etc/init.d/服务名 stop
</code></pre>

<p>临时启动一个服务
    #/etc/init.d/服务名 start</p>

<h3>设置</h3>

<p>配置默认Java使用哪个</p>

<pre><code>#sudo update-alternatives –config java
</code></pre>

<p>修改用户资料</p>

<pre><code>#sudo chfn userid
</code></pre>

<p>给apt设置代理</p>

<pre><code>#export http_proxy=http://xx.xx.xx.xx:xxx
</code></pre>

<p>修改系统登录信息</p>

<pre><code>#sudo vim /etc/motd
</code></pre>

<h3>中文</h3>

<p>转换文件名由GBK为UTF8</p>

<pre><code>#sudo apt-get install convmv convmv -r -f cp936 -t utf8 –notest –nosmart *
</code></pre>

<p>批量转换src目录下的所有文件内容由GBK到UTF8</p>

<pre><code>#find src -type d -exec mkdir -p utf8/{} "; find src -type f -exec iconv -f GBK -t UTF-8 {} -o utf8/{} "; mv utf8/* src rm -fr utf8
</code></pre>

<p>转换文件内容由GBK到UTF8</p>

<pre><code>#iconv -f gbk -t utf8 $i &gt; newfile
</code></pre>

<p>转换 mp3 标签编码</p>

<pre><code>#sudo apt-get install python-mutagen find . -iname “*.mp3” -execdir mid3iconv -e GBK {} ";
</code></pre>

<p>控制台下显示中文</p>

<pre><code>#sudo apt-get install zhcon 使用时，输入zhcon即可
</code></pre>

<h3>文件</h3>

<p>快速查找某个文件</p>

<pre><code>#whereis filename
#find 目录 -name 文件名
</code></pre>

<p>查看文件类型</p>

<pre><code>#file filename
</code></pre>

<p>显示xxx文件倒数6行的内容</p>

<pre><code>#tail -n 6 xxx
</code></pre>

<p>让tail不停地读地最新的内容</p>

<pre><code>#tail -n 10 -f /var/log/apache2/access.log
</code></pre>

<p>查看文件中间的第五行（含）到第10行（含）的内容</p>

<pre><code>#sed -n ‘5,10p’ /var/log/apache2/access.log
</code></pre>

<p>查找包含xxx字符串的文件</p>

<pre><code>#grep -l -r xxx .
</code></pre>

<p>全盘搜索文件(桌面可视化)</p>

<pre><code>gnome-search-tool
</code></pre>

<p>查找关于xxx的命令</p>

<pre><code>#apropos xxx man -k xxx
</code></pre>

<p>通过ssh传输文件</p>

<pre><code>#scp -rp /path/filenameusername@remoteIP:/path
#将本地文件拷贝到服务器上
#scp -rpusername@remoteIP:/path/filename/path
#将远程文件从服务器下载到本地
</code></pre>

<p>查看某个文件被哪些应用程序读写</p>

<pre><code>#lsof 文件名
</code></pre>

<p>把所有文件的后辍由rm改为rmvb</p>

<pre><code>#rename ’s/.rm$/.rmvb/’ *
</code></pre>

<p>把所有文件名中的大写改为小写</p>

<pre><code>#rename ‘tr/A-Z/a-z/’ *
</code></pre>

<p>删除特殊文件名的文件，如文件名：–help.txt</p>

<pre><code>#rm — –help.txt 或者 rm ./–help.txt
</code></pre>

<p>查看当前目录的子目录</p>

<pre><code>#ls -d */. 或 echo */.
</code></pre>

<p>将当前目录下最近30天访问过的文件移动到上级back目录</p>

<pre><code>#find . -type f -atime -30 -exec mv {} ../back ";
</code></pre>

<p>将当前目录下最近2小时到8小时之内的文件显示出来</p>

<pre><code>#find . -mmin +120 -mmin -480 -exec more {} ";
</code></pre>

<p>删除修改时间在30天之前的所有文件</p>

<pre><code>#find . -type f -mtime +30 -mtime -3600 -exec rm {} ";
</code></pre>

<p>查找guest用户的以avi或者rm结尾的文件并删除掉</p>

<pre><code>#find . -name ‘*.avi’ -o -name ‘*.rm’ -user ‘guest’ -exec rm {} ";
</code></pre>

<p>查找的不以java和xml结尾,并7天没有使用的文件删除掉</p>

<pre><code>#find . ! -name *.java ! -name ‘*.xml’ -atime +7 -exec rm {} ";
</code></pre>

<p>统计当前文件个数</p>

<pre><code>#ls /usr/bin|wc -w
</code></pre>

<p>统计当前目录个数</p>

<pre><code>#ls -l /usr/bin|grep ^d|wc -l
</code></pre>

<p>显示当前目录下2006-01-01的文件名</p>

<pre><code>#ls -l |grep 2006-01-01 |awk ‘{print $8}’
</code></pre>

<h3>FTP</h3>

<p>上传下载文件工具-filezilla</p>

<pre><code>#sudo apt-get install filezilla
</code></pre>

<p>filezilla无法列出中文目录？
站点->字符集->自定义->输入：GBK</p>

<h6>本地中文界面</h6>

<p>1）下载filezilla中文包到本地目录，如~/
2）#unrar x Filezilla3_zhCN.rar
3) 如果你没有unrar的话，请先安装rar和unrar</p>

<pre><code>#sudo apt-get install rar unrar
#sudo ln -f /usr/bin/rar /usr/bin/unrar
</code></pre>

<p>4）先备份原来的语言包,再安装；实际就是拷贝一个语言包。</p>

<pre><code>#sudo cp /usr/share/locale/zh_CN/filezilla.mo /usr/share/locale/zh_CN/filezilla.mo.bak

#sudo cp ~/locale/zh_CN/filezilla.mo /usr/share/locale/zh_CN/filezilla.mo
</code></pre>

<p>5）重启filezilla,即可！</p>

<h3>解压缩</h3>

<p>解压缩 xxx.tar.gz</p>

<pre><code>#tar -zxvf xxx.tar.gz
</code></pre>

<p>解压缩 xxx.tar.bz2</p>

<pre><code>#tar -jxvf xxx.tar.bz2
</code></pre>

<p>压缩aaa bbb目录为xxx.tar.gz</p>

<pre><code>#tar -zcvf xxx.tar.gz aaa bbb
</code></pre>

<p>压缩aaa bbb目录为xxx.tar.bz2</p>

<pre><code>#tar -jcvf xxx.tar.bz2 aaa bbb
</code></pre>

<h6>解压缩 RAR 文件</h6>

<p>1) 先安装</p>

<pre><code>#sudo apt-get install rar unrar
#sudo ln -f /usr/bin/rar /usr/bin/unrar
</code></pre>

<p>2) 解压</p>

<pre><code>#unrar x aaaa.rar
</code></pre>

<h6>解压缩 ZIP 文件</h6>

<p>1) 先安装</p>

<pre><code>#sudo apt-get install zip unzip
#sudo ln -f /usr/bin/zip /usr/bin/unzip
</code></pre>

<p>2) 解压</p>

<pre><code>#unzip x aaaa.zip
</code></pre>

<h3>Nautilus</h3>

<p>显示隐藏文件</p>

<pre><code>Ctrl+h
</code></pre>

<p>显示地址栏</p>

<pre><code>Ctrl+l
</code></pre>

<p>特殊 URI 地址</p>

<pre><code>* computer:/// - 全部挂载的设备和网络
* network:/// - 浏览可用的网络
* burn:/// - 一个刻录 CDs/DVDs 的数据虚拟目录
* smb:/// - 可用的 windows/samba 网络资源
* x-nautilus-desktop:/// - 桌面项目和图标
*file:///- 本地文件
* trash:/// - 本地回收站目录
* ftp:// - FTP 文件夹
* ssh:// - SSH 文件夹
* fonts:/// - 字体文件夹，可将字体文件拖到此处以完成安装
* themes:/// - 系统主题文件夹
</code></pre>

<p>查看已安装字体</p>

<pre><code>在nautilus的地址栏里输入”fonts:///“，就可以查看本机所有的fonts
</code></pre>

<h3>程序</h3>

<p>详细显示程序的运行信息</p>

<pre><code>#strace -f -F -o outfile
</code></pre>

<h6>日期和时间</h6>

<p>设置日期</p>

<pre><code>#date -s mm/dd/yy
</code></pre>

<p>设置时间</p>

<pre><code>#date -s HH:MM
</code></pre>

<p>将时间写入CMOS</p>

<pre><code>#hwclock –systohc
</code></pre>

<p>读取CMOS时间</p>

<pre><code>#hwclock –hctosys
</code></pre>

<p>从服务器上同步时间</p>

<pre><code>#sudo ntpdate time.nist.gov
#sudo ntpdate time.windows.com
</code></pre>

<h6>控制台</h6>

<p>不同控制台间切换</p>

<pre><code>Ctrl + ALT + ← Ctrl + ALT + →
</code></pre>

<p>指定控制台切换</p>

<pre><code>Ctrl + ALT + Fn(n:1~7)
</code></pre>

<p>控制台下滚屏</p>

<pre><code>SHIFT + pageUp/pageDown
</code></pre>

<p>控制台抓图</p>

<pre><code>#setterm -dump n(n:1~7)
</code></pre>

<h3>数据库</h3>

<p>mysql的数据库存放在地方</p>

<pre><code>#/var/lib/mysql
</code></pre>

<p>从mysql中导出和导入数据</p>

<pre><code>#mysqldump 数据库名 &gt; 文件名 #导出数据库
#mysqladmin create 数据库名 #建立数据库
#mysql 数据库名 &lt; 文件名 #导入数据库
</code></pre>

<p>忘了mysql的root口令怎么办</p>

<pre><code>#sudo /etc/init.d/mysql stop
#sudo mysqld_safe –skip-grant-tables
#sudo mysqladmin -u user password ‘newpassword”
#sudo mysqladmin flush-privileges
</code></pre>

<p>修改mysql的root口令</p>

<pre><code>#sudo mysqladmin -uroot -p password ‘你的新密码’
</code></pre>

<h3>其它</h3>

<p>下载网站文档</p>

<pre><code>#wget -r -p -np -khttp://www.21cn.com
· r：在本机建立服务器端目录结构；
· -p: 下载显示HTML文件的所有图片；
· -np：只下载目标站点指定目录及其子目录的内容；
· -k: 转换非相对链接为相对链接。
</code></pre>

<p>如何删除Totem电影播放机的播放历史记录</p>

<pre><code>#rm ~/.recently-used
</code></pre>

<p>如何更换gnome程序的快捷键
点击菜单，鼠标停留在某条菜单上，键盘输入任意你所需要的键，可以是组合键，会立即生效； 如果要清除该快捷键，请使用backspace</p>

<p>vim 如何显示彩色字符</p>

<pre><code>#sudo cp /usr/share/vim/vimcurrent/vimrc_example.vim /usr/share/vim/vimrc
</code></pre>

<p>如何在命令行删除在会话设置的启动程序</p>

<pre><code>#cd ~/.config/autostart rm 需要删除启动程序
</code></pre>

<p>如何提高wine的反应速度</p>

<pre><code>#sudo sed -ie ‘/GBK/,/^}/d’ /usr/share/X11/locale/zh_CN.UTF-8/XLC_LOCALE

#chgrp
</code></pre>

<p>语法: chgrp [-R] 文件组 文件…
说明： 文件的GID表示文件的文件组，文件组可用数字表示， 也可用一个有效的组名表示，此命令改变一个文件的GID，可参看chown。
-R 递归地改变所有子目录下所有文件的存取模式
例子:</p>

<pre><code>＃chgrp group file 将文件 file 的文件组改为 group

#chmod
</code></pre>

<p>语法: chmod [-R] 模式 文件…
或 chmod [ugoa] {+|-|=} [rwxst] 文件…
说明: 改变文件的存取模式，存取模式可表示为数字或符号串，例如：
＃chmod nnnn file ， n为0-7的数字，意义如下:</p>

<pre><code>4000 运行时可改变UID
2000 运行时可改变GID
1000 置粘着位
0400 文件主可读
0200 文件主可写
0100 文件主可执行
0040 同组用户可读
0020 同组用户可写
0010 同组用户可执行
0004 其他用户可读
0002 其他用户可写
0001 其他用户可执行
</code></pre>

<p>nnnn 就是上列数字相加得到的，例如 chmod 0777 file 是指将文件 file 存取权限置为所有用户可读可写可执行。
-R 递归地改变所有子目录下所有文件的存取模式</p>

<pre><code>u 文件主
g 同组用户
o 其他用户
a 所有用户
+ 增加后列权限
- 取消后列权限
= 置成后列权限
r 可读
w 可写
x 可执行
s 运行时可置UID
t 运行时可置GID
</code></pre>

<p>例子:</p>

<pre><code>＃chmod 0666 file1 file2 将文件 file1 及 file2 置为所有用户可读可写
＃chmod u+x file 对文件 file 增加文件主可执行权限
＃chmod o-rwx 对文件file 取消其他用户的所有权限

#chown
</code></pre>

<p>语法: chown [-R] 文件主 文件…</p>

<p>说明: 文件的UID表示文件的文件主，文件主可用数字表示， 也可用一个有效的用户名表示，此命令改变一个文件的UID，仅当此文件的文件主或超级用户可使用。
-R 递归地改变所有子目录下所有文件的存取模式
例子:</p>

<pre><code>#chown mary file 将文件 file 的文件主改为 mary
#chown 150 file 将文件 file 的UID改为150
</code></pre>

<h3>Ubuntu命令行下修改网络配置</h3>

<p>以eth0为例</p>

<h6>以DHCP方式配置网卡</h6>

<p>编辑文件/etc/network/interfaces:</p>

<pre><code>#sudo vi /etc/network/interfaces
</code></pre>

<p>并用下面的行来替换有关eth0的行:</p>

<pre><code># The primary network interface - use DHCP to find our address
auto eth0
iface eth0 inet dhcp
</code></pre>

<p>用下面的命令使网络设置生效:</p>

<pre><code>#sudo /etc/init.d/networking restart
</code></pre>

<p>当然,也可以在命令行下直接输入下面的命令来获取地址</p>

<pre><code>#sudo dhclient eth0
</code></pre>

<h6>为网卡配置静态IP地址</h6>

<p>编辑文件/etc/network/interfaces:</p>

<pre><code>    #sudo vi /etc/network/interfaces
</code></pre>

<p>并用下面的行来替换有关eth0的行:</p>

<pre><code>    # The primary network interface
    auto eth0
    iface eth0 inet static
    address 192.168.3.90
    gateway 192.168.3.1
    netmask 255.255.255.0
    network 192.168.3.0
    broadcast 192.168.3.255
</code></pre>

<p>将上面的ip地址等信息换成你自己就可以了.</p>

<p>用下面的命令使网络设置生效:</p>

<pre><code>#sudo /etc/init.d/networking restart
</code></pre>

<h6>设定第二个IP地址(虚拟IP地址)</h6>

<p>编辑文件/etc/network/interfaces:</p>

<pre><code>    #sudo vi /etc/network/interfaces
</code></pre>

<p>在该文件中添加如下的行:</p>

<pre><code>auto eth0:1
iface eth0:1 inet static
address 192.168.1.60
netmask 255.255.255.0
network x.x.x.x
broadcast x.x.x.x
gateway x.x.x.x
</code></pre>

<p>根据你的情况填上所有诸如address,netmask,network,broadcast和gateways等信息.
用下面的命令使网络设置生效:</p>

<pre><code>#sudo /etc/init.d/networking restart
</code></pre>

<h6>设置主机名称(hostname)</h6>

<p>使用下面的命令来查看当前主机的主机名称:</p>

<pre><code>#sudo /bin/hostname
</code></pre>

<p>使用下面的命令来设置当前主机的主机名称:</p>

<pre><code>#sudo /bin/hostname newname
</code></pre>

<p>系统启动时,它会从/etc/hostname来读取主机的名称.</p>

<h6>配置DNS</h6>

<p>首先,你可以在/etc/hosts中加入一些主机名称和这些主机名称对应的IP地址,这是简单使用本机的静态查询.
要访问DNS 服务器来进行查询,需要设置/etc/resolv.conf文件.
假设DNS服务器的IP地址是192.168.3.2, 那么/etc/resolv.conf文件的内容应为:</p>

<pre><code>    search test.com
    nameserver 192.168.3.2
</code></pre>

<h3>安装AMP服务</h3>

<p>如果采用Ubuntu Server CD开始安装时，可以选择安装，这系统会自动装上apache2,php5和mysql5。下面主要说明一下如果不是安装的Ubuntu server时的安装方法。
用命令在Ubuntu下架设Lamp其实很简单，用一条命令就完成。在终端输入以下命令：</p>

<pre><code>#sudo apt-get install apache2 mysql-server php5 php5-mysql php5-gd #phpmyadmin
</code></pre>

<p>装好后，mysql管理员是root，无密码，通过<a href="http://localhost/phpmyadmin%E5%B0%B1%E5%8F%AF%E4%BB%A5%E8%AE%BF%E9%97%AEmysql%E4%BA%86">http://localhost/phpmyadmin%E5%B0%B1%E5%8F%AF%E4%BB%A5%E8%AE%BF%E9%97%AEmysql%E4%BA%86</a></p>

<h6>修改 MySql 密码</h6>

<p>终端下输入：</p>

<pre><code>#mysql -u root
#mysql&gt; GRANT ALL PRIVILEGES ON *.* TO root@localhost IDENTIFIED BY “123456″;
</code></pre>

<p>’123456‘是root的密码，可以自由设置，但最好是设个安全点的。
    #mysql> quit; 退出mysql</p>

<h6>apache2的操作命令</h6>

<pre><code>启动：#sudo /etc/init.d/apache2 start
重启：#sudo /etc/init.d/apache2 restart
关闭：#sudo /etc/init.d/apache2 stop
apache2的默认主目录：/var/www/
</code></pre>

<h3>总结</h3>

<h6>一、文件/文件夹管理</h6>

<pre><code>ls 列出当前目录文件（不包括隐含文件）
ls -a 列出当前目录文件（包括隐含文件）
ls -l 列出当前目录下文件的详细信息

cd .. 回当前目录的上一级目录
cd - 回上一次所在的目录
cd ~ 或 cd 回当前用户的宿主目录
mkdir 目录名 创建一个目录
rmdir 空目录名 删除一个空目录
rm 文件名 文件名 删除一个文件或多个文件
rm -rf 非空目录名 删除一个非空目录下的一切

mv 路经/文件 /经/文件移动相对路经下的文件到绝对路经下
mv 文件名 新名称 在当前目录下改名
find 路经 -name “字符串” 查找路经所在范围内满足字符串匹配的文件和目录
</code></pre>

<h6>二、系统管理</h6>

<pre><code>fdisk fdisk -l 查看系统分区信息
fdisk fdisk /dev/sdb 为一块新的SCSI硬盘进行分区
chown chown root /home 把/home的属主改成root用户
chgrp chgrp root /home 把/home的属组改成root组

Useradd 创建一个新的用户
Groupadd 组名 创建一个新的组
Passwd 用户名 为用户创建密码
Passwd -d用户名 删除用户密码也能登陆
Passwd -S用户名 查询账号密码
Usermod -l 新用户名 老用户名 为用户改名
Userdel–r 用户名 删除用户一切

service [servicename] start/stop/restart 系统服务控制操作
/etc/init.d/[servicename] start/stop/restart 系统服务控制操作

uname -a 查看内核版本
cat /etc/issue 查看ubuntu版本
lsusb 查看usb设备
sudo ethtool eth0 查看网卡状态
cat /proc/cpuinfo 查看cpu信息
lshw 查看当前硬件信息
sudo fdisk -l 查看磁盘信息
df -h 查看硬盘剩余空间
free -m 查看当前的内存使用情况
ps -A 查看当前有哪些进程
kill 进程号(就是ps -A中的第一列的数字)或者 killall 进程名( 杀死一个进程)
kill -9 进程号 强制杀死一个进程

reboot Init 6 重启LINUX系统
Halt Init 0 Shutdown –h now 关闭LINUX系统
</code></pre>

<h6>三、打包/解压</h6>

<pre><code>tar -c 创建包 –x 释放包 -v 显示命令过程 –z 代表压缩包
tar –cvf benet.tar /home/benet 把/home/benet目录打包
tar –zcvf benet.tar.gz /mnt 把目录打包并压缩
tar –zxvf benet.tar.gz 压缩包的文件解压恢复
tar –jxvf benet.tar.bz2 解压缩
</code></pre>

<h6>四、make编译</h6>

<pre><code>make 编译
make install 安装编译好的源码包
</code></pre>

<h6>五、apt命令</h6>

<pre><code>apt-cache search package 搜索包
apt-cache show package 获取包的相关信息，如说明、大小、版本等
sudo apt-get install package 安装包
sudo apt-get install package - - reinstall 重新安装包
sudo apt-get -f install 修复安装”-f = –fix-missing”
sudo apt-get remove package 删除包
sudo apt-get remove package - - purge 删除包，包括删除配置文件等
sudo apt-get update 更新源
sudo apt-get upgrade 更新已安装的包
sudo apt-get dist-upgrade 升级系统
sudo apt-get dselect-upgrade 使用 dselect 升级
apt-cache depends package 了解使用依赖
apt-cache rdepends package 是查看该包被哪些包依赖
sudo apt-get build-dep package 安装相关的编译环境
apt-get source package 下载该包的源代码
sudo apt-get clean &amp;&amp; sudo apt-get autoclean 清理无用的包
sudo apt-get check 检查是否有损坏的依赖
sudo apt-get clean 清理所有软件缓存（即缓存在/var/cache/apt/archives目录里的deb包）
</code></pre>

<hr />

<hr />

<h6>微信号：</h6>

<p>clpaial10201119（Q Q：2211523682）</p>

<h6>微博WB:</h6>

<p><a href="http://weibo.com/u/3288975567?is_hot=1">http://weibo.com/u/3288975567?is_hot=1</a></p>

<h6>gitHub：</h6>

<p><a href="https://github.com/al1020119">https://github.com/al1020119</a></p>

<h6>博客</h6>

<p><a href="http://al1020119.github.io/">http://al1020119.github.io/</a></p>

<hr />

<p><img src="http://al1020119.github.io/images/iCocosCoder.jpg" title="Caption" ></p>

<p><img src="http://al1020119.github.io/images/iCocosPublic.jpg" title="Caption" ></p>
]]></content>
  </entry>
  
  <entry>
    <title type="html"><![CDATA[完虐ThinkPHP 5.* 远不止这些😱😂]]></title>
    <link href="http://al1020119.github.io/blog/2016/12/01/wan-zhuan-thinkphp-5-dot-star/"/>
    <updated>2016-12-01T00:30:20+08:00</updated>
    <id>http://al1020119.github.io/blog/2016/12/01/wan-zhuan-thinkphp-5-dot-star</id>
    <content type="html"><![CDATA[<h2>目录</h2>

<ol>
<li>下载安装</li>
<li>规范整理</li>
<li>结构介绍</li>
<li>简单配置</li>
<li>简单数据显示</li>
<li>数据库配置</li>
<li>数据库基本使用</li>
<li>模型基本使用</li>
<li>总结：（ThinkPhp5.+ <-->ThinkPhp3.+）</li>
</ol>


<!--more-->


<h3>下载安装</h3>

<h6>一、官网下载安装</h6>

<p>获取ThinkPHP的方式很多，官方网站（<a href="http://thinkphp.cn">http://thinkphp.cn</a>）提供了稳定版本或者带扩展完整版本的下载。</p>

<pre><code>官网的下载版本不一定是最新版本，GIT版本获取的才是保持更新的版本。
</code></pre>

<h6>二、Composer安装</h6>

<p>ThinkPHP5支持使用Composer安装，如果还没有安装 Composer，你可以按 Composer安装 中的方法安装。在 Linux 和 Mac OS X 中可以运行如下命令：</p>

<pre><code>curl -sS https://getcomposer.org/installer | php
mv composer.phar /usr/local/bin/composer
</code></pre>

<ul>
<li>在 Windows 中，你需要下载并运行 Composer-Setup.exe。</li>
</ul>


<p>然后在命令行下面，切换到你的web根目录下面并执行下面的命令：</p>

<pre><code>composer create-project topthink/think tp5  --prefer-dist
</code></pre>

<ul>
<li>composer更新方式：composer self-update</li>
</ul>


<h6>三、Git安装</h6>

<p>如果你不太了解Composer或者觉得Composer太慢，也可以使用git版本库安装和更新，ThinkPHP5.0拆分为多个仓库，主要包括：</p>

<pre><code>应用项目：https://github.com/top-think/think
核心框架：https://github.com/top-think/framework 

之所以设计为应用和核心仓库分离，是为了支持Composer单独更新核心框架。
</code></pre>

<p>首先克隆下载应用项目仓库</p>

<pre><code>git clone https://github.com/top-think/think tp5
</code></pre>

<p>然后切换到tp5目录下面，再克隆核心框架仓库：</p>

<pre><code>git clone https://github.com/top-think/framework thinkphp
</code></pre>

<p>两个仓库克隆完成后，就完成了ThinkPHP5.0的Git方式下载，如果需要更新核心框架的时候，只需要切换到thinkphp核心目录下面，然后执行：</p>

<pre><code>git pull https://github.com/top-think/framework
</code></pre>

<blockquote><p>如果不熟悉git命令行，可以使用任何一个GIT客户端进行操作，在此不再详细说明。</p></blockquote>

<p>无论你采用什么方式获取的ThinkPHP框架，现在只需要做最后一步来验证是否正常运行。</p>

<p>在浏览器中输入地址：</p>

<pre><code>http://localhost/tp5/public/
</code></pre>

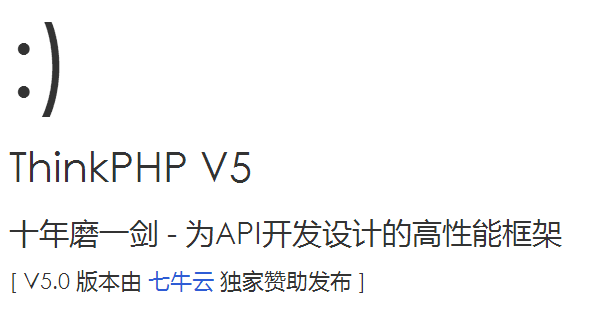
<p>如果浏览器输出如图所示，那么说明你成功了，如果不是，那么请检测相关配置或者步骤：</p>

<p><img src="http://al1020119.github.io/images/thinkphp5_0001.png" title="Caption" ></p>

<h3>规范整理</h3>

<p>ThinkPHP5遵循PSR-2命名规范和PSR-4自动加载规范，并且注意如下规范：</p>

<h6>目录和文件</h6>

<pre><code>目录不强制规范，驼峰及小写+下划线模式均支持；
类库、函数文件统一以.php为后缀；
类的文件名均以命名空间定义，并且命名空间的路径和类库文件所在路径一致；
类文件采用驼峰法命名（首字母大写），其它文件采用小写+下划线命名；
类名和类文件名保持一致，统一采用驼峰法命名（首字母大写）；
</code></pre>

<h6>函数和类、属性命名</h6>

<pre><code>类的命名采用驼峰法（首字母大写），例如 User、UserType，默认不需要添加后缀，例如UserController应该直接命名为User；
函数的命名使用小写字母和下划线（小写字母开头）的方式，例如 get_client_ip；
方法的命名使用驼峰法（首字母小写），例如 getUserName；
属性的命名使用驼峰法（首字母小写），例如 tableName、instance；
以双下划线“__”打头的函数或方法作为魔法方法，例如 __call 和 __autoload；
</code></pre>

<h6>常量和配置</h6>

<pre><code>常量以大写字母和下划线命名，例如 APP_PATH和 THINK_PATH；
配置参数以小写字母和下划线命名，例如 url_route_on 和url_convert；
</code></pre>

<h6>数据表和字段</h6>

<pre><code>数据表和字段采用小写加下划线方式命名，并注意字段名不要以下划线开头，例如 think_user 表和 user_name字段，不建议使用驼峰和中文作为数据表字段命名。
</code></pre>

<h6>应用类库命名空间规范</h6>

<p>应用类库的根命名空间统一为app（可以设置app_namespace配置参数更改）</p>

<pre><code>例如：app\index\controller\Index和app\index\model\User。
</code></pre>

<h3>结构介绍</h3>

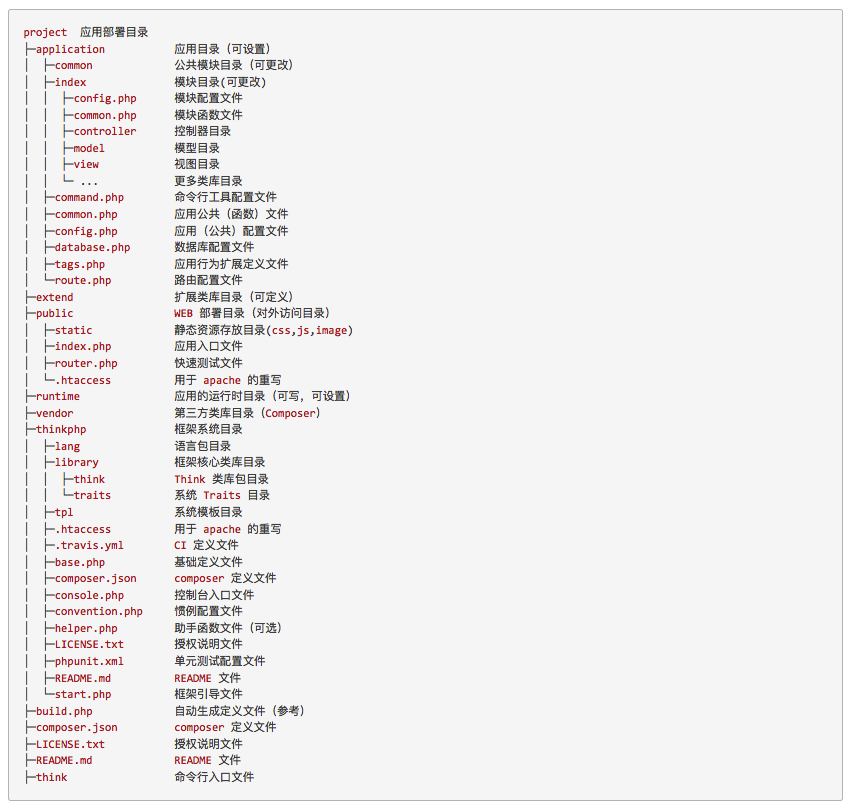
<p>下载最新版框架后，解压缩到web目录下面，可以看到初始的目录结构如下：</p>

<p><img src="http://al1020119.github.io/images/thinkphp5_0002.png" title="Caption" ></p>

<p>5.0的部署建议是public目录作为web目录访问内容，其它都是web目录之外，当然，你必须要修改public/index.php中的相关路径。如果没法做到这点，请记得设置目录的访问权限或者添加目录列表的保护文件。</p>

<pre><code>router.php用于php自带webserver支持，可用于快速测试
启动命令：php -S localhost:8888 router.php
</code></pre>

<p>5.0版本自带了一个完整的应用目录结构和默认的应用入口文件，开发人员可以在这个基础之上灵活调整。</p>

<pre><code>上面的目录结构和名称是可以改变的，尤其是应用的目录结构，这取决于你的入口文件和配置参数。
</code></pre>

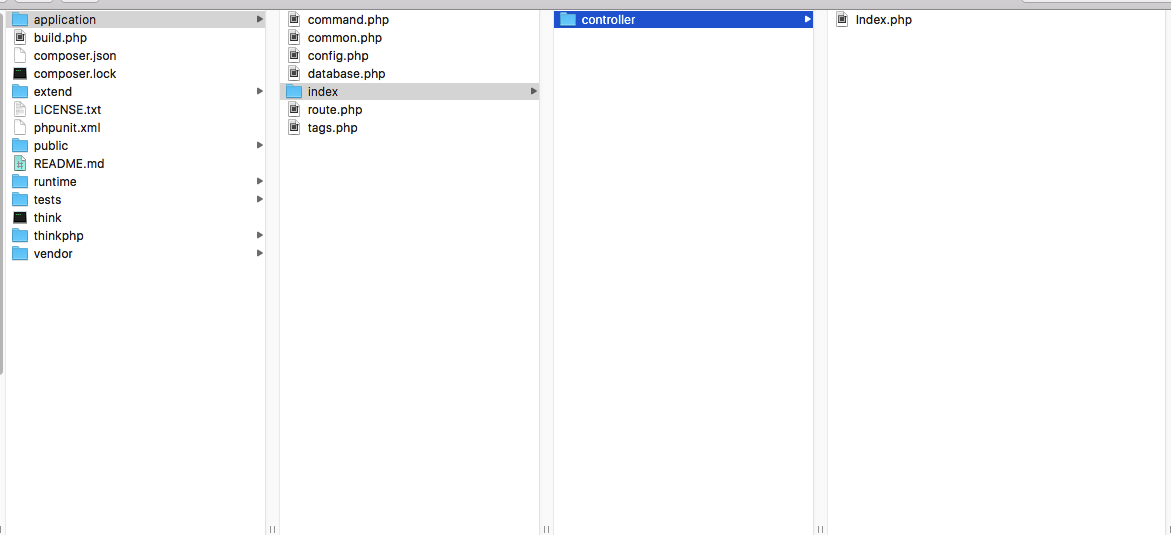
<p>这里是我下载解压后的目录结构</p>

<p><img src="http://al1020119.github.io/images/thinkphp5_0003.png" title="Caption" ></p>

<h3>简单配置</h3>

<p>细心的话我们可以发现，ThinkPhp5中入口文件相对ThinkPhp3中的入口文件发生了变化，在ThinkPhp5中的入口文件是放在根目录中的public里面index.php文件，其实5相对3来说，变化还是挺大的，如果之前是使用3写的项目。要升级到5的话，估计也是一个大工程，需要很细心的处理。</p>

<ul>
<li>前面我们输入了：<a href="http://localhost/tp5/public/">http://localhost/tp5/public/</a></li>
</ul>


<p>查看public中可以看到index.php的内容和ThinkPhp3中的入口有点相似：</p>

<p>ThinkPhp3的入口文件</p>

<pre><code>// 应用入口文件

// 检测PHP环境
if(version_compare(PHP_VERSION,'5.3.0','&lt;'))  die('require PHP &gt; 5.3.0 !');

// 开启调试模式 建议开发阶段开启 部署阶段注释或者设为false
define('APP_DEBUG',True);

// 定义应用目录
define('APP_NAME','App');
// 定义应用目录
define('APP_PATH','./App/');

// 引入ThinkPHP入口文件
require './ThinkPHP/ThinkPHP.php';

// 亲^_^ 后面不需要任何代码了 就是如此简单
</code></pre>

<p>ThinkPhp5的入口文件</p>

<pre><code>// [ 应用入口文件 ]

// 定义应用目录
define('APP_PATH', __DIR__ . '/../application/');
// 加载框架引导文件
require __DIR__ . '/../thinkphp/start.php';
</code></pre>

<p>所以我们会发现入口文件指向的是Application文件夹，然后进入到Application文件夹，有个index文件夹，里面有个Controller文件夹，打开index.php文件，看到：</p>

<pre><code>&lt;?php
namespace app\index\controller;

class Index
{
    public function index()
    {
        return '&lt;style type="text/css"&gt;*{ padding: 0; margin: 0; } .think_default_text{ padding: 4px 48px;} a{color:#2E5CD5;cursor: pointer;text-decoration: none} a:hover{text-decoration:underline; } body{ background: #fff; font-family: "Century Gothic","Microsoft yahei"; color: #333;font-size:18px} h1{ font-size: 100px; font-weight: normal; margin-bottom: 12px; } p{ line-height: 1.6em; font-size: 42px }&lt;/style&gt;&lt;div style="padding: 24px 48px;"&gt; &lt;h1&gt;:)&lt;/h1&gt;&lt;p&gt; ThinkPHP V5&lt;br/&gt;&lt;span style="font-size:30px"&gt;十年磨一剑 - 为API开发设计的高性能框架&lt;/span&gt;&lt;/p&gt;&lt;span style="font-size:22px;"&gt;[ V5.0 版本由 &lt;a href="http://www.qiniu.com" target="qiniu"&gt;七牛云&lt;/a&gt; 独家赞助发布 ]&lt;/span&gt;&lt;/div&gt;&lt;script type="text/javascript" src="http://tajs.qq.com/stats?sId=9347272" charset="UTF-8"&gt;&lt;/script&gt;&lt;script type="text/javascript" src="http://ad.topthink.com/Public/static/client.js"&gt;&lt;/script&gt;&lt;thinkad id="ad_bd568ce7058a1091"&gt;&lt;/thinkad&gt;';
    }
}
</code></pre>

<p>其中return返回的数据，正好是我们前面输入：<a href="http://localhost/tp5/public/">http://localhost/tp5/public/</a>所看到对应的数据。</p>

<p>下面开始简单的项目文件配置（根据个人习惯而定）。</p>

<h6>文件创建</h6>

<p>一切先从Application文件夹开始。因为我们平时一个项目中都会分前后端，所以这里在Application中新建一些文件个文件夹，至于index文件夹可以不用管，也可以在他的基础上或者直接把他当做前段文件夹。</p>

<ul>
<li><p>home文件夹</p>

<ul>
<li>common.php文件</li>
<li>config.php文件</li>
<li>controller文件夹

<ul>
<li>index.php文件</li>
</ul>
</li>
<li>view文件夹

<ul>
<li>index文件夹

<ul>
<li>index.html文件</li>
</ul>
</li>
</ul>
</li>
<li>model文件夹</li>
</ul>
</li>
<li><p>admin文件夹</p>

<ul>
<li>common.php文件</li>
<li>config.php文件</li>
<li>controller文件夹

<ul>
<li>index.php文件</li>
</ul>
</li>
<li>view文件夹

<ul>
<li>index文件夹

<ul>
<li>index.html文件</li>
</ul>
</li>
</ul>
</li>
<li>model文件夹</li>
</ul>
</li>
<li><p>app_extend文件夹</p>

<ul>
<li>common.php文件</li>
<li>config.php文件</li>
<li>controller文件夹

<ul>
<li>miaosha文件夹</li>
<li>weixin文件夹</li>
<li>tuangou文件夹</li>
</ul>
</li>
<li>view文件夹

<ul>
<li>miaosha文件夹</li>
<li>weixin文件夹</li>
<li>tuangou文件夹</li>
</ul>
</li>
<li>model文件夹

<ul>
<li>miaosha文件夹</li>
<li>weixin文件夹</li>
<li>tuangou文件夹</li>
</ul>
</li>
</ul>
</li>
<li><p>common文件夹</p></li>
</ul>


<p>关于其他配置和相关文件的介绍这里就略过了。相信有一点基础一应都能看懂。</p>

<h3>数据简单显示</h3>

<ol>
<li>在admin和home中controller文件夹对应的index.php文件中写下面代码：</li>
</ol>


<p>index.php实现</p>

<pre><code>&lt;?php
namespace app\home\controller;

use think\Controller;

class Index extends Controller
{
    public function index()
    {
        return $this-&gt;fetch();
    }
}
</code></pre>

<p>fetch()和ThinkPhp3中的display()方法的功能一应，实现MV层的传递。</p>

<pre><code>fetch   渲染模板输出
display     渲染内容输出
assign  模板变量赋值
engine  初始化模板引擎
</code></pre>

<ol>
<li>在admin和home中view文件夹对应的index.html文件中写下面代码：</li>
</ol>


<p>index.html实现</p>

<pre><code>&lt;html&gt;

&lt;head&gt;
    &lt;meta charset = "utf-8"&gt;
&lt;/head&gt; 

 &lt;body&gt;

欢迎来到iCocos=name；；；；；；；；；；；

 &lt;/body&gt;

&lt;/html&gt;
</code></pre>

<p>至于视图的实例化和相关配置，使用和渲染请查看官方手册：<a href="http://www.kancloud.cn/manual/thinkphp5/118113">视图</a></p>

<p>使用：浏览器分别输入下面的路径，可以看到对应我们想要看到的界面</p>

<p>home：</p>

<pre><code>http://127.0.0.1/ThComp3/public/home/index
</code></pre>

<p>admin：</p>

<pre><code>http://127.0.0.1/ThComp3/public/admin/index
</code></pre>

<p>这里就简单的实现了MVC中M层和V层之间的处理。</p>

<h3>数据库配置</h3>

<ol>
<li>先使用Navicat或者phpMyAdmin创建对应的数据库和表，并且初始化一些字段，然后插入一条简单的数据，这里我使用Navicat（支持多数数据库，操作简单）。</li>
</ol>


<p><img src="http://al1020119.github.io/images/thinkphp5_0004.png" title="Caption" ></p>

<ol>
<li>配置数据库相关属性</li>
</ol>


<p>在这之前先回顾一下原生PHP什么实现这个操作。</p>

<h6>链接数据库</h6>

<p>面向对象</p>

<pre><code>&lt;?php
$servername = "localhost";
$username = "username";
$password = "password";

// 创建连接
$conn = new mysqli($servername, $username, $password);

// 检测连接
if ($conn-&gt;connect_error) {
    die("连接失败: " . $conn-&gt;connect_error);
} 
echo "连接成功";
?&gt;
</code></pre>

<p>PDO实现</p>

<pre><code>&lt;?php
$servername = "localhost";
$username = "username";
$password = "password";

try {
    $conn = new PDO("mysql:host=$servername;dbname=myDB", $username, $password);
    echo "连接成功"; 
}
catch(PDOException $e)
{
    echo $e-&gt;getMessage();
}
?&gt;

关闭

$conn-&gt;close(); 
$conn = null; 
</code></pre>

<h6>创建数据库</h6>

<pre><code>&lt;?php
$servername = "localhost";
$username = "username";
$password = "password";

// 创建连接
$conn = new mysqli($servername, $username, $password);
// 检测连接
if ($conn-&gt;connect_error) {
    die("连接失败: " . $conn-&gt;connect_error);
}

// 创建数据库
$sql = "CREATE DATABASE myDB";
if ($conn-&gt;query($sql) === TRUE) {
    echo "数据库创建成功";
} else {
    echo "Error creating database: " . $conn-&gt;error;
}

$conn-&gt;close();
?&gt; 
</code></pre>

<h6>创建表</h6>

<pre><code> &lt;?php
$servername = "localhost";
$username = "username";
$password = "password";
$dbname = "myDB";

// 创建连接
$conn = new mysqli($servername, $username, $password, $dbname);
// 检测连接
if ($conn-&gt;connect_error) {
    die("连接失败: " . $conn-&gt;connect_error);
}

// 使用 sql 创建数据表
$sql = "CREATE TABLE MyGuests (
id INT(6) UNSIGNED AUTO_INCREMENT PRIMARY KEY,
firstname VARCHAR(30) NOT NULL,
lastname VARCHAR(30) NOT NULL,
email VARCHAR(50),
reg_date TIMESTAMP
)";

if ($conn-&gt;query($sql) === TRUE) {
    echo "Table MyGuests created successfully";
} else {
    echo "创建数据表错误: " . $conn-&gt;error;
}

$conn-&gt;close();
?&gt; 
</code></pre>

<h6>插入数据库</h6>

<pre><code>&lt;?php
$servername = "localhost";
$username = "username";
$password = "password";
$dbname = "myDB";

// 创建连接
$conn = new mysqli($servername, $username, $password, $dbname);
// 检测连接
if ($conn-&gt;connect_error) {
    die("连接失败: " . $conn-&gt;connect_error);
}

$sql = "INSERT INTO MyGuests (firstname, lastname, email)
VALUES ('John', 'Doe', 'john@example.com')";

if ($conn-&gt;query($sql) === TRUE) {
    echo "新记录插入成功";
} else {
    echo "Error: " . $sql . "&lt;br&gt;" . $conn-&gt;error;
}

$conn-&gt;close();
?&gt; 
</code></pre>

<h6>插入多条</h6>

<pre><code>&lt;?php
$servername = "localhost";
$username = "username";
$password = "password";
$dbname = "myDB";

// 创建链接
$conn = new mysqli($servername, $username, $password, $dbname);
// 检查链接
if ($conn-&gt;connect_error) {
    die("连接失败: " . $conn-&gt;connect_error);
}

$sql = "INSERT INTO MyGuests (firstname, lastname, email)
VALUES ('John', 'Doe', 'john@example.com');";
$sql .= "INSERT INTO MyGuests (firstname, lastname, email)
VALUES ('Mary', 'Moe', 'mary@example.com');";
$sql .= "INSERT INTO MyGuests (firstname, lastname, email)
VALUES ('Julie', 'Dooley', 'julie@example.com')";

if ($conn-&gt;multi_query($sql) === TRUE) {
    echo "新记录插入成功";
} else {
    echo "Error: " . $sql . "&lt;br&gt;" . $conn-&gt;error;
}

$conn-&gt;close();
?&gt; 
</code></pre>

<h6>查询数据</h6>

<pre><code>&lt;?php
$servername = "localhost";
$username = "username";
$password = "password";
$dbname = "myDB";

// 创建连接
$conn = new mysqli($servername, $username, $password, $dbname);
// 检测连接
if ($conn-&gt;connect_error) {
    die("连接失败: " . $conn-&gt;connect_error);
}

$sql = "SELECT id, firstname, lastname FROM MyGuests";
$result = $conn-&gt;query($sql);

if ($result-&gt;num_rows &gt; 0) {
    // 输出每行数据
    while($row = $result-&gt;fetch_assoc()) {
        echo "&lt;br&gt; id: ". $row["id"]. " - Name: ". $row["firstname"]. " " . $row["lastname"];
    }
} else {
    echo "0 个结果";
}
$conn-&gt;close();
?&gt; 
</code></pre>

<h6>更新</h6>

<pre><code>&lt;?php
$con=mysqli_connect("localhost","username","password","database");
// 检测连接
if (mysqli_connect_errno())
{
    echo "连接失败: " . mysqli_connect_error();
}

mysqli_query($con,"UPDATE Persons SET Age=36
WHERE FirstName='Peter' AND LastName='Griffin'");

mysqli_close($con);
?&gt;
</code></pre>

<h6>删除</h6>

<pre><code>&lt;?php
$con=mysqli_connect("localhost","username","password","database");
// 检测连接
if (mysqli_connect_errno())
{
    echo "连接失败: " . mysqli_connect_error();
}

mysqli_query($con,"DELETE FROM Persons WHERE LastName='Griffin'");

mysqli_close($con);
?&gt;
</code></pre>

<h6>ODBC</h6>

<p>下面的实例展示了如何首先创建一个数据库连接，接着创建一个结果集，然后在 HTML 表格中显示数据。</p>

<pre><code>&lt;html&gt;
&lt;body&gt;

&lt;?php
$conn=odbc_connect('northwind','','');
if (!$conn)
{
    exit("连接失败: " . $conn);
}

$sql="SELECT * FROM customers";
$rs=odbc_exec($conn,$sql);

if (!$rs)
{
    exit("SQL 语句错误");
}
echo "&lt;table&gt;&lt;tr&gt;";
echo "&lt;th&gt;Companyname&lt;/th&gt;";
echo "&lt;th&gt;Contactname&lt;/th&gt;&lt;/tr&gt;";

while (odbc_fetch_row($rs))
{
    $compname=odbc_result($rs,"CompanyName");
    $conname=odbc_result($rs,"ContactName");
    echo "&lt;tr&gt;&lt;td&gt;$compname&lt;/td&gt;";
    echo "&lt;td&gt;$conname&lt;/td&gt;&lt;/tr&gt;";
}
odbc_close($conn);
echo "&lt;/table&gt;";
?&gt;

&lt;/body&gt;
&lt;/html&gt;
</code></pre>

<h6>在根目录的database.php中配置对应的数据信息</h6>

<pre><code>&lt;?php
// +----------------------------------------------------------------------
// | ThinkPHP [ WE CAN DO IT JUST THINK ]
// +----------------------------------------------------------------------
// | Copyright (c) 2006~2016 http://thinkphp.cn All rights reserved.
// +----------------------------------------------------------------------
// | Licensed ( http://www.apache.org/licenses/LICENSE-2.0 )
// +----------------------------------------------------------------------
// | Author: liu21st &lt;liu21st@gmail.com&gt;
// +----------------------------------------------------------------------

return [
    // 数据库类型
    'type'           =&gt; 'mysql',
    // 服务器地址
    'hostname'       =&gt; '127.0.0.1',
    // 数据库名
    'database'       =&gt; 'WWWiCocos',
    // 用户名
    'username'       =&gt; 'root',
    // 密码
    'password'       =&gt; '',
    // 端口
    'hostport'       =&gt; '3306',
    // 连接dsn
    'dsn'            =&gt; '',
    // 数据库连接参数
    'params'         =&gt; [],
    // 数据库编码默认采用utf8
    'charset'        =&gt; 'utf8',
    // 数据库表前缀
    'prefix'         =&gt; '',
    // 数据库调试模式
    'debug'          =&gt; true,
    // 数据库部署方式:0 集中式(单一服务器),1 分布式(主从服务器)
    'deploy'         =&gt; 0,
    // 数据库读写是否分离 主从式有效
    'rw_separate'    =&gt; false,
    // 读写分离后 主服务器数量
    'master_num'     =&gt; 1,
    // 指定从服务器序号
    'slave_no'       =&gt; '',
    // 是否严格检查字段是否存在
    'fields_strict'  =&gt; true,
    // 数据集返回类型 array 数组 collection Collection对象
    'resultset_type' =&gt; 'array',
    // 是否自动写入时间戳字段
    'auto_timestamp' =&gt; false,
    // 是否需要进行SQL性能分析
    'sql_explain'    =&gt; false,
];
</code></pre>

<h6>也可以在调用Db类的时候动态定义连接信息</h6>

<pre><code>Db::connect([
    // 数据库类型
    'type'        =&gt; 'mysql',
    // 数据库连接DSN配置
    'dsn'         =&gt; '',
    // 服务器地址
    'hostname'    =&gt; '127.0.0.1',
    // 数据库名
    'database'    =&gt; 'thinkphp',
    // 数据库用户名
    'username'    =&gt; 'root',
    // 数据库密码
    'password'    =&gt; '',
    // 数据库连接端口
    'hostport'    =&gt; '',
    // 数据库连接参数
    'params'      =&gt; [],
    // 数据库编码默认采用utf8
    'charset'     =&gt; 'utf8',
    // 数据库表前缀
    'prefix'      =&gt; 'think_',
]);
</code></pre>

<h6>或者使用字符串方式：</h6>

<pre><code>Db::connect('mysql://root:1234@127.0.0.1:3306/thinkphp#utf8');
</code></pre>

<h4>验证连接并打印数据</h4>

<pre><code>首先必须清楚的明白之前在ThinkPhp3中的单字母函数，ThinkPhp5中已经取消了，比如M(),D()等，所以我们必须忘掉之前的这种风格。
</code></pre>

<p>这里配置好了数据库之后，使用对应的函数来验证连接，并且打印相关信息。</p>

<p>ThinkPhp3的方式</p>

<pre><code>    $db = M('tp_user'); 
    print("&lt;pre&gt;"); // 格式化输出数组
    var_dump($db);
    print("&lt;/pre&gt;");
</code></pre>

<p>ThinkPhp5的方式</p>

<pre><code>    print("&lt;pre&gt;"); // 格式化输出数组
    var_dump(Db::table('tp_user')-&gt;select());
    // Db::name('user')-&gt;select(); // 或者
    print("&lt;/pre&gt;");
</code></pre>

<p>这样就可以打印出数据库相关的信息如下：</p>

<pre><code>array(2) {
  [0]=&gt;
  array(5) {
    ["id"]=&gt;
    int(1)
    ["uname"]=&gt;
    string(2) "56"
    ["upwd"]=&gt;
    string(2) "65"
    ["ip"]=&gt;
    string(3) "645"
    ["last_time"]=&gt;
    int(564)
  }
  [1]=&gt;
  array(5) {
    ["id"]=&gt;
    int(2)
    ["uname"]=&gt;
    string(3) "234"
    ["upwd"]=&gt;
    string(3) "wer"
    ["ip"]=&gt;
    string(3) "221"
    ["last_time"]=&gt;
    int(23)
  }
}
</code></pre>

<h3>基本使用</h3>

<p>配置了数据库连接信息后，我们就可以直接使用数据库运行原生SQL操作了，支持query（查询操作）和execute（写入操作）方法，并且支持参数绑定。</p>

<pre><code>Db::query('select * from think_user where id=?',[8]);
Db::execute('insert into think_user (id, name) values (?, ?)',[8,'thinkphp']);
</code></pre>

<p>也支持命名占位符绑定，例如：</p>

<pre><code>Db::query('select * from think_user where id=:id',['id'=&gt;8]);
Db::execute('insert into think_user (id, name) values (:id, :name)',['id'=&gt;8,'name'=&gt;'thinkphp']);
</code></pre>

<p>可以使用多个数据库连接，使用</p>

<pre><code>Db::connect($config)-&gt;query('select * from think_user where id=:id',['id'=&gt;8]);
</code></pre>

<p>config是一个单独的数据库配置，支持数组和字符串，也可以是一个数据库连接的配置参数名。</p>

<h3>CRUD</h3>

<h6>查询： 基本查询</h6>

<p>查询一个数据使用：</p>

<pre><code>// table方法必须指定完整的数据表名
Db::table('think_user')-&gt;where('id',1)-&gt;find();
</code></pre>

<ul>
<li>find 方法查询结果不存在，返回 null</li>
</ul>


<p>查询数据集使用：</p>

<pre><code>Db::table('think_user')-&gt;where('status',1)-&gt;select();

select 方法查询结果不存在，返回空数组
</code></pre>

<p>如果设置了数据表前缀参数的话，可以使用</p>

<pre><code>Db::name('user')-&gt;where('id',1)-&gt;find();
Db::name('user')-&gt;where('status',1)-&gt;select();
</code></pre>

<h6>增加：添加一条数据</h6>

<p>使用 Db 类的 insert 方法向数据库提交数据</p>

<pre><code>$data = ['foo' =&gt; 'bar', 'bar' =&gt; 'foo'];
Db::table('think_user')-&gt;insert($data);
</code></pre>

<p>如果你在database.php配置文件中配置了数据库前缀(prefix)，那么可以直接使用 Db 类的 name 方法提交数据</p>

<pre><code>Db::name('user')-&gt;insert($data);
</code></pre>

<ul>
<li>insert 方法添加数据成功返回添加成功的条数，insert 正常情况返回 1</li>
</ul>


<p>添加数据后如果需要返回新增数据的自增主键，可以使用getLastInsID方法：</p>

<pre><code>Db::name('user')-&gt;insert($data);
$userId = Db::name('user')-&gt;getLastInsID();
</code></pre>

<p>或者直接使用insertGetId方法新增数据并返回主键值：</p>

<pre><code>Db::name('user')-&gt;insertGetId($data);
</code></pre>

<ul>
<li>insertGetId 方法添加数据成功返回添加数据的自增主键</li>
</ul>


<h6>更新：更新数据表中的数据</h6>

<pre><code>Db::table('think_user')
    -&gt;where('id', 1)
    -&gt;update(['name' =&gt; 'thinkphp']);
</code></pre>

<p>如果数据中包含主键，可以直接使用：</p>

<pre><code>Db::table('think_user')
    -&gt;update(['name' =&gt; 'thinkphp','id'=&gt;1]);
</code></pre>

<ul>
<li>update 方法返回影响数据的条数，没修改任何数据返回 0</li>
</ul>


<p>如果要更新的数据需要使用SQL函数或者其它字段，可以使用下面的方式：</p>

<pre><code>Db::table('think_user')
    -&gt;where('id', 1)
    -&gt;update([
        'login_time'  =&gt; ['exp','now()'],
        'login_times' =&gt; ['exp','login_times+1'],
    ]);
</code></pre>

<p>更新某个字段的值：</p>

<pre><code>Db::table('think_user')
    -&gt;where('id',1)
    -&gt;setField('name', 'thinkphp');
</code></pre>

<ul>
<li>setField 方法返回影响数据的条数，没修改任何数据字段返回 0</li>
</ul>


<h6>删除： 删除数据表中的数据</h6>

<pre><code>// 根据主键删除
Db::table('think_user')-&gt;delete(1);
Db::table('think_user')-&gt;delete([1,2,3]);

// 条件删除    
Db::table('think_user')-&gt;where('id',1)-&gt;delete();
Db::table('think_user')-&gt;where('id','&lt;',10)-&gt;delete();
</code></pre>

<ul>
<li>delete 方法返回影响数据的条数，没有删除返回 0</li>
</ul>


<p>助手函数</p>

<pre><code>// 根据主键删除
db('user')-&gt;delete(1);
// 条件删除    
db('user')-&gt;where('id',1)-&gt;delete();
</code></pre>

<h6>查询：条件查询方法</h6>

<ul>
<li>where方法</li>
</ul>


<p>可以使用where方法进行AND条件查询：</p>

<pre><code>Db::table('think_user')
    -&gt;where('name','like','%thinkphp')
    -&gt;where('status',1)
    -&gt;find();
</code></pre>

<p>多字段相同条件的AND查询可以简化为如下方式：</p>

<pre><code>Db::table('think_user')
    -&gt;where('name&amp;title','like','%thinkphp')
    -&gt;find();
</code></pre>

<ul>
<li>whereOr方法</li>
</ul>


<p>使用whereOr方法进行OR查询：</p>

<pre><code>Db::table('think_user')
    -&gt;where('name','like','%thinkphp')
    -&gt;whereOr('title','like','%thinkphp')
    -&gt;find();
</code></pre>

<p>多字段相同条件的OR查询可以简化为如下方式：</p>

<pre><code>Db::table('think_user')
    -&gt;where('name|title','like','%thinkphp')
    -&gt;find();
</code></pre>

<p>其他高级操作参考官方手册：<a href="http://www.kancloud.cn/manual/thinkphp5/118058">数据库操作</a></p>

<h3>模型介绍</h3>

<h4>模型类定义</h4>

<p>如果在某个模型类里面定义了connection属性的话，则该模型操作的时候会自动连接给定的数据库连接，而不是配置文件中设置的默认连接信息，通常用于某些数据表位于当前数据库连接之外的其它数据库，例如：</p>

<pre><code>//在模型里单独设置数据库连接信息
namespace app\index\model;

use think\Model;

class User extends Model
{
    protected $connection = [
        // 数据库类型
        'type'        =&gt; 'mysql',
        // 数据库连接DSN配置
        'dsn'         =&gt; '',
        // 服务器地址
        'hostname'    =&gt; '127.0.0.1',
        // 数据库名
        'database'    =&gt; 'thinkphp',
        // 数据库用户名
        'username'    =&gt; 'root',
        // 数据库密码
        'password'    =&gt; '',
        // 数据库连接端口
        'hostport'    =&gt; '',
        // 数据库连接参数
        'params'      =&gt; [],
        // 数据库编码默认采用utf8
        'charset'     =&gt; 'utf8',
        // 数据库表前缀
        'prefix'      =&gt; 'think_',
    ];
}
</code></pre>

<p>也可以采用DSN字符串方式定义，例如：</p>

<pre><code>//在模型里单独设置数据库连接信息
namespace app\index\model;

use think\Model;

class User extends Model
{
    //或者使用字符串定义
    protected $connection = 'mysql://root:1234@127.0.0.1:3306/thinkphp#utf8';
}
</code></pre>

<p>和连接数据库的参数一样，connection属性的值也可以设置为数据库的配置参数。</p>

<pre><code>5.0不支持单独设置当前模型的数据表前缀。
</code></pre>

<h4>模型调用</h4>

<p>模型类可以使用静态调用或者实例化调用两种方式，例如：</p>

<pre><code>// 静态调用
$user = User::get(1);
$user-&gt;name = 'thinkphp';
$user-&gt;save();

// 实例化模型
$user = new User;
$user-&gt;name= 'thinkphp';
$user-&gt;save();

// 使用 Loader 类实例化（单例）
$user = Loader::model('User');

// 或者使用助手函数`model`
$user = model('User');
$user-&gt;name= 'thinkphp';
$user-&gt;save();
</code></pre>

<h4>模型初始化</h4>

<p>模型同样支持初始化，与控制器的初始化不同的是，模型的初始化是重写Model的initialize，具体如下</p>

<pre><code>namespace app\index\model;

use think\Model;

class Index extends Model
{

    //自定义初始化
    protected function initialize()
    {
        //需要调用`Model`的`initialize`方法
        parent::initialize();
        //TODO:自定义的初始化
    }
}
</code></pre>

<p>同样也可以使用静态init方法，需要注意的是init只在第一次实例化的时候执行，并且方法内需要注意静态调用的规范，具体如下：</p>

<pre><code>namespace app\index\model;

use think\Model;

class Index extends Model
{

    //自定义初始化
    protected static function init()
    {
        //TODO:自定义的初始化
    }
}
</code></pre>

<h4>CRUD</h4>

<h6>增加</h6>

<ul>
<li>添加一条数据</li>
</ul>


<p>第一种是实例化模型对象后赋值并保存：</p>

<pre><code>$user           = new User;
$user-&gt;name     = 'thinkphp';
$user-&gt;email    = 'thinkphp@qq.com';
$user-&gt;save();
</code></pre>

<p>也可以使用data方法批量赋值：</p>

<pre><code>$user = new User;
$user-&gt;data([
    'name'  =&gt;  'thinkphp',
    'email' =&gt;  'thinkphp@qq.com'
]);
$user-&gt;save();
</code></pre>

<p>或者直接在实例化的时候传入数据</p>

<pre><code>$user = new User([
    'name'  =&gt;  'thinkphp',
    'email' =&gt;  'thinkphp@qq.com'
]);
$user-&gt;save();
</code></pre>

<p>如果需要过滤非数据表字段的数据，可以使用：</p>

<pre><code>$user = new User($_POST);
// 过滤post数组中的非数据表字段数据
$user-&gt;allowField(true)-&gt;save();
</code></pre>

<p>如果你通过外部提交赋值给模型，并且希望指定某些字段写入，可以使用：</p>

<pre><code>$user = new User($_POST);
// post数组中只有name和email字段会写入
$user-&gt;allowField(['name','email'])-&gt;save();

save方法新增数据返回的是写入的记录数。
</code></pre>

<h6>更新</h6>

<ul>
<li>查找并更新</li>
</ul>


<p>在取出数据后，更改字段内容后更新数据。</p>

<pre><code>$user = User::get(1);
$user-&gt;name     = 'thinkphp';
$user-&gt;email    = 'thinkphp@qq.com';
$user-&gt;save();
</code></pre>

<ul>
<li>直接更新数据</li>
</ul>


<p>也可以直接带更新条件来更新数据</p>

<pre><code>$user = new User;
// save方法第二个参数为更新条件
$user-&gt;save([
    'name'  =&gt; 'thinkphp',
    'email' =&gt; 'thinkphp@qq.com'
],['id' =&gt; 1]);
</code></pre>

<p>上面两种方式更新数据，如果需要过滤非数据表字段的数据，可以使用：</p>

<pre><code>$user = new User();
// 过滤post数组中的非数据表字段数据
$user-&gt;allowField(true)-&gt;save($_POST,['id' =&gt; 1]);
</code></pre>

<p>如果你通过外部提交赋值给模型，并且希望指定某些字段写入，可以使用：</p>

<pre><code>$user = new User();】(['name','email'])-&gt;save($_POST, ['id' =&gt; 1]);
</code></pre>

<h6>删除</h6>

<ul>
<li>删除当前模型</li>
</ul>


<p>删除模型数据，可以在实例化后调用delete方法。</p>

<pre><code>$user = User::get(1);
$user-&gt;delete();
</code></pre>

<ul>
<li>根据主键删除</li>
</ul>


<p>或者直接调用静态方法</p>

<pre><code>User::destroy(1);
// 支持批量删除多个数据
User::destroy('1,2,3');
// 或者
User::destroy([1,2,3]);
</code></pre>

<ul>
<li>条件删除</li>
</ul>


<p>使用数组进行条件删除，例如：</p>

<pre><code>// 删除状态为0的数据
User::destroy(['status' =&gt; 0]);
</code></pre>

<p>还支持使用闭包删除，例如：</p>

<pre><code>User::destroy(function($query){
    $query-&gt;where('id','&gt;',10);
});
</code></pre>

<p>或者通过数据库类的查询条件删除</p>

<pre><code>User::where('id','&gt;',10)-&gt;delete();
</code></pre>

<h6>查询</h6>

<ul>
<li>获取单个数据</li>
</ul>


<p>获取单个数据的方法包括：</p>

<p>取出主键为1的数据</p>

<pre><code>$user = User::get(1);
echo $user-&gt;name;

// 使用数组查询
$user = User::get(['name' =&gt; 'thinkphp']);

// 使用闭包查询
$user = User::get(function($query){
    $query-&gt;where('name', 'thinkphp');
});
echo $user-&gt;name;
</code></pre>

<p>或者在实例化模型后调用查询方法</p>

<pre><code>$user = new User();
// 查询单个数据
$user-&gt;where('name', 'thinkphp')
    -&gt;find();
</code></pre>

<ul>
<li>get或者find方法返回的是当前模型的对象实例，可以使用模型的方法。</li>
</ul>


<p>其他高级操作参考官方手册：<a href="http://www.kancloud.cn/manual/thinkphp5/135186">模型操作</a></p>

<h4>MVC思想</h4>

<ol>
<li><p>连接并获取数据相关数据</p>

<pre><code> $result = Db::table('tp_user')-&gt;find();

 //$result = Db::table('tp_user')-&gt;where('upwd', 'wer')-&gt;find();

 //var_dump(Db::select(function ($query)
 //{
 //   $query-&gt;table('tp_user')-&gt;where('id', 2);
 //
 //}));
</code></pre></li>
<li><p>将获取到的数据库数据赋值给View（注意这里使用assign,thin3中是display）</p>

<pre><code> $this-&gt;assign('result',$result);
 return $this-&gt;fetch();
</code></pre></li>
<li><p>在View中拿到数据显示</p>

<pre><code> &lt;!DOCTYPE html&gt;
 &lt;html&gt;
 &lt;head&gt;
   &lt;meta charset="UTF-8"&gt;
   &lt;title&gt;Insert title here&lt;/title&gt;
 &lt;/head&gt;
 &lt;body&gt;
   {$result.id}--{$result.data}
 &lt;/body&gt;
 &lt;/html&gt;
</code></pre></li>
</ol>


<p>一个最简单的MVC模式就实现了，其实后面开发和实战中基本上就是讲这个实现扩大，然后做相应的逻辑或者细节处理。</p>

<h3>总结</h3>

<h4>ThinkPHP5.<em> 与 ThinkPHP3.</em> 之间的使用差异</h4>

<p>因为研究TP5时间不是很长，暂时先列以下几处差异：</p>

<p>1、过去的单字母函数已完全被替换掉，如下：</p>

<pre><code>S=&gt;cache，C=&gt;config，M/D=&gt;model，U=&gt;url，I=&gt;input，E=&gt;exception，L=&gt;lang，A=&gt;controller，R=&gt;action
</code></pre>

<p>2、模版渲染：$this->display() => return view()/return $this->fetch();</p>

<p>3、在model中调用自身model：$this => Db::table($this->table)</p>

<p>4、在新建控制器与模型时的命名：</p>

<pre><code>　　①控制器去掉后缀controller：UserController =&gt; User

　　②模型去掉后缀model：UserModel =&gt; User
</code></pre>

<p>5、url访问：</p>

<pre><code>　　如果控制器名使用驼峰法，访问时需要将各字母之间用下划线链接后进行访问。

　　eg：控制器名为AddUser，访问是用add_user来进行访问
</code></pre>

<p>6、在TP5中支持配置二级参数（即二维数组），配置文件中，二级配置参数读取：</p>

<pre><code>　　①Config::get('user.type');

　　②config('user.type');
</code></pre>

<p>7、模板中支持三元运算符的运算：{$info.status ? $info.msg : $info.error}还支持这种写法：</p>

<pre><code>{$varname.aa ?? 'xxx'}或{$varname.aa ?: 'xxx'}
</code></pre>

<p>8、TP5内置标签：</p>

<pre><code>　　系统内置的标签中，volist、switch、if、elseif、else、foreach、compare（包括所有的比较标签）、（not）present、（not）empty、（not）defined等
</code></pre>

<p>9、TP5数据验证：</p>

<pre><code>　　$validate = new Validate(['name' =&gt; 'require|max:25','email' =&gt; 'email']);

　　$data = ['name' =&gt; 'thinkphp','email' =&gt; 'thinkphp@qq.com'];

　　if(!validate-&gt;check($data)){

　　　　debug::dump($validate-&gt;getError());

　　}
</code></pre>

<blockquote><p>注：使用助手函数实例化验证器——$validate = validate(&lsquo;User&rsquo;);</p></blockquote>

<p>10、TP5实现了内置分页，使用如下：</p>

<p>查询状态为1的用户数据，且每页显示10条数据</p>

<pre><code>　　$list = model('User')-&gt;where('status',1)-&gt;paginate(10);

　　 $page = $this-&gt;render();

　　 $this-&gt;assign('_list',$list);

　　 $this-&gt;assign('_page',$page);

　　 return $this-&gt;fetch();
</code></pre>

<p>模板文件中分页输出代码如下：</p>

<pre><code>　　&lt;div&gt;{$_page}&lt;/div&gt;
</code></pre>

<hr />

<hr />

<h6>微信号：</h6>

<p>clpaial10201119（Q Q：2211523682）</p>

<h6>微博WB:</h6>

<p><a href="http://weibo.com/u/3288975567?is_hot=1">http://weibo.com/u/3288975567?is_hot=1</a></p>

<h6>gitHub：</h6>

<p><a href="https://github.com/al1020119">https://github.com/al1020119</a></p>

<h6>博客</h6>

<p><a href="http://al1020119.github.io/">http://al1020119.github.io/</a></p>

<hr />

<p><img src="http://al1020119.github.io/images/iCocosCoder.jpg" title="Caption" ></p>

<p><img src="http://al1020119.github.io/images/iCocosPublic.jpg" title="Caption" ></p>
]]></content>
  </entry>
  
  <entry>
    <title type="html"><![CDATA[完虐Yii从这里开始😱😂]]></title>
    <link href="http://al1020119.github.io/blog/2016/11/13/wan-nue-yiicong-zhe-li-kai-shi/"/>
    <updated>2016-11-13T18:16:05+08:00</updated>
    <id>http://al1020119.github.io/blog/2016/11/13/wan-nue-yiicong-zhe-li-kai-shi</id>
    <content type="html"><![CDATA[<h6>目录</h6>

<ol>
<li>简单配置概述</li>
<li>Yii安装</li>
<li>数据库实战</li>
<li>附加福利</li>
</ol>


<h6>前提条件</h6>

<ol>
<li>安装：XAMPP、MAMPP，WAMPP。。。。</li>
<li>下载好了Yii Advanced</li>
</ol>


<h6>这里大概说说一下上面几点及遇到的问题</h6>

<!--more-->


<h4>1：简单配置概述</h4>

<p>因为我一直都是用Mac，所以首选XAMPP，这个安转很简单安装好了之后直接操作这些就可以</p>

<p><img src="http://al1020119.github.io/images/Yiichushihua0001.png" title="Caption" ></p>

<p>关于XAMMP（。。）的安装，MyAdmin的使用，数据库的简单配置，或者Navicat的基本使用与操作等可以网站找到一大堆，或者你也可以不使用集成工具，自己配置一套，但是作为初学者跟人感觉没有必要，中间肯定会遇到什么问题的，搞不好你还要花一段时间专门解决这些问题，更夸张的是实在搞定不了还会让你放弃这条路，哈哈！</p>

<blockquote><p>所以这里首选：XAMPP+Navicat</p></blockquote>

<h4>2：Yii安装</h4>

<p>Yii分基础班和高级版，区别就是，高级版里面自带数据库及相关配置，分前后台，具体相关请查看官方介绍</p>

<p><img src="http://al1020119.github.io/images/Yiichushihua0002.png" title="Caption" ></p>

<ol>
<li>安装基础版</li>
</ol>


<p>解压-拷贝到-XAMPP的安装目录/htdocs文件夹里面（路径地址：/Applications/XAMPP/htdocs），然后在浏览器输入：<a href="">http://127.0.0.1/basic/web/</a>（这里是你前面配置完成的情况下），就会出现这个界面：</p>

<p><img src="http://al1020119.github.io/images/Yiichushihua0003.png" title="Caption" ></p>

<ol>
<li>安装高级版</li>
</ol>


<p>同基础版一样，拷贝到基础班的同级目录，然后在浏览器输入（这里分前后端）</p>

<ol>
<li>前段：<a href="">http://127.0.0.1/Yii/frontend/web/index.php2.</a></li>
<li>后端：<a href="">http://127.0.0.1/advanced/backend/web</a> 这里会自动跳到：<a href="">http://127.0.0.1/advanced/backend/web/index.php?r=site%2Flogin</a></li>
</ol>


<p>分别就会出现一个网站的前后端。</p>

<h5>这里说说中间遇到比较多的一个问题：</h5>

<pre><code>Failed to create directory '/Applications/XAMPP/xamppfiles/htdocs/advanced/backend/runtime/logs': mkdir(): Permission denied
</code></pre>

<p>分析： 那是因为权限问题，类似Permission denied的应该都与权限有关</p>

<h6>解决方式：</h6>

<p>首先：基础版的时候出现类似Permission denied问题我使用类似下面的代码就可以解决问题。</p>

<pre><code>chmod 777 对应的名字
chmod 777 *
</code></pre>

<p>但是在高级版的时候发现还是不行，网站狂搜一顿，发现需要使用超级管理员开启权限</p>

<pre><code>sudo chmod -R 0777 /Applications/XAMPP/xamppfiles/htdocs/
</code></pre>

<p>输入密码就可以了</p>

<p>好了前戏就到这里，下面正式开始</p>

<h5>这里我使用的是PhpStorm，别问我为什么是他，任性！！！！！</h5>

<blockquote><p>注意</p>

<p>关于URL模式，文件夹含义，相关方法介绍，浏览器输入的形式等这里都不会做相关介绍，请查看官方文档，或者google。</p></blockquote>

<h3>数据库实战</h3>

<h6>1. 配置数据库</h6>

<p>在advance/backend/config里面的main-local.php文件中，有个$config中的components，里面已经有一个request，我们需要增加我们的数据库配置，后面插入如下代码（这里我的数据库密码是空的）。</p>

<pre><code>    'db'=&gt;[
        'class'=&gt;'yii\db\Connection',
        'dsn'=&gt;'mysql:host=127.0.0.1;dbname=WWWiCocos',
        'username'=&gt;'root',
        'password'=&gt;'',
        'charset'=&gt;'utf8',
    ]
</code></pre>

<h6>2. 查看数据库中的表</h6>

<p>在advance/backend/controllers里面的SiteController中插入查询数据库的方法</p>

<pre><code>public function actionGetList(){
    $allTables = Yii::$app-&gt;db-&gt;createCommand("show tables")-&gt;queryAll();
    print_r($allTables);exit;

}
</code></pre>

<p>这里需要注意的是，</p>

<ol>
<li>要先在behaviors方法内部的最前面输入return [];防止Yii的忽略模式,</li>
<li>Yii中所有方法默认一action开头，浏览器输入的时候可以不用输入action，直接输入后面的名字就可以</li>
<li>Yii中大写会转成-，所以输入应该是get-list</li>
</ol>


<p>输入：<a href="">http://127.0.0.1/advanced/backend/web/index.php?r=site&amp;a=get-list</a>，既可以查看我数据库对应的表。</p>

<h6>3. 创建表（这里为了方便使用的是可视化，高手都用代码，哈哈）</h6>

<p>打开navicat，链接并打开WWWiCocos数据库，新建一张表，设置相关字段，然后保存为YiiDB</p>

<p><img src="http://al1020119.github.io/images/Yiichushihua0004.png" title="Caption" ></p>

<h6>4. 打开Gii</h6>

<p>使用gii实现数据库模型文件的生成与CRUD</p>

<pre><code>输入http://127.0.0.1/advanced/backend/web/index.php?r=gii
</code></pre>

<p>点击star，出现下面的界面，就可以开始做数据库的操作了。</p>

<p><img src="http://al1020119.github.io/images/Yiichushihua0005.png" title="Caption" ></p>

<h6>5. Model Generato</h6>

<p>开始Model Generator，去链接并生成数据库对应的表数据</p>

<p><img src="http://al1020119.github.io/images/Yiichushihua0006.png" title="Caption" ></p>

<p>填写相关信息,这里的namespace其实就是命名空间，会直接指定文件的路径，放在哪个文件夹，这里因为是数据库操作，不管前后端都会用到，所以我放在common里面的models中，</p>

<p><img src="http://al1020119.github.io/images/Yiichushihua0007.png" title="Caption" ></p>

<p>点击Preview，就可以预料生成数据库Model文件的路，并且提示你点击Generate去生成php文件</p>

<p><img src="http://al1020119.github.io/images/Yiichushihua0008.png" title="Caption" ></p>

<p>点击Generate就会生成文件成</p>

<p><img src="http://al1020119.github.io/images/Yiichushihua0009.png" title="Caption" ></p>

<p>然后我们回到PhpStorm，查看Common文件夹里面的models中就会多了一个文件叫iCocosYiiSearch.php</p>

<p><img src="http://al1020119.github.io/images/Yiichushihua0010.png" title="Caption" ></p>

<p>里面就会有我们所建数据库的信息</p>

<pre><code>&lt;?php

namespace common\models;

use Yii;

/**
 * This is the model class for table "YiiDB".
 *
 * @property integer $id
 * @property string $name
 * @property integer $age
 * @property string $sex
 * @property string $love
 */
class iCocosYiiDBSearch extends \yii\db\ActiveRecord
{
    /**
     * @inheritdoc
     */
    public static function tableName()
    {
        return 'YiiDB';
    }

    /**
     * @inheritdoc
     */
    public function rules()
    {
        return [
            [['id', 'name', 'age', 'sex', 'love'], 'required'],
            [['id', 'age'], 'integer'],
            [['name'], 'string', 'max' =&gt; 20],
            [['sex', 'love'], 'string', 'max' =&gt; 255]
        ];
    }

    /**
     * @inheritdoc
     */
    public function attributeLabels()
    {
        return [
            'id' =&gt; 'ID',
            'name' =&gt; 'Name',
            'age' =&gt; 'Age',
            'sex' =&gt; 'Sex',
            'love' =&gt; 'Love',
        ];
    }
}
</code></pre>

<p>不信你可看看数据库中对应的字典和相关信息是否一样。</p>

<h6>6. 生成数据库对应的模型php文件</h6>

<p>然后回到gii点击CRUD进行数据库增删查改对应php文件的生成</p>

<p>在界面填写相关信息，但是有两点需要注意，需要填写对应的路径，不能直接名字，因为我们生成的CRUD对应的php文件需要文件分层，还有一个需要注意的就是类的文件名首写字母必须大写。</p>

<p><img src="http://al1020119.github.io/images/Yiichushihua0011.png" title="Caption" ></p>

<p>点击PreView预览</p>

<p><img src="http://al1020119.github.io/images/Yiichushihua0012.png" title="Caption" ></p>

<p>点击Generate生成</p>

<p><img src="http://al1020119.github.io/images/Yiichushihua0013.png" title="Caption" ></p>

<p>回到PhpStorm查看对应的上面文件路径的文件生成就会一一对应</p>

<p><img src="http://al1020119.github.io/images/Yiichushihua0014.png" title="Caption" ></p>

<p>然后在浏览器输入下面的地址执行CocosdbController中对应的index方法就可以看到如下界面，</p>

<p><a href="">http://127.0.0.1/advanced/backend/web/index.php?r=cocosdb/index</a></p>

<p><img src="http://al1020119.github.io/images/Yiichushihua0014.png" title="Caption" ></p>

<p>开始使用gii创建用户数据，点击Genertor，生成之后可以对表数据进行相应的更改</p>

<p><img src="http://al1020119.github.io/images/Yiichushihua0015.png" title="Caption" ></p>

<p><img src="http://al1020119.github.io/images/Yiichushihua0016.png" title="Caption" ></p>

<p>回到表界面可以看到一条数据已经生成</p>

<p><img src="http://al1020119.github.io/images/Yiichushihua0017.png" title="Caption" ></p>

<p>然后就是使用代码来做你想做的事情了</p>

<h4>附加福利</h4>

<p>这里我们做一些简单的界面处理</p>

<p>1.标题：backend/Views/cocosdb打开index.php（还有一个create.php），最上面一行</p>

<pre><code>$this-&gt;title = 'iCocos用户管理';
</code></pre>

<p>2.字段相关提示：common/model打开iCocosYiiDBSearch.php，修改attributeLabels方法，这里改完之后里面CRUD也会改</p>

<pre><code>/**
 * @inheritdoc
 */
public function attributeLabels()
{
    return [
        'id' =&gt; '用户ID',
        'name' =&gt; '用户昵称',
        'age' =&gt; '用户年龄',
        'sex' =&gt; '用户性别',
        'love' =&gt; '用户兴趣',
    ];
}
</code></pre>

<p><img src="http://al1020119.github.io/images/Yiichushihua0018.png" title="Caption" ></p>

<p>3.backend/Views/cocosdb打开view.php中Div里面增加附加标签（这是在Yii有些功能满足不了我们的要求的时候使用，拓张更多想要的东西）。</p>

<pre><code>&lt;?= DetailView::widget([
    'model' =&gt; $model,
    'attributes' =&gt; [
        'id',
        'name',
        'age',
        'sex',
        'love',
        ['label'=&gt;'附加信息','value'=&gt;'&lt;span onclick="fun()"&gt;附加字段&lt;/span&gt;','format'=&gt;'html'],

    ],
]) ?&gt;
</code></pre>

<p><img src="http://al1020119.github.io/images/Yiichushihua0019.png" title="Caption" ></p>

<p>同时可以结合js是哪一些想要的效果。</p>

<h6>尾声：</h6>

<blockquote><h6>好了，到这里就已经基本上结束了，在下一次，我将开始先在项目中新建一个文件夹API，专门用来实现接口，给前段，后端，移动端的调用。</h6></blockquote>

<hr />

<hr />

<h6>微信号：</h6>

<p>clpaial10201119（Q Q：2211523682）</p>

<h6>微博WB:</h6>

<p><a href="http://weibo.com/u/3288975567?is_hot=1">http://weibo.com/u/3288975567?is_hot=1</a></p>

<h6>gitHub：</h6>

<p><a href="https://github.com/al1020119">https://github.com/al1020119</a></p>

<h6>博客</h6>

<p><a href="http://al1020119.github.io/">http://al1020119.github.io/</a></p>

<hr />

<p><img src="http://al1020119.github.io/images/iCocosCoder.jpg" title="Caption" ></p>

<p><img src="http://al1020119.github.io/images/iCocosPublic.jpg" title="Caption" ></p>
]]></content>
  </entry>
  
  <entry>
    <title type="html"><![CDATA[App太胖了——减肥😂]]></title>
    <link href="http://al1020119.github.io/blog/2016/10/20/apptai-pang-liao-jian-fei/"/>
    <updated>2016-10-20T13:00:42+08:00</updated>
    <id>http://al1020119.github.io/blog/2016/10/20/apptai-pang-liao-jian-fei</id>
    <content type="html"><![CDATA[<p>先来看两张关于瘦身的整理，第一张是我实践的时候网上找到了，第二张是我根据自己的项目整理的。但是慢慢的发现项目的好像还是不足以满足需求，所以就网上找了不少资料，整理的一下。</p>

<p><img src="http://al1020119.github.io/images/iosshoushen00001.jpg" title="Caption" ></p>

<p><img src="http://al1020119.github.io/images/iosshoushen00002.jpg" title="Caption" ></p>

<!--more-->


<h3>开篇</h3>

<pre><code>最近公司需求不多，正好研究一下 App 瘦身的办法，写了点小总结。

如果你不知道下面几个问题，不妨可以看看文章。

    使用 .xcassets 有什么好处?

    @1x 、@2x 和 @3x 会一起内置到安装包中吗？

    PDF 和 @1x 、@2x 和 @3x 有什么区别？

    如果我有一个 10 x 10 的控件和一个 50 x 50 的控件，美工需要制作几张 PDF？

    Iconfont 是什么？PDF 和 Iconfont 有什么区别？

    启动图的正确打开方式？

    使用 Swift 或者 混编会增大多少的包体积？

    Install Smallest or Coding Fastest ？
</code></pre>

<h3>分析</h3>

<pre><code>在瘦身之前，首先需要分析一下，我们可以从哪几个方面入手。(以 Yep 为例)


Yep是一款很优秀的 Swift 开源软件。

https://github.com/CatchChat/Yep
</code></pre>

<h3>目录划分</h3>

<pre><code>App 的瘦身主要是针对于安装包，而在 iOS 中安装包就是一个以 .ipa 结尾的压缩包。我们可以通过 iTunes 下载获取这个 .ipa 来分析。
</code></pre>

<p><img src="http://al1020119.github.io/images/iosjianfei001.jpg" title="Caption" ></p>

<p>稍微整理一下，大致可以分为以下几类。</p>

<pre><code>资源层面：

    Assets.car：项目中所有 .xcassets 的压缩包

    image: 图片资源文件

    Video &amp;&amp; Audio ：音频 或者 视频。

代码层面：

    国际化：国际化适配的 String ===&gt; 89K

    Xib &amp;&amp; Storyboard：Xib 和 Storyboard 编译后的文件。

    Yep :项目可执行文件。

    Frameworks：Embedded Frameworks，项目中使用的动态库

其他：

    other：配置文件

    PlugIns：YepShare，一个共享的插件。
</code></pre>

<p><img src="http://al1020119.github.io/images/iosjianfei002.jpg" title="Caption" ></p>

<pre><code>虽然 Yep 不能代表所有的 App，但是在对于 Yep 的 ipa 分析之后，大致可以总结出，对一个 App 的安装包瘦身，可以从资源层面和代码层面两个层面入手。
</code></pre>

<h3>资源层面</h3>

<pre><code>在讲资源层面之前，希望我们能达到一个共识，那就是所谓的资源文件指的是 图片、视频、音频。

Remote : 将资源文件放在服务器上，当用户下载完 App 后根据需要再下载。

Local : 将资源文件集成到安装包中的。
</code></pre>

<h3>Remote</h3>

<pre><code>对于 Remote 的方式，如果做好策略(比如缓存),那么理论上，我们可以把 非必须的资源文件 都放到服务器上，这样对资源压缩率达到了 100%。也就是说安装包 没有任何非必须资源文件 。

    必须资源文件:例如应用图标、启动图的这种配置图片。

苹果的 On-Demand Resources(http://benbeng.leanote.com/post/On-Demand-Resources-Guide) 也是通过这种按需加载资源的思路给我们提供了一种阶段性加载资源的途径，具体的不展开描述，你可以点前面的链接进行查看。但是虽然以关卡、tag这种方式来按需加载资源，但是苹果的服务器对于中国用户来说实在是慢的不行，所以暂时不建议采取这种方式。你们可以在自己服务器上实现这种策略方式来加载图片。
</code></pre>

<p><img src="http://al1020119.github.io/images/iosjianfei003.jpg" title="Caption" ></p>

<p><img src="http://al1020119.github.io/images/iosjianfei004.jpg" title="Caption" ></p>

<h3>Local</h3>

<pre><code>当然全部将非必须资源文件放到服务器上明显是不现实的，对于一些必用资源文件，还是需要将资源文件 集成到安装包中的。

    必用资源文件：安装了 App 肯定会用到。
</code></pre>

<h3>Local 集成方式</h3>

<pre><code>Create group 和 Create folder references

    这两种其实就是直接把资源文件 拖 进去，在 Xcode 打包之后，所有图片都在可执行文件的相同目录下面。这也是很多老的 App 或者目前部分 App 的使用方式。

.xcassets

    这是苹果在 Xcode 5 出来之后，推荐我们使用的图片管理方式，提供了图片渲染、拉伸模式模式、机型适配等功能。在 Xcode 打包之后所有的.xcassets 文件都会放入一个Assets.car文件中。
</code></pre>

<h3>Local 开发使用方式列举分析。</h3>

<pre><code>一般 App 的图片内置方式

    采用拖的方式,图片包含@1x、@2x 和 @3x。

    采用拖的方式,图片只包含 @2x 和 @3x。

    采用拖的方式,图片只包含 @2x 或 @3x。

    采用.xcassets的方式,图片包含@1x、@2x 和 @3x。

    采用.xcassets的方式,图片只包含@2x 和 @3x。

    采用.xcassets的方式,图片只 包含@2x 或 @3x。

    采用.xcassets的方式,图片使用 PDF。
    (可能还有其他方式，希望你能告诉我。)
</code></pre>

<h6>拖的方式</h6>

<pre><code>  首先@1x、@2x 和 @3x主要是为了适配不同 ppi 的机子而做了一种策略。@1x主要是为了适配 iPhone 4 之前的 非 Retina 屏幕，@2x 主要是为了适配 非 plus的 iPhone 设备, @3x 是为了适配一个点的 3 * 3 个像素的手机。

  因为 iPhone 4 之前的机子基本没有什么 App 会去适配，所以一般来说都会删除，所以就有了 『采用拖的方式,图片只包含@2x 和 @3x』 的方式。但是假如你只提供一张图片，例如你只提供了一张 @3x 的图片，iOS 系统在 iPhone 7 上无法找到 @2x 的图片，会去查找 @3x 或者 @1x 等，再根据实际分辨率进行拉伸，最后把像素铺到屏幕上。所以在能够接受查找和拉伸造成的性能消耗的前提下，我们可以只用一张通用的图片，所以就有了 『采用拖的方式,图片包含@2x 或 @3x』 的方式。

  以一个 14M 的图片资源(包含@1x 、@2x、@3x)来说，如果所有的图片去除掉 @1x 能减少 1M 左右，去除掉@2x能去掉 4M 左右。因此采用『采用拖的方式,图片包含@2x 或 @3x』的方式虽然损失了一点性能，单大概图片资源大概减少了35%左右，。
</code></pre>

<h6>采用.xcassets的方式</h6>

<pre><code>  我们都知道了，采用『采用拖的方式,图片包含@2x 或 @3x』的方式大概图片资源大概减少了35%左右，但是稍微损失了一点性能。有什么方式可以减少掉这点性能消耗呢？

  “很幸运” ，苹果在 iOS 9 终于意识到了这个问题，然后提供了一个叫做 App Slicing(如下图所示)的东西。App Slicing大致就是App Store会根据不同的设备准备不同的安装包(App Variant)，每个安装包(App Variant)都只有相应尺寸的图片,比如 iPhone 6 去下载时，只会下载到 @2x 的图片的安装包(App Variant)。但能实现这个功能的前提是图片需要放置在.xcassets去管理。
</code></pre>

<p><img src="http://al1020119.github.io/images/iosjianfei005.jpg" title="Caption" ></p>

<pre><code>所以，目前许多 App 采用 『.xcassets的方式,图片只 包含@2x 或 @3x』 其实是没意义的，特别是在你不适配 iOS 8 的时候，你这么做是强行降低了 App 的性能。当然你要觉得为了 8% 的非 iOS 9 用户 减少 App 安装包大小 而去降低另外 92% 的用户的 App 运行性能 没什么问题，那么你可以采取上面这种方式。
</code></pre>

<h6>关于 PDF</h6>

<pre><code>  我最早是在这一篇博客（http://martiancraft.com/blog/2014/09/vector-images-xcode6/）中看到的，当然 Yep 也是这种方式。大致是删掉 @2x 和 @3x 的图片，然后替换成 矢量图 PDF，最后放入.xcassets中去。

  而 Xcode 在打包的过程中，根据你的矢量PDF图的大小，生成@1x、@2x和@3x的图。例如你的PDF图是4545px，那么Xcode会在编译时生成下面3个png：4545px 、9090px、135135px，最后再放入Assets.car中。所以采用@1x、@2x 和 @3x 和 PDF 两种方式本质上是一样的。

  在这里有很多人会有一个误解，例如在 App 中有一个 10 10 pt 和 一个 50 50 pt 的 imageView 都用了一个相同的图标。很多人会以为做一个就够了，因为 pdf 是矢量图。但是其实是需要一个 10 10 px 和 50 50 px 的两张 pdf 才可以，因为只用一张的话，另外一张用的其实就是 10 * 10px 的 PDF 的产物。
</code></pre>

<h6>关于压缩问题。</h6>

<pre><code>  我是用tinypng 来压缩的，应该是以最小的占用量达到了最适合的效果。但是其实.xcassets 也会为你做一部分的压缩。如下图所示：
</code></pre>

<p><img src="http://al1020119.github.io/images/iosjianfei006.jpg" title="Caption" ></p>

<pre><code>.xcassets 的压缩应该还对图片进行了处理这也就是为什么 840KB 压缩了 81.5%，Assets.car却没有减少那么多。

同时也有人在试验中发现，用一些压缩工具似乎没有很么实际效果，这也有可能是因为 Xcode 在打包的时候做了一定的处理。
</code></pre>

<h3>启动图</h3>

<pre><code>启动图在一个项目资源中占比其实蛮大的，之前见过一个项目 6 张启动图大概有5M 左右，最大的是2M。

    iPad 2 and iPad mini (@1x): 768 x 1024

    iPad and iPad mini (retina @2x): 1536 x 2048

    iPhone 4s (retina @2x) 640 x 960

    iPhone 5 (@2x): 640 x 1136

    iPhone 6 (@2x): 750 x 1334

    iPhone 6 Plus (@3x): 1242 x 2208


但是自从LaunchScreen.storyboard出来一后完全没必要做这么多张了。只需要将启动图设置为LaunchScreen.storyboard 然后在LaunchScreen.storyboard上设置一张 imageView 。最后再弄一张启动图的 pdf 就可以了。
</code></pre>

<h3>iconfont</h3>

<pre><code>首先这个东西估计很多人不知道，我也是在@桌同学的提醒下才知道原来 iOS 也是可以用 iconfont 的。最早这个东西是为 Web 设计的，主要是因为 网页的 大小直接影响了加载速度，所以在压缩上连小 icon 都不放过,当然还有一个最主要的目的就是减少请求次数，因为如果是图片的话，一个图片就是一次请求。

具体的效果可以看一下，使用IconFont减小iOS应用体积（http://johnwong.github.io/mobile/2015/04/03/using-icon-font-in-ios.html）这篇文章。

虽然看上去效果不多，但对于一些比较追求精致的公司可以尝试一下这种方式。

期中，PDF 和 iconfont 两个都是矢量的概念，但是 iconfont 在整个 App 中不管多少种尺寸只需要一个 iconf，但是 PDF 可能需要多个。
</code></pre>

<h3>HTML 5</h3>

<p>一些 APP 的一些功能可以用 HTML5 + WebView 的方式来实现。而 HTML 5 这个可以通过下面几种方式一步步优化：</p>

<pre><code>让做前端的给一个最小的包内置到 App，去除无用代码、代码混淆压缩等。

将所有图片 Remote 化。

将所有页面 Remote 化。
</code></pre>

<h3>其他</h3>

<pre><code>当然，还要注意资源文件重复的问题。而资源文件重复问题主要有几种：名字相同、名字不同内容相同/相似。


    对于名字相同的问题，你可以把原来的拖的方式改为.xcassets，他会自动管理相同名字的图片。然后把多余的去掉

    名字不同内容相同/相似:你可以使用Duplicate Photos工具


还有一个问题就是资源文件没有用，却占了空间，可以使用LSUnusedResources将代码中没用到的文件删除。当然可能存在误删，比如用数组加载的图片，这个工具无法识别。
</code></pre>

<h3>代码层面</h3>

<pre><code>Install Smallest VS. Coding Fastest
</code></pre>

<h3>语言选择</h3>

<pre><code>虽然说我本人更喜欢用 Swift 来写 App。但从 App 瘦身的角度，不推荐使用 Swift，不论纯 Swift 还是 混编。原因很简单。看一下下面的图：
</code></pre>

<p><img src="http://al1020119.github.io/images/iosjianfei007.jpg" title="Caption" ></p>

<pre><code>这是任何一个包含有 Swift 代码的 App 都有的一个为了支持 Swift 的动态库集合，在10M 左右。如果你使用 Objective – C 完全不用这个东西。

当然，我是可以接受安装包大10M 来用 Swift 写的。
</code></pre>

<h3>数据库选择</h3>

<pre><code>这个问题也是我在分析 Yep 的第三方库的时候发现的问题，因为 Yep 使用的是 Realm，据说是目前是性能最好的移动端数据库。但是在三方库中可以看到，Realm 的支持占了很大的比重，大约在 8M 左右。但是如果使用 FMDB 话只需要192KB，而 CoreData 几乎可以忽略不计。下面是部分截图。
</code></pre>

<p><img src="http://al1020119.github.io/images/iosjianfei008.jpg" title="Caption" ></p>

<p><img src="http://al1020119.github.io/images/iosjianfei009.jpg" title="Caption" ></p>

<p><img src="http://al1020119.github.io/images/iosjianfei010.jpg" title="Caption" ></p>

<h3>MRC VS. ARC</h3>

<pre><code>最开始是在Bang的这篇文章中看到用ARC比用 MRC 会导致可执行文件大10%。起初我是不相信的，但是在我用 SDWebImage 的1.0 版测试之后，ARC 比 MRC 的可执行程序增加了14% +。所以MRC 比 ARC 编译成可执行文件之后更小，具体的测试方法可以去他的博客看，这里就不重复了。
</code></pre>

<h3>代码段</h3>

<p>苹果官方文档 对二进制 __TEXT 段大小有限制：</p>

<p><img src="http://al1020119.github.io/images/iosjianfei011.jpg" title="Caption" ></p>

<p>代码实在瘦不下去怎么办？</p>

<ul>
<li>解决方案</li>
</ul>


<p>利用 rename_section 过审核，在Xcode中向 “Other Linker Flags” 中添加</p>

<pre><code>-Wl,-rename_section,__TEXT,__cstring,__RODATA,__cstring
-Wl,-rename_section,__TEXT,__const,__RODATA,__const
-Wl,-rename_section,__TEXT,__objc_methname,__RODATA,__objc_methname
-Wl,-rename_section,__TEXT,__objc_classname,__RODATA,__objc_classname
-Wl,-rename_section,__TEXT,__objc_methtype,__RODATA,__objc_methtype
</code></pre>

<h3>总结</h3>

<h6>先分析一下前面几个问题造成的原因：</h6>

<pre><code>  Swift &amp;&amp; Realm : 首先 Swift 是因为不稳定，所以支持的动态库没有集成到系统的”dyld的共享缓存”中去。而 Realm 因为不是苹果自己开发的，所以支持的动态库也没有集成到系统的”dyld的共享缓存”中去。所以都内置在了 App 中，而且这两个功能需要写很多代码来实现，因此容量又很大，导致看起来这两个东西占了很大的“无用”的容量。(ps.关于iOS 中库的问题，你可以去我的笔记中查看~)

  ARC:因为 ARC 叫做自动引用计数，他的实现方式其实就是 Xcode 在编译的时候自动给你加内存管的代码，但是机器毕竟没人聪明，Xcode 会在很多情况下增加很多没用的代码，这也是为什么 ARC 的底层实现比 MRC 更快，但是实际运行性能上在有些时候却不及 MRC 的原因，而正因为增加了很多没用的代码，ARC 最终编译包会比 MRC 大。
</code></pre>

<blockquote><p>总结前面的几个问题，归根结底于一个问题，那就是Install Smallest VS. Coding Fastest。很多时候为了追求更快的编码速度，总会有所损失，但是在我看来这些事值得的，不然为什么我们不用 C 来代替 objective-c 或者用汇编来代替 C 呢？</p></blockquote>

<h3>Bitcode</h3>

<pre><code>bitcode 是被编译程序的一种中间形式的代码。包含 bitcode 配置的程序将会在 App Store 上被编译和链接。 bitcode 允许苹果在后期重新优化我们程序的二进制文件，而不需要我们重新提交一个新的版本到 App Store 上。

当我们提交程序到 App Store上时， Xcode 会将程序编译为一个中间表现形式( bitcode )。然后 App store 会再将这个 bitcode 编译为可执行的64位或32位程序。

所以，通过这个方式，我们可以做到架构级别的App Slicing。
</code></pre>

<h3>Tips</h3>

<p>结合上面的内容，再加上Bang大神写的博客（<a href="http://blog.cnbang.net/tech/2544/%EF%BC%89%EF%BC%8C%E6%88%91%E6%80%BB%E7%BB%93%E4%BA%86%E5%87%A0%E6%9D%A1">http://blog.cnbang.net/tech/2544/%EF%BC%89%EF%BC%8C%E6%88%91%E6%80%BB%E7%BB%93%E4%BA%86%E5%87%A0%E6%9D%A1</a> Tips。排名越往前的我觉得越需要去优化。</p>

<pre><code>Tip 1：去除重复、无用资源文件，解决名字重复问题。


Tip 2：图片使用.xcassets管理且无须考虑@1x\@2x\@3x 问题。万不得已再用拖的办法，同时结合一定策略方案进行包瘦身。


Tip 3：图片使用PDF 优先级高于 PNG,因为 Xcode 会帮你完成剩下的任务。


Tip 4：使用tinypng压缩PNG图片。视频可以通过 Final cut 等软件进行分辨率压缩。音频则降低码率即可。


Tip 5：icon 使用 iconfont


Tip 6：非必须资源文件可以放到自己服务器上， 但必用资源文件需要内置到安装包中。


Tip 7：HTML 5 需要将图片 Remote 化 或者将整个HTML 5 的页面 Remote化。


Tip 8：Build Settings-&gt;Optimization Leve release版应该选择Fastest, Smalllest


Tip 9：开启 BitCode


    以下是几乎不可能去做的优化 Tips


Tip 10：尽可能的去除无用的代码、控制类名、方法名长度、冗余字符串


Tip 11：如果你想的话，不使用 Swift、不使用 Realm更甚至于尽量不使用 OC


Tip 12：MRC 比 ARC 编译成可执行文件之后更小。
</code></pre>

<p>更多:工作之余，写了点笔记，如果需要可以在我的 GitHub 看。</p>

<p><a href="https://github.com/al1020119">https://github.com/al1020119</a></p>

<p>参考文章</p>

<pre><code>App Thinning

http://t.cn/RVJ8kNd

Confirmed: Objective-C ARC is slow. Don’t use it! (sarcasm off)

http://t.cn/zYkzifW

4 XCODE ASSET CATALOG SECRETS YOU NEED TO KNOW

http://t.cn/RVJR2c0

使用IconFont减小iOS应用体积

http://t.cn/RVU7B3h

iOS可执行文件瘦身方法

http://t.cn/RZgnVL3

水平有限，若有错误，希望多多指正！coderonevv@gmail.com
</code></pre>

<hr />

<hr />

<h6>微信号：</h6>

<p>clpaial10201119（Q Q：2211523682）</p>

<h6>微博WB:</h6>

<p><a href="http://weibo.com/u/3288975567?is_hot=1">http://weibo.com/u/3288975567?is_hot=1</a></p>

<h6>gitHub：</h6>

<p><a href="https://github.com/al1020119">https://github.com/al1020119</a></p>

<h6>博客</h6>

<p><a href="http://al1020119.github.io/">http://al1020119.github.io/</a></p>

<hr />

<p><img src="http://al1020119.github.io/images/iCocosCoder.jpg" title="Caption" ></p>

<p><img src="http://al1020119.github.io/images/iCocosPublic.jpg" title="Caption" ></p>
]]></content>
  </entry>
  
  <entry>
    <title type="html"><![CDATA[iOS开发——常用功能代码集锦（友秀篇）]]></title>
    <link href="http://al1020119.github.io/blog/2016/10/16/ioskai-fa-chang-yong-gong-neng-dai-ma-ji-jin-(you-xiu-pian-)/"/>
    <updated>2016-10-16T12:47:16+08:00</updated>
    <id>http://al1020119.github.io/blog/2016/10/16/ioskai-fa-chang-yong-gong-neng-dai-ma-ji-jin-(you-xiu-pian-)</id>
    <content type="html"><![CDATA[<p>本次总结，是因为一次上线App被拒之后的冲动，因为有一个功能代码自己之前经常写，但是写多了就快，搞得手速练得超快（不要想污咯哦😂），所以写的时候就没有多想，也没有找找之前的代码，结果导致悲催的结局。</p>

<p>之前没有整理过项目中遇到或者写过，或者经常要用的代码，可能觉得多写几遍就没事了，或者网上一找就有了。可是事实并非如果，首先，网上找的永远不是你的。其次，写得再多还是有粗心或者注意不到的地方。最后，整理成自己的能最快速度的找到并实现，提高效率。何乐而不为呢？</p>

<p>好了，废话不多说，理论也没有，大部分只要两个操作：copy-paste。有些还是需要做小小的改动的，根据项目需求。</p>

<!--more-->


<ol>
<li>取消tableView头部和底部悬浮效果</li>
<li>获取随机数</li>
<li>去除tableView分组头部多余间距</li>
<li>图片截取</li>
<li>模糊图片</li>
<li>获取文件大小</li>
<li>手机号验证</li>
<li>邮箱验证</li>
<li>网址验证</li>
<li>JSON转字典</li>
<li>iPhone设备类型判断</li>
<li>iPhone系统版本判断</li>
<li>日志打印</li>
<li>颜色获取</li>
<li>弱引用</li>
<li>获取屏幕尺寸</li>
<li>获取view的控制</li>
<li>字典防崩溃</li>
<li>数组防崩溃</li>
<li>本文输入错误提示</li>
<li>获取当前时间</li>
<li>获取当前版本</li>
<li>tabBar红点显示</li>
<li>Log日志.m</li>
<li>MD5加密</li>
<li>按钮背景颜色</li>
<li>判断对象是否为空</li>
<li>键盘退出与隐藏通知</li>
<li>获取设备唯一ID</li>
<li>MOV转Mp4</li>
<li>上传图片</li>
<li>上传视频</li>
<li>获取视频帧图</li>
<li>压缩并导出视频</li>
<li>保存视频到相册</li>
<li>获取当前最顶层的ViewController</li>
<li>数组拆分</li>
<li>图片压缩</li>
<li>释放timer宏</li>
<li>获取某个view所在的控制器</li>
<li>两种方法删除NSUserDefaults所有记录</li>
<li>打印系统所有已注册的字体名称</li>
<li>获取图片某一点的颜色</li>
<li>字符串反转</li>
<li>禁止锁屏，</li>
<li>模态推出透明界面</li>
<li>Xcode调试不显示内存占用</li>
<li>显示隐藏文件</li>
<li>iOS跳转到App Store下载应用评分</li>
<li>iOS 获取汉字的拼音</li>
<li>手动更改iOS状态栏的颜色</li>
<li>判断当前ViewController是push还是present的方式显示的</li>
<li>获取实际使用的LaunchImage图片</li>
<li>iOS在当前屏幕获取第一响应</li>
<li>判断view是不是指定视图的子视图</li>
<li>NSArray 快速求总和 最大值 最小值 和 平均值</li>
<li>修改UITextField中Placeholder的文字颜色</li>
<li>关于NSDateFormatter的格式</li>
<li>获取一个类的所有子类</li>
<li>监测IOS设备是否设置了代理，需要CFNetwork.framework</li>
<li>阿拉伯数字转中文格式</li>
<li>Base64编码与NSString对象或NSData对象的转换</li>
<li>取消UICollectionView的隐式动画</li>
<li>下面几种方法都可以帮你去除这些动画</li>
<li>让Xcode的控制台支持LLDB类型的打印</li>
<li>CocoaPods pod install/pod update更新慢的问题</li>
<li>UIImage 占用内存大小</li>
<li>GCD timer定时器</li>
<li>图片上绘制文字 写一个UIImage的category</li>
<li>查找一个视图的所有子视图</li>
<li>计算文件大小</li>
<li>UIView设置部分圆角</li>
<li>取上整与取下整</li>
<li>计算字符串字符长度，一个汉字算两个字符</li>
<li>给UIView设置图片</li>
<li>防止scrollView手势覆盖侧滑手势</li>
<li>字符串中是否含有中文</li>
<li>dispatch_group的使用</li>
<li>UITextField每四位加一个空格,实现代理</li>
<li>获取私有属性和成员变量 #import</li>
<li>获取手机安装的应用</li>
<li>判断两个日期是否在同一周 写在NSDate的category里面</li>
<li>应用内打开系统设置界面</li>
<li>可选值如下：</li>
<li>屏蔽触发事件，2秒后取消屏蔽</li>
<li>动画暂停再开始</li>
<li>iOS中数字的格式化</li>
<li>如何获取WebView所有的图片地址，</li>
<li>获取到webview的高度</li>
<li>navigationBar变为纯透明</li>
<li>tabBar同理</li>
<li>navigationBar根据滑动距离的渐变色实现</li>
<li>iOS 开发中一些相关的路径</li>
<li>navigationItem的BarButtonItem如何紧靠屏幕右边界或者左边界？</li>
<li>NSString进行URL编码和解码</li>
<li>UIWebView设置User-Agent。</li>
<li>获取硬盘总容量与可用容量:</li>
<li>获取UIColor的RGBA值</li>
<li>修改textField的placeholder的字体颜色、大小</li>
<li>AFN移除JSON中的NSNull</li>
<li>ceil()和floor()</li>
<li>在webView加载完的代理方法里面这样写：</li>
<li>NSDateFormat最佳方式（strptime）</li>
<li>毛玻璃</li>
<li>tableview下拉刷新停留（不滚到顶部）， 类似QQ，微信拉去历史消息</li>
<li>KeyChain隐私信息存储（主要是密码类）</li>
<li>自定义圆角裁剪：搞性能</li>
<li>隐藏tabbar上面的虚线</li>
<li>隐藏导航栏下面的虚线</li>
<li>两个范围的富文本</li>
<li>修改UIAlertController</li>
</ol>


<!--more-->


<h2>1：取消tableView头部和底部悬浮效果</h2>

<pre><code>- (void)scrollViewDidScroll:(UIScrollView *)scrollView {  
    CGFloat sectionHeaderHeight = 10; //这里是我的headerView和footerView的高度  
    if (_tableView.contentOffset.y&lt;=sectionHeaderHeight&amp;&amp;_tableView.contentOffset.y&gt;=0) {  
        _tableView.contentInset = UIEdgeInsetsMake(-_tableView.contentOffset.y, 0, 0, 0);  
    } else if (_tableView.contentOffset.y&gt;=sectionHeaderHeight) {  
        _tableView.contentInset = UIEdgeInsetsMake(-sectionHeaderHeight, 0, 0, 0);  
    }  
}  


    -(void)scrollViewDidScroll:(UIScrollView *)scrollView {

    if (scrollView == self.tableView)

        {

        UITableView *tableview = (UITableView *)scrollView;

        CGFloat sectionHeaderHeight = 64;

        CGFloat sectionFooterHeight = 120;

        CGFloat offsetY = tableview.contentOffset.y;

        if (offsetY &gt;= 0 &amp;&amp; offsetY &lt;= sectionHeaderHeight)

        {

            tableview.contentInset = UIEdgeInsetsMake(-offsetY, 0, -sectionFooterHeight, 0);

        }else if (offsetY &gt;= sectionHeaderHeight &amp;&amp; offsetY &lt;= tableview.contentSize.height - tableview.frame.size.height - sectionFooterHeight)

        {

            tableview.contentInset = UIEdgeInsetsMake(-sectionHeaderHeight, 0, -sectionFooterHeight, 0);

        }else if (offsetY &gt;= tableview.contentSize.height - tableview.frame.size.height - sectionFooterHeight &amp;&amp; offsetY &lt;= tableview.contentSize.height - tableview.frame.size.height)         {

            tableview.contentInset = UIEdgeInsetsMake(-offsetY, 0, -(tableview.contentSize.height - tableview.frame.size.height - sectionFooterHeight), 0);

        }

    }

}
</code></pre>

<h2>2：获取随机数</h2>

<pre><code>//第一种
srand((unsigned)time(0)); //不加这句每次产生的随机数不变
int i = rand() % 5;
//第二种
srandom(time(0));
int i = random() % 5;
//第三种
int i = arc4random() % 5 ; 
</code></pre>

<h2>3：去除tableView分组头部多余间距</h2>

<h4>一：</h4>

<pre><code>- (void)viewDidLoad {
    [super viewDidLoad];

    self.tableView.tableHeaderView = [[UIView alloc] initWithFrame:CGRectMake(0, 0, 0, CGFLOAT_MIN)];
}
</code></pre>

<h4>二：</h4>

<pre><code>- (void)viewWillAppear:(BOOL)animated{

    [super viewWillAppear:animated];

    CGRect frameH = self.tableView.tableHeaderView.frame;
    frameH.size.height = 5;
    UIView *headerView = [[UIView alloc] initWithFrame:frameH];
    [self.tableView setTableHeaderView:headerView];


    CGRect frameF = self.tableView.tableHeaderView.frame;
    frameF.size.height = 1;
    UIView *footerView = [[UIView alloc] initWithFrame:frameF];
    [self.tableView setTableFooterView:footerView];

}
</code></pre>

<h4>有个朋友给了一个更好的方案</h4>

<pre><code>直接设置内边距，TableView会直接根据内边距进行相应的缩进！
</code></pre>

<h2>4：图片截取</h2>

<pre><code>CGSize itemSize = CGSizeMake(self.image.size.width, self.image.size.height);

dispatch_async(dispatch_get_global_queue(0, 0), ^{

    UIImage *dynamicCellImage = [UIImage imageWithData:[NSData dataWithContentsOfURL:[NSURL URLWithString:model.cover]]];
            UIGraphicsBeginImageContextWithOptions(itemSize, NO, [UIScreen mainScreen].scale);

            //压缩图片
            CGSize newSize;
            CGImageRef imageRef = nil;

            if ((dynamicCellImage.size.width / dynamicCellImage.size.height) &lt; (self.image.size.width / self.image.size.height)) {
                newSize.width = dynamicCellImage.size.width;
                newSize.height = dynamicCellImage.size.width * self.image.size.height / self.image.size.width;

                imageRef = CGImageCreateWithImageInRect([dynamicCellImage CGImage], CGRectMake(0, fabs(dynamicCellImage.size.height - newSize.height) / 2, newSize.width, newSize.height));

            } else {
                newSize.height = dynamicCellImage.size.height;
                newSize.width = dynamicCellImage.size.height * self.image.size.width / self.image.size.height;

                imageRef = CGImageCreateWithImageInRect([dynamicCellImage CGImage], CGRectMake(fabs(dynamicCellImage.size.width - newSize.width) / 2, 0, newSize.width, newSize.height));
            }

            dispatch_async(dispatch_get_main_queue(), ^{
                self.image.image = [UIImage imageWithCGImage:imageRef];
            });

            UIGraphicsEndImageContext();

});
</code></pre>

<h2>5：模糊图片</h2>

<pre><code>//加模糊效果，image是图片，blur是模糊度
+ (UIImage *)blurryImage:(UIImage *)image withBlurLevel:(CGFloat)blur {
    //模糊度,
    if ((blur &lt; 0.1f) || (blur &gt; 2.0f)) {
        blur = 0.5f;
    }

    //boxSize必须大于0
    int boxSize = (int)(blur * 100);
    boxSize -= (boxSize % 2) + 1;
//    iCocosLog(@"boxSize:%i",boxSize);
    //图像处理
    CGImageRef img = image.CGImage;

    //图像缓存,输入缓存，输出缓存
    vImage_Buffer inBuffer, outBuffer;
    vImage_Error error;
    //像素缓存
    void *pixelBuffer;

    //数据源提供者，Defines an opaque type that supplies Quartz with data.
    CGDataProviderRef inProvider = CGImageGetDataProvider(img);
    // provider’s data.
    CFDataRef inBitmapData = CGDataProviderCopyData(inProvider);

    //宽，高，字节/行，data
    inBuffer.width = CGImageGetWidth(img);
    inBuffer.height = CGImageGetHeight(img);
    inBuffer.rowBytes = CGImageGetBytesPerRow(img);
    inBuffer.data = (void*)CFDataGetBytePtr(inBitmapData);

    //像数缓存，字节行*图片高
    pixelBuffer = malloc(CGImageGetBytesPerRow(img) * CGImageGetHeight(img));

    outBuffer.data = pixelBuffer;
    outBuffer.width = CGImageGetWidth(img);
    outBuffer.height = CGImageGetHeight(img);
    outBuffer.rowBytes = CGImageGetBytesPerRow(img);


    // 第三个中间的缓存区,抗锯齿的效果
    void *pixelBuffer2 = malloc(CGImageGetBytesPerRow(img) * CGImageGetHeight(img));
    vImage_Buffer outBuffer2;
    outBuffer2.data = pixelBuffer2;
    outBuffer2.width = CGImageGetWidth(img);
    outBuffer2.height = CGImageGetHeight(img);
    outBuffer2.rowBytes = CGImageGetBytesPerRow(img);


    //Convolves a region of interest within an ARGB8888 source image by an implicit M x N kernel that has the effect of a box filter.
    error = vImageBoxConvolve_ARGB8888(&amp;inBuffer, &amp;outBuffer2, NULL, 0, 0, boxSize, boxSize, NULL, kvImageEdgeExtend);
    error = vImageBoxConvolve_ARGB8888(&amp;outBuffer2, &amp;inBuffer, NULL, 0, 0, boxSize, boxSize, NULL, kvImageEdgeExtend);
    error = vImageBoxConvolve_ARGB8888(&amp;inBuffer, &amp;outBuffer, NULL, 0, 0, boxSize, boxSize, NULL, kvImageEdgeExtend);

    if (error) {
        iCocosLog(@"error from convolution %ld", error);
    }

    //    iCocosLog(@"字节组成部分：%zu",CGImageGetBitsPerComponent(img));
    //颜色空间DeviceRGB
    CGColorSpaceRef colorSpace = CGColorSpaceCreateDeviceRGB();
    //用图片创建上下文,CGImageGetBitsPerComponent(img),7,8
    CGContextRef ctx = CGBitmapContextCreate(
                                             outBuffer.data,
                                             outBuffer.width,
                                             outBuffer.height,
                                             8,
                                             outBuffer.rowBytes,
                                             colorSpace,
                                             CGImageGetBitmapInfo(image.CGImage));

    //根据上下文，处理过的图片，重新组件
    CGImageRef imageRef = CGBitmapContextCreateImage (ctx);
    UIImage *returnImage = [UIImage imageWithCGImage:imageRef];

    //clean up
    CGContextRelease(ctx);
    CGColorSpaceRelease(colorSpace);

    free(pixelBuffer);
    free(pixelBuffer2);
    CFRelease(inBitmapData);

    CGColorSpaceRelease(colorSpace);
    CGImageRelease(imageRef);

    return returnImage;
}
</code></pre>

<h2>6：文件大小</h2>

<pre><code>/**
 *  通常用于删除缓存的时，计算缓存大小
 */
//单个文件的大小
+ (long long) fileSizeAtPath:(NSString*) filePath{
    NSFileManager* manager = [NSFileManager defaultManager];
    if ([manager fileExistsAtPath:filePath]){
        return [[manager attributesOfItemAtPath:filePath error:nil] fileSize];
    }
    return 0;
}
</code></pre>

<h2>7：手机号</h2>

<pre><code>/**
 *  手机号判断
 *
 *  @param mobileNum 号码字符串
 *
 *  @return BOOL
 */
+ (BOOL)isMobileNumber:(NSString *)mobileNum
{
        /**
         * 移动号段正则表达式
         */
        NSString *CM_NUM = @"^((13[4-9])|(147)|(15[0-2,7-9])|(178)|(18[2-4,7-8]))\\d{8}|(1705)\\d{7}$";
        /**
         * 联通号段正则表达式
         */
        NSString *CU_NUM = @"^((13[0-2])|(145)|(15[5-6])|(176)|(18[5,6]))\\d{8}|(1709)\\d{7}$";
        /**
         * 电信号段正则表达式
         */
        NSString *CT_NUM = @"^((133)|(153)|(177)|(18[0,1,9]))\\d{8}$";

        NSPredicate *pred1 = [NSPredicate predicateWithFormat:@"SELF MATCHES %@", CM_NUM];
        BOOL isMatch1 = [pred1 evaluateWithObject:mobileNum];
        NSPredicate *pred2 = [NSPredicate predicateWithFormat:@"SELF MATCHES %@", CU_NUM];
        BOOL isMatch2 = [pred2 evaluateWithObject:mobileNum];
        NSPredicate *pred3 = [NSPredicate predicateWithFormat:@"SELF MATCHES %@", CT_NUM];
        BOOL isMatch3 = [pred3 evaluateWithObject:mobileNum];

        if (isMatch1 || isMatch2 || isMatch3) {
            return YES;
        }else{
            return NO;
        }
}
</code></pre>

<h2>8：邮箱</h2>

<h4>通过区分字符串</h4>

<pre><code>-(BOOL)validateEmail:(NSString*)email

{

    if((0 != [email rangeOfString:@"@"].length) &amp;&amp;

       (0 != [email rangeOfString:@"."].length))

    {

        NSCharacterSet* tmpInvalidCharSet = [[NSCharacterSet alphanumericCharacterSet] invertedSet];

        NSMutableCharacterSet* tmpInvalidMutableCharSet = [[tmpInvalidCharSet mutableCopy] autorelease];

        [tmpInvalidMutableCharSet removeCharactersInString:@"_-"];


        NSRange range1 = [email rangeOfString:@"@"

                                      options:NSCaseInsensitiveSearch];


        //取得用户名部分

        NSString* userNameString = [email substringToIndex:range1.location];

        NSArray* userNameArray   = [userNameString componentsSeparatedByString:@"."];


        for(NSString* string in userNameArray)

        {

            NSRange rangeOfInavlidChars = [string rangeOfCharacterFromSet: tmpInvalidMutableCharSet];

            if(rangeOfInavlidChars.length != 0 || [string isEqualToString:@""])

                return NO;

        }


        //取得域名部分

        NSString *domainString = [email substringFromIndex:range1.location+1];

        NSArray *domainArray   = [domainString componentsSeparatedByString:@"."];


        for(NSString *string in domainArray)

        {

            NSRange rangeOfInavlidChars=[string rangeOfCharacterFromSet:tmpInvalidMutableCharSet];

            if(rangeOfInavlidChars.length !=0 || [string isEqualToString:@""])

                return NO;

        }


        return YES;

    }

    else {

       return NO;

    }

}
</code></pre>

<h4>利用正则表达式验证</h4>

<pre><code>-(BOOL)isValidateEmail:(NSString *)email {

    NSString *emailRegex = @"[A-Z0-9a-z._%+-]+@[A-Za-z0-9.-]+\\.[A-Za-z]{2,4}"; 

    NSPredicate *emailTest = [NSPredicate predicateWithFormat:@"SELF MATCHES %@", emailRegex]; 

    return [emailTest evaluateWithObject:email];

}
</code></pre>

<h2>9：网址</h2>

<h4>1.首先进行第一步判断传入的字符串是否符合HTTP路径的语法规则,即”<a href="HTTPS://%E2%80%9D">HTTPS://%E2%80%9D</a> 或 “<a href="HTTP://%E2%80%9D">HTTP://%E2%80%9D</a> ,从封装的一个函数,传入即可判断</h4>

<pre><code>- (NSURL *)smartURLForString:(NSString *)str
{
    NSURL *     result;
    NSString *  trimmedStr;
    NSRange     schemeMarkerRange;
    NSString *  scheme;

    assert(str != nil);

    result = nil;

    trimmedStr = [str stringByTrimmingCharactersInSet:[NSCharacterSet whitespaceCharacterSet]];
    if ( (trimmedStr != nil) &amp;&amp; (trimmedStr.length != 0) ) {
        schemeMarkerRange = [trimmedStr rangeOfString:@"://"];

        if (schemeMarkerRange.location == NSNotFound) {
            result = [NSURL URLWithString:[NSString stringWithFormat:@"http://%@", trimmedStr]];
        } else {
            scheme = [trimmedStr substringWithRange:NSMakeRange(0, schemeMarkerRange.location)];
            assert(scheme != nil);

            if ( ([scheme compare:@"http"  options:NSCaseInsensitiveSearch] == NSOrderedSame)
                || ([scheme compare:@"https" options:NSCaseInsensitiveSearch] == NSOrderedSame) ) {
                result = [NSURL URLWithString:trimmedStr];
            } else {
                // It looks like this is some unsupported URL scheme.
            }
        }
    }

    return result;
}
</code></pre>

<h4>第二步,判断此路径是否能够请求成功,直接进行HTTP请求,观察返回结果-></h4>

<pre><code>//判断
-(void) validateUrl: (NSURL *) candidate {
    NSMutableURLRequest *request = [NSMutableURLRequest requestWithURL:candidate];
    [request setHTTPMethod:@"HEAD"];
    NSURLSession *session = [NSURLSession sessionWithConfiguration:[NSURLSessionConfiguration defaultSessionConfiguration]];
    NSURLSessionDataTask *task = [session dataTaskWithRequest:request completionHandler:^(NSData * _Nullable data, NSURLResponse * _Nullable response, NSError * _Nullable error) {
        NSLog(@"error %@",error);
        if (error) {
            NSLog(@"不可用");
        }else{
            NSLog(@"可用");
        }
    }];
    [task resume];
}
</code></pre>

<h2>10：JSON转字典</h2>

<pre><code>/*!
 * @brief 把格式化的JSON格式的字符串转换成字典
 * @param jsonString JSON格式的字符串
 * @return 返回字典
 */
- (NSDictionary *)dictionaryWithJsonString:(NSString *)jsonString {
    if (jsonString == nil) {
        return nil;
    }
    iCocosLog(@"%@", jsonString);

    NSData *jsonData = [jsonString dataUsingEncoding:NSUTF8StringEncoding];
    NSError *err;
    NSDictionary *dic = [NSJSONSerialization JSONObjectWithData:jsonData
                                                        options:NSJSONReadingMutableContainers
                                                          error:&amp;err];
    if(err) {
        iCocosLog(@"json解析失败：%@",err);
        return nil;
    }
    return dic;
}
</code></pre>

<h4>数组转JSON</h4>

<pre><code>    NSArray *uids = [self.allModelUID objectAtIndexCheck:range];

    NSError *error = nil;
    NSData *picsJsonData = [NSJSONSerialization dataWithJSONObject:uids
                                                           options:NSJSONWritingPrettyPrinted
                                                             error:&amp;error];
    NSString *JSONString = [[NSString alloc] initWithData:picsJsonData encoding:NSUTF8StringEncoding];
</code></pre>

<h2>11：iPhone设备类型</h2>

<pre><code>typedef NS_ENUM(char, iPhoneModel){//0~3
    iPhone4,//320*480
    iPhone5,//320*568
    iPhone6,//375*667
    iPhone6Plus,//414*736
    UnKnown
};


/**
 *  return current running iPhone model
 *
 *  @return iPhone model
 */
+ (iPhoneModel)iPhonesModel {
    //bounds method gets the points not the pixels!!!
    CGRect rect = [[UIScreen mainScreen] bounds];

    CGFloat width = rect.size.width;
    CGFloat height = rect.size.height;

    //get current interface Orientation
    UIInterfaceOrientation orientation = [[UIApplication sharedApplication] statusBarOrientation];
    //unknown
    if (UIInterfaceOrientationUnknown == orientation) {
        return UnKnown;
    }
    /**
     //    portrait   width * height
     //    iPhone4:320*480
     //    iPhone5:320*568
     //    iPhone6:375*667
     //    iPhone6Plus:414*736
     */

    //portrait
    if (UIInterfaceOrientationPortrait == orientation) {
        if (width ==  320.0f) {
            if (height == 480.0f) {
                return iPhone4;
            } else {
                return iPhone5;
            }
        } else if (width == 375.0f) {
            return iPhone6;
        } else if (width == 414.0f) {
            return iPhone6Plus;
        }
    } else if (UIInterfaceOrientationLandscapeLeft == orientation || UIInterfaceOrientationLandscapeRight == orientation) {//landscape
        if (height == 320.0) {
            if (width == 480.0f) {
                return iPhone4;
            } else {
                return iPhone5;
            }
        } else if (height == 375.0f) {
            return iPhone6;
        } else if (height == 414.0f) {
            return iPhone6Plus;
        }
    }

    return UnKnown;
}
</code></pre>

<h2>12：iPhone系统版本</h2>

<pre><code>//获取当前系统版本
#define __ios10_0__ ([[UIDevice currentDevice].systemVersion floatValue] &gt;= 10.0)
#define __ios9_0__ ([[UIDevice currentDevice].systemVersion floatValue] &gt;= 9.0)
#define __ios8_0__ ([[UIDevice currentDevice].systemVersion floatValue] &gt;= 8.0)
</code></pre>

<h2>13：日志</h2>

<pre><code>// 日志输出
#ifdef DEBUG // 开发阶段-DEBUG阶段:使用Log
#define iCocosLog(...) NSLog(__VA_ARGS__)
#else // 发布阶段-上线阶段:移除Log
#define iCocosLog(...)
#endif
</code></pre>

<p>详细</p>

<pre><code>#ifdef DEBUG
#define iCocosLog(format, ...) printf("\n[%s] %s [第%d行] %s\n", __TIME__, __FUNCTION__, __LINE__, [[NSString stringWithFormat:format, ## __VA_ARGS__] UTF8String]);
#else
#define iCocosLog(format, ...)
#endif
</code></pre>

<h2>14：颜色</h2>

<pre><code>// 颜色
#define iCocosARGBColor(r, g, b, a) [UIColor colorWithRed:(r)/255.0 green:(g)/255.0 blue:(b)/255.0 alpha:a]
#define iCocosColor(r, g, b) iCocosARGBColor((r), (g), (b), 255)


#define random(r, g, b, a) [UIColor colorWithRed:(r)/255.0 green:(g)/255.0 blue:(b)/255.0 alpha:(a)/255.0]
#define iCocosRandomColor (random(arc4random_uniform(256), arc4random_uniform(256), arc4random_uniform(256), arc4random_uniform(256)))
</code></pre>

<h2>15：弱引用</h2>

<pre><code>// 弱引用
#define iCocosWeakSelf __weak typeof(self) weakSelf = self;
</code></pre>

<h2>16：屏幕尺寸</h2>

<pre><code>// 屏幕尺寸
#define iCocosScreenH [UIScreen mainScreen].bounds.size.height
#define iCocosScreenW [UIScreen mainScreen].bounds.size.width
</code></pre>

<h2>17：获取view的控制</h2>

<pre><code>/** 获取当前View的控制器对象 */
-(UIViewController *)getCurrentViewController{
    UIResponder *next = [self nextResponder];
    do {
        if ([next isKindOfClass:[UIViewController class]]) {
            return (UIViewController *)next;
        }
        next = [next nextResponder];
    } while (next != nil);
    return nil;
}
</code></pre>

<h2>18：字典防蹦</h2>

<h4>不可变</h4>

<pre><code>/*!
 @method objectAtIndexCheck:
 @abstract 检查是否越界和NSNull如果是返回nil
 @result 返回对象
 */
- (id)objectStringForKey:(NSString *)key
{
    if ([self objectForKey:key] == nil) {
//        iCocosLog(@"键值对不存在");
        return nil;
    }
    id value = [self objectForKey:key];

    return value;
}
</code></pre>

<h4>可变</h4>

<pre><code>/*!
 @method objectAtIndexCheck:
 @abstract 检查是否越界和NSNull如果是返回nil
 @result 返回对象
 */
- (id)objectStringForKey:(NSString *)key
{
    if ([self objectForKey:key] == nil) {

//        iCocosLog(@"键值对不存在");

        return nil;
//        return 0;
    }
    id value = [self objectForKey:key];

    return value;
}
</code></pre>

<h2>19：数组防蹦</h2>

<h4>不可变</h4>

<pre><code>/*!
 @method objectAtIndexCheck:
 @abstract 检查是否越界和NSNull如果是返回nil
 @result 返回对象
 */
- (id)objectAtIndexCheck:(NSUInteger)index  {

    if (index &gt;= [self count]) {
        iCocosLog(@"数组越界");
        return nil;
    }
    id value = [self objectAtIndex:index];
    if (value == [NSNull null]) {
        iCocosLog(@"数组为空");
        return nil;
    }
    return value;
}
</code></pre>

<h4>可变</h4>

<pre><code>/*!
 @method objectAtIndexCheck:
 @abstract 检查是否越界和NSNull如果是返回nil
 @result 返回对象
 */
- (id)objectAtIndexCheck:(NSUInteger)index  {

    if (index &gt;= [self count]) {
        iCocosLog(@"数组越界");
        return nil;
    }
    id value = [self objectAtIndex:index];
    if (value == [NSNull null]) {
        iCocosLog(@"数组为空");
        return nil;
    }
    return value;
}


- (void)removeObjectAtCheckIndex:(NSInteger)index
{
    if (index &gt;= [self count]) {
        iCocosLog(@"数组越界");
        return ;
    }
    id value = [self objectAtIndex:index];
    if (value == [NSNull null]) {
        iCocosLog(@"数组为空");
        return ;
    }

    [self removeObjectAtIndex:index];

}
</code></pre>

<h2>20：本文输入错误提示</h2>

<pre><code>- (void)shake {
    CAKeyframeAnimation *keyFrame = [CAKeyframeAnimation animationWithKeyPath:@"position.x"];
    keyFrame.duration = 0.3;
    CGFloat x = self.layer.position.x;
    keyFrame.values = @[@(x - 30), @(x - 30), @(x + 20), @(x - 20), @(x + 10), @(x - 10), @(x + 5), @(x - 5)];
    [self.layer addAnimation:keyFrame forKey:@"shake"];

}
</code></pre>

<h2>21：当前时间</h2>

<pre><code>+ (NSString *)nowTimes{
    NSDate* dat = [NSDate dateWithTimeIntervalSinceNow:0];
    int a=(int)([dat timeIntervalSince1970] + 0.5);
    NSString *timeString = [NSString stringWithFormat:@"%d", a];//转为字符型
    return timeString;
}
</code></pre>

<h2>22:当前版本</h2>

<pre><code>/*
 *  当前程序的版本号
 */
-(NSString *)version{
    //系统直接读取的版本号
    NSString *versionValueStringForSystemNow=[[NSBundle mainBundle].infoDictionary valueForKey:(NSString *)kCFBundleVersionKey];
    return versionValueStringForSystemNow;
}
</code></pre>

<h2>23:tabBar红点</h2>

<pre><code>- (void)showBadgeOnItemIndex:(int)index{

    //移除之前的小红点
    [self removeBadgeOnItemIndex:index];

    //新建小红点
    UIView *badgeView = [[UIView alloc]init];
    badgeView.tag = 888 + index;
    badgeView.backgroundColor = [UIColor redColor];
    CGRect tabFrame = self.frame;

    //确定小红点的位置
    float percentX = (index +0.6) / TabbarItemNums;
    CGFloat x = ceilf(percentX * tabFrame.size.width);
    CGFloat y = ceilf(0.1 * tabFrame.size.height);
    badgeView.frame = CGRectMake(x, y, 8, 8);
    badgeView.layer.cornerRadius = badgeView.frame.size.width/2;

    [self addSubview:badgeView];

}

- (void)hideBadgeOnItemIndex:(int)index{

    //移除小红点
    [self removeBadgeOnItemIndex:index];

}

- (void)removeBadgeOnItemIndex:(int)index{

    //按照tag值进行移除
    for (UIView *subView in self.subviews) {
        if (subView.tag == 888+index) {
            [subView removeFromSuperview];
        }
    }
}
</code></pre>

<h2>24:Log日志.m</h2>

<pre><code>@implementation UIView(Log)
+ (NSString *)searchAllSubviews:(UIView *)superview
{
    NSMutableString *xml = [NSMutableString string];

    NSString *class = NSStringFromClass(superview.class);
    class = [class stringByReplacingOccurrencesOfString:@"_" withString:@""];
    [xml appendFormat:@"&lt;%@ frame=\"%@\"&gt;\n", class, NSStringFromCGRect(superview.frame)];
    for (UIView *childView in superview.subviews) {
        NSString *subviewXml = [self searchAllSubviews:childView];
        [xml appendString:subviewXml];
    }
    [xml appendFormat:@"&lt;/%@&gt;\n", class];
    return xml;
}

- (NSString *)description
{
    return [UIView searchAllSubviews:self];
}
@end

@implementation NSDictionary (Log)
- (NSString *)descriptionWithLocale:(id)locale
{
    NSMutableString *str = [NSMutableString string];

    [str appendString:@"{\n"];

    // 遍历字典的所有键值对
    [self enumerateKeysAndObjectsUsingBlock:^(id key, id obj, BOOL *stop) {
        [str appendFormat:@"\t%@ = %@,\n", key, obj];
    }];

    [str appendString:@"}"];

    // 查出最后一个,的范围
    NSRange range = [str rangeOfString:@"," options:NSBackwardsSearch];
    if (range.length) {
        // 删掉最后一个,
        [str deleteCharactersInRange:range];
    }

    return str;
}
@end

@implementation NSArray (Log)
- (NSString *)descriptionWithLocale:(id)locale
{
    NSMutableString *str = [NSMutableString string];

    [str appendString:@"[\n"];

    // 遍历数组的所有元素
    [self enumerateObjectsUsingBlock:^(id obj, NSUInteger idx, BOOL *stop) {
        [str appendFormat:@"%@,\n", obj];
    }];

    [str appendString:@"]"];

    // 查出最后一个,的范围
    NSRange range = [str rangeOfString:@"," options:NSBackwardsSearch];
    if (range.length) {
        // 删掉最后一个,
        [str deleteCharactersInRange:range];
    }

    return str;
}
@end
</code></pre>

<h2>25:MD5</h2>

<pre><code>//16位MD5加密方式
- (NSString *)getMd5_16Bit_String:(NSString *)srcString{
    //提取32位MD5散列的中间16位
    NSString *md5_32Bit_String=[self getMd5_32Bit_String:srcString];
    NSString *result = [[md5_32Bit_String substringToIndex:24] substringFromIndex:8];//即9～25位

    return result;
}


//32位MD5加密方式
- (NSString *)getMd5_32Bit_String:(NSString *)srcString{
    const char *cStr = [srcString UTF8String];
    unsigned char digest[CC_MD5_DIGEST_LENGTH];
    CC_MD5( cStr, strlen(cStr), digest );
    NSMutableString *result = [NSMutableString stringWithCapacity:CC_MD5_DIGEST_LENGTH * 2];
    for(int i = 0; i &lt; CC_MD5_DIGEST_LENGTH; i++)
        [result appendFormat:@"%02x", digest[i]];

    return result;
}
</code></pre>

<h2>26:按钮背景颜色</h2>

<pre><code>/**
 *  使用背景颜色设置按钮不同状态的图片
 *
 *  @param color 颜色
 *
 *  @return 背景图片
 */
+ (UIImage *)imageWithColor:(UIColor *)color {
    CGRect rect = CGRectMake(0.0f, 0.0f, 1.0f, 1.0f);
    UIGraphicsBeginImageContext(rect.size);
    CGContextRef context = UIGraphicsGetCurrentContext();

    CGContextSetFillColorWithColor(context, [color CGColor]);
    CGContextFillRect(context, rect);

    UIImage *image = UIGraphicsGetImageFromCurrentImageContext();
    UIGraphicsEndImageContext();

    return image;
}
</code></pre>

<h2>27：对象是否为空</h2>

<pre><code>// 判断对象是否为空
- (BOOL)isBlanceObject:(id)object{
    if (object == nil || object == NULL) {
        return YES;
    }
    if ([object isKindOfClass:[NSNull class]]) {
        return YES;
    }
    return NO;
}
</code></pre>

<h2>28：键盘退出与隐藏</h2>

<pre><code>[[NSNotificationCenter defaultCenter] addObserver:self selector:@selector(keyboardWillShow:) name:UIKeyboardWillShowNotification object:nil];
[[NSNotificationCenter defaultCenter] addObserver:self selector:@selector(keyboardWillHide:) name:UIKeyboardWillHideNotification object:nil];
</code></pre>

<p>}</p>

<pre><code>- (void)keyboardWillShow:(NSNotification *)notification {

    // 获取通知的信息字典
    NSDictionary *userInfo = [notification userInfo];

    // 获取键盘弹出后的rect
    NSValue* aValue = [userInfo objectForKey:UIKeyboardFrameEndUserInfoKey];
    CGRect keyboardRect = [aValue CGRectValue];

    // 获取键盘弹出动画时间
    NSValue *animationDurationValue = [userInfo objectForKey:UIKeyboardAnimationDurationUserInfoKey];
    NSTimeInterval animationDuration;
    [animationDurationValue getValue:&amp;animationDuration];

}


- (void)keyboardWillHide:(NSNotification *)notification {

    // 获取通知信息字典
    NSDictionary* userInfo = [notification userInfo];

    // 获取键盘隐藏动画时间
    NSValue *animationDurationValue = [userInfo objectForKey:UIKeyboardAnimationDurationUserInfoKey];
    NSTimeInterval animationDuration;
    [animationDurationValue getValue:&amp;animationDuration];


}
</code></pre>

<h2>29：获取设备唯一ID</h2>

<p>-(NSString <em>)getUniqueDeviceIdentifierAsString
{
    NSString </em>appName=[[[NSBundle mainBundle] infoDictionary] objectForKey:(NSString*)kCFBundleNameKey];</p>

<pre><code>NSString *strApplicationUUID =  [SAMKeychain passwordForService:appName account:@"incoding"];
if (strApplicationUUID == nil)
{
    strApplicationUUID  = [[[UIDevice currentDevice] identifierForVendor] UUIDString];

    NSError *error = nil;
    SAMKeychainQuery *query = [[SAMKeychainQuery alloc] init];
    query.service = appName;
    query.account = @"incoding";
    query.password = strApplicationUUID;
    query.synchronizationMode = SAMKeychainQuerySynchronizationModeNo;
    [query save:&amp;error];

}

return strApplicationUUID;
</code></pre>

<p>}</p>

<h2>30：MOV转Mp4</h2>

<pre><code>- (void)movFileTransformToMP4WithSourceUrl:(NSURL *)sourceUrl completion:(void(^)(NSString *Mp4FilePath))comepleteBlock
{
    /**
     *  mov格式转mp4格式
     */
    AVURLAsset *avAsset = [AVURLAsset URLAssetWithURL:sourceUrl options:nil];

    NSArray *compatiblePresets = [AVAssetExportSession exportPresetsCompatibleWithAsset:avAsset];

    NSLog(@"%@",compatiblePresets);

    if ([compatiblePresets containsObject:AVAssetExportPresetHighestQuality]) {

        AVAssetExportSession *exportSession = [[AVAssetExportSession alloc] initWithAsset:avAsset presetName:AVAssetExportPresetMediumQuality];


        NSDate *date = [NSDate date];
        NSDateFormatter *formatter = [[NSDateFormatter alloc] init];
        [formatter setDateFormat:@"yyyyMMddHHmmss"];
        NSString *uniqueName = [NSString stringWithFormat:@"%@.mp4",[formatter stringFromDate:date]];
        NSString * resultPath = [NSSearchPathForDirectoriesInDomains(NSDocumentDirectory, NSUserDomainMask, YES)[0] stringByAppendingPathComponent:uniqueName];//PATH_OF_DOCUMENT为documents路径

        NSLog(@"output File Path : %@",resultPath);

        exportSession.outputURL = [NSURL fileURLWithPath:resultPath];

        exportSession.outputFileType = AVFileTypeMPEG4;//可以配置多种输出文件格式

        exportSession.shouldOptimizeForNetworkUse = YES;

        [exportSession exportAsynchronouslyWithCompletionHandler:^(void)
         {
             switch (exportSession.status) {

                 case AVAssetExportSessionStatusUnknown:

                     break;

                 case AVAssetExportSessionStatusWaiting:

                     break;

                 case AVAssetExportSessionStatusExporting:

                     break;

                 case AVAssetExportSessionStatusCompleted:
                 {
                     comepleteBlock(resultPath);


                     NSLog(@"mp4 file size:%lf MB",[NSData dataWithContentsOfURL:exportSession.outputURL].length/1024.f/1024.f);
                 }
                     break;

                 case AVAssetExportSessionStatusFailed:

                     break;

                 case AVAssetExportSessionStatusCancelled:

                     break;

             }  

         }];
    }  
}
</code></pre>

<h2>31:上传图片</h2>

<pre><code>+ (void)uploadImage:(UIImage *)imageIcon successUpload:(void (^)(id responseObject))successUpload failureUpload:(void (^)(NSError *error))failureUpload;
{

    //    拿到文件
    NSString *NSDocmentsPath = NSSearchPathForDirectoriesInDomains(NSDocumentDirectory, NSUserDomainMask, YES).firstObject;
    NSString *iconPath       = [NSDocmentsPath stringByAppendingPathComponent:[NSString stringWithFormat:@"faceUrl.png"]];
    //NSURL *url = [NSURL fileURLWithPath:iconPath];

    long long size = [iCocosGetSize fileSizeAtPath:iconPath];

    if (size &gt;= 7000000) {
        [SVProgressHUD showInfoWithStatus:@"图片过大，请重新上传 \n 请不要上传超过7Mb文件"];
        NSDictionary *errDict = [NSDictionary dictionaryWithObject:@"big" forKey:@"state"];
        failureUpload((NSError *)errDict);
        return;
    }

    //1:文件的32位MD5值
    NSString *strForEight = [iCocosFormatFileGetEight getStringWithEight:iconPath];
    //2:文件的前8个字节的16位+文件的后8个字节的16位
    NSString *str32MD5    = [NSString getMd5_32Bit_String:iconPath];

    NSString *str64       = [NSString stringWithFormat:@"%@%@", str32MD5,strForEight];

    //存图片
    //    NSData *imageData = UIImageJPEGRepresentation(imageIcon, 1.0);//将UIImage转为NSData，1.0表示不压缩图片质量。
    NSData *imageData = [iCocosFileCondenseTools resetSizeOfImageData:imageIcon maxSize:50];


    [imageData writeToFile:iconPath atomically:YES];

    AFHTTPSessionManager *manager = [AFHTTPSessionManager manager];
    manager.responseSerializer.acceptableContentTypes = [NSSet setWithObjects:@"text/html", nil];

    //    NSString *urlStrIF        = [NSString stringWithFormat:@"%@file/exist%@", [iCocosUrlOperationTools shareiCocosUrlOperationTools].iCocosFileUrl, [iCocosURLRequestExtension getURLRequestExtension]];
    NSMutableDictionary *dict = [NSMutableDictionary dictionary];
    //文件的32位MD5+前8个字节的16位+后8个字节的16位
    dict[@"file_md5"] = str64;
    dict[@"is_blur"] = @(1);
    dict[@"file_size"] = @([iCocosGetSize fileSizeAtPath:iconPath]);
    dict[@"ext"] = @"png";

    /**
     *  超时时间
     */
    [manager.requestSerializer willChangeValueForKey:@"timeoutInterval"];
    manager.requestSerializer.timeoutInterval = 10.f;
    [manager.requestSerializer didChangeValueForKey:@"timeoutInterval"];

    //    [manager POST:urlStrIF parameters:dict progress:nil success:^(NSURLSessionDataTask * _Nonnull task, id  _Nullable responseObject) {

    [iCocosAFNPOSTRequestData iCocos_POST_HostSecurity:@"file/exist" hostHeaderValue:[iCocosUrlOperationTools shareiCocosUrlOperationTools].iCocosFileHost firstRequestWithUrl:[iCocosUrlOperationTools shareiCocosUrlOperationTools].iCocosFileUrl secondRequestWithIp:[iCocosUrlOperationTools shareiCocosUrlOperationTools].iCocosFileIp params:dict success:^(id response) {

        NSString *state = [NSString stringWithFormat:@"%@", [response objectStringForKey:@"state"]];
        NSString *msg= [NSString stringWithFormat:@"%@", [response objectStringForKey:@"msg"]];
        if ([state isEqualToString:@"0"]) {
            NSString *exist = [NSString stringWithFormat:@"%@", [[response objectStringForKey:@"data"] objectStringForKey:@"exist"]];
            /**
             *  注意这里需要换成真实服务器地址
             */
            if ([exist isEqualToString:@"0"]) { //不存在就需要发送请求
                NSString *imageUrl          = [NSString stringWithFormat:@"%@file/up%@", [iCocosUrlOperationTools shareiCocosUrlOperationTools].iCocosFileUrl,[iCocosURLRequestExtension getURLRequestExtension]];
                NSMutableDictionary *params = [NSMutableDictionary dictionary];
                params[@"blur"]          = @(1);


                AFHTTPSessionManager *mger = [AFHTTPSessionManager manager];

                AFJSONResponseSerializer *response = [AFJSONResponseSerializer serializer];
                response.removesKeysWithNullValues = YES;
                manager.responseSerializer = response;

                manager.requestSerializer = [AFHTTPRequestSerializer serializer];//响应


                mger.responseSerializer.acceptableContentTypes = [NSSet setWithObjects:@"image/png", @"text/html", nil];

                /**
                 *  超时时间
                 */
                [manager.requestSerializer willChangeValueForKey:@"timeoutInterval"];
                manager.requestSerializer.timeoutInterval = 10.f;
                [manager.requestSerializer didChangeValueForKey:@"timeoutInterval"];


                [mger POST:imageUrl parameters:params constructingBodyWithBlock:^(id&lt;AFMultipartFormData&gt; formData) {
                    // 上传文件
                    NSDateFormatter *formatter = [[NSDateFormatter alloc] init];
                    formatter.dateFormat       = @"yyyyMMddHHmmss";
                    NSString *str              = [formatter stringFromDate:[NSDate date]];
                    NSString *fileName         = [NSString stringWithFormat:@"%@.png", str];

                    [formData appendPartWithFileData:imageData name:@"file" fileName:fileName mimeType:@"image/png"];

                } progress:^(NSProgress * _Nonnull uploadProgress) {

                    iCocosLog(@"封面图片================%@", uploadProgress);

                } success:^(NSURLSessionDataTask * _Nonnull task, id  _Nullable responseObject) {

                    NSDictionary *dataDic    = [responseObject objectStringForKey:@"data"]; 


                    successUpload(dataDic);

                    iCocosLog(@"%@", responseObject);
                } failure:^(NSURLSessionDataTask * _Nullable task, NSError * _Nonnull error) {
                    iCocosLog(@"上传错误:%@", error);

                    failureUpload(error);
                }];

            } else {

                NSDictionary *dataDic    = [response objectStringForKey:@"data"];

                successUpload(dataDic);
            }

        } else {
            successUpload(response);
        }
    } failure:^(NSError *error) {
        failureUpload(error);
    }];

}
</code></pre>

<h2>32：上传视频</h2>

<h4>上传MOV</h4>

<pre><code>+ (void)updateMOVVideo:(NSURL *)url successUpload:(void (^)(id responseObject))successUpload failureUpload:(void (^)(NSError *error))failureUpload;
{
    //保存数据
    //    NSUserDefaults *defaults =[NSUserDefaults standardUserDefaults];
    //    NSURL *url = [defaults URLForKey:@"RecordVideoUrl"];

    NSData *videoData = [NSData dataWithContentsOfURL:url];

    //   NSString *videoUrl = [iCocosUpLoadVideoTools upLoadVideoGetVideoUrlWithFileUrlInSandbox:url];

    //    NSString *strUrl = [NSString stringWithContentsOfURL:url usedEncoding:0 error:nil];

    //    //1:文件的32位MD5值
    //    NSString *strForEight = [iCocosFormatFileGetEight getStringWithEight:strUrl];
    //
    //    //2:文件的前8个字节的16位+文件的后8个字节的16位
    //    NSString *str32MD5 = [NSString getMd5_32Bit_String:strUrl];

    NSString *str32MD5 = [iCocosRandomSix getSixRandom];

    NSString *str64 = [NSString stringWithFormat:@"%@%@", str32MD5,str32MD5];

    AFHTTPSessionManager *manager = [AFHTTPSessionManager manager];
    manager.responseSerializer.acceptableContentTypes = [NSSet setWithObjects:@"text/html", nil];

    //    NSString *urlStrIF = [NSString stringWithFormat:@"%@file/exist%@", [iCocosUrlOperationTools shareiCocosUrlOperationTools].iCocosFileUrl, [iCocosURLRequestExtension getURLRequestExtension]];
    NSMutableDictionary *dict = [NSMutableDictionary dictionary];
    dict[@"file_md5"] = str64;
    dict[@"is_blur"] = 0;
    dict[@"file_size"] = @([iCocosGetSize fileSizeAtPath:[url absoluteString]]);
    dict[@"ext"] = @"MOV";

    /**
     *  超时时间
     */
    [manager.requestSerializer willChangeValueForKey:@"timeoutInterval"];
    manager.requestSerializer.timeoutInterval = 10.f;
    [manager.requestSerializer didChangeValueForKey:@"timeoutInterval"];

    /** 获取视频是否上传 */
    //    [manager POST:urlStrIF parameters:dict progress:nil success:^(NSURLSessionDataTask * _Nonnull task, id  _Nullable responseObject) {

    [iCocosAFNPOSTRequestData iCocos_POST_HostSecurity:@"file/exist" hostHeaderValue:[iCocosUrlOperationTools shareiCocosUrlOperationTools].iCocosFileHost firstRequestWithUrl:[iCocosUrlOperationTools shareiCocosUrlOperationTools].iCocosFileUrl secondRequestWithIp:[iCocosUrlOperationTools shareiCocosUrlOperationTools].iCocosFileIp params:dict success:^(id response) {

        NSString *state = [NSString stringWithFormat:@"%@", [response objectStringForKey:@"state"]];
        if ([state isEqualToString:@"0"]) {
            NSString *exist = [response objectStringForKey:@"exist"];
            /**
             *  注意这里需要换成真实服务器地址
             */
            if (exist == 0) { //不存在就需要发送请求
                NSString *vidUrl = [NSString stringWithFormat:@"%@file/up%@", [iCocosUrlOperationTools shareiCocosUrlOperationTools].iCocosFileUrl, [iCocosURLRequestExtension getURLRequestExtension]];
                NSMutableDictionary *params = [NSMutableDictionary dictionary];
                //            params[@"name:file"] = @""; //Content-Disposition: form-data; name="file"; filename="1.txt"
                params[@"is_blur"] = @0;
                params[@"need_mp4"] = @1;
                AFHTTPSessionManager *mger = [AFHTTPSessionManager manager];

                AFJSONResponseSerializer *response = [AFJSONResponseSerializer serializer];
                response.removesKeysWithNullValues = YES;
                manager.responseSerializer = response;

                manager.requestSerializer = [AFHTTPRequestSerializer serializer];//响应


                [mger.securityPolicy setAllowInvalidCertificates:YES];

                /** 上传视频 */
                [mger POST:vidUrl parameters:params constructingBodyWithBlock:^(id&lt;AFMultipartFormData&gt; formData) {

                    // 上传文件
                    NSDateFormatter *formatter = [[NSDateFormatter alloc] init];
                    formatter.dateFormat = @"yyyyMMddHHmmss";
                    NSString *str = [formatter stringFromDate:[NSDate date]];
                    NSString *fileName = [NSString stringWithFormat:@"%@.mov", str];

                    if (videoData != nil) {
                        [formData appendPartWithFileData:videoData name:@"file" fileName:fileName mimeType:@"video/quicktime"];
                    } else {

                    }

                } progress:^(NSProgress * _Nonnull uploadProgress) {

//                    iCocosLog(@"%@", uploadProgress);

                } success:^(NSURLSessionDataTask * _Nonnull task, id  _Nullable responseObject) {

                    NSString *state = [NSString stringWithFormat:@"%@", [responseObject objectStringForKey:@"state"]];
                    if ([state isEqualToString:@"0"]) {

                        NSDictionary *dataDic = [responseObject objectStringForKey:@"data"];

                        successUpload(dataDic);
                    }

                } failure:^(NSURLSessionDataTask * _Nullable task, NSError * _Nonnull error) {
                    iCocosLog(@"上传错误:%@", error);
                    failureUpload(error);
                }];

            } else {
                /**
                 *  已经上传
                 */
                NSDictionary *dataDic    = [response objectStringForKey:@"data"];
                NSString *file_url       = [NSString stringWithFormat:@"%@", [dataDic objectStringForKey:@"file_url"]];
                NSString *mp4_file_url       = [NSString stringWithFormat:@"%@", [dataDic objectStringForKey:@"mp4_file_url"]];

                NSUserDefaults *defaults = [NSUserDefaults standardUserDefaults];
                [defaults setValue:file_url forKey:@"video_url"];
                [defaults setValue:mp4_file_url forKey:@"mp4_file_url"];
                [defaults synchronize];

                successUpload(dataDic);
            }

        } else {
            successUpload(response);
        }
    } failure:^(NSError *error) { //上传错误
        failureUpload(error);
    }];
}
</code></pre>

<h4>上传MP4</h4>

<pre><code>+ (void)updateMP4Video:(NSURL *)url successUpload:(void (^)(id responseObject))successUpload failureUpload:(void (^)(NSError *error))failureUpload
{
    //保存数据
    //    NSUserDefaults *defaults =[NSUserDefaults standardUserDefaults];
    //    NSURL *url = [defaults URLForKey:@"RecordVideoUrl"];

    NSData *videoData = [NSData dataWithContentsOfURL:url];

    //   NSString *videoUrl = [iCocosUpLoadVideoTools upLoadVideoGetVideoUrlWithFileUrlInSandbox:url];

    //    NSString *strUrl = [NSString stringWithContentsOfURL:url usedEncoding:0 error:nil];

    //    //1:文件的32位MD5值
    //    NSString *strForEight = [iCocosFormatFileGetEight getStringWithEight:strUrl];
    //
    //    //2:文件的前8个字节的16位+文件的后8个字节的16位
    //    NSString *str32MD5 = [NSString getMd5_32Bit_String:strUrl];

    NSString *str32MD5 = [iCocosRandomSix getSixRandom];

    NSString *str64 = [NSString stringWithFormat:@"%@%@", str32MD5,str32MD5];

    AFHTTPSessionManager *manager = [AFHTTPSessionManager manager];
    manager.responseSerializer.acceptableContentTypes = [NSSet setWithObjects:@"text/html", nil];

    //    NSString *urlStrIF = [NSString stringWithFormat:@"%@file/exist%@", [iCocosUrlOperationTools shareiCocosUrlOperationTools].iCocosFileUrl, [iCocosURLRequestExtension getURLRequestExtension]];
    NSMutableDictionary *dict = [NSMutableDictionary dictionary];
    dict[@"file_md5"] = str64;
    dict[@"is_blur"] = 0;
    dict[@"file_size"] = @([iCocosGetSize fileSizeAtPath:[url absoluteString]]);
    dict[@"ext"] = @"mp4";

    /**
     *  超时时间
     */
    [manager.requestSerializer willChangeValueForKey:@"timeoutInterval"];
    manager.requestSerializer.timeoutInterval = 10.f;
    [manager.requestSerializer didChangeValueForKey:@"timeoutInterval"];

    /** 获取视频是否上传 */
    //    [manager POST:urlStrIF parameters:dict progress:nil success:^(NSURLSessionDataTask * _Nonnull task, id  _Nullable responseObject) {

    [iCocosAFNPOSTRequestData iCocos_POST_HostSecurity:@"file/exist" hostHeaderValue:[iCocosUrlOperationTools shareiCocosUrlOperationTools].iCocosFileHost firstRequestWithUrl:[iCocosUrlOperationTools shareiCocosUrlOperationTools].iCocosFileUrl secondRequestWithIp:[iCocosUrlOperationTools shareiCocosUrlOperationTools].iCocosFileIp params:dict success:^(id response) {

        NSString *state = [NSString stringWithFormat:@"%@", [response objectStringForKey:@"state"]];
        if ([state isEqualToString:@"0"]) {
            NSString *exist = [response objectStringForKey:@"exist"];
            /**
             *  注意这里需要换成真实服务器地址
             */
            if (exist == 0) { //不存在就需要发送请求
                NSString *vidUrl = [NSString stringWithFormat:@"%@file/up%@", [iCocosUrlOperationTools shareiCocosUrlOperationTools].iCocosFileUrl, [iCocosURLRequestExtension getURLRequestExtension]];
                NSMutableDictionary *params = [NSMutableDictionary dictionary];
                //            params[@"name:file"] = @""; //Content-Disposition: form-data; name="file"; filename="1.txt"
                params[@"is_blur"] = @0;
                params[@"need_mp4"] = @1;
                AFHTTPSessionManager *mger = [AFHTTPSessionManager manager];

                AFJSONResponseSerializer *response = [AFJSONResponseSerializer serializer];
                response.removesKeysWithNullValues = YES;
                manager.responseSerializer = response;

                manager.requestSerializer = [AFHTTPRequestSerializer serializer];//响应


                [mger.securityPolicy setAllowInvalidCertificates:YES];

                /** 上传视频 */
                [mger POST:vidUrl parameters:params constructingBodyWithBlock:^(id&lt;AFMultipartFormData&gt; formData) {

                    // 上传文件
                    NSDateFormatter *formatter = [[NSDateFormatter alloc] init];
                    formatter.dateFormat = @"yyyyMMddHHmmss";
                    NSString *str = [formatter stringFromDate:[NSDate date]];
                    NSString *fileName = [NSString stringWithFormat:@"%@.mp4", str];

                    if (videoData != nil) {
                        [formData appendPartWithFileData:videoData name:@"file" fileName:fileName mimeType:@"video/mp4"];
                    } else {

                    }

                } progress:^(NSProgress * _Nonnull uploadProgress) {


//                    iCocosLog(@"%@", uploadProgress);


                } success:^(NSURLSessionDataTask * _Nonnull task, id  _Nullable responseObject) {

                    NSString *state = [NSString stringWithFormat:@"%@", [responseObject objectStringForKey:@"state"]];
                    if ([state isEqualToString:@"0"]) {

                        NSDictionary *dataDic = [responseObject objectStringForKey:@"data"];

                        successUpload(dataDic);
                    }


                } failure:^(NSURLSessionDataTask * _Nullable task, NSError * _Nonnull error) {
                    iCocosLog(@"上传错误:%@", error);
                    failureUpload(error);
                }];

            } else {

                /**
                 *  已经上传
                 */
                NSDictionary *dataDic    = [response objectStringForKey:@"data"];
                NSString *file_url       = [NSString stringWithFormat:@"%@", [dataDic objectStringForKey:@"file_url"]];
                NSString *mp4_file_url       = [NSString stringWithFormat:@"%@", [dataDic objectStringForKey:@"mp4_file_url"]];

                NSUserDefaults *defaults = [NSUserDefaults standardUserDefaults];
                [defaults setValue:file_url forKey:@"video_url"];
                [defaults setValue:mp4_file_url forKey:@"mp4_file_url"];
                [defaults synchronize];

                successUpload(dataDic);
            }

        } else {
            successUpload(response);
        }
    } failure:^(NSError *error) { //上传错误
        failureUpload(error);
    }];
}
</code></pre>

<h2>33:获取视频帧图</h2>

<h4>同步获取帧图</h4>

<p>同步获取中间帧，需要指定哪个时间点的帧，当获取到以后，返回来的图片对象是CFRetained过的，需要外面手动CGImageRelease一下，释放内存。通过AVAsset来访问具体的视频资源，然后通过AVAssetImageGenerator图片生成器来生成某个帧图片：
    // Get the video&rsquo;s center frame as video poster image
    - (UIImage <em>)frameImageFromVideoURL:(NSURL </em>)videoURL {
      // result
      UIImage *image = nil;</p>

<pre><code>  // AVAssetImageGenerator
  AVAsset *asset = [AVAsset assetWithURL:videoURL];
  AVAssetImageGenerator *imageGenerator = [[AVAssetImageGenerator alloc] initWithAsset:asset];
  imageGenerator.appliesPreferredTrackTransform = YES;

  // calculate the midpoint time of video
  Float64 duration = CMTimeGetSeconds([asset duration]);
  // 取某个帧的时间，参数一表示哪个时间（秒），参数二表示每秒多少帧
  // 通常来说，600是一个常用的公共参数，苹果有说明:
  // 24 frames per second (fps) for film, 30 fps for NTSC (used for TV in North America and
  // Japan), and 25 fps for PAL (used for TV in Europe).
  // Using a timescale of 600, you can exactly represent any number of frames in these systems
  CMTime midpoint = CMTimeMakeWithSeconds(duration / 2.0, 600);

  // get the image from
  NSError *error = nil;
  CMTime actualTime;
  // Returns a CFRetained CGImageRef for an asset at or near the specified time.
  // So we should mannully release it
  CGImageRef centerFrameImage = [imageGenerator copyCGImageAtTime:midpoint
                                                       actualTime:&amp;actualTime
                                                            error:&amp;error];

  if (centerFrameImage != NULL) {
    image = [[UIImage alloc] initWithCGImage:centerFrameImage];
    // Release the CFRetained image
    CGImageRelease(centerFrameImage);
  }

  return image;
}
</code></pre>

<h4>异步获取帧图</h4>

<p>异步获取某个帧的图片，与同步相比，只是调用API不同，可以传多个时间点，然后计算出实际的时间并返回图片，但是返回的图片不需要我们手动再release了。有可能取不到图片，所以还需要判断是否是AVAssetImageGeneratorSucceeded，是才转换图片：</p>

<pre><code>// 异步获取帧图片，可以一次获取多帧图片
- (void)centerFrameImageWithVideoURL:(NSURL *)videoURL completion:(void (^)(UIImage *image))completion {
  // AVAssetImageGenerator
  AVAsset *asset = [AVAsset assetWithURL:videoURL];
  AVAssetImageGenerator *imageGenerator = [[AVAssetImageGenerator alloc] initWithAsset:asset];
  imageGenerator.appliesPreferredTrackTransform = YES;

  // calculate the midpoint time of video
  Float64 duration = CMTimeGetSeconds([asset duration]);
  // 取某个帧的时间，参数一表示哪个时间（秒），参数二表示每秒多少帧
  // 通常来说，600是一个常用的公共参数，苹果有说明:
  // 24 frames per second (fps) for film, 30 fps for NTSC (used for TV in North America and
  // Japan), and 25 fps for PAL (used for TV in Europe).
  // Using a timescale of 600, you can exactly represent any number of frames in these systems
  CMTime midpoint = CMTimeMakeWithSeconds(duration / 2.0, 600);

  // 异步获取多帧图片
  NSValue *midTime = [NSValue valueWithCMTime:midpoint];
  [imageGenerator generateCGImagesAsynchronouslyForTimes:@[midTime] completionHandler:^(CMTime requestedTime, CGImageRef  _Nullable image, CMTime actualTime, AVAssetImageGeneratorResult result, NSError * _Nullable error) {
    if (result == AVAssetImageGeneratorSucceeded &amp;&amp; image != NULL) {
      UIImage *centerFrameImage = [[UIImage alloc] initWithCGImage:image];
      dispatch_async(dispatch_get_main_queue(), ^{
        if (completion) {
          completion(centerFrameImage);
        }
      });
    } else {
      dispatch_async(dispatch_get_main_queue(), ^{
        if (completion) {
          completion(nil);
        }
      });
    }
  }];
}
</code></pre>

<h2>34:压缩并导出视频</h2>

<p>压缩视频是因为视频分辨率过高所生成的视频的大小太大了，对于移动设备来说，内存是不能太大的，如果不支持分片上传到服务器，或者不支持流上传、文件上传，而只能支持表单上传，那么必须要限制大小，压缩视频。</p>

<p>就像我们在使用某平台的视频的上传的时候，到现在还没有支持流上传，也不支持文件上传，只支持表单上传，导致视频大一点就会闪退。流上传是上传成功了，但是人家后台不识别，这一次让某平台坑坏了。直接用file上传，也传过去了，上传进度100%了，但是人家那边还是作为失败处理，无奈！</p>

<blockquote><p>言归正传，压缩、导出视频，需要通过AVAssetExportSession来实现，我们需要指定一个preset，并判断是否支持这个preset，只有支持才能使用。</p></blockquote>

<p>我们这里设置的preset为AVAssetExportPreset640x480，属于压缩得比较厉害的了，这需要根据服务器视频上传的支持程度而选择的。然后通过调用异步压缩并导出视频：</p>

<pre><code>- (void)compressVideoWithVideoURL:(NSURL *)videoURL
                        savedName:(NSString *)savedName
                       completion:(void (^)(NSString *savedPath))completion {
  // Accessing video by URL
  AVURLAsset *videoAsset = [[AVURLAsset alloc] initWithURL:videoURL options:nil];

  // Find compatible presets by video asset.
  NSArray *presets = [AVAssetExportSession exportPresetsCompatibleWithAsset:videoAsset];

  // Begin to compress video
  // Now we just compress to low resolution if it supports
  // If you need to upload to the server, but server does't support to upload by streaming,
  // You can compress the resolution to lower. Or you can support more higher resolution.
  if ([presets containsObject:AVAssetExportPreset640x480]) {
    AVAssetExportSession *session = [[AVAssetExportSession alloc] initWithAsset:videoAsset  presetName:AVAssetExportPreset640x480];

    NSString *doc = [NSHomeDirectory() stringByAppendingPathComponent:@"Documents"];
    NSString *folder = [doc stringByAppendingPathComponent:@"HYBVideos"];
    BOOL isDir = NO;
    BOOL isExist = [[NSFileManager defaultManager] fileExistsAtPath:folder isDirectory:&amp;isDir];
    if (!isExist || (isExist &amp;&amp; !isDir)) {
      NSError *error = nil;
      [[NSFileManager defaultManager] createDirectoryAtPath:folder
                                withIntermediateDirectories:YES
                                                 attributes:nil
                                                      error:&amp;error];
      if (error == nil) {
        NSLog(@"目录创建成功");
      } else {
        NSLog(@"目录创建失败");
      }
    }

    NSString *outPutPath = [folder stringByAppendingPathComponent:savedName];
    session.outputURL = [NSURL fileURLWithPath:outPutPath];

    // Optimize for network use.
    session.shouldOptimizeForNetworkUse = true;

    NSArray *supportedTypeArray = session.supportedFileTypes;
    if ([supportedTypeArray containsObject:AVFileTypeMPEG4]) {
      session.outputFileType = AVFileTypeMPEG4;
    } else if (supportedTypeArray.count == 0) {
      NSLog(@"No supported file types");
      return;
    } else {
      session.outputFileType = [supportedTypeArray objectAtIndex:0];
    }

    // Begin to export video to the output path asynchronously.
    [session exportAsynchronouslyWithCompletionHandler:^{
      if ([session status] == AVAssetExportSessionStatusCompleted) {
        dispatch_async(dispatch_get_main_queue(), ^{
          if (completion) {
            completion([session.outputURL path]);
          }
        });
      } else {
        dispatch_async(dispatch_get_main_queue(), ^{
          if (completion) {
            completion(nil);
          }
        });
      }
    }];
  }
}
</code></pre>

<h2>35:保存视频到相册</h2>

<p>写入相册可以通过ALAssetsLibrary类来实现，它提供了写入相册的API，异步写入，完成是要回到主线程更新UI：</p>

<pre><code>NSURL *videoURL = [info objectForKey:UIImagePickerControllerMediaURL];
ALAssetsLibrary *library = [[ALAssetsLibrary alloc] init];
dispatch_async(dispatch_get_global_queue(0, 0), ^{
  // 判断相册是否兼容视频，兼容才能保存到相册
  if ([library videoAtPathIsCompatibleWithSavedPhotosAlbum:videoURL]) {
    [library writeVideoAtPathToSavedPhotosAlbum:videoURL completionBlock:^(NSURL *assetURL, NSError *error) {
      dispatch_async(dispatch_get_main_queue(), ^{
        // 写入相册
        if (error == nil) {
            NSLog(@"写入相册成功");
        } else {
           NSLog(@"写入相册失败");
        }
      }
    }];
  }
});
</code></pre>

<h2>36:获取当前最顶层的ViewController</h2>

<pre><code>    - (UIViewController *)topViewController {
    UIViewController *resultVC;
    resultVC = [self _topViewController:[[UIApplication sharedApplication].keyWindow rootViewController]];
    while (resultVC.presentedViewController) {
        resultVC = [self _topViewController:resultVC.presentedViewController];
    }
    return resultVC;
}

- (UIViewController *)_topViewController:(UIViewController *)vc {
    if ([vc isKindOfClass:[UINavigationController class]]) {
        return [self _topViewController:[(UINavigationController *)vc topViewController]];
    } else if ([vc isKindOfClass:[UITabBarController class]]) {
        return [self _topViewController:[(UITabBarController *)vc selectedViewController]];
    } else {
        return vc;
    }
    return nil;
}
</code></pre>

<p>使用方法</p>

<pre><code>UIViewController *topmostVC = [self topViewController];
</code></pre>

<h2>37:数组拆分</h2>

<pre><code>/**
 *  数组拆分
 *
 *  @param array   数组
 *  @param subSize 大小
 *
 *  @return 多个数组
 */
- (NSMutableArray *)splitArray: (NSArray *)array withSubSize : (int)subSize{
    //  数组将被拆分成指定长度数组的个数
    unsigned long count = array.count % subSize == 0 ? (array.count / subSize) : (array.count / subSize + 1);
    //  用来保存指定长度数组的可变数组对象
    NSMutableArray *arr = [[NSMutableArray alloc] init];

    //利用总个数进行循环，将指定长度的元素加入数组
    for (int i = 0; i &lt; count; i ++) {
        //数组下标
        int index = i * subSize;
        //保存拆分的固定长度的数组元素的可变数组
        NSMutableArray *arr1 = [[NSMutableArray alloc] init];
        //移除子数组的所有元素
        [arr1 removeAllObjects];

        int j = index;
        //将数组下标乘以1、2、3，得到拆分时数组的最大下标值，但最大不能超过数组的总大小
        while (j &lt; subSize*(i + 1) &amp;&amp; j &lt; array.count) {
            [arr1 addObject:[array objectAtIndexCheck:j]];
            j += 1;
        }
        //将子数组添加到保存子数组的数组中
        [arr addObject:[arr1 copy]];  
    }  

    return arr;
}
</code></pre>

<h2>38.图片压缩</h2>

<p>用法：UIImage *yourImage= [self imageWithImageSimple:image scaledToSize:CGSizeMake(210.0, 210.0)];</p>

<pre><code>//压缩图片
- (UIImage*)imageWithImageSimple:(UIImage*)image scaledToSize:(CGSize)newSize

{

// Create a graphics image context

UIGraphicsBeginImageContext(newSize);

// Tell the old image to draw in this newcontext, with the desired

// new size

[image drawInRect:CGRectMake(0,0,newSize.width,newSize.height)];

// Get the new image from the context

UIImage* newImage = UIGraphicsGetImageFromCurrentImageContext();

// End the context

UIGraphicsEndImageContext();

// Return the new image.

return newImage;

}
</code></pre>

<h2>39.释放Timer宏</h2>

<pre><code>/*
 * 判断这个Timer不为nil则停止并释放
 * 如果不先停止可能会导致crash
 */
#define WVSAFA_DELETE_TIMER(timer) { \
    if (timer != nil) { \
        [timer invalidate]; \
        [timer release]; \
        timer = nil; \
    } \
}
</code></pre>

<h3>获取某个view所在的控制器</h3>

<pre><code>- (UIViewController *)viewController
{
  UIViewController *viewController = nil;  
  UIResponder *next = self.nextResponder;
  while (next)
  {
    if ([next isKindOfClass:[UIViewController class]])
    {
      viewController = (UIViewController *)next;      
      break;    
    }    
    next = next.nextResponder;  
  } 
    return viewController;
}
</code></pre>

<h3>两种方法删除NSUserDefaults所有记录</h3>

<pre><code>//方法一
NSString *appDomain = [[NSBundle mainBundle] bundleIdentifier];
[[NSUserDefaults standardUserDefaults] removePersistentDomainForName:appDomain];


//方法二
- (void)resetDefaults
{
    NSUserDefaults * defs = [NSUserDefaults standardUserDefaults];
    NSDictionary * dict = [defs dictionaryRepresentation];
    for (id key in dict)
    {
        [defs removeObjectForKey:key];
    }
    [defs synchronize];
}
</code></pre>

<h3>打印系统所有已注册的字体名称</h3>

<pre><code>#pragma mark - 打印系统所有已注册的字体名称
void enumerateFonts()
{
    for(NSString *familyName in [UIFont familyNames])
   {
        NSLog(@"%@",familyName);               
        NSArray *fontNames = [UIFont fontNamesForFamilyName:familyName];       
        for(NSString *fontName in fontNames)
       {
            NSLog(@"\t|- %@",fontName);
       }
   }
}
</code></pre>

<h3>获取图片某一点的颜色</h3>

<pre><code>- (UIColor*) getPixelColorAtLocation:(CGPoint)point inImage:(UIImage *)image
{

    UIColor* color = nil;
    CGImageRef inImage = image.CGImage;
    CGContextRef cgctx = [self createARGBBitmapContextFromImage:inImage];

    if (cgctx == NULL) {
        return nil; /* error */
    }
    size_t w = CGImageGetWidth(inImage);
    size_t h = CGImageGetHeight(inImage);
    CGRect rect = {0,0,w,}};

    CGContextDrawImage(cgctx, rect, inImage);
    unsigned char* data = CGBitmapContextGetData (cgctx);
    if (data != NULL) {
        int offset = 4*((w*round(point.y))+round(point.x));
        int alpha =  data[offset];
        int red = data[offset+1];
        int green = data[offset+2];
        int blue = data[offset+3];
        color = [UIColor colorWithRed:(red/255.0f) green:(green/255.0f) blue:
                 (blue/255.0f) alpha:(alpha/255.0f)];
    }
    CGContextRelease(cgctx);
    if (data) {
        free(data);
    }
    return color;
}
</code></pre>

<h3>字符串反转</h3>

<pre><code>第一种：
- (NSString *)reverseWordsInString:(NSString *)str
{    
    NSMutableString *newString = [[NSMutableString alloc] initWithCapacity:str.length];
    for (NSInteger i = str.length - 1; i &gt;= 0 ; i --)
    {
        unichar ch = [str characterAtIndex:i];       
        [newString appendFormat:@"%c", ch];    
    }    
     return newString;
}

//第二种：
- (NSString*)reverseWordsInString:(NSString*)str
{    
     NSMutableString *reverString = [NSMutableString stringWithCapacity:str.length];    
     [str enumerateSubstringsInRange:NSMakeRange(0, str.length) options:NSStringEnumerationReverse | NSStringEnumerationByComposedCharacterSequences  usingBlock:^(NSString *substring, NSRange substringRange, NSRange enclosingRange, BOOL *stop) { 
          [reverString appendString:substring];                         
      }];    
     return reverString;
}
</code></pre>

<h3>禁止锁屏，</h3>

<p>默认情况下，当设备一段时间没有触控动作时，iOS会锁住屏幕。但有一些应用是不需要锁屏的，比如视频播放器。</p>

<pre><code>[UIApplication sharedApplication].idleTimerDisabled = YES;
或
[[UIApplication sharedApplication] setIdleTimerDisabled:YES];
</code></pre>

<h3>模态推出透明界面</h3>

<pre><code>UIViewController *vc = [[UIViewController alloc] init];
UINavigationController *na = [[UINavigationController alloc] initWithRootViewController:vc];

if ([[[UIDevice currentDevice] systemVersion] floatValue] &gt;= 8.0)
{
     na.modalPresentationStyle = UIModalPresentationOverCurrentContext;
}
else
{
     self.modalPresentationStyle=UIModalPresentationCurrentContext;
}

[self presentViewController:na animated:YES completion:nil];
</code></pre>

<h3>Xcode调试不显示内存占用</h3>

<pre><code>editSCheme  里面有个选项叫叫做enable zoombie Objects  取消选中
</code></pre>

<h3>显示隐藏文件</h3>

<pre><code>//显示
defaults write com.apple.finder AppleShowAllFiles -bool true
killall Finder

//隐藏
defaults write com.apple.finder AppleShowAllFiles -bool false
killall Finder
</code></pre>

<h3>iOS跳转到App Store下载应用评分</h3>

<pre><code>[[UIApplication sharedApplication] openURL:[NSURL URLWithString:@"itms-apps://itunes.apple.com/WebObjects/MZStore.woa/wa/viewContentsUserReviews?type=Purple+Software&amp;id=APPID"]];
</code></pre>

<h3>iOS 获取汉字的拼音</h3>

<pre><code>+ (NSString *)transform:(NSString *)chinese
{    
    //将NSString装换成NSMutableString 
    NSMutableString *pinyin = [chinese mutableCopy];    
    //将汉字转换为拼音(带音标)    
    CFStringTransform((__bridge CFMutableStringRef)pinyin, NULL, kCFStringTransformMandarinLatin, NO);    
    NSLog(@"%@", pinyin);    
    //去掉拼音的音标    
    CFStringTransform((__bridge CFMutableStringRef)pinyin, NULL, kCFStringTransformStripCombiningMarks, NO);    
    NSLog(@"%@", pinyin);    
    //返回最近结果    
    return pinyin;
 }
</code></pre>

<h3>手动更改iOS状态栏的颜色</h3>

<pre><code>- (void)setStatusBarBackgroundColor:(UIColor *)color
{
    UIView *statusBar = [[[UIApplication sharedApplication] valueForKey:@"statusBarWindow"] valueForKey:@"statusBar"];

    if ([statusBar respondsToSelector:@selector(setBackgroundColor:)])
    {
        statusBar.backgroundColor = color;    
    }
}
</code></pre>

<h3>判断当前ViewController是push还是present的方式显示的</h3>

<pre><code>NSArray *viewcontrollers=self.navigationController.viewControllers;

if (viewcontrollers.count &gt; 1)
{
    if ([viewcontrollers objectAtIndex:viewcontrollers.count - 1] == self)
    {
        //push方式
       [self.navigationController popViewControllerAnimated:YES];
    }
}
else
{
    //present方式
    [self dismissViewControllerAnimated:YES completion:nil];
}
</code></pre>

<h3>获取实际使用的LaunchImage图片</h3>

<pre><code>- (NSString *)getLaunchImageName
{
    CGSize viewSize = self.window.bounds.size;
    // 竖屏    
    NSString *viewOrientation = @"Portrait";  
    NSString *launchImageName = nil;    
    NSArray* imagesDict = [[[NSBundle mainBundle] infoDictionary] valueForKey:@"UILaunchImages"];
    for (NSDictionary* dict in imagesDict)
    {
        CGSize imageSize = CGSizeFromString(dict[@"UILaunchImageSize"]);
        if (CGSizeEqualToSize(imageSize, viewSize) &amp;&amp; [viewOrientation isEqualToString:dict[@"UILaunchImageOrientation"]])
        {
            launchImageName = dict[@"UILaunchImageName"];        
        }    
    }    
    return launchImageName;
}
</code></pre>

<h3>iOS在当前屏幕获取第一响应</h3>

<pre><code>UIWindow * keyWindow = [[UIApplication sharedApplication] keyWindow];
UIView * firstResponder = [keyWindow performSelector:@selector(firstResponder)];
</code></pre>

<h3>判断对象是否遵循了某协议</h3>

<pre><code>if ([self.selectedController conformsToProtocol:@protocol(RefreshPtotocol)])
{
     [self.selectedController performSelector:@selector(onTriggerRefresh)];
}
</code></pre>

<h3>判断view是不是指定视图的子视图</h3>

<pre><code>BOOL isView = [textView isDescendantOfView:self.view];
</code></pre>

<h3>NSArray 快速求总和 最大值 最小值 和 平均值</h3>

<pre><code>NSArray *array = [NSArray arrayWithObjects:@"2.0", @"2.3", @"3.0", @"4.0", @"10", nil];
CGFloat sum = [[array valueForKeyPath:@"@sum.floatValue"] floatValue];
CGFloat avg = [[array valueForKeyPath:@"@avg.floatValue"] floatValue];
CGFloat max =[[array valueForKeyPath:@"@max.floatValue"] floatValue];
CGFloat min =[[array valueForKeyPath:@"@min.floatValue"] floatValue];
NSLog(@"%f\n%f\n%f\n%f",sum,avg,max,min);
</code></pre>

<h3>修改UITextField中Placeholder的文字颜色</h3>

<pre><code>[textField setValue:[UIColor redColor] forKeyPath:@"_placeholderLabel.textColor"];
</code></pre>

<h3>关于NSDateFormatter的格式</h3>

<pre><code>G: 公元时代，例如AD公元
yy: 年的后2位
yyyy: 完整年
MM: 月，显示为1-12
MMM: 月，显示为英文月份简写,如 Jan
MMMM: 月，显示为英文月份全称，如 Janualy
dd: 日，2位数表示，如02
d: 日，1-2位显示，如 2
EEE: 简写星期几，如Sun
EEEE: 全写星期几，如Sunday
aa: 上下午，AM/PM
H: 时，24小时制，0-23
K：时，12小时制，0-11
m: 分，1-2位
mm: 分，2位
s: 秒，1-2位
ss: 秒，2位
S: 毫秒
</code></pre>

<h3>获取一个类的所有子类</h3>

<pre><code>+ (NSArray *) allSubclasses
{
    Class myClass = [self class];
    NSMutableArray *mySubclasses = [NSMutableArray array];
    unsigned int numOfClasses;
    Class *classes = objc_copyClassList(&amp;numOfClasses;);
    for (unsigned int ci = 0; ci 
}
</code></pre>

<h3>监测IOS设备是否设置了代理，需要CFNetwork.framework</h3>

<pre><code>NSDictionary *proxySettings = (__bridge NSDictionary *)(CFNetworkCopySystemProxySettings());
NSArray *proxies = (__bridge NSArray *)(CFNetworkCopyProxiesForURL((__bridge CFURLRef _Nonnull)([NSURL URLWithString:@"http://www.baidu.com"]), (__bridge CFDictionaryRef _Nonnull)(proxySettings)));
NSLog(@"\n%@",proxies);

NSDictionary *settings = proxies[0];
NSLog(@"%@",[settings objectForKey:(NSString *)kCFProxyHostNameKey]);
NSLog(@"%@",[settings objectForKey:(NSString *)kCFProxyPortNumberKey]);
NSLog(@"%@",[settings objectForKey:(NSString *)kCFProxyTypeKey]);

if ([[settings objectForKey:(NSString *)kCFProxyTypeKey] isEqualToString:@"kCFProxyTypeNone"])
{
     NSLog(@"没代理");
}
else
{
     NSLog(@"设置了代理");
}
</code></pre>

<h3>阿拉伯数字转中文格式</h3>

<pre><code>+(NSString *)translation:(NSString *)arebic
{  
    NSString *str = arebic;
    NSArray *arabic_numerals = @[@"1",@"2",@"3",@"4",@"5",@"6",@"7",@"8",@"9",@"0"];
    NSArray *chinese_numerals = @[@"一",@"二",@"三",@"四",@"五",@"六",@"七",@"八",@"九",@"零"];
    NSArray *digits = @[@"个",@"十",@"百",@"千",@"万",@"十",@"百",@"千",@"亿",@"十",@"百",@"千",@"兆"];
    NSDictionary *dictionary = [NSDictionary dictionaryWithObjects:chinese_numerals forKeys:arabic_numerals];

    NSMutableArray *sums = [NSMutableArray array];
    for (int i = 0; i 

}
</code></pre>

<h3>Base64编码与NSString对象或NSData对象的转换</h3>

<pre><code>// Create NSData object
NSData *nsdata = [@"iOS Developer Tips encoded in Base64"
  dataUsingEncoding:NSUTF8StringEncoding];

// Get NSString from NSData object in Base64
NSString *base64Encoded = [nsdata base64EncodedStringWithOptions:0];

// Print the Base64 encoded string
NSLog(@"Encoded: %@", base64Encoded);

// Let's go the other way...

// NSData from the Base64 encoded str
NSData *nsdataFromBase64String = [[NSData alloc]
  initWithBase64EncodedString:base64Encoded options:0];

// Decoded NSString from the NSData
NSString *base64Decoded = [[NSString alloc]
  initWithData:nsdataFromBase64String encoding:NSUTF8StringEncoding];
NSLog(@"Decoded: %@", base64Decoded);
</code></pre>

<h3>取消UICollectionView的隐式动画</h3>

<pre><code>UICollectionView在reloadItems的时候，默认会附加一个隐式的fade动画，有时候很讨厌，尤其是当你的cell是复合cell的情况下(比如cell使用到了UIStackView)。
</code></pre>

<h3>下面几种方法都可以帮你去除这些动画</h3>

<pre><code>//方法一
[UIView performWithoutAnimation:^{
    [collectionView reloadItemsAtIndexPaths:@[[NSIndexPath indexPathForItem:index inSection:0]]];
}];

//方法二
[UIView animateWithDuration:0 animations:^{
    [collectionView performBatchUpdates:^{
        [collectionView reloadItemsAtIndexPaths:@[[NSIndexPath indexPathForItem:index inSection:0]]];
    } completion:nil];
}];

//方法三
[UIView setAnimationsEnabled:NO];
[self.trackPanel performBatchUpdates:^{
    [collectionView reloadItemsAtIndexPaths:@[[NSIndexPath indexPathForItem:index inSection:0]]];
} completion:^(BOOL finished) {
    [UIView setAnimationsEnabled:YES];
}];
</code></pre>

<h3>让Xcode的控制台支持LLDB类型的打印</h3>

<pre><code>打开终端输入三条命令:
touch ~/.lldbinit
echo display @import UIKit &gt;&gt; ~/.lldbinit
echo target stop-hook add -o \"target stop-hook disable\" &gt;&gt; ~/.lldbinit
</code></pre>

<h3>CocoaPods pod install/pod update更新慢的问题</h3>

<pre><code>pod install --verbose --no-repo-update 
pod update --verbose --no-repo-update
</code></pre>

<p>如果不加后面的参数，默认会升级CocoaPods的spec仓库，加一个参数可以省略这一步，然后速度就会提升不少</p>

<h3>UIImage 占用内存大小</h3>

<pre><code>UIImage *image = [UIImage imageNamed:@"aa"];
NSUInteger size  = CGImageGetHeight(image.CGImage) * CGImageGetBytesPerRow(image.CGImage);
</code></pre>

<h3>GCD timer定时器</h3>

<pre><code>dispatch_queue_t queue = dispatch_get_global_queue(DISPATCH_QUEUE_PRIORITY_DEFAULT, 0);
dispatch_source_t timer = dispatch_source_create(DISPATCH_SOURCE_TYPE_TIMER, 0, 0,queue);
dispatch_source_set_timer(timer,dispatch_walltime(NULL, 0),1.0*NSEC_PER_SEC, 0); //每秒执行
dispatch_source_set_event_handler(timer, ^{
    //@"倒计时结束，关闭"
    dispatch_source_cancel(timer); 
    dispatch_async(dispatch_get_main_queue(), ^{

    });
});
dispatch_resume(timer);
</code></pre>

<h3>图片上绘制文字 写一个UIImage的category</h3>

<pre><code>- (UIImage *)imageWithTitle:(NSString *)title fontSize:(CGFloat)fontSize
{
    //画布大小
    CGSize size=CGSizeMake(self.size.width,self.size.height);
    //创建一个基于位图的上下文
    UIGraphicsBeginImageContextWithOptions(size,NO,0.0);//opaque:NO  scale:0.0

    [self drawAtPoint:CGPointMake(0.0,0.0)];

    //文字居中显示在画布上
    NSMutableParagraphStyle* paragraphStyle = [[NSParagraphStyle defaultParagraphStyle] mutableCopy];
    paragraphStyle.lineBreakMode = NSLineBreakByCharWrapping;
    paragraphStyle.alignment=NSTextAlignmentCenter;//文字居中

    //计算文字所占的size,文字居中显示在画布上
    CGSize sizeText=[title boundingRectWithSize:self.size options:NSStringDrawingUsesLineFragmentOrigin
                                     attributes:@{NSFontAttributeName:[UIFont systemFontOfSize:fontSize]}context:nil].size;
    CGFloat width = self.size.width;
    CGFloat height = self.size.height;

    CGRect rect = CGRectMake((width-sizeText.width)/2, (height-sizeText.height)/2, sizeText.width, sizeText.height);
    //绘制文字
    [title drawInRect:rect withAttributes:@{ NSFontAttributeName:[UIFont systemFontOfSize:fontSize],NSForegroundColorAttributeName:[ UIColor whiteColor],NSParagraphStyleAttributeName:paragraphStyle}];

    //返回绘制的新图形
    UIImage *newImage= UIGraphicsGetImageFromCurrentImageContext();
    UIGraphicsEndImageContext();
    return newImage;
}
</code></pre>

<h3>查找一个视图的所有子视图</h3>

<pre><code>- (NSMutableArray *)allSubViewsForView:(UIView *)view
{
    NSMutableArray *array = [NSMutableArray arrayWithCapacity:0];
    for (UIView *subView in view.subviews)
    {
        [array addObject:subView];
        if (subView.subviews.count &gt; 0)
        {
            [array addObjectsFromArray:[self allSubViewsForView:subView]];
        }
    }
    return array;
}
</code></pre>

<h3>计算文件大小</h3>

<pre><code>//文件大小
- (long long)fileSizeAtPath:(NSString *)path
{
    NSFileManager *fileManager = [NSFileManager defaultManager];

    if ([fileManager fileExistsAtPath:path])
    {
        long long size = [fileManager attributesOfItemAtPath:path error:nil].fileSize;
        return size;
    }

    return 0;
}

//文件夹大小
- (long long)folderSizeAtPath:(NSString *)path
{
    NSFileManager *fileManager = [NSFileManager defaultManager];

    long long folderSize = 0;

    if ([fileManager fileExistsAtPath:path])
    {
        NSArray *childerFiles = [fileManager subpathsAtPath:path];
        for (NSString *fileName in childerFiles)
        {
            NSString *fileAbsolutePath = [path stringByAppendingPathComponent:fileName];
            if ([fileManager fileExistsAtPath:fileAbsolutePath])
            {
                long long size = [fileManager attributesOfItemAtPath:fileAbsolutePath error:nil].fileSize;
                folderSize += size;
            }
        }
    }

    return folderSize;
}
</code></pre>

<h3>UIView设置部分圆角</h3>

<p>你是不是也遇到过这样的问题，一个button或者label，只要右边的两个角圆角，或者只要一个圆角。该怎么办呢。这就需要图层蒙版来帮助我们了</p>

<pre><code>CGRect rect = view.bounds;
CGSize radio = CGSizeMake(30, 30);//圆角尺寸
UIRectCorner corner = UIRectCornerTopLeft|UIRectCornerTopRight;//这只圆角位置
UIBezierPath *path = [UIBezierPath bezierPathWithRoundedRect:rect byRoundingCorners:corner cornerRadii:radio];
CAShapeLayer *masklayer = [[CAShapeLayer alloc]init];//创建shapelayer
masklayer.frame = view.bounds;
masklayer.path = path.CGPath;//设置路径
view.layer.mask = masklayer;
</code></pre>

<h3>取上整与取下整</h3>

<pre><code>floor(x),有时候也写做Floor(x)，其功能是“下取整”，即取不大于x的最大整数 例如：
x=3.14，floor(x)=3
y=9.99999，floor(y)=9

与floor函数对应的是ceil函数，即上取整函数。

ceil函数的作用是求不小于给定实数的最小整数。
ceil(2)=ceil(1.2)=cei(1.5)=2.00

floor函数与ceil函数的返回值均为double型
</code></pre>

<h3>计算字符串字符长度，一个汉字算两个字符</h3>

<pre><code>//方法一：
- (int)convertToInt:(NSString*)strtemp
{
    int strlength = 0;
    char* p = (char*)[strtemp cStringUsingEncoding:NSUnicodeStringEncoding];
    for (int i=0 ; i
}
</code></pre>

<h3>给UIView设置图片</h3>

<pre><code>UIImage *image = [UIImage imageNamed:@"image"];
self.MYView.layer.contents = (__bridge id _Nullable)(image.CGImage);
self.MYView.layer.contentsRect = CGRectMake(0, 0, 0.5, 0.5);
</code></pre>

<h3>防止scrollView手势覆盖侧滑手势</h3>

<pre><code>[scrollView.panGestureRecognizerrequireGestureRecognizerToFail:self.navigationController.interactivePopGestureRecognizer];
</code></pre>

<h3>去掉导航栏返回的back标题</h3>

<pre><code>[[UIBarButtonItemappearance]setBackButtonTitlePositionAdjustment:UIOffsetMake(0, -60)forBarMetrics:UIBarMetricsDefault];
</code></pre>

<h3>字符串中是否含有中文</h3>

<pre><code>+ (BOOL)checkIsChinese:(NSString *)string
{
    for (int i=0; i
}
</code></pre>

<h3>dispatch_group的使用</h3>

<pre><code> dispatch_group_t dispatchGroup = dispatch_group_create();
    dispatch_group_enter(dispatchGroup);
    dispatch_after(dispatch_time(DISPATCH_TIME_NOW, (int64_t)(1 * NSEC_PER_SEC)), dispatch_get_main_queue(), ^{
        NSLog(@"第一个请求完成");
        dispatch_group_leave(dispatchGroup);
    });

    dispatch_group_enter(dispatchGroup);

    dispatch_after(dispatch_time(DISPATCH_TIME_NOW, (int64_t)(10 * NSEC_PER_SEC)), dispatch_get_main_queue(), ^{
        NSLog(@"第二个请求完成");
        dispatch_group_leave(dispatchGroup);
    });

    dispatch_group_notify(dispatchGroup, dispatch_get_main_queue(), ^(){
        NSLog(@"请求完成");
    });
</code></pre>

<h3>UITextField每四位加一个空格,实现代理</h3>

<pre><code>- (BOOL)textField:(UITextField *)textField shouldChangeCharactersInRange:(NSRange)range replacementString:(NSString *)string
{
    // 四位加一个空格
    if ([string isEqualToString:@""])
    {
        // 删除字符
        if ((textField.text.length - 2) % 5 == 0)
        {
            textField.text = [textField.text substringToIndex:textField.text.length - 1];
        }
        return YES;
    }
    else
    {
        if (textField.text.length % 5 == 0)
        {
            textField.text = [NSString stringWithFormat:@"%@ ", textField.text];
        }
    }
    return YES;
}
</code></pre>

<h3>获取私有属性和成员变量 #import</h3>

<pre><code>//获取私有属性 比如设置UIDatePicker的字体颜色
- (void)setTextColor
{
    //获取所有的属性，去查看有没有对应的属性
    unsigned int count = 0;
    objc_property_t *propertys = class_copyPropertyList([UIDatePicker class], &amp;count);
    for(int i = 0;i 


//获得成员变量 比如修改UIAlertAction的按钮字体颜色
    unsigned int count = 0;
    Ivar *ivars = class_copyIvarList([UIAlertAction class], &amp;count);
    for(int i =0;i 
</code></pre>

<h3>获取手机安装的应用</h3>

<pre><code>Class c =NSClassFromString(@"LSApplicationWorkspace");
id s = [(id)c performSelector:NSSelectorFromString(@"defaultWorkspace")];
NSArray *array = [s performSelector:NSSelectorFromString(@"allInstalledApplications")];
for (id item in array)
{
    NSLog(@"%@",[item performSelector:NSSelectorFromString(@"applicationIdentifier")]);
    //NSLog(@"%@",[item performSelector:NSSelectorFromString(@"bundleIdentifier")]);
    NSLog(@"%@",[item performSelector:NSSelectorFromString(@"bundleVersion")]);
    NSLog(@"%@",[item performSelector:NSSelectorFromString(@"shortVersionString")]);
}
</code></pre>

<h3>判断两个日期是否在同一周 写在NSDate的category里面</h3>

<pre><code>- (BOOL)isSameDateWithDate:(NSDate *)date
{
    //日期间隔大于七天之间返回NO
    if (fabs([self timeIntervalSinceDate:date]) &gt;= 7 * 24 *3600)
    {
        return NO;
    }

    NSCalendar *calender = [NSCalendar currentCalendar];
    calender.firstWeekday = 2;//设置每周第一天从周一开始
    //计算两个日期分别为这年第几周
    NSUInteger countSelf = [calender ordinalityOfUnit:NSCalendarUnitWeekday inUnit:NSCalendarUnitYear forDate:self];
    NSUInteger countDate = [calender ordinalityOfUnit:NSCalendarUnitWeekday inUnit:NSCalendarUnitYear forDate:date];

    //相等就在同一周，不相等就不在同一周
    return countSelf == countDate;
}
</code></pre>

<h3>应用内打开系统设置界面</h3>

<pre><code>//iOS8之后
[[UIApplication sharedApplication] openURL:[NSURL URLWithString:UIApplicationOpenSettingsURLString]];
//如果App没有添加权限，显示的是设定界面。如果App有添加权限（例如通知），显示的是App的设定界面。

//iOS8之前
//先添加一个url type如下图，在代码中调用如下代码,即可跳转到设置页面的对应项
[[UIApplication sharedApplication] openURL:[NSURL URLWithString:@"prefs:root=WIFI"]];
</code></pre>

<h3>可选值如下：</h3>

<pre><code>About — prefs:root=General&amp;path=About
Accessibility — prefs:root=General&amp;path=ACCESSIBILITY
Airplane Mode On — prefs:root=AIRPLANE_MODE
Auto-Lock — prefs:root=General&amp;path=AUTOLOCK
Brightness — prefs:root=Brightness
Bluetooth — prefs:root=General&amp;path=Bluetooth
Date &amp; Time — prefs:root=General&amp;path=DATE_AND_TIME
FaceTime — prefs:root=FACETIME
General — prefs:root=General
Keyboard — prefs:root=General&amp;path=Keyboard
iCloud — prefs:root=CASTLE
iCloud Storage &amp; Backup — prefs:root=CASTLE&amp;path=STORAGE_AND_BACKUP
International — prefs:root=General&amp;path=INTERNATIONAL
Location Services — prefs:root=LOCATION_SERVICES
Music — prefs:root=MUSIC
Music Equalizer — prefs:root=MUSIC&amp;path=EQ
Music Volume Limit — prefs:root=MUSIC&amp;path=VolumeLimit
Network — prefs:root=General&amp;path=Network
Nike + iPod — prefs:root=NIKE_PLUS_IPOD
Notes — prefs:root=NOTES
Notification — prefs:root=NOTIFICATI*****_ID
Phone — prefs:root=Phone
Photos — prefs:root=Photos
Profile — prefs:root=General&amp;path=ManagedConfigurationList
Reset — prefs:root=General&amp;path=Reset
Safari — prefs:root=Safari
Siri — prefs:root=General&amp;path=Assistant
Sounds — prefs:root=Sounds
Software Update — prefs:root=General&amp;path=SOFTWARE_UPDATE_LINK
Store — prefs:root=STORE
Twitter — prefs:root=TWITTER
Usage — prefs:root=General&amp;path=USAGE
VPN — prefs:root=General&amp;path=Network/VPN
Wallpaper — prefs:root=Wallpaper
Wi-Fi — prefs:root=WIFI
</code></pre>

<h3>屏蔽触发事件，2秒后取消屏蔽</h3>

<pre><code>[[UIApplication sharedApplication] beginIgnoringInteractionEvents];
dispatch_after(dispatch_time(DISPATCH_TIME_NOW, (int64_t)(2 * NSEC_PER_SEC)), dispatch_get_main_queue(), ^{
    [[UIApplication sharedApplication] endIgnoringInteractionEvents]
});
</code></pre>

<h3>动画暂停再开始</h3>

<pre><code>-(void)pauseLayer:(CALayer *)layer
{
    CFTimeInterval pausedTime = [layer convertTime:CACurrentMediaTime() fromLayer:nil];
    layer.speed = 0.0;
    layer.timeOffset = pausedTime;
}

-(void)resumeLayer:(CALayer *)layer
{
    CFTimeInterval pausedTime = [layer timeOffset];
    layer.speed = 1.0;
    layer.timeOffset = 0.0;
    layer.beginTime = 0.0;
    CFTimeInterval timeSincePause = [layer convertTime:CACurrentMediaTime() fromLayer:nil] - pausedTime;
    layer.beginTime = timeSincePause;
}
</code></pre>

<h3>iOS中数字的格式化</h3>

<pre><code>//通过NSNumberFormatter，同样可以设置NSNumber输出的格式。例如如下代码：
NSNumberFormatter *formatter = [[NSNumberFormatter alloc] init];
formatter.numberStyle = NSNumberFormatterDecimalStyle;
NSString *string = [formatter stringFromNumber:[NSNumber numberWithInt:123456789]];
NSLog(@"Formatted number string:%@",string);
//输出结果为：[1223:403] Formatted number string:123,456,789

//其中NSNumberFormatter类有个属性numberStyle，它是一个枚举型，设置不同的值可以输出不同的数字格式。该枚举包括：
typedef NS_ENUM(NSUInteger, NSNumberFormatterStyle) {
    NSNumberFormatterNoStyle = kCFNumberFormatterNoStyle,
    NSNumberFormatterDecimalStyle = kCFNumberFormatterDecimalStyle,
    NSNumberFormatterCurrencyStyle = kCFNumberFormatterCurrencyStyle,
    NSNumberFormatterPercentStyle = kCFNumberFormatterPercentStyle,
    NSNumberFormatterScientificStyle = kCFNumberFormatterScientificStyle,
    NSNumberFormatterSpellOutStyle = kCFNumberFormatterSpellOutStyle
};
//各个枚举对应输出数字格式的效果如下：其中第三项和最后一项的输出会根据系统设置的语言区域的不同而不同。
[1243:403] Formatted number string:123456789
[1243:403] Formatted number string:123,456,789
[1243:403] Formatted number string:￥123,456,789.00
[1243:403] Formatted number string:-539,222,988%
[1243:403] Formatted number string:1.23456789E8
[1243:403] Formatted number string:一亿二千三百四十五万六千七百八十九
</code></pre>

<h3>如何获取WebView所有的图片地址，</h3>

<p>在网页加载完成时，通过js获取图片和添加点击的识别方式</p>

<pre><code>//UIWebView
- (void)webViewDidFinishLoad:(UIWebView *)webView
{
    //这里是js，主要目的实现对url的获取
    static  NSString * const jsGetImages =
    @"function getImages(){\
    var objs = document.getElementsByTagName(\"img\");\
    var imgScr = '';\
    for(var i=0;i

}

//WKWebView
- (void)webView:(WKWebView *)webView didFinishNavigation:(null_unspecified WKNavigation *)navigation
{
    static  NSString * const jsGetImages =
    @"function getImages(){\
    var objs = document.getElementsByTagName(\"img\");\
    var imgScr = '';\
    for(var i=0;i
</code></pre>

<h3>获取到webview的高度</h3>

<pre><code>CGFloat height = [[self.webView stringByEvaluatingJavaScriptFromString:@"document.body.offsetHeight"] floatValue];
</code></pre>

<h3>navigationBar变为纯透明</h3>

<pre><code>//第一种方法
//导航栏纯透明
[self.navigationBar setBackgroundImage:[UIImage new] forBarMetrics:UIBarMetricsDefault];
//去掉导航栏底部的黑线
self.navigationBar.shadowImage = [UIImage new];

//第二种方法
[[self.navigationBar subviews] objectAtIndex:0].alpha = 0;
</code></pre>

<h3>tabBar同理</h3>

<pre><code>[self.tabBar setBackgroundImage:[UIImage new]];
self.tabBar.shadowImage = [UIImage new];
</code></pre>

<h3>navigationBar根据滑动距离的渐变色实现</h3>

<pre><code>//第一种
- (void)scrollViewDidScroll:(UIScrollView *)scrollView
{
    CGFloat offsetToShow = 200.0;//滑动多少就完全显示
    CGFloat alpha = 1 - (offsetToShow - scrollView.contentOffset.y) / offsetToShow;
    [[self.navigationController.navigationBar subviews] objectAtIndex:0].alpha = alpha;
}

//第二种
- (void)scrollViewDidScroll:(UIScrollView *)scrollView
{
    CGFloat offsetToShow = 200.0;
    CGFloat alpha = 1 - (offsetToShow - scrollView.contentOffset.y) / offsetToShow;

    [self.navigationController.navigationBar setShadowImage:[UIImage new]];
    [self.navigationController.navigationBar setBackgroundImage:[self imageWithColor:[[UIColor orangeColor]colorWithAlphaComponent:alpha]] forBarMetrics:UIBarMetricsDefault];
}

//生成一张纯色的图片
- (UIImage *)imageWithColor:(UIColor *)color
{
    CGRect rect = CGRectMake(0.0f, 0.0f, 1.0f, 1.0f);
    UIGraphicsBeginImageContext(rect.size);
    CGContextRef context = UIGraphicsGetCurrentContext();
    CGContextSetFillColorWithColor(context, [color CGColor]);
    CGContextFillRect(context, rect);
    UIImage *theImage = UIGraphicsGetImageFromCurrentImageContext();
    UIGraphicsEndImageContext();

    return theImage;
}
</code></pre>

<h3>iOS 开发中一些相关的路径</h3>

<pre><code>模拟器的位置:
/Applications/Xcode.app/Contents/Developer/Platforms/iPhoneSimulator.platform/Developer/SDKs 

文档安装位置:
/Applications/Xcode.app/Contents/Developer/Documentation/DocSets

插件保存路径:
~/Library/ApplicationSupport/Developer/Shared/Xcode/Plug-ins

自定义代码段的保存路径:
~/Library/Developer/Xcode/UserData/CodeSnippets/ 
如果找不到CodeSnippets文件夹，可以自己新建一个CodeSnippets文件夹。

描述文件路径
~/Library/MobileDevice/Provisioning Profiles
</code></pre>

<h3>navigationItem的BarButtonItem如何紧靠屏幕右边界或者左边界？</h3>

<p>一般情况下，右边的item会和屏幕右侧保持一段距离：
下面是通过添加一个负值宽度的固定间距的item来解决，也可以改变宽度实现不同的间隔：</p>

<pre><code>UIImage *img = [[UIImage imageNamed:@"icon_cog"] imageWithRenderingMode:UIImageRenderingModeAlwaysOriginal];
//宽度为负数的固定间距的系统item
UIBarButtonItem *rightNegativeSpacer = [[UIBarButtonItem alloc] initWithBarButtonSystemItem:UIBarButtonSystemItemFixedSpace target:nil action:nil];
[rightNegativeSpacer setWidth:-15];

UIBarButtonItem *rightBtnItem1 = [[UIBarButtonItem alloc]initWithImage:img style:UIBarButtonItemStylePlain target:self action:@selector(rightButtonItemClicked:)];
UIBarButtonItem *rightBtnItem2 = [[UIBarButtonItem alloc]initWithImage:img style:UIBarButtonItemStylePlain target:self action:@selector(rightButtonItemClicked:)];
self.navigationItem.rightBarButtonItems = @[rightNegativeSpacer,rightBtnItem1,rightBtnItem2];
</code></pre>

<h3>NSString进行URL编码和解码</h3>

<pre><code>NSString *string = @"http://abc.com?aaa=你好&amp;bbb=tttee";

//编码 打印：http://abc.com?aaa=%E4%BD%A0%E5%A5%BD&amp;bbb=tttee
string = [string stringByAddingPercentEncodingWithAllowedCharacters:[NSCharacterSet URLQueryAllowedCharacterSet]];

//解码 打印：http://abc.com?aaa=你好&amp;bbb=tttee
string = [string stringByRemovingPercentEncoding];
</code></pre>

<h3>UIWebView设置User-Agent。</h3>

<pre><code>//设置
NSDictionary *dic = @{@"UserAgent":@"your UserAgent"};
[[NSUserDefaults standardUserDefaults] registerDefaults:dic];
//获取
NSString *agent = [self.WebView stringByEvaluatingJavaScriptFromString:@"navigator.userAgent"];
</code></pre>

<h3>获取硬盘总容量与可用容量:</h3>

<pre><code>NSFileManager *fileManager = [NSFileManager defaultManager];
NSDictionary *attributes = [fileManager attributesOfFileSystemForPath:NSHomeDirectory() error:nil];

NSLog(@"容量%.2fG",[attributes[NSFileSystemSize] doubleValue] / (powf(1024, 3)));
NSLog(@"可用%.2fG",[attributes[NSFileSystemFreeSize] doubleValue] / powf(1024, 3));
</code></pre>

<h3>获取UIColor的RGBA值</h3>

<pre><code>UIColor *color = [UIColor colorWithRed:0.2 green:0.3 blue:0.9 alpha:1.0];
const CGFloat *components = CGColorGetComponents(color.CGColor);
NSLog(@"Red: %.1f", components[0]);
NSLog(@"Green: %.1f", components[1]);
NSLog(@"Blue: %.1f", components[2]);
NSLog(@"Alpha: %.1f", components[3]);
</code></pre>

<h3>修改textField的placeholder的字体颜色、大小</h3>

<pre><code>[self.textField setValue:[UIColor redColor] forKeyPath:@"_placeholderLabel.textColor"];
[self.textField setValue:[UIFont boldSystemFontOfSize:16] forKeyPath:@"_placeholderLabel.font"];
</code></pre>

<h3>AFN移除JSON中的NSNull</h3>

<pre><code>AFJSONResponseSerializer *response = [AFJSONResponseSerializer serializer];
response.removesKeysWithNullValues = YES;
</code></pre>

<h3>ceil()和floor()</h3>

<pre><code>ceil()功 能：返回大于或者等于指定表达式的最小整数
floor()功 能：返回小于或者等于指定表达式的最大整数
UIWebView里面的图片自适应屏幕
</code></pre>

<h3>在webView加载完的代理方法里面这样写：</h3>

<pre><code>- (void)webViewDidFinishLoad:(UIWebView *)webView
{
    NSString *js = @"function imgAutoFit() { \
    var imgs = document.getElementsByTagName('img'); \
    for (var i = 0; i &lt; imgs.length; ++i) { \
    var img = imgs[i]; \
    img.style.maxWidth = %f; \
    } \
    }";

    js = [NSString stringWithFormat:js, [UIScreen mainScreen].bounds.size.width - 20];

    [webView stringByEvaluatingJavaScriptFromString:js];
    [webView stringByEvaluatingJavaScriptFromString:@"imgAutoFit()"];
}
</code></pre>

<h3>NSDateFormat最佳方式（strptime）</h3>

<pre><code>+ (NSDate *)dateFromISO8601StringDateFormatter:(NSString *)string locale:(NSLocale *)locale{
    if (!string) {
        return nil;
    }

    struct tm tm;
    time_t t;

    strptime([string cStringUsingEncoding:NSUTF8StringEncoding], "%Y-%m-%d %H:%M:%S", &amp;tm);
    tm.tm_isdst = -1;
    t = mktime(&amp;tm);

    return [NSDate dateWithTimeIntervalSince1970:t + [[NSTimeZone localTimeZone] secondsFromGMT]];
}

- (NSString *)ISO8601String:(NSDate*)date {
    struct tm *timeinfo;
    char buffer[80];

    time_t rawtime = [date timeIntervalSince1970] - [[NSTimeZone localTimeZone] secondsFromGMT];
    timeinfo = localtime(&amp;rawtime);

    strftime(buffer, 80, "%Y-%m-%d %H:%M:%S", timeinfo);

    return [NSString stringWithCString:buffer encoding:NSUTF8StringEncoding];
}
</code></pre>

<h3>毛玻璃</h3>

<pre><code>//创建
UIImageView *imageView = [[UIImageView alloc]initWithFrame:self.view.bounds];
//图片
imageView.image = [UIImage imageNamed:@"1.jpeg"];
//背景颜色
imageView.backgroundColor = [UIColor yellowColor];
//设置图片内容模式
imageView.contentMode = UIViewContentModeScaleAspectFill;

[self.view addSubview:imageView];

//毛玻璃
UIToolbar *toolbar = [[UIToolbar alloc]initWithFrame:imageView.bounds];
//样式
toolbar.barStyle = UIBarStyleDefault;
//透明度
toolbar.alpha = 0.8f;
[imageView addSubview:toolbar];
</code></pre>

<h3>tableview下拉刷新停留（不滚到顶部）， 类似QQ，微信拉去历史消息</h3>

<p> 关于TableView代理方法和其他一些数据与逻辑处理和平时一样，只是在下啦的时候啦到的数据，放到最前面，同事控制TableView的偏移。</p>

<pre><code>self.oldSize = self.tableView.contentSize;
self.oldPoint = self.tableView.contentOffset;

dispatch_after(dispatch_time(DISPATCH_TIME_NOW, (int64_t)(0.2 * NSEC_PER_SEC)), dispatch_get_main_queue(), ^{

    //                if (self.isfirst) {
    for (int i = 0; i &lt; 15; i++) {
        [self.dataArray insertObject:[NSString stringWithFormat:@"新增加信息%d",i] atIndex:0];
    }

    //            }
    //            self.isfirst = YES;
    // 刷新表格
    [self.tableView reloadData];

    // (最好在刷新表格后调用)调用endRefreshing可以结束刷新状态
    [self.tableView EndRefreshing];

    CGSize newSize = self.tableView.contentSize;


    CGPoint newPoint = CGPointMake(0, self.oldPoint.y+newSize.height - self.oldSize.height);
    self.tableView.contentOffset = newPoint;
});
</code></pre>

<h3>KeyChain隐私信息存储（主要是密码类）</h3>

<p>集成NSObject</p>

<pre><code> -(NSMutableDictionary *)getKeychainQuery:(NSString *)service
{
    return [NSMutableDictionary dictionaryWithObjectsAndKeys:
            (__bridge_transfer id)kSecClassGenericPassword,(__bridge_transfer id)kSecClass,
            service, (__bridge_transfer id)kSecAttrService,
            service, (__bridge_transfer id)kSecAttrAccount,
            (__bridge_transfer id)kSecAttrAccessibleAfterFirstUnlock,(__bridge_transfer id)kSecAttrAccessible,
            nil];
}

+ (void)saveKeychainValue:(NSString *)sValue Key:(NSString *)sKey
{
    //Get search dictionary
    NSMutableDictionary *keychainQuery = [self getKeychainQuery:sKey];
    //Delete old item before add new item
    SecItemDelete((__bridge_retained CFDictionaryRef)keychainQuery);
    //Add new object to search dictionary(Attention:the data format)
    [keychainQuery setObject:[NSKeyedArchiver archivedDataWithRootObject:sValue] forKey:(__bridge_transfer id)kSecValueData];
    //Add item to keychain with the search dictionary
    SecItemAdd((__bridge_retained CFDictionaryRef)keychainQuery, NULL);
}

+ (NSString *)readKeychainValue:(NSString *)sKey
{
    NSString *ret = nil;
    NSMutableDictionary *keychainQuery = [self getKeychainQuery:sKey];

    //Configure the search setting
    [keychainQuery setObject:(id)kCFBooleanTrue forKey:(__bridge_transfer id)kSecReturnData];
    [keychainQuery setObject:(__bridge_transfer id)kSecMatchLimitOne forKey:(__bridge_transfer id)kSecMatchLimit];
    CFDataRef keyData = NULL;
    if (SecItemCopyMatching((__bridge_retained CFDictionaryRef)keychainQuery, (CFTypeRef *)&amp;keyData) == noErr) {
    &lt;a href="http://www.jobbole.com/members/xyz937134366"&gt;@try&lt;/a&gt; {
        ret = (NSString *)[NSKeyedUnarchiver unarchiveObjectWithData:(__bridge_transfer NSData *)keyData];
        } &lt;a href="http://www.jobbole.com/members/wx895846013"&gt;@catch&lt;/a&gt; (NSException *e) {
            NSLog(@"Unarchive of %@ failed: %@", sKey, e);
        } &lt;a href="http://www.jobbole.com/members/finally"&gt;@finally&lt;/a&gt; {
        }
    }
    return ret;
}

+ (void)deleteKeychainValue:(NSString *)sKey {
    NSMutableDictionary *keychainQuery = [self getKeychainQuery:sKey];
    SecItemDelete((__bridge_retained CFDictionaryRef)keychainQuery);
}
</code></pre>

<h3>自定义圆角裁剪：搞性能</h3>

<pre><code>// ------------------------------------------------------------------
// --------------------- 以下是自定义图像处理部分 -----------------------
// ------------------------------------------------------------------

// 自定义裁剪算法
- (UIImage *)dealImage:(UIImage *)img cornerRadius:(CGFloat)c {
    // 1.CGDataProviderRef 把 CGImage 转 二进制流
    CGDataProviderRef provider = CGImageGetDataProvider(img.CGImage);
    void *imgData = (void *)CFDataGetBytePtr(CGDataProviderCopyData(provider));
    int width = img.size.width * img.scale;
    int height = img.size.height * img.scale;

    // 2.处理 imgData
//    dealImage(imgData, width, height);
    cornerImage(imgData, width, height, c);

    // 3.CGDataProviderRef 把 二进制流 转 CGImage
    CGDataProviderRef pv = CGDataProviderCreateWithData(NULL, imgData, width * height * 4, releaseData);
    CGImageRef content = CGImageCreate(width , height, 8, 32, 4 * width, CGColorSpaceCreateDeviceRGB(), kCGBitmapByteOrder32Big | kCGImageAlphaPremultipliedLast, pv, NULL, true, kCGRenderingIntentDefault);
    UIImage *result = [UIImage imageWithCGImage:content];
    CGDataProviderRelease(pv);      // 释放空间
    CGImageRelease(content);

    return result;
}

void releaseData(void *info, const void *data, size_t size) {
    free((void *)data);
}

// 在 img 上处理图片, 测试用
void dealImage(UInt32 *img, int w, int h) {
    int num = w * h;
    UInt32 *cur = img;
    for (int i=0; i&lt;num; i++, cur++) {
        UInt8 *p = (UInt8 *)cur;
        // RGBA 排列
        // f(x) = 255 - g(x) 求负片
        p[0] = 255 - p[0];
        p[1] = 255 - p[1];
        p[2] = 255 - p[2];
        p[3] = 255;
    }
}

// 裁剪圆角
void cornerImage(UInt32 *const img, int w, int h, CGFloat cornerRadius) {
    CGFloat c = cornerRadius;
    CGFloat min = w &gt; h ? h : w;

    if (c &lt; 0) { c = 0; }
    if (c &gt; min * 0.5) { c = min * 0.5; }

    // 左上 y:[0, c), x:[x, c-y)
    for (int y=0; y&lt;c; y++) {
        for (int x=0; x&lt;c-y; x++) {
            UInt32 *p = img + y * w + x;    // p 32位指针，RGBA排列，各8位
            if (isCircle(c, c, c, x, y) == false) {
                *p = 0;
            }
        }
    }
    // 右上 y:[0, c), x:[w-c+y, w)
    int tmp = w-c;
    for (int y=0; y&lt;c; y++) {
        for (int x=tmp+y; x&lt;w; x++) {
            UInt32 *p = img + y * w + x;
            if (isCircle(w-c, c, c, x, y) == false) {
                *p = 0;
            }
        }
    }
    // 左下 y:[h-c, h), x:[0, y-h+c)
    tmp = h-c;
    for (int y=h-c; y&lt;h; y++) {
        for (int x=0; x&lt;y-tmp; x++) {
            UInt32 *p = img + y * w + x;
            if (isCircle(c, h-c, c, x, y) == false) {
                *p = 0;
            }
        }
    }
    // 右下 y~[h-c, h), x~[w-c+h-y, w)
    tmp = w-c+h;
    for (int y=h-c; y&lt;h; y++) {
        for (int x=tmp-y; x&lt;w; x++) {
            UInt32 *p = img + y * w + x;
            if (isCircle(w-c, h-c, c, x, y) == false) {
                *p = 0;
            }
        }
    }
}

// 判断点 (px, py) 在不在圆心 (cx, cy) 半径 r 的圆内
static inline bool isCircle(float cx, float cy, float r, float px, float py) {
    if ((px-cx) * (px-cx) + (py-cy) * (py-cy) &gt; r * r) {
        return false;
    }
    return true;
}

// 其他图像效果可以自己写函数，然后在 dealImage: 中调用 otherImage 即可
void otherImage(UInt32 *const img, int w, int h) {
    // 自定义处理
}
</code></pre>

<h3>隐藏tabbar上面的虚线</h3>

<pre><code>//隐藏阴影线
[[UITabBar appearance] setShadowImage:[UIImage new]];
- (void)setupTabBarBackgroundImage {
    UIImage *image = [UIImage imageNamed:@"tab_bg"];
    CGFloat top = 40; // 顶端盖高度
    CGFloat bottom = 40 ; // 底端盖高度
    CGFloat left = 100; // 左端盖宽度
    CGFloat right = 100; // 右端盖宽度
    UIEdgeInsets insets = UIEdgeInsetsMake(top, left, bottom, right);
    // 指定为拉伸模式，伸缩后重新赋值
    UIImage *TabBgImage = [image resizableImageWithCapInsets:insets resizingMode:UIImageResizingModeStretch];
    self.tabBar.backgroundImage = TabBgImage;
    [[UITabBar appearance] setShadowImage:[UIImage new]];
    [[UITabBar appearance] setBackgroundImage:[[UIImage alloc]init]];
}
//自定义TabBar高度
- (void)viewWillLayoutSubviews {
    CGRect tabFrame = self.tabBar.frame;
    tabFrame.size.height = 60;
    tabFrame.origin.y = self.view.frame.size.height - 60;
    self.tabBar.frame = tabFrame;
}
</code></pre>

<h3>隐藏导航栏下面的虚线</h3>

<h6>#方法一，世界使用背景图片与阴影</h6>

<pre><code>- (void)viewWillAppear:(BOOL)animated{


    // Called when the view is about to made visible. Default does nothing    

    [super viewWillAppear:animated];


    //去除导航栏下方的横线

    [navigationBar setBackgroundImage:[UIImage imageWithColor:[self colorFromHexRGB:@"33cccc"]]

                       forBarPosition:UIBarPositionAny

                           barMetrics:UIBarMetricsDefault];

    [navigationBar setShadowImage:[UIImage new]];


}
</code></pre>

<p>这是唯一一个隐藏这条线的官方用法，但是有一个缺陷-删除了translucency(半透明)</p>

<h6>#方法二：</h6>

<p>1）声明UIImageView变量,存储底部横线</p>

<pre><code>@interface MyViewController {
    UIImageView *navBarHairlineImageView;
}
</code></pre>

<p>2）在viewDidLoad中加入：</p>

<pre><code>navBarHairlineImageView = [self findHairlineImageViewUnder:self.navigationController.navigationBar];
</code></pre>

<p>3）实现找出底部横线的函数</p>

<pre><code>- (UIImageView *)findHairlineImageViewUnder:(UIView *)view {
    if ([view isKindOfClass:UIImageView.class] &amp;&amp; view.bounds.size.height &lt;= 1.0) {
            return (UIImageView *)view;
    }
    for (UIView *subview in view.subviews) {
        UIImageView *imageView = [self findHairlineImageViewUnder:subview];
        if (imageView) {
            return imageView;
        }
    }
    return nil;
}
</code></pre>

<p>4）最后在viewWillAppear，viewWillDisappear中处理</p>

<pre><code>- (void)viewWillAppear:(BOOL)animated {
    [super viewWillAppear:animated];
    navBarHairlineImageView.hidden = YES;
}

- (void)viewWillDisappear:(BOOL)animated {
    [super viewWillDisappear:animated];
    navBarHairlineImageView.hidden = NO;
}
</code></pre>

<p> ###两个范围的富文本</p>

<pre><code>NSString *times = [NSString stringWithFormat:@"哇塞！本次视频聊天%@", [info objectStringForKey:@"times"]];
NSString *type = [NSString stringWithFormat:@"%@", [info objectStringForKey:@"type"]];
NSString *counts = nil;
if ([type isEqualToString:@"1"]) {
    counts = [NSString stringWithFormat:@"消耗%@能量", [info objectStringForKey:@"counts"]];
} else {
    counts = [NSString stringWithFormat:@"赚了%@积分", [info objectStringForKey:@"counts"]];
}

NSString *formatString = [NSString stringWithFormat:@"%@,%@", times, counts];
NSMutableAttributedString *AttributedStr = [[NSMutableAttributedString alloc]initWithString:formatString];
NSRange range = [formatString rangeOfString:@","];
[AttributedStr addAttribute:NSForegroundColorAttributeName value:[UIColor colorWithHexString:@"#fb455a"] range:NSMakeRange(9, range.location - 9)];
[AttributedStr addAttribute:NSForegroundColorAttributeName value:[UIColor colorWithHexString:@"#fb455a"] range:NSMakeRange(range.location + 3, formatString.length - range.location - 5)];
</code></pre>

<h3>修改UIAlertController</h3>

<pre><code>// 在 viewDidLoad 中创建
UIAlertController *alertVC = [UIAlertController alertControllerWithTitle:nil message:AttributedStr.string preferredStyle:UIAlertControllerStyleAlert];
// 用 KVC 修改其 没有暴露出来的
</code></pre>

<p>//    [alertVC setValue:AttributedTit forKey:@&ldquo;attributedTitle&rdquo;];
    [alertVC setValue:AttributedStr forKey:@&ldquo;attributedMessage&rdquo;];</p>

<pre><code>//修改按钮的颜色，同上可以使用同样的方法修改内容，样式
UIAlertAction *defaultAction = [UIAlertAction actionWithTitle:@"确定" style:UIAlertActionStyleDefault handler:nil];
[defaultAction setValue:[UIColor blackColor] forKey:@"_titleTextColor"];
[alertVC addAction:defaultAction];

[self presentViewController:alertVC animated:YES completion:nil];
</code></pre>

<p>上面使用了一种个人比较喜欢的方法，</p>

<blockquote><p>总体来说，第二种办法还是很好地，建议大家使用第二种办法。</p></blockquote>

<hr />

<hr />

<h6>微信号：</h6>

<p>clpaial10201119（Q Q：2211523682）</p>

<h6>微博WB:</h6>

<p><a href="http://weibo.com/u/3288975567?is_hot=1">http://weibo.com/u/3288975567?is_hot=1</a></p>

<h6>gitHub：</h6>

<p><a href="https://github.com/al1020119">https://github.com/al1020119</a></p>

<h6>博客</h6>

<p><a href="http://al1020119.github.io/">http://al1020119.github.io/</a></p>

<hr />

<p><img src="http://al1020119.github.io/images/iCocosCoder.jpg" title="Caption" ></p>

<p><img src="http://al1020119.github.io/images/iCocosPublic.jpg" title="Caption" ></p>
]]></content>
  </entry>
  
  <entry>
    <title type="html"><![CDATA[iOS装逼篇——AOP编程]]></title>
    <link href="http://al1020119.github.io/blog/2016/10/14/ioszhuang-bi-pian-apobian-cheng/"/>
    <updated>2016-10-14T11:45:17+08:00</updated>
    <id>http://al1020119.github.io/blog/2016/10/14/ioszhuang-bi-pian-apobian-cheng</id>
    <content type="html"><![CDATA[<h4>实现原理</h4>

<ul>
<li>用Objective-C强大的runtime.</li>
</ul>


<p>我们知道当给一个对象发送一个方法的时候, 如果当前类和父类都没实现该方法的时候就会走转发流程</p>

<pre><code>动态方法解析 -&gt; 快速消息转发 -&gt; 标准消息转发
</code></pre>

<!--more-->


<h2>准备知识</h2>

<h3>准备知识一：Method,SEL,IMP概念</h3>

<h6>SEL</h6>

<pre><code> 先看一下SEL的概念，Objective-C在编译时，会依据每一个方法的名字、参数序列，生成一个唯一的整型标识(Int类型的地址)，这个标识就是SEL。

 SEL也是@selector的类型，用来表示OC运行时的方法的名字。来看一下OC中的定义
</code></pre>

<p><img src="http://al1020119.github.io/images/iosapo001.png" title="Caption" ></p>

<pre><code>  本质上，SEL只是一个指向方法的指针（准确的说，只是一个根据方法名hash化了的KEY值，能唯一代表一个方法），它的存在只是为了加快方法的查询速度。这个查找过程我们将在下面说明。
  我们可以在运行时添加新的selector，也可以在运行时获取已存在的selector。
</code></pre>

<h6>IMP</h6>

<pre><code>  实际上是一个函数指针，指向方法实现的首地址，定义如下：
</code></pre>

<p><img src="http://al1020119.github.io/images/iosapo002.png" title="Caption" ></p>

<h6>关于IMP的几点说明：</h6>

<p>使用当前CPU架构实现的标准的C调用约定</p>

<pre><code>第一个参数是指向self的指针（如果是实例方法，则是类实例的内存地址；如果是类方法，则是指向元类的指针）
第二个参数是方法选择器(selector)，
第三个参数开始是方法的实际参数列表。
</code></pre>

<p>通过取得IMP，我们可以跳过Runtime的消息传递机制，直接执行IMP指向的函数实现，这样省去了Runtime消息传递过程中所做的一系列查找操作，会比直接向对象发送消息高效一些，当然必须说明的是，这种方式只适用于极特殊的优化场景，如效率敏感的场景下大量循环的调用某方法。</p>

<h6>Method</h6>

<pre><code>  直接上定义：
</code></pre>

<p><img src="http://al1020119.github.io/images/iosapo003.png" title="Caption" ></p>

<pre><code>  Method = SEL + IMP + method_types，相当于在SEL和IMP之间建立了一个映射
</code></pre>

<p>相关方法：</p>

<pre><code>// 给 cls 添加一个新方法  
BOOL class_addMethod (  
   Class cls,  
   SEL name,  
   IMP imp,  
   const charchar *types  
);  

// 替换 cls 里的一个方法的实现  
IMP class_replaceMethod (  
   Class cls,  
   SEL name,  
   IMP imp,  
   const charchar *types  
);  

// 返回 cls 的指定方法  
Method class_getInstanceMethod (  
   Class cls,  
   SEL name  
);  

// 设置一个方法的实现  
IMP method_setImplementation (  
   Method m,  
   IMP imp  
);  

// 返回 cls 里的 name 方法的实现  
IMP class_getMethodImplementation (  
   Class cls,  
   SEL name  
);  
</code></pre>

<h3>准备知识二：iOS方法调用流程</h3>

<h6>方法调用的核心是objc_msgSend方法：</h6>

<pre><code>         objc_msgSend(receiver, selector, arg1,arg2,…)
</code></pre>

<p>具体的过程如下：</p>

<pre><code>        先找到selector 对应的方法实现(IMP)，因为同一个方法可能在不同的类中有不同的实现，所以需要receiver的类来找到确切的IMP

        IMP class_getMethodImplementation(Class class, SEL selector)
</code></pre>

<p>如同其文档所说：</p>

<pre><code>The function pointer returned may be a function internal to the runtime instead of an actual method implementation. For example, if instances of the class do not respond to the selector, the function pointer returned will be part of the runtime's message forwarding machinery.
</code></pre>

<p>具体来说，当找不到IMP的时候，方法返回一个 _objc_msgForward 对象，用来标记需要转入消息转发流程，我们现在用的AOP框架也是利用了这个机制来人为的制造找不到IMP的假象来触发消息转发的流程</p>

<p><img src="http://al1020119.github.io/images/iosapo004.png" title="Caption" ></p>

<pre><code>    如果实在对_objc_msgFroward的内部实现感兴趣，只能看看源码了，只不过都是汇编实现的....感兴趣的同学可以想想为什么是用汇编来实现
    这里有个源码的镜像https://github.com/opensource-apple ，如果翻墙费劲的话
</code></pre>

<p>根据查找结果</p>

<pre><code>    找到了IMP，调用找到的IMP，传入参数
    没找到IMP，转入消息转发流程
    将IMP的返回值作为自己的返回值
</code></pre>

<p>补充说明一下IMP的查找过程，消息传递的关键在于objc_class结构体中的以下几个东西：</p>

<pre><code>Class *isa
Class *super_class
objc_method_list **methodLists
objc_cache *cache
</code></pre>

<p>当消息发送给一个对象时，objc_msgSend通过对象的isa获取到类的结构体，然后在cache和methodLists中查找，如果没找到就找其父类，以此类推知道找到NSObject类，如果还没找到，就走消息转发流程。</p>

<h3>准备知识三：iOS方法转发流程</h3>

<pre><code>  从上文中我们看到当obj无法查找到 IMP时，会返回一个特定的IMP _objc_msgForward , 然后会进入消息转发流程，具体流程如下：
</code></pre>

<h6>动态方法解析</h6>

<pre><code>    resolveInstanceMethod:解析实例方法 
    resolveClassMethod:解析类方法
</code></pre>

<p>通过class_addMethod的方式将缺少的selector动态创建出来，前提是有提前实现好的IMP（method_types一致）</p>

<pre><code>    这种方案更多的是位@dynamic属性准备的
</code></pre>

<h6>备用接受者（AOP中有使用）</h6>

<p>如果上一步没有处理，runtime会调用以下方法</p>

<pre><code>        -(id)forwardingTargetForSelector:(SEL)aSelector
</code></pre>

<p>如果该方法返回非nil的对象，则使用该对象作为新的消息接收者，不能返回self，会出现无限循环</p>

<p>如果不知道该返回什么，应该使用[super forwardingTargetForSelector:aSelector]</p>

<p>这种方法属于单纯的转发，无法对消息的参数和返回值进行处理</p>

<h6>完整转发（AOP中有使用）</h6>

<pre><code>    - (void)forwardInvocation:(NSInvocation *)anInvocation
</code></pre>

<p>对象需要创建一个NSInvocation对象，把消息调用的全部细节封装进去，包括selector, target, arguments 等参数，还能够对返回结果进行处理
为了使用完整转发，需要重写以下方法</p>

<pre><code>        -(NSMethodSignature *)methodSignatureForSelector:(SEL)aSelector，如果2中return nil,执行methodSignatureForSelector：
</code></pre>

<p>因为消息转发机制为了创建NSInvocation需要使用这个方法吗获取信息，重写它为了提供合适的方法签名</p>

<h2>AOP核心逻辑解析</h2>

<pre><code>    到了有意思的戏肉部分，打算用流程图的方式解析一下核心的两个流程：拦截器(intercepter)注册流程和拦截器(intercepter)执行流程。
</code></pre>

<h4>拦截器(intercepter)注册流程</h4>

<p><img src="http://al1020119.github.io/images/iosapo005.png" title="Caption" ></p>

<p>说明：（图中m:代表Method，ClassA是AOP的目标类，X是AOP的目标方法，AOPAspect是AOP处理类-单例）</p>

<pre><code>1. 将原始的X的IMP拿出来，以特定的命名规则动态加入AOPAspect
2. 将X的IMP替换为_objc_msgForward，用这种比较tricky的方式来触发消息转发流程
3. 将ClassA中原有的forwardingTargetForSelector:的IMP以特定的命名规则存入AOPAspect
4. 将ClassA的forwardingTargetForSelector：的IMP用AOPApect中的baseClassForwardingTargetForSelector替换，其中的具体逻辑见下面的代码

后边的就是将拦截器的信息和block存入到AOPAspect中，细节就不讲了，有兴趣的同学可以到github上看看原始版
</code></pre>

<p><img src="http://al1020119.github.io/images/iosapo006.png" title="Caption" ></p>

<h4>拦截器(intercepter)执行流程</h4>

<p><img src="http://al1020119.github.io/images/iosapo007.png" title="Caption" ></p>

<p>说明：（图中m:代表Method，ClassA是AOP的目标类，X是AOP的目标方法，AOPAspect是AOP处理类-单例,IMP是方法对应的实现）</p>

<p>开始调用，objc_msgSend开始查找SEL为X的IMP，查到结果为_objc_msgForward，触发ClassA的转发流程</p>

<pre><code>1. ClassA中转发流程调用forwardingTargetForSelector:，实际会调用替换上去的baseClassForwardingTargetForSelector:的IMP，这个IMP正常情况下会返回AOPAspect的单例作为target（代码见上文图）
2. 接下来开始在AOPAspect的单例中执行转发流程，经过一系列的3.1-3.5的跳转查找，最终会触发转发流程的forwardingInvocation方法

3. 在forwardingInvocation中触发一系列的interceptors的执行（包括原始的X的IMP），代码见下图
4. 后边的interceptor的执行细节也略过了，有兴趣的同学可以到github上看看原始版
</code></pre>

<p><img src="http://al1020119.github.io/images/iCocosPublic.jpg" title="Caption" ></p>

<h2>AOP案例</h2>

<p>这里举个例子,我们有个方法sumA:andB:, 用来返回ab之和的一个字串,我们在这个方法前和方法后都增加个一段代码</p>

<pre><code>在运行方法前我们把参数改成2和3, 当然这里是演示用,实际用的时候别改参数,不然其他同事真的要骂人了
在运行方法后我们输出传入的参数和返回值
</code></pre>

<p>在CODE上查看代码片派生到我的代码片</p>

<pre><code>- (void)clickTestAop:(id)sender  
{  
    AopTestM *test = [[AopTestM alloc] init];  
    NSLog(@"run1");  
    [test sumA:1 andB:2];  

    NSString *before = [XYAOP interceptClass:[AopTestM class] beforeExecutingSelector:@selector(sumA:andB:) usingBlock:^(NSInvocation *invocation) {  
        int a = 3;  
        int b = 4;  

        [invocation setArgument:&amp;a atIndex:2];  
        [invocation setArgument:&amp;b atIndex:3];  

        NSLog(@"berore fun. a = %d, b = %d", a , b);  
    }];  

    NSString *after =  [XYAOP interceptClass:[AopTestM class] afterExecutingSelector:@selector(sumA:andB:) usingBlock:^(NSInvocation *invocation) {  
        int a;  
        int b;  
        NSString *str;  

        [invocation getArgument:&amp;a atIndex:2];  
        [invocation getArgument:&amp;b atIndex:3];  
        [invocation getReturnValue:&amp;str];  

        NSLog(@"after fun. a = %d, b = %d, sum = %@", a , b, str);  
    }];  

    NSLog(@"run2");  
    [test sumA:1 andB:2];  

    [XYAOP removeInterceptorWithIdentifier:before];  
    [XYAOP removeInterceptorWithIdentifier:after];  

    NSLog(@"run3");  
    [test sumA:1 andB:2];  
}   

- (NSString *)sumA:(int)a andB:(int)b  
{  
    int value = a + b;  
    NSString *str = [NSString stringWithFormat:@"fun running. sum : %d", value];  
    NSLog(@"%@", str);  

    return str;  
}  
</code></pre>

<p>我们执行这段代码的时候,大伙猜猜结果是啥.结果如下</p>

<pre><code>2014-10-28 22:52:47.215 JoinShow[3751:79389] run1  
2014-10-28 22:52:52.744 JoinShow[3751:79389] fun running. sum : 3  
2014-10-28 22:52:52.745 JoinShow[3751:79389] run2  
2014-10-28 22:52:52.745 JoinShow[3751:79389] berore fun. a = 3, b = 4  
2014-10-28 22:52:52.745 JoinShow[3751:79389] fun running. sum : 7  
2014-10-28 22:52:52.745 JoinShow[3751:79389] after fun. a = 3, b = 4, sum = fun running. sum : 7  
2014-10-28 22:52:52.746 JoinShow[3751:79389] run3  
2014-10-28 22:52:52.746 JoinShow[3751:79389] fun running. sum : 3  
</code></pre>

<h2>AOP库</h2>

<p>一个简洁高效的用于使iOS支持AOP面向切面编程的库.它可以帮助你在不改变一个类或类实例的代码的前提下,有效更改类的行为.比iOS传统的 AOP方法,更加简单高效.支持在方法执行的前/后或替代原方法执行.曾经是 PSPDFKit 的一部分,PSPDFKit,在Dropbox和Evernote中都有应用,现在单独单独开源出来给大家使用.</p>

<h4>项目主页: Aspects</h4>

<p>最新实例:<a href="https://github.com/steipete/Aspects/archive/master.zip">点击下载</a></p>

<blockquote><p>注: AOP是一种完全不同于OOP的设计模式.更多信息,可以参考这里: AOP 百度百科</p></blockquote>

<h5>安装使用</h5>

<p>CocoaPods 安装</p>

<pre><code>pod "Aspects"
</code></pre>

<p>手动安装</p>

<pre><code>把文件 Aspects.h/m 拖到工程中即可.
</code></pre>

<h5>使用</h5>

<p>Aspects 用于支持AOP(面向切面编程)模式,用于部分解决OOP(面向对象)模式无法解决的特定问题.具体指的是那些在多个方法有交叉,无法或很难被有效归类的操作,比如:</p>

<pre><code>不论何时用户通过客户端获取服务器端数据,权限检查总是必须的.
不论何时用户和市场交互,总应该更具用户的操作提供相应地购买参考或相关商品.
所有需要日志记录的操作.
</code></pre>

<h5>接口概述</h5>

<p>Aspects 给 NSObject 扩展了下面的方法:</p>

<pre><code>/// 为一个指定的类的某个方法执行前/替换/后,添加一段代码块.对这个类的所有对象都会起作用.
///
/// @param block  方法被添加钩子时,Aspectes会拷贝方法的签名信息.
/// 第一个参数将会是 `id&lt;AspectInfo&gt;`,余下的参数是此被调用的方法的参数.
/// 这些参数是可选的,并将被用于传递给block代码块对应位置的参数.
/// 你甚至使用一个没有任何参数或只有一个`id&lt;AspectInfo&gt;`参数的block代码块.
///
/// @注意 不支持给静态方法添加钩子.
/// @return 返回一个唯一值,用于取消此钩子.
+ (id&lt;AspectToken&gt;)aspect_hookSelector:(SEL)selector
                      withOptions:(AspectOptions)options
                       usingBlock:(id)block
                            error:(NSError **)error;

/// 为一个指定的对象的某个方法执行前/替换/后,添加一段代码块.只作用于当前对象.
 - (id&lt;AspectToken&gt;)aspect_hookSelector:(SEL)selector withOptions:(AspectOptions)options usingBlock:(id)block error:(NSError **)error; - (id&lt;AspectToken&gt;)aspect_hookSelector:(SEL)selector withOptions:(AspectOptions)options usingBlock:(id)block error:(NSError **)error; 
/// 撤销一个Aspect 钩子.
/// @return YES 撤销成功, 否则返回 NO. 
id&lt;AspectToken&gt; aspect = ...; 
[aspect remove];
</code></pre>

<p>所有的调用,都会是线程安全的.Aspects 使用了Objective-C 的消息转发机会,会有一定的性能消耗.所有对于过于频繁的调用,不建议使用 Aspects.Aspects更适用于视图/控制器相关的等每秒调用不超过1000次的代码.</p>

<p>可以在调试应用时,使用Aspects动态添加日志记录功能.</p>

<pre><code>[UIViewController aspect_hookSelector:@selector(viewWillAppear:) withOptions:AspectPositionAfter usingBlock:^(id&lt;AspectInfo&gt; aspectInfo, BOOL animated) {
    NSLog(@"控制器 %@ 将要显示: %tu", aspectInfo.instance, animated);
} error:NULL];
</code></pre>

<p>使用它,分析功能的设置会很简单:</p>

<pre><code>https://github.com/orta/ARAnalytics
</code></pre>

<p>你可以在你的测试用例中用它来检查某个方法是否被真正调用(当涉及到继承或类目扩展时,很容易发生某个父类/子类方法未按预期调用的情况):</p>

<pre><code>- (void)testExample {
    TestClass *testClass = [TestClass new];
    TestClass *testClass2 = [TestClass new];

    __block BOOL testCallCalled = NO;
    [testClass aspect_hookSelector:@selector(testCall) withOptions:AspectPositionAfter usingBlock:^{
        testCallCalled = YES;
    } error:NULL];

    [testClass2 testCallAndExecuteBlock:^{
        [testClass testCall];
    } error:NULL];
    XCTAssertTrue(testCallCalled, @"调用testCallAndExecuteBlock 必须调用 testCall");
}
</code></pre>

<p>它对调试应用真的会提供很大的作用.这里我想要知道究竟何时轻击手势的状态发生变化(如果是某个你自定义的手势的子类,你可以重写setState:方法来达到类似的效果;但这里的真正目的是,捕捉所有的各类控件的轻击手势,以准确分析原因):</p>

<pre><code>[_singleTapGesture aspect_hookSelector:@selector(setState:) withOptions:AspectPositionAfter usingBlock:^(id&lt;AspectInfo&gt; aspectInfo) {
    NSLog(@"%@: %@", aspectInfo.instance, aspectInfo.arguments);
} error:NULL];
</code></pre>

<p>下面是一个你监测一个模态显示的控制器何时消失的示例.通常,你也可以写一个子类,来实现相似的效果,但使用 Aspects 可以有效减小你的代码量:</p>

<pre><code>@implementation UIViewController (DismissActionHook)

// Will add a dismiss action once the controller gets dismissed.
- (void)pspdf_addWillDismissAction:(void (^)(void))action {
    PSPDFAssert(action != NULL);

    [self aspect_hookSelector:@selector(viewWillDisappear:) withOptions:AspectPositionAfter usingBlock:^(id&lt;AspectInfo&gt; aspectInfo) {
        if ([aspectInfo.instance isBeingDismissed]) {
            action();
        }
    } error:NULL];
}

@end
</code></pre>

<h5>对调试的好处</h5>

<p>Aspectes 会自动标记自己,所有很容易在调用栈中查看某个方法是否已经调用:</p>

<p>在返回值不为void的方法上使用 Aspects</p>

<p>你可以使用 NSInvocation 对象类自定义返回值:</p>

<pre><code>[PSPDFDrawView aspect_hookSelector:@selector(shouldProcessTouches:withEvent:) withOptions:AspectPositionInstead usingBlock:^(id&lt;AspectInfo&gt; info, NSSet *touches, UIEvent *event) {
    // 调用方法原来的实现.
    BOOL processTouches;
    NSInvocation *invocation = info.originalInvocation;
    [invocation invoke];
    [invocation getReturnValue:&amp;processTouches];

    if (processTouches) {
        processTouches = pspdf_stylusShouldProcessTouches(touches, event);
        [invocation setReturnValue:&amp;processTouches];
    }
} error:NULL];
</code></pre>

<h5>兼容性与限制</h5>

<p>当应用于某个类时(使用类方法添加钩子),不能同时hook父类和子类的同一个方法;否则会引起循环调用问题.但是,当应用于某个类的示例时(使用实例方法添加钩子),不受此限制.
使用KVO时,最好在 aspect_hookSelector: 调用之后添加观察者;否则可能会引起崩溃.</p>

<blockquote><p>最后：如果你对ios开发中的响应式编程，链式编程，函数式编程也有研究或者比较感兴趣，可以私聊我，或者一起交流学习！</p></blockquote>

<hr />

<hr />

<h6>微信号：</h6>

<p>clpaial10201119（Q Q：2211523682）</p>

<h6>微博WB:</h6>

<p><a href="http://weibo.com/u/3288975567?is_hot=1">http://weibo.com/u/3288975567?is_hot=1</a></p>

<h6>gitHub：</h6>

<p><a href="https://github.com/al1020119">https://github.com/al1020119</a></p>

<h6>博客</h6>

<p><a href="http://al1020119.github.io/">http://al1020119.github.io/</a></p>

<hr />

<p><img src="http://al1020119.github.io/images/iCocosCoder.jpg" title="Caption" ></p>

<p><img src="http://al1020119.github.io/images/iCocosPublic.jpg" title="Caption" ></p>
]]></content>
  </entry>
  
  <entry>
    <title type="html"><![CDATA[iOS必备篇——应有尽有]]></title>
    <link href="http://al1020119.github.io/blog/2016/10/13/iosda-shen-zhi-lu-ying-you-jin-you/"/>
    <updated>2016-10-13T18:39:20+08:00</updated>
    <id>http://al1020119.github.io/blog/2016/10/13/iosda-shen-zhi-lu-ying-you-jin-you</id>
    <content type="html"><![CDATA[<h3>目录</h3>

<ul>
<li><a href="#UI">UI</a>

<ul>
<li><a href="#%E4%B8%8B%E6%8B%89%E5%88%B7%E6%96%B0">下拉刷新</a></li>
<li><a href="#%E6%A8%A1%E7%B3%8A%E6%95%88%E6%9E%9C">模糊效果</a></li>
<li><a href="#AutoLayout">AutoLayout</a></li>
<li><a href="#%E5%AF%8C%E6%96%87%E6%9C%AC">富文本</a></li>
<li><a href="#%E5%9B%BE%E8%A1%A8">图表</a></li>
<li><a href="#%E8%A1%A8%E7%9B%B8%E5%85%B3%E4%B8%8ETabbar">表相关与Tabbar</a></li>
<li><a href="#%E9%9A%90%E8%97%8F%E4%B8%8E%E6%98%BE%E7%A4%BA">隐藏与显示</a></li>
<li><a href="#HUD%E4%B8%8EToast">HUD与Toast</a></li>
<li><a href="#%E5%AF%B9%E8%AF%9D%E6%A1%86">对话框</a></li>
<li><a href="#%E5%85%B6%E4%BB%96UI">其他UI</a></li>
</ul>
</li>
</ul>


<!--more-->


<ul>
<li><p><a href="#%E5%8A%A8%E7%94%BB">动画</a></p>

<ul>
<li><a href="#%E4%BE%A7%E6%BB%91%E4%B8%8E%E5%8F%B3%E6%BB%91%E8%BF%94%E5%9B%9E%E6%89%8B%E5%8A%BF">侧滑与右滑返回手势</a></li>
<li><a href="#gif%E5%8A%A8%E7%94%BB">gif动画</a></li>
<li><a href="#%E5%85%B6%E4%BB%96%E5%8A%A8%E7%94%BB">其他动画</a></li>
</ul>
</li>
<li><a href="#%E7%BD%91%E7%BB%9C%E7%9B%B8%E5%85%B3">网络相关</a>

<ul>
<li><a href="#%E7%BD%91%E7%BB%9C%E8%BF%9E%E6%8E%A5">网络连接</a></li>
<li><a href="#%E5%9B%BE%E5%83%8F%E8%8E%B7%E5%8F%96">图像获取</a></li>
<li><a href="#%E7%BD%91%E7%BB%9C%E8%81%8A%E5%A4%A9">网络聊天</a></li>
<li><a href="#%E7%BD%91%E7%BB%9C%E6%B5%8B%E8%AF%95">网络测试</a></li>
<li><a href="#WebView">WebView</a></li>
</ul>
</li>
<li><a href="#Model">Model</a></li>
<li><a href="#%E9%80%9A%E8%AE%AF%E5%BD%95">通讯录</a></li>
<li><a href="#%E5%85%B6%E4%BB%96">其他</a></li>
<li><a href="#%E6%95%B0%E6%8D%AE%E5%BA%93">数据库</a></li>
<li><a href="#%E7%BC%93%E5%AD%98%E5%A4%84%E7%90%86">缓存处理</a></li>
<li><a href="#PDF">PDF</a></li>
<li><a href="#%E5%9B%BE%E5%83%8F%E6%B5%8F%E8%A7%88%E5%8F%8A%E5%A4%84%E7%90%86">图像浏览及处理</a></li>
<li><a href="#%E6%91%84%E5%83%8F%E7%85%A7%E7%9B%B8%E8%A7%86%E9%A2%91%E9%9F%B3%E9%A2%91%E5%A4%84%E7%90%86">摄像照相视频音频处理</a></li>
<li><a href="#%E5%93%8D%E5%BA%94%E5%BC%8F%E6%A1%86%E6%9E%B6">响应式框架</a></li>
<li><a href="#%E6%B6%88%E6%81%AF%E7%9B%B8%E5%85%B3">消息相关</a>

<ul>
<li><a href="#%E6%B6%88%E6%81%AF%E6%8E%A8%E9%80%81%E5%AE%A2%E6%88%B7%E7%AB%AF">消息推送客户端</a></li>
<li><a href="#%E6%B6%88%E6%81%AF%E6%8E%A8%E9%80%81%E6%9C%8D%E5%8A%A1%E5%99%A8%E7%AB%AF">消息推送服务器端</a></li>
<li><a href="#%E9%80%9A%E7%9F%A5%E7%9B%B8%E5%85%B3">通知相关</a></li>
</ul>
</li>
<li><a href="#%E7%89%88%E6%9C%AC%E6%96%B0API%E7%9A%84Demo">版本新API的Demo</a></li>
<li><a href="#%E4%BB%A3%E7%A0%81%E5%AE%89%E5%85%A8%E4%B8%8E%E5%AF%86%E7%A0%81">代码安全与密码</a></li>
<li><a href="#%E6%B5%8B%E8%AF%95%E5%8F%8A%E8%B0%83%E8%AF%95">测试及调试</a></li>
<li><a href="#AppleWatch">AppleWatch</a></li>
<li><a href="#%E5%AE%8C%E6%95%B4%E9%A1%B9%E7%9B%AE">完整项目</a></li>
<li><a href="#%E5%A5%BD%E7%9A%84%E6%96%87%E7%AB%A0">好的文章</a></li>
<li><a href="#VPN">VPN</a></li>
<li><a href="#Xcode%E6%8F%92%E4%BB%B6">Xcode插件</a></li>
<li><a href="#%E7%BE%8E%E5%B7%A5%E8%B5%84%E6%BA%90">美工资源</a></li>
<li><a href="#%E5%BC%80%E5%8F%91%E8%B5%84%E6%BA%90">开发资源</a>

<ul>
<li><a href="#%E5%BC%80%E5%8F%91%E8%B5%84%E6%96%99">开发资料</a></li>
<li><a href="#swift">swift</a></li>
<li><a href="#%E4%BB%96%E4%BA%BA%E5%BC%80%E6%BA%90%E6%80%BB%E7%BB%93">他人开源总结</a></li>
<li><a href="#%E4%B8%AD%E6%96%87%E5%BC%80%E5%8F%91%E5%8D%9A%E5%AE%A2%E5%88%97%E8%A1%A8">中文开发博客列表</a></li>
</ul>
</li>
</ul>


<hr />

<h3>具体内容 =============================</h3>

<hr />

<h4>UI</h4>

<h5>下拉刷新</h5>

<ul>
<li><a href="https://github.com/enormego/EGOTableViewPullRefresh">EGOTableViewPullRefresh</a> - 最早的下拉刷新控件。</li>
<li><a href="https://github.com/samvermette/SVPullToRefresh">SVPullToRefresh</a> - 下拉刷新控件。</li>
<li><a href="https://github.com/CoderMJLee/MJRefresh">MJRefresh</a> - 仅需一行代码就可以为UITableView或者CollectionView加上下拉刷新或者上拉刷新功能。可以自定义上下拉刷新的文字说明。具体使用看“使用方法”。 （国人写）</li>
<li><a href="https://github.com/xhzengAIB/XHRefreshControl">XHRefreshControl</a> - XHRefreshControl 是一款高扩展性、低耦合度的下拉刷新、上提加载更多的组件。（国人写）</li>
<li><a href="https://github.com/coolbeet/CBStoreHouseRefreshControl">CBStoreHouseRefreshControl</a> - 一个效果很酷炫的下拉刷新控件。</li>
<li><a href="https://github.com/dasdom/BreakOutToRefresh">BreakOutToRefresh</a> - 一个下拉刷新打砖块的开源 Swift 库，能让用户在等待下拉刷新的时候边玩撞球游戏边等待。</li>
<li><a href="https://github.com/KittenYang/KYJellyPullToRefresh">KYJellyPullToRefresh</a> - 实现弹性物理效果的下拉刷新，神奇的贝塞尔曲线，配合UIDynamic写的一个拟物的下拉刷新动画。</li>
<li><a href="https://github.com/michaelhenry/MHYahooParallaxView">MHYahooParallaxView</a> - 类似于Yahoo Weather和News Digest首屏的视差滚动。</li>
<li><a href="https://github.com/gsdios/SDRefreshView">SDRefreshView</a> - 简单易用的上拉和下拉刷新（多版本细节适配）。</li>
<li><a href="https://github.com/MakeZL/ZLSwiftRefresh">ZLSwiftRefresh</a> - swift下拉刷新/上拉加载更多，支持自定义动画，集成简单，兼容UITableView/CollectionView/ScrollView/WebView。</li>
<li><a href="https://github.com/dasdom/BreakOutToRefresh">BreakOutToRefresh</a> - swift，上拉和下拉刷新。</li>
<li><a href="https://github.com/andreamazz/GearRefreshControl">GearRefreshControl</a> -  swift，上拉和下拉刷新。</li>
<li><a href="https://github.com/jcavar/refresher">refresher</a> -  swift，上拉和下拉刷新。</li>
<li><a href="http://d.cocoachina.com/code/detail/237753">可展开/收缩的下拉菜单&ndash;SvpplyTable</a> -  一个可展开可收缩的下拉菜单，类似Svpply app。</li>
<li><a href="https://github.com/Sephiroth87/ODRefreshControl">ODRefreshControl</a> - 原iOS6上的橡皮糖刷新样式，很有意思。现在也很多大的 App 在用，比如虾米音乐和 QQ 客户端。</li>
<li><a href="https://github.com/Yalantis/PullToMakeSoup">PullToMakeSoup</a> - PullToMakeSoup, 自定义下拉刷新的动画效果：煮饭, Yalantis新作！</li>
<li><a href="https://github.com/cyndibaby905/TwitterCover">TwitterCover</a> -  Twitter iOS客户端的下拉封面模糊效果。</li>
<li><a href="https://github.com/MartinRGB/Replace-iOS">Replace-iOS</a> - Replace-iOS 让人眼前一亮的下拉刷新（iOS）。</li>
<li><a href="https://github.com/KittenYang/Animations">Animations</a> - 封装了一下，使用的时候只要两行代码。一些动画的飞机稿，都是一些单独分离出来的用于测试的子动画，现在统一归类一下。</li>
<li><a href="https://github.com/entotsu/PullToBounce">PullToBounce</a> - 下拉刷新的动画 for UIScrollView。</li>
<li><a href="https://github.com/li6185377/WaterDropRefresh">WaterDropRefresh</a> - 仿Path 水滴的下拉刷新效果 还有视差滚动。</li>
<li><a href="https://github.com/EnjoySR/ESRefreshControl">ESRefreshControl</a> - 仿新浪微博、百度外卖、网易新闻下拉刷新样式Demo（仅供参考）。</li>
<li><a href="https://github.com/alienjun/WaveRefresh">WaveRefresh</a> - 下拉刷新水波纹动画。</li>
<li><a href="https://github.com/gontovnik/DGElasticPullToRefresh">DGElasticPullToRefresh</a> - 是一款带有弹性效果的 iOS 下拉刷新组件。</li>
<li><a href="https://github.com/wuwen1030/CALayerAnimationDemoh">CALayerAnimationDemoh</a> - 双向注水动画下拉刷新组件,使用CALayer的mask实现。</li>
</ul>


<h5>模糊效果</h5>

<ul>
<li><a href="https://github.com/nicklockwood/FXBlurView">FXBlurView</a> - 是一个UIView子类，支持iOS5.0以上版本，支持静态、动态模糊效果，继承与UIView的模糊特效。</li>
<li><a href="https://github.com/onevcat/VVBlurPresentation">VVBlurPresentation</a> -很简单易用的在原来viewconntroller基础上做模糊，然后present新的viewcontroller的。</li>
<li><a href="https://github.com/pchernovolenko/UICustomActionSheet">UICustomActionSheet</a> - 通过模糊背景来着重强调与菜单相关的元素&ndash;对话框 里面已经收藏。</li>
<li><a href="https://github.com/szk-atmosphere/SABlurImageView">SABlurImageView</a> - 支持渐变动画效果的图像模糊化类库。P.S. 与前几天推存类库 SAHistoryNavigationViewController 是同一位作者。</li>
<li><a href="https://github.com/FlexMonkey/Blurable">Blurable.swift</a> - swift模糊组件。</li>
</ul>


<h5>AutoLayout</h5>

<ul>
<li><a href="https://github.com/Masonry/Masonry">Masonry</a> - Masonry是一个轻量级的布局框架，拥有自己的描述语法，采用更优雅的链式语法封装自动布局，简洁明了并具有高可读性（ <a href="http://adad184.com/2014/09/28/use-masonry-to-quick-solve-autolayout/">使用介绍1</a>  <a href="http://ios.jobbole.com/81483/">使用介绍2</a>），<a href="http://www.cocoachina.com/ios/20150702/12217.html">iOS自适应前段库-Masonry的使用</a>），<a href="http://www.jianshu.com/p/2ed5f7444900">Masonry、Classy、ClassyLiveLayout介绍</a>。<a href="https://github.com/lcddhr/DDMasonryTest">使用DEMO</a> 视图居中显示、子视图含边距、视图等距离摆放、计算ScrollView的contentsize。</li>
<li><a href="https://github.com/cloudkite/Classy/">Classy</a> - Classy是一个能与UIKit无缝结合stylesheet(样式)系统。它借鉴CSS的思想，但引入新的语法和命名规则，<a href="http://classy.as/getting-started/">Classy官网</a>，<a href="http://www.jianshu.com/p/2ed5f7444900">Masonry、Classy、ClassyLiveLayout介绍</a>。</li>
<li><a href="https://github.com/olegam/ClassyLiveLayout">ClassyLiveLayout</a> - ClassyLiveLayout通过结合Classy stylesheets与Masonry一起使用，能够在运行的模拟器中微调Auto Layout约束实时显示效果的工具，<a href="http://www.jianshu.com/p/2ed5f7444900">Masonry、Classy、ClassyLiveLayout介绍</a>。</li>
<li><a href="https://github.com/Masonry/Snap">Snap</a> - Snap是Masonry Auto Layout DSL的Swift版本，是一款轻量级的布局框架，使用了更良好的语法封装了AutoLayout。Snap支持iOS和OS X。</li>
<li><a href="https://github.com/SnapKit/SnapKit">SnapKit</a> - 就是“snap”， &ndash;swift 喜欢自动布局吗？当然喜欢！至少在storyboard中创建时会喜欢。 在代码中纯手工创建约束灰常痛苦，但幸运的是我们有了SnapKit，在board中用上它，你可以简单直观地编写约束了。。</li>
<li><a href="https://github.com/smileyborg/PureLayout">PureLayout</a> - PureLayout 是 iOS &amp; OS X Auto Layout 的终极 API——非常简单，又非常强大。PureLayout 通过一个全面的Auto Layout API 扩展了 UIView/NSView, NSArray 和 NSLayoutConstraint，仿照苹果自身的框架。</li>
<li><a href="https://github.com/smileyborg/UIView-AutoLayout">UIView-AutoLayout</a> -
Deprecated in favor of PureLayout, which includes OS X support:<a href="https://github.com/smileyborg/PureLayout%E3%80%82">https://github.com/smileyborg/PureLayout%E3%80%82</a></li>
<li><a href="https://github.com/robb/Cartography">Cartography</a> - Cartography 是用来声明 Swift 中的 Auto Layout，无需输入任何 stringly 就可设置自己 Auto Layout 的约束声明。</li>
<li><a href="https://github.com/philcn/Auto-Layout-Showcase">Auto-Layout-Showcase</a> - swift,AutoLayout 进阶 Demo，宽高比约束、比例约束、不等约束、视差约束、低优先级约束等高级用法，无需写码即可进行复杂页面布局，Demo 还动态模拟了各屏幕下的效果。来自百度知道 iOS 小组的内部分享。</li>
<li><a href="https://github.com/forkingdog/UIView-FDCollapsibleConstraints">UIView-FDCollapsibleConstraints</a> - 一个AutoLayout辅助工具，最优雅的方式解决自动布局中子View的动态显示和隐藏的问题。第二个Demo模拟了一个经典的FlowLayout，任意一个元素隐藏时，底下的元素需要自动“顶”上来，配合这个扩展，你可以在IB里连一连，选一选，不用一行代码就能搞定。</li>
<li><a href="https://github.com/luodezhao/Autolayout_Demo">Autolayout_Demo</a> - 在项目中用自动布局实现的类似抽屉效果。</li>
<li><a href="http://code.cocoachina.com/detail/320405/">当view隐藏的时候也隐藏其autolayout的NSLayoutAttribute</a> - 当view隐藏的时候也隐藏其autolayout的NSLayoutAttribute，从而不用大量的代码工作。</li>
<li><a href="https://github.com/gsdios/SDAutoLayout">SDAutoLayout</a> - AutoLayout 一行代码搞定自动布局！支持Cell、Label和Tableview高度自适应，致力于做最简单易用的AutoLayout库。</li>
<li><a href="https://github.com/mamaral/Neon">Neon.swift</a> - 功能强大的 UI 布局神器。</li>
</ul>


<h5>富文本</h5>

<ul>
<li><a href="https://github.com/honcheng/RTLabel">RTLabel</a> - RTLabel 基于UILabel类的拓展,能够支持Html标记的富文本显示，它是基于Core Text,因此也支持Core Text上的一些东西。32位，很久没有更新了。</li>
<li><a href="https://github.com/bingxue314159/RTLabel">RTLabel</a> - 富文本，RTLabel支持64位。</li>
<li><a href="https://github.com/12207480/TYAttributedLabel">TYAttributedLabel</a> -  TYAttributedLabel。 简单易用的属性文本控件(无需了解CoreText)，支持富文本，图文混排显示，支持添加链接，image和UIView控件，支持自定义排版显示。</li>
<li><a href="https://github.com/TinyQ/TQRichTextView">TQRichTextView</a> - 用于做富文本视图控件显示，用于即时通讯的表情显示，以及资源评论的富文本显示。</li>
<li><a href="https://github.com/mattt/TTTAttributedLabel">TTTAttributedLabel</a> - 一个文字视图开源组件，是UILabel的替代元件，可以以简单的方式展现渲染的属性字符串。另外，还支持链接植入，不管是手动还是使用UIDataDetectorTypes自动把电话号码、事件、地址以及其他信息变成链接。<a href="http://blog.csdn.net/prevention/article/details/9998575">用TTTAttributedLabel创建变化丰富的UILabel</a> - 网易新闻iOS版使用。</li>
<li><a href="https://github.com/molon/MLEmojiLabel">MLEmojiLabel</a> - 自动识别网址、号码、邮箱、@、#话题#和表情的label。可以自定义自己的表情识别正则，和对应的表情图像。(默认是识别微信的表情符号)，继承自TTTAttributedLabel，所以可以像label一样使用。label的特性全都有，使用起来更友好更方便。</li>
<li><a href="https://github.com/nicklockwood/FXLabel">FXLabel</a> - FXLabel是一个功能强大使用简单的类库，通过提供一个子类改进了标准的UILabel组件，为字体增加了阴影、内阴影和渐变色等，可以被用在任何标准的UILabel中。FXLabel还提供了更多控件，可以对字体行距、字体间距等进行调整。</li>
<li><a href="https://github.com/TigerWf/WFReader">WFReader</a> - 一款简单的coretext阅读器，支持文本选择、高亮以及字体大小选择等。</li>
<li><a href="https://github.com/nigelgrange/WPAttributedMarkup">WPAttributedMarkup</a> - WPAttributedMarkup is a simple utility category that can be used to easily create an attributed string from text with markup tags and a style dictionary。</li>
<li><a href="https://github.com/MoZhouqi/KMPlaceholderTextView">KMPlaceholderTextView</a> - 可显示多行 placeholder 的 textView，可以在IB里面设置 &ndash; swift。</li>
<li><a href="https://github.com/mrchenhao/HHFlashSwitch">HHFlashSwitch</a> - 一个另类的UISwitch，选择后，背景水波扩散变色效果。</li>
<li><a href="https://github.com/zhangyu9050/UUColorSwitch">UUColorSwitch</a> - Switch 开关动画效果,当打开开关时，Switch可实现平滑渲染过渡到父视图的效果。</li>
<li><a href="https://github.com/zekunyan/UITextViewDIYEmojiExample">UITextViewDIYEmojiExample</a> - <a href="http://tutuge.me/2015/03/07/UITextView%E7%BC%96%E8%BE%91%E6%97%B6%E6%8F%92%E5%85%A5%E8%87%AA%E5%AE%9A%E4%B9%89%E8%A1%A8%E6%83%85-%E7%AE%80%E5%8D%95%E7%9A%84%E5%9B%BE%E6%96%87%E6%B7%B7%E7%BC%96/">UITextView编辑时插入自定义表情-简单的图文混编</a>。</li>
<li><a href="https://github.com/facebook/Shimmer">Shimmer</a> - BlingBling闪光效果，酷炫的Label的效果，可以用于加载等待提示。</li>
<li><a href="https://github.com/nnhubbard/ZSSRichTextEditor">ZSSRichTextEditor</a> - 适用于iOS的富文本WYSIWYG编辑器，支持语法高亮和源码查看。ZSSRichTextEditor包含所有WYSIWYG标准的编辑器工具。</li>
<li><a href="https://github.com/cjwirth/RichEditorView">RichEditorView</a> - swift，一套可定制富文本编辑器组件及示例。功能完整、代码简练、实现逻辑巧妙（编辑器核心与 WebView 结合，采用 HTML5 contentEditable 编辑模式，执行JS 配套命令 execCommand 实现富文本编辑功能）。</li>
<li><a href="https://github.com/Cocoanetics/DTCoreText">DTCoreText</a> - 可以解析HTML与CSS最终用CoreText绘制出来，通常用于在一些需要显示富文本的场景下代替低性能的UIWebView。<a href="http://blog.cnbang.net/tech/2630/">DTCoreText源码解析</a>。</li>
<li><a href="https://github.com/cloverstudio/CSGrowingTextView">CSGrowingTextView</a> - 用作即时通讯文本框和评论文本框使用，可以显示多行输入。</li>
<li><a href="https://github.com/indragiek/MarkdownTextView">MarkdownTextView</a> - 显示Markdown的TextView。</li>
<li><a href="http://d.cocoachina.com/code/detail/300299">高仿微信限定行数文字内容</a> - 采用Autolayout高仿微信纯文字限定行数。</li>
<li><a href="https://github.com/lingochamp/FuriganaTextView">FuriganaTextView</a> - 实现复杂的日文韩文排版。</li>
<li><a href="https://github.com/gmertk/ParkedTextField">ParkedTextField</a> - 带固定文本的输入组件。</li>
<li><a href="https://github.com/lexrus/LTMorphingLabel">LTMorphingLabel</a> - swift 能够实现文字变形动画效果的Label，用Swift写的一个能够实现文字变形动画效果的Label，很炫。</li>
<li><a href="https://github.com/zyprosoft/GJCFCoreText">GJCFCoreText</a> - 图文混排。</li>
<li><a href="https://github.com/KyoheiG3/AttributedLabel">AttributedLabel</a> - 显示性能数量级 UILabel 的 AttributedLabel。无畏无惧、挑战权威。</li>
<li><a href="https://github.com/liufan321/FFLabel">FFLabel</a> - 自动检测 URLs, @username, #topic# 等关链词（提供响应扩展）。实用的标签文本小组件。</li>
<li><a href="https://github.com/raulriera/TextFieldEffects">TextFieldEffects</a> - 标准的UITextField有些枯燥么？来认识一下TextFieldEffects吧！废话不多说，只要看几个例子,是啊，都是些简单的dropin控制器。甚至可以在storyboard中使用IBDesignables。</li>
<li><a href="https://github.com/filipstefansson/AutocompleteField">AutocompleteField</a> - 可应用于 iOS 应用中文字输入框自动补全的场景, 兼容到 iOS 8。</li>
<li><a href="https://github.com/yannickl/Splitflap">Splitflap.swift</a> - 可用于快速给 iOS 应用创建文字翻转的动画效果。</li>
<li><a href="https://github.com/wordpress-mobile/WordPress-Editor-iOS">WordPress-Editor-iOS</a> - 一个文本编辑器 简书和新浪博客都在用。</li>
<li><a href="https://github.com/ibireme/YYText">YYText</a> - 功能强大的 iOS 富文本框架。</li>
</ul>


<h5>图表</h5>

<ul>
<li><a href="https://github.com/kevinzhow/PNChart">PNChart</a> - 国内开源作者，动态的图表。</li>
<li><a href="https://github.com/zemirco/swift-linechart">swift-linechart</a> - 功能完整、实用的折线图组件。使用方便，参数配置简单。是不可多得的优质组件&ndash;swift。</li>
<li><a href="https://github.com/danielgindi/ios-charts">ios-charts</a> - 一款优秀 Android 图表开源库 MPAndroidChart 的 Swift 语言实现版（支持 Objective-C 和 Swift 调用）。缺省提供的示例代码为 Objective-C。</li>
<li><a href="https://github.com/xhacker/TEAChart">TEAChart</a> - xhacker/TEAChart 一个简洁的 iOS 图表库，支持柱状图、饼图以及日历等。</li>
<li><a href="https://github.com/yasuoza/YOChartImageKit">YOChartImageKit</a> - 支持在watchOS上绘制图表，看它最近更新挺勤快的，可以关注一下。</li>
<li><a href="https://github.com/kevinzhow/RealtimeGradientText">RealtimeGradientText</a> - Fun With CALayer Mask 刚好今天开源了一个有趣的项目 RealtimeGradientText，所以也好聊一下 CALayer 的 Mask，<a href="http://blog.zhowkev.in/2015/07/06/fun-with-mask/">说明</a>。</li>
</ul>


<h5>表相关与Tabbar</h5>

<ul>
<li><a href="https://github.com/onevcat/SWTableViewCell">SWTableViewCell</a> - 国内开源作者，带很多手势的表单元格。</li>
<li><a href="https://github.com/alikaragoz/MCSwipeTableViewCell">MCSwipeTableViewCell</a> - 带很多手势的表单元格。</li>
<li><a href="https://github.com/1000Memories/TMQuiltView">TMQuiltView</a> - 瀑布流。</li>
<li><a href="https://github.com/lengmolehongyan/WaterfallFlowDemo">WaterfallFlowDemo</a> - 一个简单的UICollectionView瀑布流布局演示demo。</li>
<li><a href="https://github.com/xmartlabs/XLForm">XLForm</a> - 很多表格类的table,写法更高冷一点，推荐使用。</li>
<li><a href="https://github.com/xmartlabs/Eureka">Eureka.swift</a> - Eureka 是 XLForm 的 Swift 的移植版本, 一个可以帮助开发者们快速构建 iOS 各种复杂表单的库, 具有较高的可扩展性, 方便自定制样式。</li>
<li><a href="https://github.com/romaonthego/RETableViewManager">RETableViewManager</a> - 可以十分方便地生成各种样式、各种功能的TableView。只要开发者能想到的列表效果或者功能，都可以利用这份代码迅速编写出来。比如，之前要实现一个填写各种资料的列表，可能需要很多代码，现在只需要几行代码就可以实现。</li>
<li><a href="https://github.com/TomThorpe/UIScrollSlidingPages">UIScrollSlidingPages</a> - 允许添加多视图控件，并且可以横向滚动。有点类似于Groupon app。</li>
<li><a href="https://github.com/izyhuang/HBHorizontalTableView">HBHorizontalTableView</a> - swift，TableView 横向滚动小示例（仿照 AppStore 应用展示）。</li>
<li><a href="https://github.com/mcelayir/HorizontalScrollCell">HorizontalScrollCell</a> - HorizontalScrollCell是一款使用方便的水平方向可滚动的单元格，适用于UICollectionView中实现水片方向滚动视图。 。</li>
<li><a href="https://github.com/shiyuan17/SYJiugonggeTableView">SYJiugonggeTableView</a> - tableView封装的九宫格。</li>
<li><a href="https://github.com/ZhipingYang/UUChatTableView">UUChatTableView</a> - UUChatTableView 气泡聊天界面，支持文本、图片以及音频的气泡聊天界面。<a href="http://www.cocoachina.com/ios/20150205/11116.html">源码推荐说明</a>。</li>
<li><a href="https://github.com/acani/Chats">Chats</a> - 聊天 UI 示例程序。此项目应该只为演示或学习之用，没有服务器 &ndash; swift。</li>
<li><a href="https://github.com/layerhq/Atlas-iOS">Atlas-iOS</a> - 快速在iOS里集成聊天功能，类似开源版本的环信。Layer家开源了一套聊天app界面的解决方案.看起来很赞，很多蛮复杂的东西直接都帮封好了。不得不说现在做app开发真是很简单，大部分时间搭积木就可以了。<a href="https://atlas.layer.com/">官方网站</a>。</li>
<li><a href="https://github.com/badoo/Chatto">Chatto.swift</a> - Chatto.swift:轻量级聊天应用框架及示例。文字及图片可扩展输入栏，汽泡效果等聊天核心特性，分页及自动布局完善。</li>
<li><a href="https://github.com/agdsdl/DLSlideView">DLSlideView</a> - DLSlideView对常见的顶部Tab页点击、滑动分页做了封装。它使用基于ViewController的container特性（而不是scrollview）来管理各个子页面，以支持无限分页，<a href="http://www.cocoachina.com/ios/20150205/11116.html">源码推荐说明</a>。</li>
<li><a href="https://github.com/pozi119/VOVCManager">VOVCManager</a> - 页面管理器:1.跳转指定页面,只需要知道viewController的Class名,如果有storyboard,则需要指定storyboard名；2.无需添加基类；3.支持URLScheme跳转指定页面。</li>
<li><a href="https://github.com/Moblox/MBXPageViewController">MBXPageViewController</a> - 简洁快速的页面切换&ndash;MBXPageViewController，带有按钮控件的UIPageController，非常整洁、简单以及快速。该项目通过三种形式展示页面之间的切换，比如导航栏上的多个tab切换、页面左右两端箭头指示切换，以及使用分段控件。</li>
<li><a href="https://github.com/ming1016/PagerTab">PagerTab</a> - UIScrollView实现滑动转换页面，类似网易云音乐iOS版的页面滑动切换效果。</li>
<li><a href="https://github.com/guilhermearaujo/GUITabPagerViewController">GUITabPagerViewController</a> - 多个tab滑动切换。</li>
<li><a href="https://github.com/pozi119/VOMetroLayoutDemo">VOMetroLayoutDemo</a> - Metro风格的UICollectionView, 目前只支持横向布局,仅在iPad上应用。</li>
<li><a href="https://github.com/KittenYang/KYCellAnimation">KYCellAnimation</a> - 给UITableViewCell增加进入的动画。</li>
<li><a href="https://github.com/knutigro/COBezierTableView">COBezierTableView</a> - swift，通过编辑 Bezier 曲线四点位置设置 TableView 内 Cell 及对应按扭位置。实验效果很赞。</li>
<li><a href="https://github.com/robbdimitrov/RDVTabBarController">RDVTabBarController</a> - 一个TabBar组件，可以方便设置底部菜单的文字图片，点击效果，小红点提示等。</li>
<li><a href="https://github.com/DeveloperLx/LxTabBarController">LxTabBarController</a> - 改变了原生tabbar切换tab时的生硬效果，并加入滑动切换手势（有和界面上的其它手势发生冲突的风险，可根据具体项目予以关闭），<a href="https://github.com/DeveloperLx/LxTabBarController-swift">swift版本</a>。</li>
<li><a href="https://github.com/leichunfeng/WXTabBarController">WXTabBarController</a> - 在系统 UITabBarController 的基础上完美实现了安卓版微信 TabBar 的滑动切换功能，单手操作 iPhone 6 Plus 切换 TabBar 一直是一件很痛苦的事情，而滑动切换是一种不错的解决方案，支持屏幕旋转。</li>
<li><a href="https://github.com/KittenYang/GooeyTabbar">GooeyTabbar</a> - 皮筋式弹性缩放工具栏示例及演示。</li>
<li><a href="http://d.cocoachina.com/code/detail/298409">横向展示文本内容的自定义cell</a> - 可以横向展示文本内容的自定义cell，根据文本无限滚动。</li>
<li><a href="https://github.com/forkingdog/UITableView-FDTemplateLayoutCell">UITableView-FDTemplateLayoutCell</a> - UITableView-FDTemplateLayoutCell 是一个方便缓存 UITableViewCell 的高度的框架。</li>
<li><a href="https://github.com/jozsef-vesza/ExpandingStackCells">ExpandingStackCells</a> - 采用 UIStackView 实现表格单元格扩展内容显示示例及解决方案。</li>
<li><a href="https://github.com/forkingdog/FDStackView">FDStackView</a> - 可以将 UIStackView 的最低支持版本拉低到 iOS6，无需配置，没有代码侵染，扔到工程里后直接用系统 UIStackView 的 API 即可，同时兼容 Storyboard。</li>
<li><a href="https://github.com/nghialv/Sapporo">Sapporo</a> - swift 单元格模型驱动的集合视图管理器组件。又一个超实用的“轮子”。</li>
<li><a href="https://github.com/WeeTom/MDIHorizontalSectionTableViewController">MDIHorizontalSectionTableViewController</a> - 根据产品需求开源了一个交互项目，可以理解为横向Section的TableView，section和cell同时支持拖拽，后续安卓版本也会开源出来。</li>
<li><a href="https://github.com/JazysYu/JZNavigationExtension">JZNavigationExtension</a> - 多功能导航控制器，可以透明返回栏。</li>
<li><a href="https://github.com/okla/QuickRearrangeTableView">QuickRearrangeTableView</a> - 基于 UITableView 的快速重排功能扩展子类。通过长按选定单元格然后滚动移动到指定位置。</li>
<li><a href="https://github.com/nshintio/uicollectionview-reordering">uicollectionview-reordering</a> - UICollectionViews的拖拽(拖动、移动)效果,<a href="http://nshint.io/blog/2015/07/16/uicollectionviews-now-have-easy-reordering/">实例教程</a>.</li>
<li><a href="https://github.com/dzenbot/DZNEmptyDataSet">DZNEmptyDataSet</a> - DZNEmptyDataSet算是一个很标准的iOS内建方式，适合用来处理空的table view和collection view。会自动将collection view处理完善，并将用户消息以合适美观的方式显示出来。每个iOS项目都可以自动处理。</li>
<li><a href="https://github.com/MortimerGoro/MGSwipeTableCell">MGSwipeTableCell</a> - 另一个常见于很多应用中的UI组件，苹果应该考虑在标准的iOS SDK中加入一些类似的内容。Swipeable表格cell是这个pod的最佳描述，也是最好的。</li>
<li><a href="https://github.com/HebeTienCoder/XLPlainFlowLayout">XLPlainFlowLayout</a> - 可以让UICollectionView的header也支持悬停效果，类似于tableView的Plain风格。</li>
<li><a href="https://github.com/wangmchn/WMPageController">WMPageController</a> - 一个方便的 pageContrller 的控件，里面还包括滚动视图。</li>
<li><a href="https://github.com/steipete/PSTCollectionView">PSTCollectionView</a> - PSTCollectionView。</li>
<li><a href="https://github.com/lianleven/LLRiseTabBar-iOS">LLRiseTabBar-iOS</a> - 直接使用系统的特性实现的tabbar，比较简单。</li>
<li><a href="https://github.com/MartinRGB/MTMaterialDelete">MTMaterialDelete</a> - 非常有趣的Material Design动画，动画删除表里面的单元格。</li>
<li><a href="https://github.com/gmertk/BusyNavigationBar">BusyNavigationBar</a> - 进度条式NavigationBar导航条。</li>
<li><a href="https://github.com/cemolcay/ReorderableGridView-Swift">ReorderableGridView-Swift</a> - 拖拽排序卡片。</li>
</ul>


<h5>隐藏与显示</h5>

<ul>
<li><a href="http://d.cocoachina.com/code/detail/286102">SlideTapBar</a> - 滚动栏菜单，向上滚动时隐藏tabbar，向下滚动马上显示tabbar。</li>
<li><a href="https://github.com/Yalantis/FoldingTabBar.iOS">FoldingTabBar.iOS</a> - 可折叠Tab Bar和Tab Bar Controller。</li>
<li><a href="https://github.com/ltebean/LTNavigationBar">LTNavigationBar</a> - LTNavigationBar为app导航栏添加动态着色效果，可自定义其背景色。Demo包含：1.变换背景色；2.滚动视图，导航栏和状态栏重叠。</li>
<li><a href="https://github.com/bryankeller/BLKFlexibleHeightBar">BLKFlexibleHeightBar</a> - 固定Header的效果库，一个拥有非常灵活高度的标题栏，可以为使用软件的用户提供更多的阅读和滑动空间，现在已经被众多app所采用。</li>
</ul>


<h5>HUD与Toast</h5>

<ul>
<li><a href="https://github.com/jdg/MBProgressHUD">MBProgressHUD</a> - 最多人用的loading。</li>
<li><a href="https://github.com/LvJianfeng/EBuyCommon">EBuyCommon</a> - 1.基于MBProgressHUD实现得图形加载提示方式，及其它标题方式提醒。2.弹窗。</li>
<li><a href="https://github.com/TransitApp/SVProgressHUD">SVProgressHUD</a> - SVProgressHUD的loading，如果你需要定制化的等待提示器，这个就是了（也许是最好的）。</li>
<li><a href="https://github.com/relatedcode/ProgressHUD">ProgressHUD</a> - ProgressHUD的loading，使用最简单。</li>
<li><a href="https://github.com/mutualmobile/MMProgressHUD">MMProgressHUD</a> - 设置HUD出现和消失的方式（包括上下、左右、淡入淡出、放大缩小等等），设置HUD的内容（可以在HUD中加入帧动画、动态图片等等），设置HUD出现时的底部覆盖层颜色，等等。总而言之，这是一份集大成的HUD代码。慢慢看视频吧，囊括了所有效果。</li>
<li><a href="https://github.com/devSC/WSProgressHUD">WSProgressHUD</a> - 一个小巧精致的HUD,支持添加到自定义View上, 还有更多小细节.。</li>
</ul>


<h5>对话框</h5>

<ul>
<li><a href="https://github.com/m1entus/WCAlertView">WCAlertView</a> - 自定义的对话框。</li>
<li><a href="https://github.com/wimagguc/ios-custom-alertview">IOS7AlertView</a> - IOS7AlertView的对话框。</li>
<li><a href="https://github.com/mtonio91/AMSmoothAlert">AMSmoothAlert</a> - 动画效果不错，最多star，但不支持arm64。</li>
<li><a href="https://github.com/dinhquan/DQAlertView">DQAlertView</a> - 扁平化的样式不错。</li>
<li><a href="https://github.com/mrchenhao/HHAlertView">HHAlertView</a> - 一个简易的alertview  有三种样式，有成功，失败，和警告三种样式，支持Delegate和block两种回调。</li>
<li><a href="https://github.com/martinjuhasz/MJPopupViewController">MJPopupViewController</a> - 实现弹出视图的各种弹出和消失效果，包括淡入淡出（fade in，fade out），从屏幕上方飞进，下方飞出，从屏幕左方飞进，右方飞出等等效果，弹窗。</li>
<li><a href="https://github.com/adad184/MMPopupView">MMPopupView</a> - 弹出框的基类组件（弹窗）。</li>
<li><a href="https://github.com/fengchuanxiang/Menu">Menu</a> - 项目中可能会用到的常用菜单，以后有时间会继续补充，弹窗。</li>
<li><a href="https://github.com/teodorpatras/EasyTipView">EasyTipView</a> - 弹出提示框类及演示示例。同样地，API 简单、易用。好“轮子”，弹窗。</li>
<li><a href="https://github.com/kolyvan/kxmenu">kxmenu</a> - kxmenu弹出菜单，点击视图上任意位置的按钮，会弹出一个菜单，并且有个小箭头指向点击的按钮，类似气泡视图。弹出的菜单位置会根据按钮的位置来进行调整。</li>
<li><a href="https://github.com/questbeat/QBPopupMenu">QBPopupMenu</a> - QBPopupMenu弹出菜单，实现类似 UIMenuItem 的弹出菜单按钮。点击按钮，会弹出一个菜单，上面可以排列多个按钮。纯代码实现，不需要任何图片。</li>
<li><a href="https://github.com/zhenlintie/STModalDemo">STModalDemo</a> - 弹出视图（通知，提示，选择，窗口）。</li>
<li><a href="https://github.com/TaimurAyaz/TAOverlay">TAOverlay</a> - TAOverlay可通过叠加层展示有用的信息，可自定义文本和背景色，添加阴影和模糊效果，以及更改字体大小或者用自定义图片替换页面上的icon。</li>
<li><a href="https://github.com/pchernovolenko/UICustomActionSheet">UICustomActionSheet</a> - 通过模糊背景来着重强调与菜单相关的元素&ndash;模糊效果 里面已经收藏。</li>
<li><a href="http://code.cocoachina.com/detail/232178">ActionSheetPicker-3.0</a> - 该项目是此前热门项目ActionSheetPicker的新版本，快速复制了iOS 8上的下拉 UIPickerView/ActionSheet功能。</li>
<li><a href="https://github.com/mayuur/MJAlertView">MJAlertView</a> - 3D效果转场效果警示图&ndash;MJAlertView。</li>
<li><a href="https://github.com/morizotter/SwiftyDrop">SwiftyDrop</a> - 轻量、易用的小清新弹出列表及信息提示组件真心不错。</li>
<li><a href="https://github.com/steipete/PSTAlertController">PSTAlertController</a> - 兼容 iOS7的 XXAlertController，接口跟UIAlertController 一模一样，做到高低版本通用。</li>
<li><a href="https://github.com/hryk224/PCLBlurEffectAlert">PCLBlurEffectAlert.swfit</a> - 细节定制较丰富的弹出警报窗口组件。</li>
<li><a href="https://github.com/wxxsw/GSAlert">GSAlert.swfit</a> - 苹果在iOS8推出了全新的UIAlertController，旧的UIAlertView和UIActionSheet渐渐被废弃，但如果你仍然支持iOS7系统，你将不得不写两套代码。GSAlert解决了这个问题。</li>
</ul>


<h5>其他UI</h5>

<ul>
<li><a href="https://github.com/levey/AwesomeMenu">AwesomeMenu</a> - 最多人用的Path菜单。</li>
<li><a href="https://github.com/Tangdixi/DCPathButton">DCPathButton</a> - Path，4.0的弹出菜单，呼出或者关闭菜单时，多个小图标会分别按照逆时针和顺时针的方向进行滚动。</li>
<li><a href="https://github.com/itouch2/SphereMenu">SphereMenu</a> - 利用UIDynamicAnimator的有趣的菜单，path类似。</li>
<li><a href="https://github.com/KittenYang/KYGooeyMenu">KYGooeyMenu</a> - KYGooeyMenu 是一个具有 Gooey Effects 带粘性的扇形菜单控件(卫星菜单、path)。</li>
<li><a href="https://github.com/yoavlt/LiquidFloatingActionButton">LiquidFloatingActionButton</a> - 卫星弹出菜单。</li>
<li><a href="https://github.com/JustinFincher/JZMultiChoicesCircleButton">JZMultiChoicesCircleButton</a> - 三维多选按钮。</li>
<li><a href="https://github.com/xhzengAIB/TwitterPaggingViewer">TwitterPaggingViewer</a>  - 多个Tableview，左右滑动。</li>
<li><a href="https://github.com/carantes/CircularProgressControl">CircularProgressControl</a> - Circular Progress Control using CAShapeLayer ，环形进度控制条。</li>
<li><a href="https://github.com/kaandedeoglu/KDCircularProgress">KDCircularProgress</a> -  KDCircularProgress是使用swift制作的色彩炫丽的进度条，可以加入多种颜色来控制进度条的渐变效果。</li>
<li><a href="https://github.com/cgwangding/TextProgress">TextProgress</a> - 自定义实现数字进度条：1、可以自定义数字（0-100），填充的比例为当前设置的数字，2、可以实现自定义填充颜色，上下部分都可以，3、可以自定义边界的颜色4、实现了水波动画，可以设置打开或关闭。</li>
<li><a href="https://github.com/gsdios/SDProgressView">SDProgressView</a> - 简便美观的进度指示器，此系列共有六种样式的进度指示器。</li>
<li><a href="https://github.com/ninjaprox/NVActivityIndicatorView">NVActivityIndicatorView</a> -  loading 进度条动画，有20-30多种，是在此<a href="https://github.com/gontovnik/DGActivityIndicatorView">DGActivityIndicatorView</a> 基础上做得修改。</li>
<li><a href="https://github.com/saitjr/LoopProgressDemo">LoopProgressDemo</a> - 环形渐变进度条。</li>
<li><a href="http://www.superqq.com/blog/2015/08/12/realization-circular-gradient-progress/">环形渐变进度条实现</a>，</li>
<li><a href="https://github.com/xmartlabs/XLPagerTabStrip">XLPagerTabStrip</a> - 做的很棒的iOS下的PagerTabStrip。</li>
<li><a href="https://github.com/alskipp/ASProgressPopUpView">ASProgressPopUpView</a> - 弹出的进度条显示进度。</li>
<li><a href="https://github.com/onevcat/RandomColorSwift">RandomColorSwift</a> - 一个自动生成好看的颜色的 Swift 库，RandomColorSwift。</li>
<li><a href="https://github.com/ChangweiZhang/HexColorService">HexColorService</a> - 将16进制颜色字符串转成UIColor。</li>
<li><a href="https://github.com/NorthernRealities/Rainbow">Rainbow</a> - 旨在提高代码可读性及易用性的 UIColor 扩展，它使原先有限的预定义颜色（方法）选择，扩展至超过 1200 种。</li>
<li><a href="https://github.com/zhxnlai/UIColor-ChineseTraditionalColors">UIColor-ChineseTraditionalColors</a> - 中国传统颜色引用 UIColor 扩展。“UIColor.桃红()，UIColor.竹青() &hellip;”，共158种。</li>
<li><a href="http://code.cocoachina.com/detail/284158">类似美团的下拉菜单</a> - 类似美团的下拉菜单，<a href="http://www.cocoachina.com/ios/20150205/11116.html">源码推荐说明</a>。</li>
<li><a href="http://code4app.com/ios/%E7%B1%BB%E4%BC%BC%E7%BE%8E%E5%9B%A2%E7%9A%84%E4%B8%8B%E6%8B%89%E9%80%89%E9%A1%B9/538606d4933bf06e0a8b496e">类似美团的下拉选项</a> -  类似于美团、大众点评的下拉菜单选项，code4app代码，评论代码有瑕疵。</li>
<li><a href="http://code.cocoachina.com/detail/284267">CRMediaPickerController</a> - 一个简单易用的图片/视频选择器。1.可同时选择照片和视频。 2.挑选范围有Camera、Camera Roll、Photo Library以及最近拍摄的照片和视频。3.可自定义UIImagePickerController属性（Camera Overlay、Camera Device、Camera View Transform以及allowsEditing）。4.支持横屏和竖屏5.原生的iOS UI。，<a href="http://www.cocoachina.com/ios/20150205/11116.html">源码推荐说明</a>。</li>
<li><a href="https://github.com/modocache/MDCSwipeToChoose">MDCSwipeToChoose</a> - MDCSwipeToChoose可简单地添加滑动手势来调用UIView，并使用该行为提供了一个组件以创建类似Tinder app的like或者dislike界面的轻扫。基于轻扫的方向，你可以决定执行什么样的行为，并且你可以自定义文本颜色和图片。该项目适用于教学用的抽认卡、图片查看器以及其他等。</li>
<li><a href="http://d.cocoachina.com/code/detail/285611">iOS Material Design库</a> - 该项目借鉴于谷歌的Material Design guideline，用户可自定义背景色。</li>
<li><a href="https://github.com/fpt-software/Material-Controls-For-iOS">Material-Controls-For-iOS</a> - Material Design风格的各种控件，非常完整全面。</li>
<li><a href="https://github.com/richzertuche/ZMaterialDesignUIButton">ZMaterialDesignUIButton</a> - Swift Material Design UIButton。</li>
<li><a href="https://github.com/pixyzehn/MediumScrollFullScreen">MediumScrollFullScreen</a> - Medium的可扩展滚动页面，上下滚动时，全屏显示内容，并自然消隐上下菜单。由此项目感知，作者是一位很注重细节的开发者，他的另外<a href="https://github.com/pixyzehn">几个菜单类项目</a>也都不错，值得参考，比如：PathMenu, MediumMenu 等。</li>
<li><a href="https://github.com/SatanWoo/WZFlashButton">WZFlashButton</a> - WZFlashButton，点击后button里面出现水波扩散效果。</li>
<li><a href="https://github.com/piemonte/Twinkle">Twinkle</a> - 为字体加上钻石版闪耀的效果。使用Swift编写。</li>
<li><a href="https://github.com/palmin/ios-multi-back-button">ios-multi-back-button</a> - 可替换内置的UInavigationController返回按钮，长按左上角的返回按钮，实现多层级的快速返回。</li>
<li><a href="http://code.cocoachina.com/detail/226543">ASDayPicker</a> - 适用于iOS (iPhone)的日期选择器(时间选择器)，类似于Calendar app的周视图。</li>
<li><a href="http://adad184.com/2014/10/29/2014-10-29-how-to-setup-today-extension-programmatically/">today extension</a> - 用纯代码构建一个Widget(today extension) 。</li>
<li><a href="https://github.com/f33chobits/FSCalendar">FSCalendar</a> - 日历视图，带有微妙和平滑的滚动效果，可自定义外观&ndash;国人。</li>
<li><a href="https://github.com/Mozharovsky/CVCalendar">CVCalendar</a> - 是一个方便开发者集成自定义日历视图到自己 iOS 应用的项目, 支持 Storyboard 和手动配置, 使用 CocoaPods 进行安装, 提供了丰富的 API 供开发者使用。</li>
<li><a href="https://github.com/EmilYo/HSDatePickerViewController">HSDatePickerViewController</a> - 带有Dropbox Mailbox感觉的时间日期选择器(时间选择器)。启动是背景被模糊化。界面也是主流的扁平化风格。</li>
<li><a href="https://github.com/huzhiqin/HZQDatePickerView">HZQDatePickerView</a> - 自定义时间选择器(日期选择器)，包括开始日期和结束日期两种类型。</li>
<li><a href="https://github.com/nsdictionary/CFCityPickerVC">CFCityPickerVC</a> - 城市选取控制器。</li>
<li><a href="https://github.com/jonathantribouharet/JTCalendar">JTCalendar</a> - iOS下优美的 Calendar 组件，做 GTD 类 App 必备。</li>
<li><a href="https://github.com/Yalantis/Persei">Persei</a> - 动画隐藏或显示顶部菜单支持库及示例项目。&ndash;swift</li>
<li><a href="https://github.com/jivesoftware/PDTSimpleCalendar">PDTSimpleCalendar</a> - 是iOS最棒的日历组件了。你可以在各个方面对它进行定制，无论是运行逻辑还是外观方面。</li>
<li><a href="https://github.com/hyperoslo/Form">Form</a> - JSON 驱动的 Form表单系统，复杂的表单填写类 App 极其需要（比如淘宝呢！）。</li>
<li><a href="https://github.com/neoneye/SwiftyFORM">SwiftyFORM</a> - swift 表单输入框架（亮点是表单验证规则引擎），是我见过地最易用的 Swift 表单组件。</li>
<li><a href="https://github.com/icanzilb/SwiftSpinner">SwiftSpinner</a> - SwiftSpinner是使用swift制作的一款精致带感的指示器，并且连带有字体信息显示，模糊背景，半透明，扁平化等IOS8的效果。</li>
<li><a href="https://github.com/Akkyie/AKPickerView-Swift">AKPickerView-Swift</a> - 一款小而美的 3D 效果选择器。</li>
<li><a href="https://github.com/larcus94/ImagePickerSheet">ImagePickerSheet</a> - 图片或视频选择器（可多选）组件及其示例项目。</li>
<li><a href="https://github.com/saiwu-bigkoo/iOS-RatingBar">iOS-RatingBar</a> - iOS-RatingBar swift版的评分控件,跟Android的RatingBar一样有两种模式，评分模式和只读模式'支持视图编辑，自定义星星数量，评分等级,另外还能支持非整数星，0.5颗星，0.1颗星,可以开启动画效果。</li>
<li><a href="https://github.com/cwRichardKim/RKNotificationHub">RKNotificationHub</a> - 快速给 UIView 添加上炫酷的通知图标（Badge、红点、提示）。</li>
<li><a href="https://github.com/weng1250/WZLBadge">WZLBadge</a> - Badge，支持横竖屏支持iOS5~iOS8允许高度定制化，包括“红点”的背景颜色，文字(字体大小、颜色)，位置等。<a href="http://code.cocoachina.com/detail/316890/%E4%B8%80%E8%A1%8C%E4%BB%A3%E7%A0%81%E5%AE%9E%E7%8E%B0%E5%A4%9A%E9%A3%8E%E6%A0%BC%E7%9A%84%E6%8E%A8%E9%80%81%E5%B0%8F%E7%BA%A2%E7%82%B9/">说明</a>.</li>
<li><a href="https://github.com/andreamazz/BubbleTransition">BubbleTransition</a> - 以气泡膨胀和缩小的动画效果来显示和移除 controller，Uber的就是这种取消操作的方式。</li>
<li><a href="https://github.com/KittenYang/KYFloatingBubble">KYFloatingBubble</a> - 类似iOS7中Game Center浮动气泡的效果。</li>
<li><a href="https://github.com/Draveness/DKNightVersion">DKNightVersion</a> - DKNightVersion 是一个支持夜间模式切换的框架。</li>
<li><a href="https://github.com/sx1989827/EasyUIControl">EasyUIControl</a> - 一个可以简化界面ui的控件框架。</li>
<li><a href="https://github.com/DeveloperLx/LxGridView">LxGridView-oc</a> <a href="https://github.com/DeveloperLx/LxGridView-swift">LxGridView-swift</a> - 利用UICollectionView模仿iOS系统桌面图标的交互，作用如动图。</li>
<li><a href="https://github.com/ZhongTaoTian/QQBtn">QQBtn</a> - 仿QQ未读消息弹性按钮动画，达到和手机QQ未读信息一样的动画效果，效果基本实现。</li>
<li><a href="https://github.com/gmertk/GMStepper">GMStepper</a> - swift 带动画效果、支持手势滑动操作的步进标签。</li>
<li><a href="https://github.com/tomvanzummeren/TZStackView">TZStackView</a> - OS 9 UIStackView 功能模拟实现于 iOS 7/ iOS 8 内。</li>
<li><a href="https://github.com/441088327/LayoutTrait">LayoutTrait</a> - swift 一个小类库。 做iPad 多任务分屏 适配的同学可以看一下。</li>
<li><a href="https://github.com/HAHAKea/HACursor">HACursor</a> - HACursor，是一个对横向ScrollView中的视图进行管理的UI控件。只要几行代码就可以集成类似于网易新闻对主题页面进行排序，删除操作的功能。</li>
<li><a href="https://github.com/IOStao/ZTPageController">ZTPageController</a> - 模仿网易新闻和其他新闻样式做的一个菜单栏，栏中有各自的控制器，其中有4中展示样式’网易style' ’搜狐style' ’腾讯style1' ’网易style2' 。</li>
<li><a href="https://github.com/nixzhu/Ruler">Ruler</a> - 尺子。</li>
<li><a href="https://github.com/justhum/HUMSlider">HUMSlider</a> - HUMSlider是一款能够自动显示刻度记号的滑竿，滑动到某处，该处的刻度会自动上升，两边还能配置图像。支持代码或storyboard中实现。</li>
<li><a href="https://github.com/zhangli4659507/JDSelectedDemo">JDSelectedDemo</a> - 仿京东筛选菜单实现。</li>
<li><a href="https://github.com/PhamBaTho/BTNavigationDropdownMenu">BTNavigationDropdownMenu</a> -  下拉列表暨导航标题组件。简单、直接、易用 -swift。</li>
<li><a href="https://github.com/luzefeng/3DTouchDemo">3DTouchDemo</a> - 详细介绍了每个参数的含义和3Dtouch的入口，保证包学包会。</li>
<li><a href="https://github.com/RichardLeung/3DTouchSample">3DTouchSample</a> - 3D-Touch的功能分为两个部分：Shortcut和Preview。</li>
<li><a href="https://github.com/DeskConnect/SBShortcutMenuSimulator">SBShortcutMenuSimulator</a> - 教你如何在模拟器上测试 3D Touch 功能!</li>
<li><a href="https://github.com/richzertuche/InceptionTouch">InceptionTouch.swift</a> - 让没有 3D Touch 设备也有类似交互体验的 InceptionTouch 类（基于 UITextView 实现，支持日期，链接，电话号码，地址触摸响应）。</li>
<li><a href="http://code.cocoachina.com/view/128287">仿LOL滚动视图</a> - 仿LOL滚动视图。</li>
<li><a href="http://code.cocoachina.com/view/128281">答题选择切换页</a> - 将scrollview和tableview封装在一起，在初始化的时候简单的将数据带上，就可以一页一页的左右来回滑动。</li>
<li><a href="https://github.com/alafighting/CharacterPickerView">CharacterPickerView</a> - 可实现三级联动的选择器，高仿iOS的滚轮控件,可实现单项选择，并支持一二三级联动效果。</li>
<li><a href="https://github.com/SergioChan/SCTrelloNavigation">SCTrelloNavigation</a> - 类似trello的导航动效控件实现。</li>
<li><a href="https://github.com/Akateason/XTPaster">XTPaster</a> - 贴纸功能出现在很多图片社交中, 就是图片上面贴图片, 对贴纸而言就是需要控制贴纸的位置,旋转,大小,<a href="http://www.jianshu.com/p/d873d348bbfb">如何使用</a>。</li>
<li><a href="https://github.com/refinemobi/RGCategoryView">RGCategoryView</a> - 仿了个苏宁易购的分类页面。</li>
<li><a href="https://github.com/txaidw/TWControls">TWControls.swift</a> - 简单的开关和按钮控制器,使用闭包来执行由控件触发的操作。</li>
<li><a href="https://github.com/ephread/Instructions">Instructions.swift</a> - 可定制嵌入式操作指引框架及演示。</li>
<li><a href="https://github.com/Lves/LLPieCharts">LLPieCharts</a> - LLPieCharts iOS 绘制饼图，<a href="http://www.lvesli.com/?p=339">教程</a>。</li>
<li><a href="https://github.com/Boris-Em/BEMCheckBox">BEMCheckBox</a> - BEMCheckBox 是一个用于 iOS 应用上构建漂亮, 高度可定制化动画效果的复选框类库, 最低支持到 iOS 7 系统, 有多种不同风格的动画效果可供选择。</li>
<li><a href="https://github.com/kevin0571/STPopup">STPopup</a> - 提供了一个可在 iPhone 和 iPad 上使用的具有 UINavigationController 弹出效果的 STPopupController 类, 并能在 Storyboard 上很好的工。</li>
<li><a href="https://github.com/victorBaro/VBFPopFlatButton">VBFPopFlatButton</a> - 通过几条线段实现的非常Q萌的动画按钮效果。</li>
<li><a href="https://github.com/richzertuche/ZSeatSelector">ZSeatSelector</a> - 电影院位置排座位。</li>
<li><a href="https://github.com/zangqilong198812/CustomSearchBar">CustomSearchBar</a> - 自定义searchbar,类似于instagram的搜索框效果。</li>
<li><a href="https://github.com/LeoNatan/LNPopupController">LNPopupController</a> - AppleMusic式pop up，弹出是页面，可以上下拉动。</li>
<li><a href="https://github.com/gontovnik/DGRunkeeperSwitch/">DGRunkeeperSwitch</a> - 动画segment，节选器。</li>
</ul>


<hr />

<h4>动画</h4>

<ul>
<li><a href="http://www.starming.com/index.php?v=index&amp;view=62">Core Animation笔记，基本的使用方法</a> - Core Animation笔记，基本的使用方法：1.基本动画，2.多步动画，3.沿路径的动画，4.时间函数，5.动画组。</li>
<li><a href="https://github.com/sxyx2008/awesome-ios-animation">awesome-ios-animation</a> - <a href="https://github.com/sxyx2008/DevArticles/issues/91">iOS Animation 主流炫酷动画框架(特效)收集整理</a> 收集整理了下iOS平台下比较主流炫酷的几款动画框架。</li>
<li><a href="https://github.com/Animatious/awesome-animation">awesome-animation</a> -  在内的十多位童鞋们一起发起的一起动画开源组正式成立啦~Github组织名称：Animatious，这是我们第一期成员先前开源的一些动效库，我们的第一个合作开源项目正在紧锣密鼓的准备~请大家期待设计和代码的碰撞吧。</li>
</ul>


<h5>侧滑与右滑返回手势</h5>

<ul>
<li><a href="https://github.com/fastred/SloppySwiper">SloppySwiper</a> - iOS系统自带的UINavigationController要7.0才支持，但不过该手势只能从屏幕左侧边缘识别，如果要扩大到整个屏幕范围怎么办？配合一个SloppySwiper无需代码就可以轻松实现。此库支持iOS5.0以上版本（另外：Nav的title滑动不明显，本人写了2个类似的控件），<a href="https://github.com/Tim9Liu9/SloppySwiper-Example">SloppySwiper-demo</a> ：代码方式与storyboard方式。</li>
<li><a href="https://github.com/singro/SCNavigation">SCNavigation</a> - UINavigation可以右滑返回，隐藏UINavigationBar。</li>
<li><a href="https://github.com/YueRuo/UINavigationController-YRBackGesture">UINavigationController-YRBackGesture</a> - 支持右滑返回手势，标题栏不动。</li>
<li><a href="https://github.com/gresrun/GHSidebarNav">GHSidebarNav</a> - 现在比较流行使用侧开(侧滑)菜单设计。试了不少控件，感觉GHSidebarNav最成熟，尤其对纯代码创建的界面兼容性最好。<a href="http://www.cnblogs.com/zyl910/archive/2013/06/14/ios_storyboard_sidemenu.html">在Storyboard中使用GHSidebarNav侧开菜单控件</a>。</li>
<li><a href="https://github.com/aryaxt/iOS-Slide-Menu">iOS-Slide-Menu</a> - 能够类似Facebook和Path那样弹出左右边栏侧滑菜单,还支持手势。多种可以自定义的属性 (非常不错)。</li>
<li><a href="https://github.com/ECSlidingViewController/ECSlidingViewController">ECSlidingViewController</a> - 侧滑菜单。</li>
<li><a href="https://github.com/gotosleep/JASidePanels">JASidePanels</a> - 侧滑菜单,有左右菜单，有pop功能，支持手势侧滑,本人使用中：简单。</li>
<li><a href="https://github.com/Ramotion/animated-tab-bar">animated-tab-bar</a> - 让 Tabbar items能显示萌萌的动画。</li>
<li><a href="http://code.cocoachina.com/detail/284346">tabbar图标动画</a> - tabbar上图标的动画实现，<a href="http://www.cocoachina.com/ios/20150205/11116.html">源码推荐说明</a>。</li>
<li><a href="https://github.com/Yalantis/Side-Menu.iOS/tree/master/SideMenu">SideMenu</a> - swift实现，一款带动画效果可定制 Slide Menu，可以学习其动画实现思路。P.S. 对于Hamburger式菜单，虽然很常用，不过，苹果并不鼓励使用，甚至有开发小组对其弊病用自家上线应用前后数据对比进行了抨击。</li>
<li><a href="https://github.com/romaonthego/RESideMenu">RESideMenu</a> - 侧开菜单，qq类似。</li>
<li><a href="https://github.com/Jiahai/JHMenuTableViewDemo">JHMenuTableViewDemo</a> - 仿网易邮箱列表侧滑菜单。</li>
<li><a href="https://github.com/xudafeng/SlideMenuView">SlideMenuView</a> - 炫酷侧滑菜单布局框架，<a href="Android%20%E7%89%88%E6%9C%AC%E7%9A%84%E4%B8%80%E8%87%B4%E5%AE%9E%E7%8E%B0%E8%AF%B7%E8%A7%81%EF%BC%9Ahttps://github.com/xudafeng/SlidingMenu">Android版本的一致实现</a>。</li>
<li><a href="https://github.com/shinept/QQConfiguration">QQConfiguration</a> - swift，QQ-iPhone端框架，左侧菜单栏拖动手势。</li>
<li><a href="https://github.com/KyleGoddard/KGFloatingDrawer">KGFloatingDrawer</a> - 侧滑菜单，qq类似，KyleGoddard/KGFloatingDrawer：一款适合于大屏手机或平板的浮动抽屉式导航界面组件。效果很赞- 侧开菜单，qq类似（与RESideMenu类似）。</li>
<li><a href="https://github.com/cocoatoucher/AIFlatSwitch">AIFlatSwitch</a> - 一款带平滑过渡动画的 Switch 组件类，类相同风格的 Menu/Back<a href="https://github.com/fastred/HamburgerButton">HamburgerButton</a>,类似相同风格的 Menu/Close<a href="https://github.com/robb/hamburger-button">hamburger-button</a>.</li>
<li><a href="https://github.com/jhurray/JHChainableAnimations">JHChainableAnimations</a> - 在应用中采用链式写出酷炫的动画效果, 使代码更加清晰易读，利用block实现的链式编程。</li>
<li><a href="https://github.com/WXGBridgeQ/WXGSlideMenuDemo">WXGSlideMenuDemo</a> - 个简单实现侧拉（侧滑）菜单的小demo，供初学者共同学习、练习使用。</li>
<li><a href="https://github.com/pkluz/PKRevealController">PKRevealController</a> - PKRevealController是一个可以滑动的侧边栏菜单（可向左、向右或者同时向两侧），只需手指轻轻一点（或者按一下按钮，但是这样滑动时不够炫酷），这类控制的其他库，而PKRevealController是最棒的。安装简便，高度定制且对手势识别良好。可以当做一个标准控件用在iOS SDK中。</li>
<li><a href="https://github.com/GabrielAlva/SwiftPages">SwiftPages</a> - 高可定制类似 Instagram 视图滑动切换功能类库。API 简单、易用。</li>
<li><a href="https://github.com/michaelhenry/FlipBoardNavigationController">FlipBoardNavigationController</a> - FlipBoardNavigationController。</li>
<li><a href="https://github.com/mutualmobile/MMDrawerController">MMDrawerController</a> - 最多人用的一个有关侧边“抽屉”导航框架，里面还有很多你意想不到的交互效果，侧滑。</li>
<li><a href="http://code.cocoachina.com/detail/316925/UIWebView%E7%BF%BB%E9%A1%B5%E8%BF%94%E5%9B%9E%E6%95%88%E6%9E%9C%EF%BC%88%E5%8F%98%E9%80%9A%E6%96%B9%E6%B3%95%EF%BC%89/">UIWebView翻页返回效果</a> - UIWebView翻页返回效果（变通方法）。</li>
<li><a href="https://github.com/lilei644/LLSlideMenu">LLSlideMenu</a> - 一个弹性侧滑菜单,弹性动画原理借鉴该项目中阻尼函数实现。</li>
</ul>


<h5>gif动画</h5>

<ul>
<li><a href="https://github.com/yfme/UIImageView-PlayGIF">UIImageView-PlayGIF</a> - UIImageView-PlayGIF。</li>
<li><a href="https://github.com/liyong03/YLGIFImage">YLGIFImage</a> - YLGIFImage。</li>
<li><a href="https://github.com/liyong03/YLGIFImage-Swift">YLGIFImage-Swift</a> - YLGIFImage-Swift。</li>
<li><a href="https://github.com/mortenjust/droptogif">droptogif</a> -  droptogif视频拖拽到应用窗口后自动转换为 GIF 动画（其转换进程动画效果也超赞）。</li>
</ul>


<h5>其他动画</h5>

<ul>
<li><a href="https://github.com/schneiderandre/popping">popping</a> - popping是一个POP 使用实例工程</li>
<li><a href="https://github.com/xhzengAIB/SinaMenuView">SinaMenuView</a> - 用POP动画引擎写的Sina微博的Menu菜单。</li>
<li><a href="https://github.com/adad184/MMTweenAnimation">MMTweenAnimation</a> - facebook POP的自定义动画扩展(基于POPCustomAnimation) 提供10种函数式动画。</li>
<li><a href="https://github.com/pingguo-zangqilong/ZQLRotateMenu">ZQLRotateMenu</a> - 这是一个旋转视图的选择器。</li>
<li><a href="https://github.com/pingguo-zangqilong/CoolLoadAniamtion">CoolLoadAniamtion</a> - 一个简单但是效果不错的loading动画。</li>
<li><a href="https://github.com/pingguo-zangqilong/SequenRotateAnimation">SequenRotateAnimation</a> - 一个简单的loading次序动画。</li>
<li><a href="https://github.com/441088327/SYAppStart">SYAppStart</a> - App启动插画的自定义过度。</li>
<li><a href="https://github.com/victorjiang/UIImage-VJDeviceSpecificMedia/">VJDeviceSpecificMedia</a> - <a href="http://www.imooc.com/wenda/detail/249271">如何根据设备选择不同尺寸的图片</a> 可以通过设置不同尺寸设备的LaunchImage，来使得App适配这些设备，要是在不同不同尺寸设备上使用不同大小的图片，则需要在代码中一一判断，然后加载。</li>
<li><a href="https://github.com/michaelbabiy/RMParallax">RMParallax</a> - RMParallax是一个app启动页引导开源项目，除了细微的翻页视差效果，描述文本的过渡也非常美观（版本新特性、导航页、引导页）。</li>
<li><a href="https://github.com/Nododo/ADo_GuideView">ADo_GuideView</a> - 转动的用户引导页(模仿网易bobo) 因为没有从app包里抓到@3x的图片,建议在iPhone5模拟器运行,保证效果~ （版本新特性、导航页、引导页）。</li>
<li><a href="https://github.com/nsdictionary/CoreNewFeatureVC">CoreNewFeatureVC</a> - 版本新特性（引导页），1.封装并简化了版本新特性启动视图！2.添加了版本的本地缓存功能，3.集成简单，使用方便，没有耦合度，4.支持block回调（版本新特性、导航页、引导页）。</li>
<li><a href="https://github.com/MachelleZhang/MZGuidePages">MZGuidePages</a> - 自己写的通用导航页，可以直接引入工程使用，请参考案例（版本新特性、导航页、引导页）。</li>
<li><a href="https://github.com/AdamBCo/ABCIntroView">ABCIntroView</a> - ABCIntroView是一个易于使用的入门类，让你到达主屏幕之前介绍你的应用程序（版本新特性、导航页、引导页）。</li>
<li><a href="https://github.com/MengTo/Spring">Spring</a> - Spring是一个Swift编写的开源库，可简化Swift编写的iOS动画。支持shake、pop、morph、squeeze、wobble、swing、flipX、flipY、fall、squeezeLeft、squeezeRight以及squeezeDown等多种动画形式，用 IBDesignable 让使用者可以在 Xcode 中快速设置动画效果。</li>
<li><a href="https://github.com/KittenYang/KYBezierBounceView">KYBezierBounceView</a> - 手势控制贝塞尔曲线，取消手势贝塞尔曲线会有反弹效果。</li>
<li><a href="http://kittenyang.com/cadisplaylinkanduibezierpath/">cadisplaylinkanduibezierpath</a> - CADisplayLink结合UIBezierPath的神奇妙用。</li>
<li><a href="https://github.com/KittenYang/KYCuteView">KYCuteView</a> - 实现类似QQ消息拖拽消失的交互+GameCenter的浮动小球效果，<a href="http://kittenyang.com/drawablebubble/">分析</a>。</li>
<li><a href="https://github.com/KittenYang/KYWaterWaveView">KYWaterWaveView</a> - 一个内置波浪动画的UIView，里面有鱼跳跃水溅起来的效果。</li>
<li><a href="https://github.com/KittenYang/KYPingTransition">KYPingTransition</a> - 实现圆圈放大放小的转场动画，可以根据自己的需要使用Paper中的弹性效果，有Material风格。</li>
<li><a href="https://github.com/KittenYang/KYNewtonCradleAnimiation">KYNewtonCradleAnimiation</a> - 牛顿摆动画。</li>
<li><a href="https://github.com/scotteg/LayerPlayer">LayerPlayer</a> - 一款全面展示核心动画 API 示例项目（上架应用）。包括 CALayer, CAScrollLayer, CATextLayer, AVPlayerLayer, CAGradientLayer, CAReplicatorLayer, CATiledLayer, CAShapeLayer, CAEAGLLayer, CATransformLayer, CAEmitterLayer 等使用的互动演示。</li>
<li><a href="https://github.com/JayGajjar/JGTransitionCollectionView">JGTransitionCollectionView</a> - swift，基于集合视图扩展实现完成自动布局及单元项 Flip式动画效果（效果很赞）。组件使用方便、自然（只需设置集合视图数据源的标准方式即可）。</li>
<li><a href="https://github.com/KittenYang/KYShareMenu">KYShareMenu</a> - 带弹性动画的分享菜单。</li>
<li><a href="https://github.com/Yalantis/Context-Menu.iOS">Context-Menu.iOS</a> - 可以为app的菜单添加漂亮的动画内容，可自定义icon，并可根据自己的喜好设计单元格和布局。</li>
<li><a href="https://github.com/LuciusLu/DeformationButton">DeformationButton</a> - 一个简单的变换形状动画按钮。</li>
<li><a href="https://github.com/heroims/UnReadBubbleView">UnReadBubbleView</a> - UnReadBubbleView是一个能够拖拽并拉长的气泡视图。拖拽到一定的长度会消失，可以通过系数设置来控制拖拽的长度。气泡也支持多种属性设置。</li>
<li><a href="https://github.com/smallmuou/PPDragDropBadgeView">PPDragDropBadgeView</a> - 实现了类似于QQ 5.0 水滴拖拽效果. 支持iOS 5.0+ ARC，气泡能够带有数字标识，同时支持消失block方法。消失时还带有消失效果动画。</li>
<li><a href="https://github.com/MartinRGB/GiftCard-Implementation">GiftCard-Implementation</a> - 购买的炫酷动画。</li>
<li><a href="https://github.com/gsdios/SDCycleScrollView">SDCycleScrollView</a> - 无限循环自动图片轮播器(一步设置即可使用)。</li>
<li><a href="https://github.com/johnlui/Swift-On-iOS/tree/master/BuildAnInfiniteCarousel">BuildAnInfiniteCarousel</a> - 自己动手造无限循环图片轮播，<a href="https://autolayout.club/2015/10/29/%E8%87%AA%E5%B7%B1%E5%8A%A8%E6%89%8B%E9%80%A0%E6%97%A0%E9%99%90%E5%BE%AA%E7%8E%AF%E5%9B%BE%E7%89%87%E8%BD%AE%E6%92%AD/">教程</a>。</li>
<li><a href="https://github.com/nicklockwood/iCarousel">iCarousel</a> - iCarousel是一个类，它继承于UIView。用于简化实现各种类型的旋转木马(分页滚动视图），无限轮播 ，<a href="http://www.cocoachina.com/ios/20150828/13198.html">iOS开发之多图片无缝滚动组件封装与使用</a>。</li>
<li><a href="https://github.com/smartwalle/KIPageView">KIPageView</a> - 无限循环PageView，横向TableView，无限轮播。</li>
<li><a href="http://code.cocoachina.com/view/128288">简单实用的无限循环轮播图</a> - 简单实用的无限循环轮播图 。</li>
<li><a href="https://github.com/Akateason/XTLoopScroll">XTLoopScroll</a> - 用两个 timer 三个重用的 view 实现无限循环 scrollView，1自动轮播 2点击监听回调当前图片 3手动滑动后重新计算轮播的开始时间, 良好的用户体验。</li>
<li><a href="https://github.com/zangqilong198812/HotGirls">HotGirls</a> - 卡片动画。</li>
<li><a href="https://github.com/tispr/tispr-card-stack">tispr-card-stack</a> - swift 卡片风格动画切换组件及完整交互示例。</li>
<li><a href="https://github.com/zhxnlai/ZLSwipeableViewSwift">ZLSwipeableViewSwift</a> - swift 卡片堆叠效果的实现（ZLSwipeableView)】可实现类似Tinder和Potluck应用程序的卡片堆叠效果，该项目基于<a href="https://github.com/zhxnlai/ZLSwipeableView/">ZLSwipeableView objective-c</a>实现。1.自定义动画。2.自定义滑动切换。3.自定义方向。4.撤销。</li>
<li><a href="https://github.com/Yalantis/Koloda">Koloda</a> - 基于卡片的 Tinder-style 动画效果示例。精细绝人。更赞的是额外附了详细开发教程 How We Built Tinder-Like Koloda Animation in Swift <a href="https://yalantis.com/blog/how-we-built-tinder-like-koloda-in-swift/">网页链接</a> 。Yalantis 出品动画程序款款精品。</li>
<li><a href="https://github.com/zangqilong198812/QQPersonalInfoTransition">QQPersonalInfoTransition</a> - 仿照QQ的转场。</li>
<li><a href="https://github.com/KittenYang/KYAnimatedPageControl">KYAnimatedPageControl</a> - 除了滚动视图时PageControl会以动画的形式一起移动，点击目标页还可快速定位。支持两种样式：粘性小球和旋转方块。</li>
<li><a href="https://github.com/likedan/KDIntroView">KDIntroView</a> - swift 动态介绍视图框架及演示。另外两个相似的类库是 RazzleDazzle和 Presentation，择需使用。</li>
<li><a href="https://github.com/IFTTT/RazzleDazzle">RazzleDazzle</a> - 【IFTTT开源Swift编写的帧动画框架&ndash;RazzleDazzle】RazzleDazzle 是IFTTT开源的一个iOS帧动画框架，非常适用于APP初次使用时的介绍和引导信息。JazzHands是UIKit一个简单的关键帧基础动画框架，可通过手势、scrollview、KVO等控制动画，被IFTTT应用在IFTTT for iPhone上。</li>
<li><a href="https://github.com/hyperoslo/Presentation">Presentation</a> - 一个类似RazzleDazzle的框架。</li>
<li><a href="https://github.com/poolqf/FillableLoaders">FillableLoaders</a> - 基于 CGPaths 可定制个性化填空式装载类库。附水波上涨式示例。</li>
<li><a href="https://github.com/dsxNiubility/SXWaveAnimate">SXWaveAnimate</a> - 实现非常美观的灌水动画。</li>
<li><a href="https://github.com/liusen001/LSPaomaView">LSPaomaView</a> - 可循环滚动的较长文字，跑马灯，效果很好，一句话集成。</li>
<li><a href="https://github.com/ProudOfZiggy/SIFloatingCollection_Swift">SIFloatingCollection_Swift</a> - 可定制的 Apple Music 风格浮动形状动画组件及演示。</li>
<li><a href="https://github.com/suguru/Cheetah">Cheetah</a> - 易用、高可读链式动画类库。另一个类似类库是 <a href="https://github.com/Draveness/DKChainableAnimationKit">DKChainableAnimationKit</a>。</li>
<li><a href="https://github.com/CezaryKopacz/CKWaveCollectionViewTransition">CKWaveCollectionViewTransition</a> - swift， UICollectionViewController之间切换的动画。</li>
<li><a href="https://github.com/entotsu/TKSubmitTransition">TKSubmitTransition</a> - 基于 UIButton 的登录加载、返回按钮转场动画组件及示例。</li>
<li><a href="https://github.com/AugustRush/ARAnimation">ARAnimation</a> - ARAnimation 对 Core Animation 进行了封装, 帮助 iOS 开发者能更加便捷的在项目中使用动画。</li>
<li>[CardsAnimationDemo]<a href="https://github.com/adow/CardsAnimationDemo">https://github.com/adow/CardsAnimationDemo</a>) - swift， <a href="http://swiftcn.io/topics/64?f=w">《使用 UICollectionView 实现的一个卡片动画》</a>不是直接操作所有 UIView 和 CALayer 的 transform3D 属性来实现整个效果的，而是使用 UICollectionView 来完成所有的视图管理和实现。。</li>
<li><a href="https://github.com/TBXark/TKRubberIndicator">TKRubberIndicator.swift</a> - 一个很不错的 page control。</li>
<li><a href="http://code.cocoachina.com/view/127174">渐变特效文字</a> - 做了一个仿iPhone的移动滑块来解锁的渐变特效文字,还有一个类似ktv歌词显示的文字特效。</li>
<li><a href="https://github.com/zekunyan/TTGEmojiRate">TTGEmojiRate.swift</a> - TTGEmojiRate.swift以Emoji表情为基础绘图，<a href="http://tutuge.me/2015/10/25/ttgemojirate-lib/">Swift开源项目: TTGEmojiRate的实现</a>。</li>
<li><a href="https://github.com/nathanwhy/HYAwesomeTransition">HYAwesomeTransition</a> - 模仿格瓦拉的转场效果。</li>
<li><a href="https://github.com/seedante/CardAnimation">CardAnimation.swift</a> - CardAnimation 是国人开发的一个用 Swift 实现卡片垂直翻转动画的 Demo, <a href="http://www.jianshu.com/p/286222d4edf8">实现思路</a>。</li>
<li><a href="https://github.com/Glow-Inc/TaskSwitcherDemon">TaskSwitcherDemon</a> -  是仿造iOS9的Task Switcher做出来的动画效果, 具体的实现思路可参照<a href="http://tech.glowing.com/cn/implement-ios9-task-switcher-animation/">这篇文章</a>。</li>
<li><a href="https://github.com/lzwjava/CoreAnimationCode">CoreAnimationCode.swift</a> - 提供了 &ldquo;iOS Core Animation Advanced Techniques&rdquo; 书籍中的代码实例, 方便开发者们进行参考学习。</li>
<li><a href="https://github.com/xxycode/UIViewXXYBoom">UIViewXXYBoom.swift</a> - 一个炫酷好玩的爆炸效果，<a href="http://xxycode.com/ru-he-zhi-zuo-ge-xuan-ku-hao-wan-de-bao-zha-xiao-guo-2/">如何实现这个效果</a>。</li>
<li><a href="https://github.com/zhxnlai/ZLSwipeableViewSwift">ZLSwipeableViewSwift</a> - <a href="https://github.com/zhxnlai/ZLSwipeableView">ZLSwipeableView</a> - ZLSwipeableViewSwift在Tinder and Potluck中的动画效果实现思路（连续卡片翻页效果），最贴心的是作者提供了OC和Swift两个版本来供开发者使用，非常丝滑顺畅的效果。</li>
</ul>


<hr />

<h4>网络相关</h4>

<h5>网络连接</h5>

<ul>
<li><a href="https://github.com/AFNetworking/AFNetworking">AFNetworking</a> - ASI不升级以后，最多人用的网络连接开源库，<a href="http://www.superqq.com/blog/2014/11/07/ioswang-luo-bian-cheng-zhi-afnetworkingshi-yong/">iOS网络编程之AFNetworking使用</a>,<a href="http://www.superqq.com/blog/2015/01/29/ioskai-fa-xia-zai-wen-jian-su-du-ji-suan/">iOS开发下载文件速度计算</a> , <a href="http://www.cocoachina.com/ios/20151022/13831.html">AFNetworking 3.0迁移指南</a> , <a href="http://www.cocoachina.com/ios/20140829/9480.html">AFNetworking2.0源码解析&lt;一></a> 、<a href="http://www.cocoachina.com/ios/20140904/9523.html">AFNetworking2.0源码解析&lt;二></a>、<a href="http://www.cocoachina.com/ios/20140916/9632.html">AFNetworking源码解析&lt;三></a>、<a href="http://www.cocoachina.com/ios/20141120/10265.html">AFNetworking源码解析&lt;四></a>。</li>
<li><a href="https://github.com/Alamofire/Alamofire">Alamofire</a> - Alamofire是AFNetworking的作者mattt新写的网络请求的swift库。</li>
<li><a href="https://github.com/yuantiku/YTKNetwork">YTKNetwork</a> - 是基于 AFNetworking 封装的 iOS网络库，提供了更高层次的网络访问抽象。相比AFNetworking，YTKNetwork提供了以下更高级的功能：按时间或版本号缓存网络请求内容、检查返回 JSON 内容的合法性、文件的断点续传、批量的网络请求发送、filter和插件机制等。</li>
<li><a href="https://github.com/DeveloperLx/LxFTPRequest">LxFTPRequest</a> - 支持获取FTP服务器资源列表，下载/上传文件，创建/销毁ftp服务器文件/目录，以及下载断点续传，下载/上传进度，自动判断地址格式合法性跟踪等功能！国人开发，QQ：349124555。</li>
<li><a href="https://github.com/HHuiHao/HSDownloadManager">HSDownloadManager</a> - HSDownloadManager，下载音乐、视频、图片各种资源，支持多任务、断点下载。</li>
<li><a href="https://github.com/HHuiHao/MutableUploadDemo">MutableUploadDemo</a> - 模拟需求：图文混编，要求用户选择图片后就上传，可选择多图，并行上传，用户确定提交后后台执行，必须全部图片上传完才能提交文字。</li>
<li><a href="https://github.com/swtlovewtt/WTRequestCenter">WTRequestCenter</a> - 方便缓存的请求库，提供了方便的HTTP请求方法，传入请求url和参数，返回成功和失败的回调。 UIKit扩展提供了许多不错的方法，快速缓存图片，图片查看，缩放功能， 颜色创建，设备UUID，网页缓存，数据缓存等功能。 无需任何import和配置，目前实现了基础需求。</li>
<li><a href="https://github.com/mutualmobile/MMWormhole">MMWormhole</a> - Message passing between iOS apps and extensions 2个iOS设备之间通信。</li>
<li><a href="https://github.com/socketio/socket.io-client-swift">socket.io-client-swift</a> - WebSockect 客户端类库。开放的通讯协议，有利于构建强大地跨平台应用。</li>
<li><a href="https://github.com/nghialv/Transporter">Transporter</a> - swift， 短小、精悍、易用的多文件（并发或顺序）上传和下载传输库。还支持后台运行、传输进程跟踪、暂停/续传/取消/重试控制等功能。</li>
<li><a href="https://github.com/kevin0571/STNetTaskQueue">STNetTaskQueue</a> - STNetTaskQueue Objective-C 可扩展网络请求管理库。</li>
<li><a href="https://github.com/robbiehanson/CocoaAsyncSocket">CocoaAsyncSocket</a> - 在iOS开发中使用socket，一般都是用第三方库AsyncSocket，不得不承认这个库确实很强大，<a href="http://www.superqq.com/blog/2015/04/03/ioskai-fa-zhi-asyncsocketshi-yong-jiao-cheng/">使用教程</a>。</li>
<li><a href="https://github.com/eugenehp/GCDAsyncSocket">GCDAsyncSocket</a> - GCDAsyncSocket ， <a href="https://github.com/smalltask/TestTcpConnection">不错的Demo</a>。</li>
<li><a href="https://github.com/JustHTTP/Just">Just</a> - 小而美的 HTTP 类。功能简单、直接、完整且健壮性高&ndash; swift。</li>
<li><a href="https://github.com/nghialv/Future">Future</a> - 基于微框架设计思想的异步执行及结果响应类，代码即简单又干净&ndash; swift。</li>
<li><a href="https://github.com/mzeeshanid/MZDownloadManager">MZDownloadManager</a> - 下载管理。</li>
<li><a href="https://github.com/venmo/DVR">DVR</a> - 针对网络请求的测试框架，超实用的工具。且支持 iOS, OSX, watchOS 全平台。</li>
<li><a href="https://github.com/hongfenglt/HFDownLoad">HFDownLoad</a> - iOS开发网络篇之文件下载、大文件下载、断点下载:NSData方式、NSURLConnection方式、NSURLSession下载方式 <a href="http://blog.csdn.net/hongfengkt/article/details/48290561">下载方式具体的思路、区别见Blog</a> 。</li>
<li><a href="https://github.com/johnlui/Pitaya">Pitaya.swift</a> - Pitaya 是纯 Swift 写的 iOS 网络库，支持 Basic Authorization、SSL 钢钉、HTTP raw body / JSON body、快速文件上传等特性，并通过内置 JSONNeverDie 实现了对 JSON 的完全支持，开箱即用。 <a href="https://github.com/johnlui/Pitaya/wiki/%E4%B8%AD%E6%96%87%E6%96%87%E6%A1%A3">中文文档</a></li>
</ul>


<h5>图像获取</h5>

<ul>
<li><a href="https://github.com/rs/SDWebImage">SDWebImage</a> - SDWebImage 网络图片获取及缓存处理。</li>
<li><a href="https://github.com/onevcat/Kingfisher">Kingfisher</a> - 纯 Swift 实现的类 SDWebImage 库，实现了异步下载和缓存图片。</li>
<li><a href="https://github.com/kiavashfaisali/KFSwiftImageLoader">KFSwiftImageLoader</a> - Swift，一个图像缓存加载库。</li>
<li><a href="https://github.com/path/FastImageCache">FastImageCache</a> - FastImageCache 网络图片获取及缓存处理，<a href="http://www.imooc.com/wenda/detail/247239">iOS图片加载速度极限优化—FastImageCache解析</a>。</li>
<li><a href="https://github.com/enormego/EGOCache">EGOCache</a> - 十分知名的第三方缓存类库，可以缓存NSString、UIImage、NSImage以及NSData。除此，如果还可以缓存任何一个实现了<NSCoding>接口的对象。所有缓存的数据都可以自定义过期的时间，默认是1天。EGOCache 支持多线程（thread-safe），<a href="http://www.superqq.com/blog/2014/11/06/ioskai-fa-:uitableviewjia-zai-duo-zhang-zhao-pian-dao-zhi-nei-cun-shang-zhang-de-wen-ti/">UITableView加载多张照片导致内存上涨的问题</a>。</li>
<li><a href="https://github.com/ibireme/YYWebImage/">YYWebImage</a> - 一个图片加载库 YYWebImage，支持 APNG、WebP、GIF 播放，支持渐进式图片加载，更高性能的缓存，更多图像处理方法，可以替代 SDWebImage 等开源库，<a href="http://blog.ibireme.com/2015/11/02/mobile_image_benchmark/">相关文章</a>。</li>
</ul>


<h5>网络聊天</h5>

<ul>
<li><a href="https://github.com/robbiehanson/XMPPFramework">XMPPFramework</a> - XMPPFramework openfire聊天。</li>
<li><a href="https://github.com/dsxNiubility/SXTheQQ">SXTheQQ</a> - 用xmppFramework框架编写QQ程序，主要为了练习通讯的一些原理，界面比较渣 必须要先在本地配置好环境才可以运行。</li>
<li><a href="http://www.easemob.com/">环信</a> - 给开发者更稳定IM云功能。8200万用户考验，好用！（暂无及时语音、视频通话）</li>
<li><a href="http://www.rongcloud.cn/">融云</a> - 即时通讯云服务提供商。（暂无及时语音、视频通话）</li>
<li><a href="http://www.yuntongxun.com">容联云通讯</a> - 提供基于互联网通话,视频会议,呼叫中心/IVR,IM等通讯服务。</li>
<li><a href="https://github.com/ChatSecure/ChatSecure-iOS">chatsecure</a> - 基于XMPP的iphone、android加密式聊天软件， <a href="https://chatsecure.org/">chatsecure官网</a> 。 <a href="https://github.com/chrisballinger/Off-the-Record-iOS">iOS代码1</a>，<a href="https://github.com/chrisballinger/ChatSecure-iOS">iOS代码2</a>， <a href="http://www.cocoachina.com/bbs/read.php?tid=153156">iOS中文版</a>。</li>
<li><a href="https://github.com/xhzengAIB/MessageDisplayKit">MessageDisplayKit</a> - 仿微信聊天，参考JSQMessagesViewController。（国人写）</li>
<li><a href="https://github.com/jessesquires/JSQMessagesViewController">JSQMessagesViewController</a> - 聊天 。</li>
<li><a href="https://github.com/HanYaZhou1990/-SunFlower">SunFlower</a> - 环信聊天demo，比较多功能 。</li>
<li><a href="http://code4app.com/ios/BlueTalk%E8%93%9D%E7%89%99%E8%81%8A%E5%A4%A9-%E6%89%8B%E6%9C%BA%E4%B9%8B%E9%97%B4/552b8190933bf0291e8b4748">BlueTalk蓝牙聊天</a> - 以MultipeerConnectivity为基础， 实现了简单的蓝牙聊天。</li>
</ul>


<h5>网络测试</h5>

<ul>
<li><a href="https://github.com/tonymillion/Reachability">Reachability</a> - 苹果提供过一个Reachability类，用于检测网络状态。但是该类由于年代久远，并不支持ARC。该项目旨在提供一个苹果的Reachability类的替代品，支持ARC和block的使用方式。<a href="http://www.jianshu.com/p/efcfa3c87306">iOS网络监测如何区分2、3、4G</a></li>
<li><a href="https://github.com/ashleymills/Reachability.swift">Reachability.swift</a> - 用于替换苹果的 Reachability 类，可以方便地检测当前是否联网以及具体的联网状态。</li>
<li><a href="https://github.com/crazypoo/SimpleCarrie">SimpleCarrie</a> - 简单的运营商信息获取!。</li>
<li><a href="https://github.com/crazypoo/SimpleCarrie">NetReachability</a> - swift2.0 简单的方法检查网络连接的连通性，提供通知中心集成接口。</li>
<li><a href="https://github.com/coderyi/NetworkEye">NetworkEye</a> - 一个网络调试库，可以监控App内HTTP请求并显示请求相关的详细信息，方便App开发的网络调试。</li>
<li><a href="https://github.com/bin1991/SimpleBS">SimpleBS.swift</a> - 网络测试小工具。</li>
</ul>


<h5>WebView</h5>

<ul>
<li><a href="https://github.com/mattgemmell/MGTemplateEngine">MGTemplateEngine</a> - MGTemplateEngine比较象 PHP 中的 Smarty、FreeMarker 和 Django的模版引擎，是一个轻量级的引擎，简单好用。只要设置很多不同的HMTL模版，就能轻松的实现一个View多种内容格式的显示，对于不熟悉HTML或者减轻 工作量而言，把这些工作让设计分担一下还是很好的，也比较容易实现设计想要的效果。</li>
<li><a href="https://github.com/ninjinkun/NJKWebViewProgress">NJKWebViewProgress</a> - 一个 UIWebView 的进度条接口库,UIWebView 本身是不提供进度条的。</li>
<li><a href="https://github.com/siriusdely/GTMNSString-HTML">GTMNSString-HTML</a> - 谷歌开源的用于过滤HTML标签。</li>
</ul>


<hr />

<h4>Model</h4>

<ul>
<li><a href="https://github.com/johnezang/JSONKit">JSONKit</a> - JSONKit库是非常简单易用而且效率又比较高的，重要的JSONKit适用于ios 5.0以下的版本,使用JSONKit库来解析json文件，只需要下载JSONKit.h 和JSONKit.m添加到工程中；然后加入libz.dylib即可。</li>
<li><a href="https://github.com/icanzilb/JSONModel">JSONModel</a> - 解析服务器返回的Json数据的库,<a href="http://www.jianshu.com/p/3d795ea37835">JSONModel源码解析一</a>。</li>
<li><a href="https://github.com/Mantle/Mantle">Mantle</a> - Mantle主要用来将JSON数据模型化为OC对象, 大系统中使用。<a href="http://www.iwangke.me/2014/10/13/Why-Changba-iOS-choose-Mantle/">为什么选择Mantle</a>。</li>
<li><a href="https://github.com/refusebt/RFJModel">RFJModel</a> - RFJModel是一个IOS类库，可以将JSON字典自动装填到OBJC对象。相比JSONModel有一些非常好的特性，使用上也比较简单。</li>
<li><a href="https://github.com/nicklockwood/XMLDictionary">XMLDictionary</a> - ios与mac os平台下xml与NSDictionary相互转化开源类库。</li>
<li><a href="https://github.com/CoderMJLee/MJExtension">MJExtension</a> - 用于json转model进行使用，转换效率很高，使用也比较简单，只要前后台约定好，json直接就转成了model。</li>
<li><a href="https://github.com/CoderMJLee/MJExtension">CFRuntime</a> - “Swift 版的 MJExtension，运行时、反射与一键字典模型互转”。</li>
<li><a href="https://github.com/openboy2012/DDModel">DDModel</a> - 快速搭建项目Model层，支持ORM映射关系，能从JSON/XML直接实例一个Model对象。支持SQLite本地数据持久化，封装了HTTP， 减少HTTP代码与UIViewController的代码耦合，支持Cache；类似RESTKit、Mantle的功能；使用该类库以后简化了网络层的开发工作，把更多的精力放在UI上面；目前只支持GET/POST方法的请求。使用到的第三方库有：1.SQLitePersistentObject; 2.JTObjectMapping; 3.AFNetworking; 4.XMLDictionary;</li>
<li><a href="https://github.com/alexeyxo/protobuf-swift">protobuf-swift</a> - Protocol Buffers 的 Swift 语言实现库。P.S. Protocol Buffers 是 Google 开源项目，主要功能是实现直接序列化结构化的对象数据，方便跨平台快速传递，开发者也可以直接修改 protobuf 中的数据。相比 XML 和 JSON，protobuf 解析更快，存储更小。</li>
<li><a href="https://github.com/matthewcheok/JSONCodable">JSONCodable</a> - 基于 Swift 2.0 新特性（Protocol Extensions and Error Handling）的JSON 解析类。</li>
<li><a href="https://github.com/SwiftyJSON/SwiftyJSON">SwiftyJSON</a> - 使Swift的JSON解析变得简单。</li>
<li><a href="https://github.com/johnlui/JSONNeverDie">JSONNeverDie.swift</a> - JSON 到 Model 类的自动映射工具。</li>
<li><a href="https://github.com/cezheng/Fuzi">Fuzi.swift</a> - Swift实现的轻量快速的 XML/HTML 解析器。</li>
<li><a href="https://github.com/drmohundro/SWXMLHash">SWXMLHash.swift</a> - 易用的 XML 解析类库。非常实用的“轮子”。</li>
<li><a href="https://github.com/ibireme/YYModel">YYModel</a> - 高性能的 iOS JSON 模型框架。</li>
</ul>


<hr />

<h4>通讯录</h4>

<ul>
<li><a href="http://code.cocoachina.com/view/128245">快速查找联系人</a> - 类似微信联系人搜索的界面,快速查找联系人,并支持点击查询结果 。</li>
</ul>


<hr />

<h4>其他</h4>

<ul>
<li><a href="https://github.com/exsortis/DateTimeKit">DateTimeKit</a> - 一个超赞的时间处理的库，Joda-Time ！ 他能帮你轻松处理时区，处理时间加减，计算到期时间等等场景下的问题。</li>
<li><a href="https://github.com/malcommac/SwiftDate">SwiftDate</a> - 特别完整、强大的日期时间操作管理类库。它几乎涵盖了已知开源日期类库所有优秀特性。 他能帮你轻松处理时区，处理时间加减，计算到期时间等等场景下的问题。</li>
<li><a href="https://github.com/nst/iOS-Runtime-Headers">iOS私有API</a> - 私有API，绿色 == public，红色 == private，蓝色 == dylib。</li>
<li><a href="http://opensource.apple.com/source/CF/">iOS源代码</a> - iOS源代码。</li>
<li><a href="https://github.com/ShiqiYu/libfacedetection">libfacedetection</a> - C++ 人脸识别 包含正面和多视角人脸检测两个算法.优点:速度快(OpenCV haar+adaboost的2-3倍), 准确度高 (FDDB非公开类评测排名第二），能估计人脸角度。</li>
<li><a href="https://github.com/Brimizer/Slidden">Slidden</a> - 一个老外开源的开发自定义键盘的库，利用这个开源库，可以方便的配置键位、颜色以及键位对应的图片。</li>
<li><a href="https://github.com/michaeltyson/TPKeyboardAvoiding">TPKeyboardAvoiding</a> - 用户键盘弹出自动计算高度，进行屏幕滚动操作。</li>
<li><a href="http://d.cocoachina.com/code/detail/298267">CDPMonitorKeyboard</a> - CDPMonitorKeyboard封装,可以解决输入视图(例如textField,textView等)被键盘覆盖问题，并可设置高于键盘多少。</li>
<li><a href="http://code.cocoachina.com/detail/297973/%E8%87%AA%E5%8A%A8%E7%9B%91%E5%90%AC%E9%94%AE%E7%9B%98%E9%AB%98%E5%BA%A6/">自动监听键盘高度</a> - 自动监听键盘高度，初始界面，输入框在屏幕最下方，当键盘出现时，输入框随即移动到键盘上方。</li>
<li><a href="https://github.com/Jiar/KeyboardToolBar/">KeyboardToolBar</a> - 从此不再担心键盘遮住输入框，<a href="http://www.jianshu.com/p/48993ff982c1">文档</a>。</li>
<li><a href="https://github.com/441088327/SYKeyboardTextField">SYKeyboardTextField</a> - SYKeyboardTextField 是一个轻巧,简单,非侵入式的键盘附随输入框! 采用Swift编写。</li>
<li><a href="https://github.com/zwaldowski/BlocksKit">BlocksKit</a> - block框架，为 OC 常用类提供了强大的 Block 语法支持，使得编写 OC 代码变得舒适、快速、优雅。</li>
<li><a href="https://github.com/facebook/KVOController">KVOController</a> - 在项目中有使用 KVO ，那么 KVOController 绝对是个好选择。它是 facebook 开源的一个 KVO 增强框架。</li>
<li><a href="https://github.com/arashpayan/appirater">appirater</a> - 用于提醒用户给你的 APP 打分的工具。</li>
<li><a href="https://github.com/MHaroonBaig/MotionKitr">MotionKitr</a> - 为核心运动框架（The Core Motion framework）提供友好的类库封装，以更方便使用三轴陀螺仪和加速感应器特性。</li>
<li><a href="https://launchkit.io/reviews/">Review Monitor</a> -  第一时间自动推送 Apple Store 的用户评论到你的邮件箱或者 Slack，第一时间跟进用户反馈，打造优秀 App 必备工具！类似的有：App annie 的类似功能。</li>
<li><a href="https://github.com/Naituw/WBWebViewConsole">WBWebViewConsole</a> - 类似微博iPhone客户端的 “调试选项” 吗？把其中的 “内置浏览器网页调试” 开源在 Github 上了。</li>
<li><a href="https://github.com/futurice/ios-good-practices">ios-good-practices</a> - ios-good-practices iOS 开发最佳实践。</li>
<li><a href="http://ios.jobbole.com/81830/">iOS开发最佳实践</a> - iOS 开发最佳实践 &ndash; 中文。</li>
<li><a href="http://code.cocoachina.com/detail/232160">TodayExtensionSharingDefaults</a> - TodayExtensionSharingDefaults是一个iOS 8 Today扩展示例，可以使用NSUserDefaults与其containing app分享数据。</li>
<li><a href="https://github.com/yannickl/QRCodeReader.swift">QRCodeReader.swift</a> - QRCodeReader.swift一款简单的 QR 二维码阅读组件及示例，提供前后相机切换功能。</li>
<li><a href="https://github.com/MxABC/swiftScan">swiftScan</a> - 具有丰富功能的二维码扫描组件及类库。<a href="https://github.com/MxABC/LBXScan">对应OC版本LBXScan</a>。</li>
<li><a href="https://github.com/appcoda/QR-Code-Generator">QR-Code-Generator.swift</a> - 生成二维码。</li>
<li><a href="https://github.com/100mango/QRCatcher">QRCatcher</a> - 一个简洁美观的二维码扫描应用， <a href="https://github.com/100mango/zen/blob/master/iOS%E5%AD%A6%E4%B9%A0%EF%BC%9AAVFoundation%20%E8%A7%86%E9%A2%91%E6%B5%81%E5%A4%84%E7%90%86/iOS%E5%AD%A6%E4%B9%A0%EF%BC%9AAVFoundation%20%E8%A7%86%E9%A2%91%E6%B5%81%E5%A4%84%E7%90%86%20.md">iOS学习：AVFoundation 视频流处理&ndash;二维码扫描</a>。</li>
<li><a href="https://github.com/zhengjinghua/MQRCodeReaderViewController">MQRCodeReaderViewController</a> - 二维码扫描控件, UI 做了优化, 仿造微信, 直接拖进项目就可使用。</li>
<li><a href="https://github.com/ayanonagon/Parsimmon">Parsimmon</a> - swift，小而美的语言学类库封装工具包。提供分词、标记词性、词形归并、朴素贝页斯分类、决策树等自然语言分析小工具。P.S. 英语分词效果好于中文，感兴趣的同学可以针对中文做一些优化开发。参考译文 NSHipster - <a href="http://nshipster.cn/nslinguistictagger/">NSLinguistic​Tagger</a>。</li>
<li><a href="https://github.com/liuchunlao/Password-keyboard">Password-keyboard</a> - 随机变换数字位置的密码键盘。 模仿银行类应用在付款时输入的随机密码键盘。</li>
<li><a href="https://github.com/SemperIdem/MKMapView-Extension">MKMapView-Extension</a> - 这是关于 MKMapView 写的一个基于swift的扩展，可以扩展 MKMapView 的相关功能，减少复用代码量。</li>
<li><a href="https://github.com/nomothetis/SemverKit">SemverKit</a> - 针对符合『语义化版本规范 2.0.0』版本号的解析、比较运算类库。不仅支持 Major, Minor, Patch，还支持 Alpha 和 Beta 预发布版本，以及相应地递增运算扩展。</li>
<li><a href="https://github.com/jpotts18/SwiftValidator">SwiftValidator</a> - 基于规则的输入验证类库。项目良好的面向对象设计思想，使规则的扩展及自定义非常方便。更专业的规则引擎（甚至是基于自然语言的规则配置）解决方案，比如：开源的 Drools，商用的 ILOG 等。</li>
<li><a href="https://github.com/gali8/Tesseract-OCR-iOS">Tesseract-OCR-iOS</a> - 有关OCR文字识别项目。</li>
<li><a href="https://github.com/osnr/Screenotate">Screenotate</a> - 支持 OCR 文字识别的载屏笔记 Mac 完整应用。</li>
<li><a href="http://cocoacats.com/">cocoacats</a> - 【分类汇总】里面收集了 iOS 中常用的分类文件，一直在更新。。</li>
<li><a href="https://github.com/nonstriater/Olla4iOS">Olla4iOS</a> - 过去积累的一些方便复用的类和方法，还在整理中。</li>
<li><a href="https://github.com/Draveness/DKNightVersion">DKNightVersion</a> - 用最快的方式给你的应用加上夜间和白天的切换效果。</li>
<li><a href="https://github.com/morizotter/TouchVisualizer">TouchVisualizer</a> - 实用的多点触摸可视化组件。扩展并作用于 UIWindows，结构上提供了简单地针对触摸显示定制，比如触摸点的颜色。</li>
<li><a href="https://github.com/wezm/RegexKitLite">RegexKitLite</a> - 用来处理正则表达式。</li>
<li><a href="https://github.com/sharplet/Regex">Regex.swift</a> - 实用的正则表达式微框架类库。</li>
<li><a href="https://github.com/cezheng/PySwiftyRegex">PySwiftyRegex.swift</a> - 像Python一样简洁高效地作正则处理。</li>
<li><a href="https://github.com/marmelroy/PhoneNumberKit">PhoneNumberKit.swift</a> -  解析、格式化及验证国际电话号码工具库（相当于 Google 的 libphonenumber 库的 Swift 版本）。</li>
<li><a href="https://github.com/czechboy0/XcodeServerSDK">XcodeServerSDK</a> - 非官方 Xcode Server SDK 封装库。 P.S. 该 SDK 分离自之前推荐的由该作者开发的自动测试框架 <a href="https://github.com/czechboy0/Buildasaur">Buildasaur</a>。</li>
<li><a href="https://github.com/FabrizioBrancati/BFKit-Swift">BFKit-Swift</a> - BFKit-Swift 这套工具库可以提高应用开发效率。</li>
<li><a href="https://github.com/CloudKitSpace/CKSIncrementalStore">CKSIncrementalStore</a> - 基于 CloudKit 服务器实现多终端数据同步。</li>
<li><a href="https://github.com/oisdk/SwiftSequence">SwiftSequence</a> - 简洁、灵活、多变的操作 SequenceType 的类库（基于微框架（μframework）设计思想）。</li>
<li><a href="https://github.com/photondragon/IDNFeedParser">IDNFeedParser</a> - 一个简单易用的Rss解析库。</li>
<li><a href="https://github.com/nsdictionary/CoreUmeng">CoreUmeng</a> - 简单：友盟分享封装。</li>
<li><a href="https://github.com/100apps/openshare">openshare</a> - 不用官方SDK，利用社交软件移动客户端(微信/QQ/微博/人人/支付宝)分享/登录/支付。</li>
<li><a href="https://github.com/tomkowz/Swifternalization">Swifternalization</a> - 一套实用的本地化工具库。使用教程及 API 文档完整。值得收入项目的“轮子”。</li>
<li><a href="https://github.com/owensd/apous">apous</a> - 一款有趣的 Swift 应用 － 让 Swift 成为脚本语言。</li>
<li><a href="https://github.com/kostiakoval/Mirror">Mirror</a> - 通过反射（Refection）实现镜像对象封装库。从而可以更轻松获取（或输出）对象属性名、类型及值变量。</li>
<li><a href="https://github.com/nixzhu/Proposer">Proposer</a> - Proposer 用单个 API 处理 iOS 上的权限请求，以便使用前确认可访问“相册”、“相机”、“麦克风”、“通讯录”或“用户位置”。</li>
<li><a href="https://github.com/nickoneill/PermissionScope">PermissionScope</a> - 用这个库可以在询问用户前，就告知用户所需的系统权限，为用户带来更好的体验。接受度更高—>更多活跃用户->更高的留存率->数据更好->下载率更高。</li>
<li><a href="https://github.com/intuit/LocationManager">LocationManager</a> - CoreLocation使用起来还是比较麻烦的，需要授权，判断系统版本等等，所以推荐使用第三方框架LocationManager，使用Block，十分简单！<a href="http://www.cocoachina.com/ios/20150721/12611.html">iOS-CoreLocation：无论你在哪里，我都要找到你！</a> 。</li>
<li><a href="https://github.com/Cee/pangu.objective-c">pangu.objective-c</a> - 有多种语言实现版本～ Pangu.Objective-C：格式化中英文之间的空格（OC）。</li>
<li><a href="https://github.com/atomicobject/objection">objection</a> - 一个轻量级的依赖注入框架Objection。</li>
<li><a href="https://github.com/johnlui/Swift-On-iOS/tree/master/ControlOrientation/ControlOrientation">ControlOrientation</a> - 如何用代码控制以不同屏幕方向打开新页面【iOS】， <a href="http://lvwenhan.com/ios/458.html">使用说明</a>。</li>
<li><a href="https://github.com/nicklockwood/iRate">iRate</a> - 问卷调查。</li>
<li><a href="https://github.com/nihalahmed/GameCenterManager">GameCenterManager</a> - 在iOS上管理GameCenter vanilla并不算难，但是有了这个库会更简单也更快。好上加好不是更好么。</li>
<li><a href="https://github.com/slackhq/SlackTextViewController">SlackTextViewController</a> - 用作极佳、定制的文本输入控制时，自适应文本区域，手势识别、自动填充、多媒体合并，快速drop-in解决方案。</li>
<li><a href="https://github.com/saturngod/IAPHelper">IAPHelper</a> - 应用内付费给我们提供了很多样本代码，而这个库丢掉了那些代码，将金钱交易相关的大多通用任务做了简单的封装。</li>
<li><a href="https://github.com/JanC/TAPromotee">TAPromotee</a> - 交叉推广应用是你可以免费实现的最佳市场推广策略之一。使用这个库做起来非常简单，不用都不可能——将TAPromotee加入你的podfile中，免费配置与享受更多下载吧。</li>
<li><a href="https://github.com/cgwangding/DownloadFontOnline">DownloadFontOnline</a> - 实现了在线下载一些字体的功能，不用在工程中导入字体库，下载的字体也不会保存在你的应用中，所以可以放心使用。修复了一下崩溃的bug。</li>
<li><a href="https://github.com/zhenlintie/STClock">STClock</a> - 仿锤子时钟。</li>
<li><a href="https://github.com/git-up/GitUp">GitUp</a> - GitUp是一个可视化的Git客户端，能够实时的进行编辑、合并、回滚等多种操作，更多功能，请下载体验。</li>
<li><a href="http://code.cocoachina.com/detail/320392/">获取联系人信息，通讯录</a> - 获取联系人信息，通讯录。</li>
<li><a href="https://github.com/HHuiHao/Universal-Jump-ViewController">Universal-Jump-ViewController</a> - 根据规则跳转到指定的界面(runtime实用篇一)。</li>
<li><a href="https://github.com/Ekhoo/Device">Device-swift</a> - 可以非常方便的获取设备型号和屏幕尺寸，实现起来难度不大，大家可以学习一下源码。</li>
<li><a href="https://github.com/khoiln/RunKit">RunKit.swift</a> - 针对 GCD 框架的一个友好访问封装库（支持方法链式调用）。</li>
<li><a href="https://github.com/FlexMonkey/Plum-O-Meter">Plum-O-Meter</a> - swift 称重应用， (3D Touch之我见)[<a href="http://swift.gg/2015/10/23/3d-touch-impressions-and-thoughts/">http://swift.gg/2015/10/23/3d-touch-impressions-and-thoughts/</a>]。</li>
<li><a href="http://code.cocoachina.com/view/128249">打开自带地图、百度地图、腾讯地图</a> - 打开自带地图、百度地图、腾讯地图。</li>
<li><a href="https://github.com/colin1994/batteryLevelTest">batteryLevelTest</a> - runtime精准获取电池电量，<a href="http://www.jianshu.com/p/11c1afdf5415">文档</a>。</li>
<li><a href="https://github.com/100apps/openshare">openshare</a> - 不用官方SDK，利用社交软件移动客户端(微信/QQ/微博/人人/支付宝)分享/登录/支付。。</li>
<li><a href="https://github.com/MatthewYork/DateTools">DateTools</a> - 用于提高Objective-C中日期和时间相关操作的效率。灵感来源于 DateTime和Time Period Library。</li>
<li><a href="https://github.com/deepdevelop/DDSlackFeedback">DDSlackFeedback</a> - 用这个接口实现的摇一摇上传文字或者截屏反馈到你的 Slack channel，特别适合测试 app 的时候用，集成也很简单。</li>
<li><a href="https://github.com/coolnameismy/BabyBluetooth">BabyBluetooth</a> - 是一个非常容易使用的蓝牙库, 适用于 iOS 和 Mac OS, 基于原生 CoreBluetooth 框架封装, 可以帮开发者们更简单地使用 CoreBluetooth API, 使用链式方法体, 使得代码更简洁、优雅。</li>
<li><a href="https://github.com/rasmusth/BluetoothKit">BluetoothKit.swift</a> - 基于 CoreBluetooth API 实现iOS/OS X 设备间蓝牙通讯封装类库。功能强大、传输稳定，示例完整，很酷。</li>
<li><a href="https://github.com/bignerdranch/CoreDataStack">CoreDataStack.swift</a> - 存储栈。</li>
<li><a href="https://github.com/THREDOpenSource/SYNQueue">SYNQueue.swift</a> - 执行队列类库。</li>
<li><a href="https://github.com/davedelong/DDMathParser">DDMathParser.swift</a> - 相比 NSExpression 和 GCMathPaser，功能更强大的数学表达式解析器。</li>
<li><a href="https://github.com/soffes/RateLimit">RateLimit.swift</a> - 简单、实用定时执行任务工具类库。</li>
<li><a href="https://github.com/shaojiankui/IOS-Categories">iOS-Categories</a> - 收集了许多有助于开发的iOS扩展,各种category分类。</li>
<li><a href="https://github.com/ibireme/YYCategories">YYCategories</a> - 功能丰富的 Category 类型工具库。</li>
<li><a href="https://github.com/ibireme/YYAsyncLayers">YYAsyncLayers</a> -  iOS 异步绘制与显示的工具。</li>
<li><a href="https://github.com/ibireme/YYDispatchQueuePool">YYDispatchQueuePool</a> -  iOS 全局并发队列管理工具。</li>
<li><a href="https://github.com/ibireme/YYKeyboardManager">YYKeyboardManager</a> -   iOS 键盘监听管理工具。</li>
</ul>


<hr />

<h4>数据库</h4>

<ul>
<li><a href="https://github.com/ccgus/fmdb">FMDB</a> - sqlite的工具， <a href="https://github.com/tangqiaoboy/FmdbSample">多线程FMDatabaseQueue实例</a>，<a href="https://github.com/liuchunlao/LVDatabaseDemo">FMDB数据库的使用演示和封装工具类</a>，<a href="http://code.cocoachina.com/view/128312">基于fmdb 的基本操作</a> 通过 fmdb 进行的数据库的 基本操作(增删改查 )查找是使用 UISearchBar 和UISearchDisplayController 进行混合使用。</li>
<li><a href="https://github.com/Gerry1218/GXDatabaseUtils">GXDatabaseUtils</a> - 在FMDB基础上的工具。</li>
<li><a href="https://github.com/realm/realm-cocoa">realm-cocoa</a> - Realm是一个真正为移动设备打造的数据库，同时支持Objective-C和Swfit。Realm宣称其相比Sqlite，在移动设备上有着更好的性能表现,<a href="https://realm.io/cn/">官方中文</a>。</li>
<li><a href="https://github.com/andrelind/Breeze">Breeze</a> - 用Swift写的一个轻量级的CoreData管理工具，并且还支持iCloud 。</li>
<li><a href="https://github.com/Alecrim/AlecrimCoreData">AlecrimCoreData</a> - Swift，更容易地访问 CoreData 对象封装类库。除了 CRUD，还提供指针定位，强大的排序、筛选，异步数据获取，以及独立线程后台存取数据。</li>
<li><a href="https://github.com/JohnEstropia/CoreStore">CoreStore</a> -  Core Data 管理类库。 其中事务管理及查询是其比较大的亮点，整套 API 功能完整。</li>
<li><a href="https://github.com/magicalpanda/MagicalRecord">MagicalRecord</a> - MagicalRecord就像是给Core Data提供了一层外包装，隐藏掉所有不相关的东西。 其中事务管理及查询是其比较大的亮点，整套 API 功能完整。</li>
<li><a href="https://github.com/hyperoslo/Presentation">Presentation</a> - 重量级好项目 Presentation，它可以方便你制作定制的动画式教程、Release Notes、个性化演讲稿等。</li>
<li><a href="https://github.com/terhechte/CoreValue">CoreValue</a> - Swift 2 版 Core Data 封装库。相比另外两个 <a href="https://github.com/arkverse/SwiftRecord">SwiftRecord</a>和 <a href="https://github.com/JohnEstropia/CoreStore">CoreStore</a>更轻量。</li>
<li><a href="https://github.com/sqlcipher/sqlcipher">SQLCipher</a> - SQLCipher使用256-bit AES加密，SQLCipher分为收费版本和免费版本。<a href="https://www.zetetic.net/sqlcipher/ios-tutorial/">官方教程</a>， <a href="http://foggry.com/blog/2014/05/19/jia-mi-ni-de-sqlite/">加密你的SQLite</a> - 各种sqlite数据库加密介绍。 <a href="http://download.csdn.net/detail/wzzvictory_tjsd/7379055">SQLCipherDemo下载</a> 。</li>
<li><a href="https://github.com/stephencelis/SQLite.swift">SQLite.swift</a> - 纯swift实现的类型安全的SQLite3封装，数据存储和JSON解析是永恒的话题。</li>
</ul>


<hr />

<h4>缓存处理</h4>

<ul>
<li><a href="https://github.com/yuantiku/YTKKeyValueStore">YTKKeyValueStore</a> - Key-Value存储工具类，<a href="http://tangqiaoboy.gitcafe.io/blog/2014/10/03/opensouce-a-key-value-storage-tool/">说明</a>。</li>
<li><a href="https://github.com/tumblr/TMCache">TMCache</a> - TMCache 是 Tumblr 开源的一个基于 key/value 的数据缓存类库,可以用于缓存一些临时数据或者需要频繁加载的数据,比如某些下载的数据或者一些临时处理结果。</li>
<li><a href="https://github.com/jl322137/JLKeychain">JLKeychain</a> - 快捷使用keychain存储数据的类，使keychain像NSUserDefaults一样工作。</li>
<li><a href="https://github.com/soffes/sskeychain">sskeychain</a> - SSKeyChains对苹果安全框架API进行了简单封装,支持对存储在钥匙串中密码、账户进行访问,包括读取、删除和设置。</li>
<li><a href="https://github.com/kishikawakatsumi/KeychainAccess">KeychainAccess</a> - 管理Keychain接入的小助手。</li>
<li><a href="https://github.com/ibireme/YYCache">YYCache</a> - 高性能的 iOS 缓存框架。</li>
</ul>


<hr />

<h4>PDF</h4>

<ul>
<li><a href="https://github.com/vfr/Reader">Reader</a> - Reader可提供类似iBooks的文档导航，支持屏幕旋转和所有方向，并通过密码保护加密PDF文件，支持PDF链接和旋转页面。</li>
</ul>


<hr />

<h4>图像浏览及处理</h4>

<ul>
<li><a href="https://github.com/liric28/FLAnimatedImage">FLAnimatedImage</a> - gif播放处理的工具。</li>
<li><a href="https://github.com/yackle/CLImageEditor">CLImageEditor</a> - 超强的图片编辑库，快速帮你实现旋转，防缩，滤镜等等一系列麻烦的事情。</li>
<li><a href="https://github.com/esilverberg/ios-image-filters">ios-image-filters</a> - 图像滤镜，库比较旧了，很容易崩溃。</li>
<li><a href="https://github.com/xissburg/XBImageFilters">XBImageFilters</a> - 图像滤镜。</li>
<li><a href="https://github.com/mwaterfall/MWPhotoBrowser">MWPhotoBrowser</a> - 一个非常不错的照片浏览器，在github的star接近3000个，<a href="http://www.superqq.com/blog/2015/01/22/jie-jue-mwphotobrowserzhong-de-sdwebimagejia-zai-da-tu-dao-zhi-de-nei-cun-jing-gao-wen-ti/">解决MWPhotoBrowser中的SDWebImage加载大图导致的内存警告问题</a>。</li>
<li><a href="https://github.com/objcio/issue-21-core-image-explorer">core-image-explorer</a> -  Core Image 滤镜处理图片&ndash; swift ，<a href="http://objccn.io/issue-21-6/">Core Image 介绍</a>。</li>
<li><a href="https://github.com/rFlex/CoreImageShop">CoreImageShop</a> - CoreImageShop图片滤镜处理&ndash; Mac app that let you create a complete Core Image Filter usable on iOS using SCRecorder。</li>
<li><a href="https://github.com/BradLarson/GPUImage">GPUImage</a> - 处理图片效果。</li>
<li><a href="https://github.com/ruslanskorb/RSKImageCropper">RSKImageCropper</a> - 适用于iOS的图片裁剪器，类似Contacts app，可上下左右移动图片选取最合适的区域。</li>
<li><a href="http://code.cocoachina.com/detail/232156">WZRecyclePhotoStackView</a> - 删除照片交互&ndash;WZRecyclePhotoStackView，就是模拟生活中是删除或保留犹豫不决的情形而产生的。 在上滑，下滑的部分，借鉴了<a href="https://github.com/cwRichardKim/TinderSimpleSwipeCards">TinderSimpleSwipeCards</a>。</li>
<li><a href="https://github.com/schwa/TimingFunctionEditor">TimingFunctionEditor</a> - TimingFunctionEditor用swift编写， 贝塞尔曲线编辑器，编辑后可以预览或拷贝代码片段直接使用。P.S. 该项目采用更简单的依赖管理器 <a href="https://github.com/Carthage/Carthage">Carthage</a> ，而非常用的 CocoaPods。<a href="http://www.cocoachina.com/ios/20141204/10528.html">Carthage介绍中文</a>。</li>
<li><a href="https://github.com/aaronabentheuer/AAFaceDetection">AAFaceDetection</a> - AAFaceDetection&ndash;swift，简单、实用的面部识别封装库。虽然该技术从 iOS 5 发展，不过真正有趣的应用还不多。。</li>
<li><a href="https://github.com/itouch2/PhotoTweaks">PhotoTweaks</a> - 这个库挺赞的，正好是对图像操作的。</li>
<li><a href="https://github.com/contentful-labs/Concorde">Concorde</a> - swift, Concorde, 一个可用于下载和解码渐进式 JPEG 的库, 可用来改善应用的用户体验。</li>
<li><a href="https://github.com/tristanhimmelman/ZoomTransition">ZoomTransition</a> - swift, 通过手势操控图片的放大、缩小、旋转等自由变化效果的组件及示例。</li>
<li><a href="https://github.com/melvitax/AFImageHelper">AFImageHelper</a> - swift,一套针对 UIImage 和 UIImageView 的实用扩展库，功能包含填色和渐变、裁剪、缩放以及具有缓存机制的在线图片获取。</li>
<li><a href="https://github.com/demon1105/PinterestSwift">PinterestSwift</a> - swift,Pinterest 风格图片缩放、切换示例。</li>
<li><a href="https://github.com/KittenYang/KYElegantPhotoGallery">KYElegantPhotoGallery</a> - 一个优雅的图片浏览库。</li>
<li><a href="https://github.com/gsdios/SDPhotoBrowser">SDPhotoBrowser</a> - 仿新浪动感图片浏览器,非常简单易用的图片浏览器，模仿微博图片浏览器动感效果，综合了图片展示和存储等多项功能。</li>
<li><a href="https://github.com/chennyhuang/HZPhotoBrowser">HZPhotoBrowser</a> - 一个类似于新浪微博图片浏览器的框架（支持显示和隐藏动画；支持双击缩放，手势放大缩小；支持图片存储；支持网络加载gif图片，长图滚动浏览；支持横竖屏显示）。</li>
<li><a href="https://github.com/YiZhuoChen/PhotoStackView-Swift">PhotoStackView-Swift</a> - PhotoStackView——照片叠放视图，<a href="http://blog.csdn.net/u013604612/article/details/46336657">使用说明</a>。</li>
<li><a href="https://github.com/FlexMonkey/MarkingMenu">MarkingMenu</a> - 基于手势、类似 Autodesk Maya 风格标记菜单及图片渲染。</li>
<li><a href="https://github.com/dsxNiubility/SXPhotoShow">SXPhotoShow</a> - UICollectionViewFlowLayout流水布局 是当下collectionView中常用且普通的布局方式。本代码也写了三种好看的布局，其中LineLayout和流水布局有很大的相同点就直接继承UICollectionViewFlowLayout，然后StackLayout，CircleLayout这两种都是直接继承自最原始的UICollectionViewLayout 布局方案。</li>
<li><a href="https://github.com/cgwangding/PictureWatermark">PictureWatermark</a> - 主要实现了给图片加文字以及图片水印的功能，已封装成了UIImage的类别，方便使用。</li>
<li><a href="http://code.cocoachina.com/detail/320603/">自定义宽高比的相册框 拍照</a> - 取出照片时 弹出自定义view。在这个自定义view上创建一个需要的相框大小的view层 把取出的图片赋值给UIImageView按缩放添加到这个层上。对uiimageView添加捏合、移动 手势。添加按钮 选取，最后根据位移和缩放比例 裁剪image。</li>
<li><a href="https://github.com/gang544043963/LGPhotoBrowser">LGPhotoBrowser</a> - LGPhotoBrowser:相册选择/浏览器/照相机（仿微信）,包含三个模块：照片浏览器，相册选择器，照相机。</li>
<li><a href="https://github.com/oscarWyz/PhotoBrowser">PhotoBrowser</a> - 一个简单的好用的的图片浏览器。</li>
<li><a href="https://github.com/xujingzhou/BeautyHour">BeautyHour</a> - 完整应用，功能与“美图秀秀”雷同。</li>
<li><a href="https://github.com/DroidsOnRoids/MPParallaxView">MPParallaxView</a> - 是用 Swift 写的类似 Apple TV Parallax 效果的视图。</li>
<li><a href="https://github.com/zhengjinghua/StitchingImage">StitchingImage</a> - 仿微信群组封面拼接控件, 直接拖进项目就可使用，<a href="http://gold.xitu.io/entry/56395f5360b20b143a9178f6">教程</a>。</li>
<li><a href="https://github.com/seedante/SDECollectionViewAlbumTransition">SDECollectionViewAlbumTransition</a> - 用自定义的 push 和 pop 实现了有趣的 iOS 相册翻开动画效果。</li>
<li><a href="https://github.com/xujingzhou/BeautyHour">SKPhotoBrowser.swift</a> - swift中规中矩、实用的图片浏览类库。示例也很完整。</li>
<li><a href="https://github.com/kean/Nuke">Nuke.swift</a> - 完整、强大、实用的图片管理类库。主要功能包括可定制装载，缓存，滤镜及尺寸变换。</li>
<li><a href="https://github.com/AwesomeDennis/DNImagePicker">DNImagePicker</a> - 类似wechat的图片选择。</li>
<li><a href="https://github.com/lioonline/CocoaPicker">CocoaPicker</a> - 仿QQ图片选择器（OC）。</li>
<li><a href="https://github.com/johnil/JFImagePickerController">JFImagePickerController</a> - vvebo作者：多选照片、预览已选照片、针对超大图片优化。</li>
<li><a href="https://github.com/vitoziv/VIPhotoView">VIPhotoView</a> - 图片浏览，用于展示图片的工具类，因为是个 View，所以你可以放在任何地方显示。支持旋转，双击指定位置放大等。</li>
<li><a href="https://github.com/SpringOx/AGImagePickerController">AGImagePickerController</a> - 是一个图片选择器，支持图片多选，支持大图横滑预览，支持放大预览，支持横竖屏，支持所有的iOS设备。</li>
<li><a href="https://github.com/ibireme/YYImage">YYImage</a> - 功能强大的 iOS 图像框架，支持大部分动画图像、静态图像的播放/编码/解码。</li>
<li><a href="https://github.com/KyoheiG3/PagingView">PagingView.swift</a> - 注重细节的自动布局分页视图组件。</li>
</ul>


<hr />

<h4>摄像照相视频音频处理</h4>

<ul>
<li><a href="https://github.com/rFlex/SCRecorder">SCRecorder</a> - SCRecorder 短视频录制。</li>
<li><a href="https://github.com/pingguo-zangqilong/VideoPushDemo">VideoPushDemo</a> - 视频剪辑 <a href="http://www.jianshu.com/p/3006502912aa">视频特效制作1</a> <a href="http://www.jianshu.com/p/6313025349a9">视频特效制作2</a>。</li>
<li><a href="https://github.com/omergul123/LLSimpleCamera">LLSimpleCamera</a> - A simple, customizable camera control for iOS， 摄像头。</li>
<li><a href="https://github.com/syedhali/EZAudio">EZAudio</a> - EZAudio 是一个 iOS 和 OSX 上简单易用的音频框架，根据音量实时显示波形图，基于Core Audio，适合实时低延迟音频处理，非常直观。<a href="http://segmentfault.com/blog/news/1190000000370957">中文介绍</a>,<a href="http://www.syedharisali.com/about">官网</a>。</li>
<li><a href="http://ffmpeg.org/">ffmpeg</a> - ffmpeg官网，<a href="http://www.cocoachina.com/ios/20150514/11827.html">FFmpeg在iOS上完美编译</a>。</li>
<li><a href="http://www.videolan.org/">VCL</a> - VCL官网。</li>
<li><a href="https://github.com/kolyvan/kxmovie">kxmovie</a> - 使用ffmpeg的影片播放器，<a href="http://www.cocoachina.com/bbs/read.php?tid=145575">修改说明</a>， <a href="https://github.com/kinglonghuang">修改代码</a>。</li>
<li><a href="https://github.com/Bilibili/ijkplayer">ijkplayer</a> - B站开源的视频播放器，支持Android和iOS。</li>
<li><a href="https://github.com/tumtumtum/StreamingKit">StreamingKit</a> - StreamingKit流媒体音乐播放器。</li>
<li><a href="https://github.com/muhku/FreeStreamer">FreeStreamer</a> - FreeStreamer流媒体音乐播放器，cpu占用非常小。</li>
<li><a href="https://github.com/douban/DOUAudioStreamer">DOUAudioStreamer</a> - DOUAudioStreamer豆瓣的音乐流媒体播放器。</li>
<li><a href="https://github.com/fmpro/fmpro">fmpro</a> - 电台播放器，支持锁屏歌词，支持基本播放流程，歌词展示，后台锁屏播放和控制以及锁屏后封面+歌词，<a href="https://github.com/jovisayhehe/fmpro_R">fmpro_R</a> 。</li>
<li><a href="https://github.com/mmackh/IPDFCameraViewController">IPDFCameraViewController</a> - 支持相机定焦拍摄、滤镜、闪光、实时边框检测以及透视矫正功能，并有简单易用的API。</li>
<li><a href="https://github.com/rFlex/SCRecorder">SCRecorder</a> - 酷似 Instagram/Vine 的音频/视频摄像记录器，以 Objective-C 为基础的过滤器框架。 你可以做很多如下的操作：记录多个视频录像片段。删除任何你不想要的记录段。可以使用任何视频播放器播放片段。保存的记录可以在序列化的 NSDictionary 中使用。（在 NSUserDefaults 的中操作）添加使用 Core Image 的视频滤波器。可自由选择你需要的 parameters 合并和导出视频。</li>
<li><a href="https://github.com/GabrielAlva/Cool-iOS-Camera">Cool-iOS-Camera</a> - Cool-iOS-Camera。</li>
<li><a href="https://github.com/IFTTT/FastttCamera">FastttCamera</a> - FastttCamera 快速照相。</li>
<li><a href="https://github.com/itsmeichigo/ICGVideoTrimmer">ICGVideoTrimmer</a> - ICGVideoTrimmer提供提供视频剪切的视图（类似系统相册中浏览视频时顶部那个条状视图）。左右两个边界选择器还能够自定义。</li>
<li><a href="http://d.cocoachina.com/code/detail/285717">IOS录音和播放功能demo</a> - 比较完整的ios录音和播放功能的实现。</li>
<li><a href="https://github.com/imaginary-cloud/CameraManager">CameraManager</a> - 相机管理封装类库。看着极好用的样子&mdash;-swift。</li>
<li><a href="https://github.com/msching/MCAudioInputQueue">MCAudioInputQueue</a> - 简易录音类，基于AudioQueue的。</li>
<li><a href="https://github.com/vizllx/DraggableYoutubeFloatingVideo">DraggableYoutubeFloatingVideo</a> - 展示像类似Youtube移动应用的那种浏览视频的效果，当点击某视频时能够从右下方弹出一个界面，并且该界面能够通过手势，再次收缩在右下方并继续播放。这是通过AutoLayout设计实现。</li>
<li><a href="http://www.penguin.cz/~utx/amr">amr</a> - 做即时通讯的音频处理，录音文件是m4a，便于web端的音频播放。</li>
<li><a href="https://github.com/f33chobits/FSVoiceBubble">FSVoiceBubble</a> - 一个轻量级播放录音音频的气泡：1.支持短时间的音频播放（支持网络音频）；2.播放时的声波动画；3.自定义包括声波的颜色，气泡的背景等。</li>
<li><a href="https://github.com/36Kr-Mobile/KRVideoPlayer">KRVideoPlayer</a> - 类似Weico的播放器，支持竖屏模式下全屏播放。</li>
<li><a href="http://code.cocoachina.com/view/128253">自定义视频播放器AVPlayer</a> - 利用系统类AVPlayer实现完全自定义视频播放器，显示播放时间，缓存等功能。代码清晰，注释详细。</li>
<li><a href="https://github.com/xujingzhou/VideoBeautify">VideoBeautify</a> - 功能酷似美拍,秒拍等应用的源码：对视频进行各种美化处理，采用主题形式进行分类，内含各种滤镜，动画特效和音效等。</li>
<li><a href="https://github.com/hanton/HTY360Player">HTY360Player</a> - 是一款提供在 iOS 中使用 360 度无死角拖拽视频进行不同角度播放的视频播放器。</li>
<li><a href="https://github.com/AlexLittlejohn/ALCameraViewController">ALCameraViewController</a> - ALCameraViewController 摄像头视图控制器（含可定制照片选择器，图片简单裁切功能）及演示。</li>
<li><a href="https://github.com/lfb-cd/recordDemo">recordDemo.swift</a> - 一个Swift语言实现直接可以用的录音Demo，<a href="http://www.jianshu.com/p/f0b88355d7cb">实现说明</a>。</li>
<li><a href="https://github.com/swiftcodex/Swift-Radio-Pro">Swift-Radio-Pro</a> - 集成 LastFM 的专业电台应用（基于 Swift 2.0）。</li>
<li><a href="https://github.com/coderyi/Eleven">Eleven</a> - Eleven Player - 一个使用 FFmpeg 实现的简单强大的 iOS 开源播放器。</li>
<li><a href="https://github.com/mobileplayer/mobileplayer-ios">mobileplayer-ios.swift</a> - 很不错的高度可定制播放器项目。</li>
<li><a href="https://github.com/lajos/iFrameExtractor">iFrameExtractor</a> - 开源视频播放器， ffmpeg在iOS的使用-iFrameExtractor源码解析，<a href="http://ios.jobbole.com/82408/">文章</a>。</li>
</ul>


<hr />

<h4>响应式框架</h4>

<ul>
<li><a href="https://github.com/ReactiveCocoa/ReactiveCocoa">ReactiveCocoa</a> - ReactiveCocoa 受函数响应式编程激发。不同于使用可变的变量替换和就地修改，RAC提供Signals来捕获当前值和将来值（ <a href="http://yulingtianxia.com/blog/2014/07/29/reactivecocoa/">使用介绍</a> ），<a href="http://iiiyu.com/2014/12/26/learning-ios-notes-thirty-six/">不错的例子</a>,入门好教程：<a href="http://www.cocoachina.com/ios/20150123/10994.html">ReactiveCocoa入门教程：第一部分 </a>。<a href="http://ios.jobbole.com/82232/">Reactive Cocoa 3.0 在 MVVM 中的应用</a> ,<a href="http://www.jianshu.com/p/87ef6720a096">小码哥：快速让你上手ReactiveCocoa之基础篇</a>。</li>
<li><a href="https://github.com/ReactiveCocoa/ReactiveAnimation">ReactiveAnimation</a> - ReactiveCocoa 推出了一个叫 ReactiveAnimation 的子项目，直接用完全用 Swift 来实现了。</li>
<li><a href="https://github.com/gavinkwoe/BeeFramework">BeeFramework</a> -  与ReactiveCocoa类似，<a href="http://www.lanrenios.com/tutorials/all/2012/1220/641.html">BeeFramework用户指南 v1.0</a>。</li>
<li><a href="https://github.com/iMartinKiss/Objective-Chain">Objective-Chain</a> - Objective-Chain是一个面向对象的响应式框架，作者表示该框架吸收了 ReactiveCocoa 的思想，并且想做得更面向对象一些。</li>
<li><a href="https://github.com/ReactiveX/RxSwift">RxSwift</a> - RxSwift。</li>
</ul>


<hr />

<h4>消息相关</h4>

<h5>消息推送客户端</h5>

<ul>
<li><a href="https://github.com/sagiwei/SGPush/tree/master/SGPushDemo">SGPushDemo</a> - 消息推送客户端</li>
<li><a href="https://github.com/mattt/Orbiter">Orbiter</a> - 消息推送客户端:Push Notification Registration for iOS.</li>
<li><a href="https://github.com/ios44first/PushDemo">PushDemo</a> - 客户端消息接收消息代码，<a href="http://blog.sina.com.cn/s/blog_71715bf80102uy2k.html">IOS开发之 &mdash;- IOS8推送消息注册</a> ， <a href="http://my.oschina.net/u/2340880/blog/413584">分分钟搞定IOS远程消息推送</a>。</li>
</ul>


<h5>消息推送服务端</h5>

<ul>
<li><a href="https://code.google.com/p/javapns/downloads/list">javapns源代码</a> - 消息推送的java服务端代码，注意：DeviceToken中间不能有空格。</li>
<li><a href="https://github.com/stefanhafeneger/PushMeBaby">pushMeBaby</a> - Mac端消息推送端代码，注意：DeviceToken中间要有空格。</li>
</ul>


<h5>通知相关</h5>

<ul>
<li><a href="https://github.com/jessesquires/JSQNotificationObserverKit">JSQNotificationObserverKit</a> - 一款轻量、易用的通知发送及响应框架类库。作者是知名开源项目 JSQMessagesViewController（Objective-C 版即时聊天）的作者 Jesse Squires.</li>
<li><a href="https://github.com/Glow-Inc/GLPubSub">GLPubSub</a> - 一个简短实用的 NSNotificationCenter 的封装。</li>
<li><a href="https://github.com/lizyyy/Homeoff">Homeoff</a> - 用swift写了一个模仿Launcher通知中心快捷方式的应用。支持20个应用，并增加了一个返回到桌面来解放Home键的功能。</li>
<li><a href="https://github.com/jaydee3/JDStatusBarNotification">JDStatusBarNotification</a> - 在状态栏顶部显示通知。可以自定义颜色字体以及动画。支持进度显示以及显示状态指示器。</li>
</ul>


<hr />

<h4>版本新API的Demo</h4>

<ul>
<li><a href="https://github.com/WildDylan/appleSample">appleSample</a> - iOS 苹果官方Demo合集， <a href="https://developer.apple.com/library/ios/navigation/#section=Resource%20Types&amp;topic=Sample%20Code">官方demo</a>.</li>
<li><a href="https://github.com/shu223/iOS7-Sampler">iOS7-Sampler</a> - 整合了iOS7.0的一些十分有用的特性，比如：Dynamic Behaviors、碰撞检测、语音合成、视图切换、图像滤镜、三维地图、Sprite Kit（动画精灵）、Motion Effect（Parallax）、附近蓝牙或者wifi搜索连接、AirDrop、运动物体追踪（iPhone 5S以上，需要M7处理器）等等。对于日常的应用开发十分实用。</li>
<li><a href="https://github.com/shu223/iOS8-Sampler">iOS8-Sampler</a> - 日本的shuさん制作的 iOS8 参考代码集。01.Audio Effects ；02.New Image Filters；03.Custom Filters；04.Metal Basic；05.Metal Uniform Streaming；06.SceneKit；07.HealthKit；08.TouchID；09.Visual Effects；10.WebKit；11.UIAlertController；12.User Notification；13.Pedometer；14.AVKit；15.Histogram；16.Code Generator；17.New Fonts；18.Popover；19.Accordion Fold Transition</li>
<li><a href="https://github.com/shu223/iOS-9-Sampler">iOS-9-Sampler</a> - 通过实例介绍了iOS 9 SDK中重要新特性的使用。</li>
<li><a href="https://github.com/MartinRGB/MTSwift-Learning">MTSwift-Learning</a> - 通过一些简单项目实战演练开始学习 Swift 。</li>
<li><a href="https://github.com/shinobicontrols/iOS8-day-by-day">iOS8-day-by-day</a> - swift。</li>
<li><a href="https://github.com/shinobicontrols/iOS9-day-by-day">iOS9-day-by-day</a> - swfit <a href="http://www.jianshu.com/p/039f8de6ee4d">iOS9 Day-by-Day :: Day 2 :: UI Testing</a>。</li>
<li><a href="http://www.cocoachina.com/ios/20150714/12557.html">iOS 9 分屏多任务</a> - iOS 9 分屏多任务：Slide Over &amp; Split View快速入门（中文版）。</li>
<li><a href="https://github.com/uraimo/uistackview-sample">uistackview-sample.swift</a> - iOS 9 引进了 UIStackViews，提供 auto-layout 特性。如果你开发过 Android 应用，会发现它和 LinearLayouts 概念上很类似，它是增强版。你可以手动创建，也可以使用 IB 自动创建，本文用的是代码实现。。</li>
</ul>


<hr />

<h4>代码安全与密码</h4>

<ul>
<li><a href="https://github.com/Polidea/ios-class-guard">ios-class-guard</a> - 一个用于混淆iOS的类名、方法名以及变量名的开源库&ndash;有人反映编译出来的app运行不了。</li>
<li><a href="https://www.polidea.com/#!heartbeat/blog/Protecting_iOS_Applications">《Protecting iOS Applications》</a>：文章系统地介绍了如何保护iOS程序的代码安全，防止反汇编分析。</li>
<li><a href="https://github.com/facebook/fishhook">fishhook</a> - fishhook是Facebook开源的一个可以hook系统方法的工具。</li>
<li><a href="https://github.com/smilingxinyi/GesturePassword">GesturePassword</a> - 一个iOS手势密码功能实现，iPad/iPhone 都可以用，没有使用图片，里面可以通过view自己添加。keychain做的数据持久化，利用苹果官方KeychainItemWrapper类。操作部分都在controller了。删除直接用一下clear。</li>
<li><a href="https://github.com/Juuman/JMPasswordView">JMPasswordView</a> - 简单实用的手势密码，效果可自行调控。</li>
<li><a href="http://code.cocoachina.com/detail/298556/%E4%BB%BF%E5%AF%86%E7%A0%81%E9%94%81-%E4%B9%9D%E5%AE%AB%E6%A0%BC/">仿密码锁-九宫格</a> - 仿密码锁-九宫格，主要是使用UIButton 手势事件  UIBezierPath画图，解锁失败弹出“密码错误”。</li>
<li><a href="https://github.com/nsdictionary/CoreLock">CoreLock</a> - 本框架是高仿支付宝，并集成了所有功能，并非一个简单的解锁界面展示。个人制作用时1周多，打造解锁终结者框架。</li>
<li><a href="https://github.com/crazypoo/LikeAlipayLockCodeView">LikeAlipayLockCodeView</a> - 高仿支付宝手势解锁（超级版）。</li>
<li><a href="https://github.com/iosdeveloperpanc/PCGestureUnlock">PCGestureUnlock</a> - 目前最全面最高仿支付宝的手势解锁，而且提供方法进行参数修改，能解决项目开发中所有手势解锁的开发。</li>
<li><a href="https://github.com/icoder20150719/ICPayPassWordDemo">ICPayPassWordDemo</a> - CPayPassWordDemo，一个模仿支付宝支付密码输入对话框小demo。</li>
<li><a href="https://github.com/bigsan/RSAESCryptor">RSAESCryptor</a> - 加密 RSA+AES Encryption/Decryption library for iOS. This library uses 2048-bit RSA and 256-bit key with 128-bit block size AES for encryption/decryption。</li>
</ul>


<hr />

<h4>测试及调试</h4>

<ul>
<li><a href="https://github.com/tapwork/HeapInspector-for-iOS">HeapInspector</a> - HeapInspector是一个用于检测应用中的内存泄漏的开源调试工具。</li>
<li><a href="http://try.crashlytics.com/">Crashlytics</a> - Crashlytics 崩溃报告 崩溃日志   <a href="http://www.infoq.com/cn/articles/crashlytics-crash-statistics-tools">使用说明</a> 。</li>
<li><a href="https://github.com/RuiAAPeres/UIViewController-Swizzled">UIViewController-Swizzled</a> - 把你进入的每一个controller的类名打出来,如果看一些特别复杂的项目的时候直接运行demo就可以知道执行次序了。</li>
<li><a href="https://code.google.com/p/snoop-it/">snoop-it</a> - snoop-it比UIViewController-Swizzled好用，代码托管在google上。</li>
<li><a href="https://github.com/zenangst/Versions">Versions</a> - 版本比较小工具。</li>
<li><a href="http://code4app.com/ios/MobileWebPerformanceTest/5465d3e9933bf00c658b4f43">MobileWebPageTest</a> - MobileWebPageTest是用来测试移动网页性能的软件，它可以对页面的加载和渲染过程进行截屏，协助开发者分析出页面性能瓶颈。</li>
<li><a href="https://github.com/Coneboy-k/KKLog">KKLog</a> - 一个日志管理系统。</li>
<li><a href="https://github.com/emaloney/CleanroomLogger">CleanroomLogger</a> - 相当于 CocoaLumberjack 或 Log4j 的 Swift 版本，功能上甚至更强大。另外，源代码中已经内含了完整的 API 文档，使用非常方便。</li>
<li><a href="https://github.com/czechboy0/Buildasaur">Buildasaur</a> - 自动测试框架 Buildasaur。</li>
<li><a href="http://www.devtf.cn/?p=739">使用Quick框架和Nimble来测试ViewControler</a> - Quick是一个用于创建BDD测试的框架。配合Nimbl，可以为你创建更符合预期目标的测试。</li>
<li><a href="https://github.com/KrauseFx/fastlane">fastlane</a> - 一套iOS开发和持续集成的命令行工具fastlane，可以用来快速搭建CI甚至自动提交的开发环境。这套工具中包括了上传ipa文件，自动截取多语言截屏，生成推送证书，管理产品证书等一系列实用工具。</li>
<li><a href="https://github.com/kif-framework/KIF">KIF</a> - 是一个开源的用户界面UI测试框架. 使用 KIF, 并利用 iOS中的辅助功能 API, 你将能够编写模拟用户输入，诸如点击，触摸和文本输入，自动化的UI测试.</li>
<li><a href="https://github.com/Quick/Quick">Quick</a> - 用于Swift中的单元测试（也可用于Objective-C），与Xcode整合在一起。如果你是Objective-C的粉丝，我建议用Specta代替这个，但是对Swift使用者来说，Quick是最佳选择。</li>
<li><a href="https://github.com/railsware/Sleipnir">Sleipnir</a> - Swift的测试框架。</li>
<li><a href="https://github.com/kiwi-bdd/Kiwi/wiki">kiwi-bdd</a> - TDD或BDD，objective-c语言的测试框架，最流行的BDD测试框架了，Kiwi最受欢迎（根据github上的star数来推断，行为描述和期望写起来也比较易懂，至少我是这么认为的） <a href="http://www.jianshu.com/p/7e3f197504c1#">iOS开发中的测试框架</a>。</li>
<li><a href="https://github.com/specta/specta">specta</a> -  TDD或BDD，objective-c语言的测试框架，用的人多。</li>
<li><a href="https://github.com/pivotal/cedar">cedar</a> -  TDD或BDD，objective-c语言的测试框架，用的人少。</li>
<li><a href="https://github.com/daisuke0131/ViewMonitor">ViewMonitor</a> - 能够帮助 iOS 开发者们精确的测量视图, 可直接在调试应用中查看具体某个视图的坐标, 宽高等参数。</li>
<li><a href="https://github.com/adad184/MMPlaceHolder">MMPlaceHolder</a> - 一行代码显示UIView的位置及相关参数。</li>
<li><a href="https://github.com/adad184/XXPlaceHolder">XXPlaceHolder.swift</a> - MMPlaceHolder的swift版本。

<ul>
<li><a href="https://github.com/kconner/KMCGeigerCounter">KMCGeigerCounter</a> - KMCGeigerCounter通过复杂和简单的视图演示了类似盖革计数器的帧速计算功能。掉帧通常是可见的，但是很难区分55fps和60fps之间的不同，而KMCGeigerCounter可以让你观测到掉落5帧的情况。</li>
</ul>
</li>
</ul>


<hr />

<h4>AppleWatch</h4>

<ul>
<li><a href="https://github.com/eleks/rnd-apple-watch-tesla">Tesla汽车AppleWatch app demo演示</a> - 通过AppleWatch控制特斯拉汽车，同时可以看到汽车的相关信息，比如剩余电量、可续行里程等，以及解锁/上锁车门、调节司机和乘客的四区域空调温度、开启车辆大灯、定位汽车等。<a href="http://www.cocoachina.com/ios/20150205/11116.html">源码推荐说明</a>。</li>
<li><a href="https://github.com/kostiakoval/WatchKit-Apps">WatchKit-Apps</a> - WatchKit 开源小项目示例集锦。是不可多得地学习 WatchKit 的示例式教程（1.如何创建一个简单的交互式计数器；2.如何从手表上控制iOS app；3.如何在WatchKit app和iOS app之间共享数据；4.如何创建一个拥有不同背景色的数字时钟；5.展示不同的UI层；6.如何创建支持滑动手势的应用程序。）。</li>
<li><a href="https://github.com/KittenYang/KYVoiceCurve">KYVoiceCurve</a> - 类似Apple Watch中语音的声音曲线动画。</li>
<li><a href="https://github.com/Instagram/IGInterfaceDataTable">IGInterfaceDataTable</a> - IGInterfaceDataTable是WKInterfaceTable对象的一个类别，可以让开发者更简单地配置多维数据。该项目使用类似UITableViewDataSource的数据源模式配置Apple Watch表格，而不是将数据结构扁平化成为数组。</li>
<li><a href="http://www.swiftkiller.com/?p=613">Apple Watch开发教程资料汇总</a> - Apple Watch开发教程资料汇总。</li>
<li><a href="https://github.com/contentful-labs/Stargate">Stargate</a> - 通过 iPhone 桥接实现 Mac 与 Watch 的即时通讯。Stargate 通过封装两个优秀的基础类库 MMWormhole 和 PeerKit 实现高效的通讯应用。&ndash;swift</li>
<li><a href="https://github.com/sandofsky/soon">soon</a> - 一款倒计时 WatchKit 示例应用。作者从架构的角度，思考如何设计一款完整、通讯高效且性能又好的 WatchKit 扩展应用。该示例学习性非常强。&ndash;swift</li>
<li><a href="https://github.com/shu223/watchOS-2-Sampler">watchOS-2-Sampler</a> - 基于 watchOS 2 若干新特性，写了相应的示例代码供大家学习、参考。</li>
<li><a href="https://github.com/KhaosT/HMWatch">HMWatch</a> - HMWatch是个有待完善的watchOS 2.0 HomeKit 应用示例。</li>
<li><a href="https://github.com/manavgabhawala/CocoaMultipeer">CocoaMultipeer</a> - CocoaMultipeer这个开源框架支持OS X, iOS和watchOS设备间的点对点通信，解决watchOS和Mac之间通信的方案还是很有用的。</li>
<li><a href="https://github.com/GetHighstreet/HighstreetWatchApp">HighstreetWatchApp</a> - 是电商平台Highstreet针对App Watch的一款应用，该demo中加载的是虚拟数据。</li>
<li><a href="https://github.com/NilStack/NKWatchChart">NKWatchChart</a> - NKWatchChart是一个基于PNChart专门为Apple Watch 开发的图表库,目前支持 line, bar, pie, circle 和 radar 等 图表形式。</li>
<li><a href="https://github.com/diwu/BeijingAirWatch">BeijingAirWatch</a> - 国人的开源项目代码 ！WatchOS 2.0 Complication of Real-time Air Quality for Major Chinese Cities 苹果表盘实时刷新北上广沈蓉空气质量。</li>
</ul>


<hr />

<h4>VPN</h4>

<ul>
<li><a href="https://github.com/lexrus/vpnon/">vpnon</a> - swift的VPN On 的源码和本地化内容都是开放的: <a href="https://crowdin.com/project/vpnon">官方网站</a>。</li>
<li><a href="https://github.com/CatchChat/Hydro.network">Hydro.network</a> - <a href="http://zhowkev.in/2015/03/09/hydro-network-de-kai-fa-lu-cheng/">Hydro.network 的开发旅程</a>, <a href="https://gitcafe.com/Catch/Hydro.network">gitcafe</a>。</li>
</ul>


<hr />

<h4>完整项目</h4>

<ul>
<li><a href="https://github.com/singro/v2ex">v2ex</a> - v2ex 的客户端，新闻、论坛。</li>
<li><a href="https://github.com/iAugux/iBBS-Swift">iBBS-Swift</a> - “新手开源一个用Swift（2.0）写的论坛客户端”。<a href="http://obbs.sinaapp.com/">BBS 服务端</a>。</li>
<li><a href="https://github.com/wikimedia/apps-ios-wikipedia">apps-ios-wikipedia</a> - apps-ios-wikipedia 客户端。</li>
<li><a href="https://github.com/uber/jetstream-ios">jetstream-ios</a> - 一款 Uber 的 MVC 框架。它同时提供了多用户实时通讯支持，一旦启动 JetStream 后端服务，通过 WebSocket 协议可以分分钟建立多用户实时通讯应用。</li>
<li><a href="https://github.com/jpsim/DeckRocket">DeckRocket</a> - 在相同 WiFi 网络环境内，通过iPhone 控制并播放 Mac 中的 PDF 文档。</li>
<li><a href="https://github.com/JayFang1993/ScanBook">ScanBook</a> - 扫扫图书:可以扫描条形码查询图书，也可以关键字搜索，遇到合乎你口味的书，还可以看看别人的读书笔记，不同角度去体会。</li>
<li><a href="https://github.com/MengTo/DesignerNewsApp">DesignerNewsApp</a> - Swift 开发的 DesignerNews 客户端，看着美美的！</li>
<li><a href="https://github.com/KittenYang/KYWeibo">KYWeibo</a> - 调用新浪API自己写的第三方微博客户端。</li>
<li><a href="https://github.com/li6185377/DouQu_IOS">DouQu_IOS</a> - 逗趣IOS手机端（一款笑话软件）,拥有完整的功能的手机应用app 。</li>
<li><a href="https://github.com/itjhDev/itjh">IT江湖iOS客户端</a> - IT江湖iOS客户端。</li>
<li><a href="https://github.com/artsy/eidolon">Eidolon</a> - 艺术品拍卖的投标亭平台，用swift与反应式编程框架 ReactiveCocoa。</li>
<li><a href="https://github.com/nonstriater/CrazyPuzzle">CrazyPuzzle</a> - 模仿“看图猜成语”App，功能齐全，配有音效，效果很不错。游戏使用cocoa框架完成，没有使用cocos2d的框架。</li>
<li><a href="https://github.com/Tim9Liu9/WhoCall">WhoCall</a> - 谁CALL我，iOS来电信息语音提醒，无需越狱。（需要iOS 7.0及以上版本。)骚扰电话预警、来电归属地提醒、联系人姓名播报，这些有中国特色人性化的电话功能，iOS上也应该有。电话提醒、私有API。</li>
<li><a href="http://www.devtf.cn/?p=562">仿iOS猎豹垃圾清理(实现原理+源码)</a> -  仿iOS猎豹垃圾清理(实现原理+源码),用到私有API。</li>
<li><a href="https://github.com/sam408130/DSLolita">DSLolita</a> - 模仿新浪微博做的一款app，有发送博文，评论，点赞，私聊功能。</li>
<li><a href="https://github.com/gsdios/GSD_ZHIFUBAO">GSD_ZHIFUBAO</a> - 支付宝高仿版。</li>
<li><a href="https://github.com/thoughtbot/Tropos">Tropos</a> - Tropos, 由 thoughtbot 推出的一款用 Objective-C 写的开源天气类应用, 截至今天, thoughtbot 已在 GitHub 上贡献了 174 个开源项目, 实在令人敬佩。</li>
<li><a href="https://github.com/liu044100/SmileWeather">SmileWeather</a> -开源天气类应用,天气图标很完整。</li>
<li><a href="https://github.com/leichunfeng/MVVMReactiveCocoa">MVVMReactiveCocoa</a> - GitBucket 2.0 通过审核啦，她是我在公司实践了一年多 MVVM 和 RAC 的基础上，利用业余时间开发的第三方 GitHub 客户端，旨在能够对想实践 MVVM 和 RAC 的 iOS 开发者有所帮助。<a href="https://itunes.apple.com/cn/app/id961330940?mt=8">AppStore地址</a>，欢迎下载使用GitBucket和收藏MVVMReactiveCocoa。</li>
<li><a href="https://github.com/dasdom/Tomate">Tomate</a> - 这个圆盘式计时器让你更专注于工作或学习。P.S. App Store 上架收费应用（0.99 欧）。</li>
<li><a href="https://github.com/joeshang/StoveFireiOSMenu">StoveFireiOSMenu</a> - 炉火餐饮系统iPad点餐端。</li>
<li><a href="https://github.com/belm/BaiduFM-Swift">BaiduFM-Swift</a> - 百度FM, swift语言实现，基于最新xcode6.3+swift1.2,初步只是为了实现功能，代码比较粗燥，后面有时间会整理，支持Apple Watch。</li>
<li><a href="https://github.com/ZhongTaoTian/WNXHuntForCity">WNXHuntForCity</a> - iOS高仿城觅项目（开发思路和代码）。</li>
<li><a href="https://github.com/zyprosoft/ZYChat">ZYChat</a> - 关于聊天界面的可消息类型扩展，响应绑定设计。</li>
<li><a href="https://github.com/minxiaoming/NiceAppDemo">NiceAppDemo</a> - 仿最美应用-每日最美的钢琴律动效果。</li>
<li><a href="https://github.com/lookingstars/meituan">meituan</a> - 美团5.7iOS版（高仿），功能包括，团购首页，高德地图搜索附近美食并显示在地图上，上门服务，商家，友盟分享。</li>
<li><a href="https://github.com/zangqilong198812/MeituanDemo">MeituanDemo</a> - 造美团应用界面构建的 iOS 应用, 第一个是 @叶孤城___ 的 MeituanDemo。</li>
<li><a href="https://github.com/tubie/JFMeiTuan">JFMeiTuan</a> - 造美团应用界面构建的 iOS 应用, 第二个是 @tubiebutu 的 JFMeiTuan。</li>
<li><a href="https://github.com/lookingstars/chuanke">chuanke</a> - 高仿百度传课iOS版。</li>
<li><a href="https://github.com/aiqiuqiu/Tuan">Tuan</a> - 模仿MJ老师iPad版美团（swift版），偶有bug 见谅。</li>
<li><a href="https://github.com/dsxNiubility/SXNews">SXNews</a> - 模仿网易新闻做的新闻软件，完成了主导航页，新闻详情页，图片浏览页，评论页。效果不错，比网上流传的各种和网易新闻UI架构有关的代码都要完整，都要好。</li>
<li><a href="https://github.com/coderyi/Monkey">Monkey</a> - Monkey for GitHub是一个GitHub开发者和仓库排名的开源App。这次主要增加了登录GitHub的功能，随手follow和star，并且增加发现模块，包括GitHub的trending，动态，showcases等。</li>
<li><a href="https://github.com/callmewhy/Uther">Uther</a> -  跟蠢萌的外星人聊天，还能帮你记事”。<a href="https://itunes.apple.com/cn/app/uther/id1024104920">itunes下载</a> 。</li>
<li><a href="https://github.com/zixun/CocoaChinaPlus">CocoaChinaPlus</a> - CocoaChina+是一款开源的第三方CocoaChina移动端。整个App都用Swift2.0编写(除部分第三方OC代码外，比如JPush和友盟)。</li>
<li><a href="http://code.cocoachina.com/view/128246">高仿斗鱼TV</a> - 高仿斗鱼TV，点击头部滚动视图可以播放视频。</li>
<li><a href="https://github.com/LonelyTown/LXZEALER">LXZEALER</a> - 模仿着做了zealer客户端,App里几乎所有请求都是Post,所以内容都是固定的URL加载的,登录功能只做了微博的第三方登录。</li>
<li><a href="https://github.com/pengleelove/ShiXiSeng_ios">ShiXiSeng_ios</a> - 完整app的UI框架。</li>
<li><a href="https://github.com/Coding/Coding-iPad">Coding-iPad</a> - Coding-iPad 是@Coding的官方 iPad 客户端, 又是一个完整的开源应用。</li>
<li><a href="https://github.com/likumb/SimpleMemo">SimpleMemo</a> - 易便签已经转到Swift2.0，全面适配iOS9和Watch OS2，并支持iPhone6s和iPhone6sPlus的3D Touch功能，包括图标快捷键和内容预览。</li>
<li><a href="https://github.com/xxycode/XXYAudioEngine">XXYAudioEngine.swift</a> - 基于NSURLSession 和 AVAudoPlayer的在线音乐的工具，可以把音乐保存在本地，也可以支持后台播放，后台下载，最低支持iOS7，swift版本1.2。</li>
</ul>


<hr />

<h4>好的文章</h4>

<ul>
<li><a href="http://www.jianshu.com/p/38cd35968864">自定义转场动画</a> - 3 种方法～ 关于自定义转场动画。</li>
<li><a href="https://github.com/icepy/_posts/blob/master/iOS%E6%8F%90%E9%AB%98%E6%95%88%E7%8E%87%E7%9A%84%E6%96%B9%E6%B3%95%E5%92%8C%E5%B7%A5%E5%85%B7.md">iOS提高效率的方法和工具</a> - iOS提高效率的方法和工具。</li>
<li><a href="http://jsonapi.org.cn/">用 JSON 构建 API 的标准指南</a> - 用 JSON 构建 API 的标准指南。</li>
<li><a href="http://blog.callmewhy.com/2015/09/21/rxswift-getting-started-0/">RxSwift入坑手册</a> - RxSwift入坑手册。</li>
</ul>


<hr />

<h4>Xcode插件</h4>

<ul>
<li><a href="http://www.cocoachina.com/special/xcode/">iOS开发进阶，从Xcode开始</a> - 学习使用Xcode构建出色的应用程序！</li>
<li><p>在Xcode启动的时候，Xcode将会寻找位于~/Library/Application Support/Developer/Shared/Xcode/Plug-ins文件夹中的后缀名为.xcplugin的bundle作为插件进行加载（运行其中的可执行文件）。<a href="http://studentdeng.github.io/blog/2014/02/21/xcode-plugin-fun/">Xcode5 Plugins 开发简介</a>  <a href="http://joeyio.com/ios/2013/07/25/write_xcode4_plugin_of_your_own/">写个自己的Xcode4插件</a></p></li>
<li><p><a href="http://www.onevcat.com/2013/02/xcode-plugin/">Xcode 4 插件制作入门</a> - Xcode 4 插件制作入门:Xcode所使用的所有库都包含在Xcode.app/Contents/的Frameworks，SharedFrameworks和OtherFrameworks三个文件夹下。其中和Xcode关系最为直接以及最为重要的是Frameworks中的IDEKit和IDEFoundation，以及SharedFrameworks中的DVTKit和DVTFoundation四个。</p></li>
<li><p><a href="https://github.com/rickytan/RTImageAssets">RTImageAssets</a> - 一个 Xcode 插件，用来生成 @3x 的图片资源对应的 @2x 和 @1x 版本。<a href="https://itunes.apple.com/app/asset-catalog-creator-free/id866571115?mt=12">Asset Catalog Creator</a> 功能强大，能自动生成全部尺寸：包括App Icons、Image Sets、Launch Screens Generator。</p></li>
<li><p><a href="https://github.com/onevcat/VVDocumenter-Xcode">VVDocumenter-Xcode</a> - 一个Xcode插件，build后，随手打开一个你之前的项目，然后在任意一个方法上面连按三下"/&ldquo;键盘，就ok了。</p></li>
<li><p><a href="https://github.com/shjborage/Reveal-Plugin-for-XCode">Reveal-Plugin-for-XCode</a> - 一个Reveal插件，可以使工程不作任何修改的情况下使用Reveal，该插件已在Alcatraz上架。<a href="http://security.ios-wiki.com/issue-3-4/">Reveal：分析iOS UI的利器</a> 。</p></li>
<li><p><a href="https://github.com/google/j2objc">java2Objective-c</a> - Google公司出得java转Obje-C转换工具，转换逻辑，不转换UI。</p></li>
<li><p><a href="https://github.com/kzaher/RegX">RegX</a> - 专治代码强迫症的 Xcode 插件，使用 Swift 和 Objective-C 编写。其用竖向对齐特定源代码的元素，使得代码更易读和易理解。<a href="http://www.cocoachina.com/ios/20141224/10743.html">说明</a> ； 菜单：xcode——》Edit-》Regx 。</p></li>
<li><p><a href="https://github.com/ksuther/KSImageNamed-Xcode">KSImageNamed</a> - 自动完成，特别是如果你正在写Objective-C，如果Xcode能自动完成文件名难道不会很伟大吗？比如图像文件的名称。</p></li>
<li><p><a href="https://github.com/FuzzyAutocomplete/FuzzyAutocompletePlugin">FuzzyAutocomplete</a> - Xcode的实现自动完成还不完美，此插件能给出你所期望或想要的建议，设置：xcode-》Editor-》FuzzyAutocomplete-》plugin settings。</p></li>
<li><p><a href="https://github.com/johnno1962/GitDiff">GitDiff</a> - Xcode的代码编辑器的一个微妙的补强，加上了足够的可见信息以了解上次git提交以来发生了什么变化，设置：xcode-》Edit-》GitDiff。</p></li>
<li><p><a href="https://github.com/trawor/XToDo">XToDo</a> - 这个插件不仅凸显TODO，FIXME，???，以及！！！注释，也在便利列表呈现他们。 菜单：xcode-》view-》snippets;   调出列表显示: xcode-》view-》ToDo List ： ctrl + T 。</p></li>
<li><p><a href="https://github.com/limejelly/Backlight-for-XCode">Backlight</a> - 突出显示当前正在编辑的行。菜单：xcode-》view-》Backlight 。</p></li>
<li><p><a href="https://github.com/kattrali/cocoapods-xcode-plugin">CocoaPods</a> - 该CocoaPods的插件增加了一个CocoaPods菜单到Xcode的产品菜单。如果你不喜欢命令行，那么你一定会喜欢这个插件。 <a href="http://tangqiaoboy.gitcafe.io/blog/2014/05/25/use-cocoapod-to-manage-ios-lib-dependency/">用CocoaPods做iOS程序的依赖管理 </a>。</p></li>
<li><p><a href="https://github.com/markohlebar/Peckham">Peckham</a> - 添加import语句比较麻烦，此插件 按Command-Control-P，给出的选项列表中选择要的头文件。先要安装<a href="http://alcatraz.io/">Alcatraz</a> ,在终端输入： <strong>curl -fsSL <a href="https://raw.github.com/supermarin/Alcatraz/master/Scripts/install.sh">https://raw.github.com/supermarin/Alcatraz/master/Scripts/install.sh</a> | sh</strong> ； 重启xcode-》window-》Package Manager：搜索 <strong>Peckham</strong> 安装，打开Peckham.xcodeproj，编译 Peckham target，重启Xcode 。</p></li>
<li><p><a href="https://github.com/lucholaf/Auto-Importer-for-Xcode">Auto-Importer</a> - Auto-Importer是一个自动导入类对应的头文件的Xcode插件。</p></li>
<li><p><a href="http://alcatraz.io/">Alcatraz</a> -使用Alcatraz来管理Xcode插件 <a href="http://tangqiaoboy.gitcafe.io/blog/2014/03/05/use-alcatraz-to-manage-xcode-plugins/">使用说明</a> 。</p></li>
<li><p><a href="https://github.com/kimsungwhee/KSHObjcUML">KSHObjcUML</a> -KSHObjcUML 是一个 Objective-C 类引用关系图的 Xcode 插件。</p></li>
<li><p><a href="https://github.com/omz/ColorSense-for-Xcode">ColorSense-for-Xcode</a> - 颜色插件，安装之后，就不用根据RGB选择颜色，直接从取色板中取颜色，会自动补齐RGB代码。。</p></li>
<li><p><a href="http://www.imooc.com/wenda/detail/237132">10款提高iOS开发效率的XCode插件</a> - 10款提高iOS开发效率的XCode插件：1. XcodeColors；5. ACCodeSnippetRepository；10. Dash for Xcode。</p></li>
<li><p><a href="https://github.com/MakeZL/ZLGotoSandboxPlugin">ZLGotoSandboxPlugin</a> - 支持Xcode快捷键了跳转当前应用沙盒了！快捷键是 Shift+Common+w。</p></li>
<li><p><a href="https://github.com/burczyk/XcodeSwiftSnippets">XcodeSwiftSnippets</a> - XcodeSwiftSnippets, 提供了很多可在 Xcode 上使用的 Swift 代码片段, 通过自动补全的方式极大的提高了开发效率， <a href="https://github.com/Xcode-Snippets/Objective-C">另外还有 Objective-C 版的</a>。</p></li>
<li><p><a href="https://vimeo.com/128713880">CoPilot</a> - 通过此插件， Xcode 可以协同编程了（采用 WebSocket 通讯）。如此强大的“黑工具”，不爱它能行吗。</p></li>
<li><a href="https://github.com/EnjoySR/ESJsonFormat-Xcode">ESJsonFormat-Xcode</a> - 将Json格式化输出为模型的属性。</li>
<li><a href="https://github.com/stefanceriu/SCXcodeMiniMap">SCXcodeMiniMap</a> - Xcode迷你小地图-SCXcodeMiniMap。</li>
<li><a href="http://code.cocoachina.com/detail/316095/xTransCodelation/">xTransCodelation</a> - XCODE中英文翻译插件，提供API查询模式和网页模式，都是利用的百度翻译。另外集成了一个可以一键关闭其他所有APP的实用功能，方便开发者！</li>
<li><a href="https://github.com/jwaitzel/SuggestedColors/">SuggestedColors</a> - Xcode 插件SuggestedColors，用于 IB颜色设置 辅助插件，非常好用。</li>
</ul>


<hr />

<h4>美工资源</h4>

<ul>
<li><a href="https://github.com/markohlebar/Peckham">TWG_Retina_Icons</a> - 一套支持 Retina 高清屏的 iPhone 免费图标集。</li>
<li><a href="https://github.com/cparnot/ASCIImage">ASCIImage</a> - 使用 NSString 创建 image，<a href="http://cocoamine.net/blog/2015/03/20/replacing-photoshop-with-nsstring/">说明</a>。</li>
<li><a href="https://github.com/RayPS/my-sketch-colors">my-sketch-colors</a> - 配色。</li>
<li><a href="http://www.imooc.com/wenda/detail/250367">Font Awesome</a> - Font Awesome：一套绝佳的图标字体库和CSS框架，详细的安装方法请参考<a href="http://fortawesome.github.io/Font-Awesome/icons/">官方网站</a><a href="http://fontawesome.dashgame.com/">中文网站</a>,<a href="https://github.com/FortAwesome/Font-Awesome">GitHub地址</a> 。</li>
<li><a href="https://github.com/yannickl/DynamicColor">DynamicColor</a> - 强大的颜色操作扩展类。通过该类，你可以通过扩展方法基于某个颜色得到不同深浅、饱和度、灰度、色相，以及反转后的新颜色。是不可多得的好类库。</li>
<li><a href="https://github.com/ViccAlexander/Chameleon">Chameleon</a> - Chameleon是一个iOS的色彩框架。它运用现代化flat color将UIColor扩展地非常美观。我们还可以通过它运用自定义颜色创建调色板。它还有很多功用，请浏览readme。</li>
<li><a href="https://github.com/ArtSabintsev/FontBlaster">FontBlaster</a> - 载入定制字体时更简单。</li>
</ul>


<h4>其他资源</h4>

<ul>
<li><a href="http://githuber.info/#/index">githuber</a> - 最好用的GitHub人才搜索工具。</li>
<li><a href="https://www.codatlas.com">codatlas</a> - 源代码搜索利器。</li>
<li><a href="https://searchcode.com/">searchcode</a> - 源代码搜索利器：来自悉尼的代码搜索引擎汇聚了 Github, Bitbucket, Sourceforge&hellip;等多家开源站点超20万个项目、180亿行源代码，能以特殊字符、语言、仓库和源方式从90多种语言找到函数、API的真实代码。</li>
<li><a href="https://github.com/kitematic/kitematic">kitematic</a> - Mac 上使用 Docker 最简单的方案。</li>
</ul>


<hr />

<h4>开发资源</h4>

<h5>开发资料</h5>

<ul>
<li><a href="http://www.douban.com/note/276160185/?type=like">豆瓣iOS开源库列表</a> - 豆瓣iOS开源库列表，很多开源项目。</li>
<li><a href="https://github.com/AttackOnDobby/iOS-Core-Animation-Advanced-Techniques">iOS-Core-Animation-Advanced-Techniques</a> - 中文版iOS 高级动画技术。</li>
<li><a href="http://www.jianshu.com/p/50b63a221f09">iOS开发的一些奇巧淫技1</a> - TableView不显示没内容的Cell怎么办; 键盘事件：<a href="https://github.com/hackiftekhar/IQKeyboardManager">IQKeyboardManager</a>;  app不流畅:<a href="https://github.com/kconner/KMCGeigerCounter">KMCGeigerCounter</a>;  CoreData用起来好烦:<a href="https://github.com/magicalpanda/MagicalRecord">MagicalRecord</a>;  CollectionView实现悬停的header:<a href="https://github.com/jamztang/CSStickyHeaderFlowLayout">CSStickyHeaderFlowLayout</a>。</li>
<li><a href="http://www.jianshu.com/p/08f194e9904c">iOS开发的一些奇巧淫技2</a> -  用一个pan手势来代替UISwipegesture的各个方向、拉伸图片、播放GIF、上拉刷新、把tableview里cell的小对勾的颜色改变、navigationbar弄成透明的而不是带模糊的效果、改变uitextfield placeholder的颜色和位置。</li>
<li><a href="http://code4app.com/article/cocoapods-install-usage">cocoapods安装指南</a> - cocoapods安装指南。</li>
<li><a href="https://github.com/johnno1962/Remote">RemoteControl</a> - Control your iPhone from inside Xcode for end-to-end testing 。</li>
<li><a href="http://objccn.io/issue-13-1/">MVVM 介绍</a> - 替换MVC的开发模式。</li>
<li><p><a href="http://apistore.baidu.com/astore/index">第三方接口</a> - 基本所有第三方接口都在这，再也不用那么麻烦去找了。</p></li>
<li><p><a href="http://yyny.me/ios/%E6%8F%90%E9%AB%98iOS%E5%BC%80%E5%8F%91%E6%95%88%E7%8E%87%E7%9A%84%E6%96%B9%E6%B3%95%E5%92%8C%E5%B7%A5%E5%85%B7/">提高iOS开发效率的方法和工具</a> - 提高iOS开发效率的方法和工具。</p></li>
<li><a href="https://github.com/oa414/objc-zen-book-cn">禅与 Objective-C 编程艺术</a> - 禅与 Objective-C 编程艺术 （Zen and the Art of the Objective-C Craftsmanship 中文翻译）。</li>
<li><a href="http://www.imooc.com/article/1216">Objective-C编码规范：26个方面解决iOS开发问题</a> - 【Objective-C编码规范：26个方面解决iOS开发问题：“我们制定Objective-C编码规范的原因是我们能够在我们的书，教程和初学者工具包的代码保持优雅和一致。”今天分享的规范来自raywenderlich.com团队成员共同完成的，希望对学习OC的朋友们有所指导和帮助。</li>
</ul>


<h6>swift</h6>

<ul>
<li><a href="https://github.com/numbbbbb/the-swift-programming-language-in-chinese">Swift中文指南</a> - 中文版Apple官方Swift教程《The Swift Programming Language》，<a href="http://numbbbbb.gitbooks.io/-the-swift-programming-language-/content/">老码版本</a>  <a href="http://numbbbbb.gitbooks.io/-the-swift-programming-language-/content/chapter1/03_revision_history.html">历史版本更新说明</a>。</li>
<li><a href="http://wiki.jikexueyuan.com/project/swift/">The Swift Programming Language 中文版</a> - The Swift Programming Language 中文版。</li>
<li><a href="http://www.swifttoolbox.io/">swifttoolbox</a> -  swifttoolbox swift开发的开源库汇总。</li>
<li><a href="https://github.com/ipader/SwiftGuide">SwiftGuide</a> -  这份指南汇集了Swift语言主流学习资源，并以开发者的视角整理编排&ndash; 非常不错，值得推荐。</li>
<li><a href="https://github.com/ipader/SwiftGuide/blob/master/Featured.md">Swift开源项目精选</a> - Swift开源项目精选&ndash;推荐，每周都有更新。</li>
<li><a href="https://swift.zeef.com/robin.eggenkamp">Awesome Swift</a> - 一个收集了很多 Swift 开发资源的网站。</li>
<li><a href="https://github.com/x140yu/Developing_iOS_8_Apps_With_Swift">Developing_iOS_8_Apps_With_Swift</a> - Developing iOS 8 Apps with Swift 字幕简体中文翻译项目（斯坦福白胡子老头swift教学视频）。</li>
<li><a href="https://github.com/johnlui/Swift-On-iOS">Swift-On-iOS</a> - JohnLui 的 Swift On iOS 代码仓库。</li>
<li><a href="https://github.com/PerfectlySoft/Perfect">Perfect</a> - Perfect 致力于 Swift 服务端应用，从打造专业应用服务器开始。。</li>
</ul>


<h5>他人开源总结</h5>

<ul>
<li><a href="http://www.code4app.com/">code4app</a> - 最多国人用的代码库。</li>
<li><a href="http://code.cocoachina.com/">cocoachina</a> - 国内最热门的iOS社区的代码库。</li>
<li><a href="https://github.com/vsouza/awesome-ios">awesome-ios</a> - 一个老外整理的，<a href="http://app.memect.com/doc/ios.html">中文版</a>。</li>
<li><a href="https://github.com/cjwirth/awesome-ios-ui">awesome-ios-ui</a> - 收集了不少 iOS UI/UX 库, 包含了很多酷炫的动画效果。</li>
<li><a href="http://ios-cosmos.com/">ios-cosmos</a> - The iOS Cosmos：收录了IOS绝大部分的开源框架和工具。</li>
<li><a href="https://haskell.zeef.com/konstantin.skipor#block_28362_basics">Awesome Haskell资料大全</a> -    Awesome Haskell 资料大全：框架，库和软件。</li>
<li><a href="http://ios-cosmos.com">Cosmos</a> - The iOS Cosmos：收录了IOS绝大部分的开源框架和工具。</li>
<li><a href="http://cocoacontrols.com">cocoacontrols</a> -  收集了很多UI控件效果代码，缺点是需要翻墙，而且代码分类不够好。</li>
<li><a href="https://github.com/lexrus">lexrus</a> -  lexrus国内出名的iOS开源coder，非常酷的label动画、textfield动画。</li>
<li><p><a href="https://github.com/dkhamsing/open-source-ios-apps">open-source-ios-apps</a> - iOS App集合，分：swift与Objective-C&ndash;国外人整理。</p></li>
<li><p><a href="http://www.csdn.net/article/2015-03-04/2824108-ios-developers-sites">适合iOS开发者的15大网站推荐</a> -  适合 iOS 开发者的 15 大网站推荐 &mdash; 英文网站。</p></li>
<li><p><a href="https://github.com/Aufree/trip-to-iOS/blob/master/Top-100.md">Objective-C GitHub 排名前 100 项目简介</a> -  主要对当前 GitHub 排名前 100 的项目做一个简单的简介, 方便初学者快速了解到当前 Objective-C 在 GitHub 的情况。</p></li>
<li><p><a href="http://github.ibireme.com/github/list/ios/">Github-iOS备忘</a> -整理了比较常用的iOS第三方组件，以及github上的统计。</p></li>
<li><a href="https://github.com/JanzTam/MyGithubMark">MyGithubMark</a> - Github上的iOS资料-个人记录（持续更新）。</li>
</ul>


<h5>中文开发博客列表</h5>

<ul>
<li><a href="https://github.com/tangqiaoboy/iOSBlogCN">唐巧整理</a> - 猿题库唐巧整理。</li>
</ul>


<table>
<thead>
<tr>
<th>博客地址 </th>
<th> RSS地址</th>
</tr>
</thead>
<tbody>
<tr>
<td><a href="http://southpeak.github.io/">南峰子的技术博客</a> </td>
<td> 南峰子的技术博客。</td>
</tr>
<tr>
<td><a href="http://blog.devtang.com">唐巧的技术博客</a> </td>
<td> <a href="http://blog.devtang.com/atom.xml">http://blog.devtang.com/atom.xml</a></td>
</tr>
<tr>
<td><a href="http://onevcat.com">OneV&rsquo;s Den</a> </td>
<td> <a href="http://onevcat.com/atom.xml">http://onevcat.com/atom.xml</a></td>
</tr>
<tr>
<td><a href="http://beyondvincent.com">破船之家</a> </td>
<td> <a href="http://beyondvincent.com/atom.xml">http://beyondvincent.com/atom.xml</a></td>
</tr>
<tr>
<td><a href="http://nshipster.cn">NSHipster</a> </td>
<td> <a href="http://nshipster.cn/feed.xml">http://nshipster.cn/feed.xml</a></td>
</tr>
<tr>
<td><a href="http://blog.leezhong.com/">Limboy 无网不剩</a> </td>
<td> <a href="http://feeds.feedburner.com/lzyy">http://feeds.feedburner.com/lzyy</a></td>
</tr>
<tr>
<td><a href="http://ios.lextang.com">Lex iOS notes</a> </td>
<td> <a href="http://ios.lextang.com/rss">http://ios.lextang.com/rss</a></td>
</tr>
<tr>
<td><a href="http://nianxi.net">念茜的博客</a> </td>
<td> <a href="http://nianxi.net/feed.xml">http://nianxi.net/feed.xml</a></td>
</tr>
<tr>
<td><a href="http://blog.xcodev.com">Xcode Dev</a> </td>
<td> <a href="http://blog.xcodev.com/atom.xml">http://blog.xcodev.com/atom.xml</a></td>
</tr>
<tr>
<td><a href="http://wufawei.com/">Ted&rsquo;s Homepage</a></td>
<td> <a href="http://wufawei.com/feed">http://wufawei.com/feed</a></td>
</tr>
<tr>
<td><a href="http://blog.t-xx.me">txx&rsquo;s blog</a> </td>
<td> <a href="http://blog.t-xx.me/atom.xml">http://blog.t-xx.me/atom.xml</a></td>
</tr>
<tr>
<td><a href="http://imkevin.me">KEVIN BLOG</a> </td>
<td> <a href="http://imkevin.me/rss">http://imkevin.me/rss</a></td>
</tr>
<tr>
<td><a href="http://www.xiangwangfeng.com">阿毛的蛋疼地</a> </td>
<td> <a href="http://www.xiangwangfeng.com/atom.xml">http://www.xiangwangfeng.com/atom.xml</a></td>
</tr>
<tr>
<td><a href="http://billwang1990.github.io">亚庆的 Blog</a> </td>
<td> <a href="http://billwang1990.github.io/atom.xml">http://billwang1990.github.io/atom.xml</a></td>
</tr>
<tr>
<td><a href="http://nonomori.farbox.com">Nonomori</a> </td>
<td> <a href="http://nonomori.farbox.com/feed">http://nonomori.farbox.com/feed</a></td>
</tr>
<tr>
<td><a href="http://tang3w.com">言无不尽</a> </td>
<td> <a href="http://tang3w.com/atom.xml">http://tang3w.com/atom.xml</a></td>
</tr>
<tr>
<td><a href="http://wonderffee.github.io">Wonderffee&rsquo;s Blog</a> </td>
<td> <a href="http://wonderffee.github.io/atom.xml">http://wonderffee.github.io/atom.xml</a></td>
</tr>
<tr>
<td><a href="http://imtx.me">I&rsquo;m TualatriX</a> </td>
<td> <a href="http://imtx.me/feed/latest/">http://imtx.me/feed/latest/</a></td>
</tr>
<tr>
<td><a href="http://vclwei.com">vclwei</a> </td>
<td> <a href="http://vclwei.com/posts.rss">http://vclwei.com/posts.rss</a></td>
</tr>
<tr>
<td><a href="http://blog.cocoabit.com">Cocoabit</a> </td>
<td> <a href="http://blog.cocoabit.com/atom.xml">http://blog.cocoabit.com/atom.xml</a></td>
</tr>
<tr>
<td><a href="http://nixzhu.me">nixzhu on scriptogr.am</a> </td>
<td> <a href="http://nixzhu.me/feed">http://nixzhu.me/feed</a></td>
</tr>
<tr>
<td><a href="http://studentdeng.github.io">不会开机的男孩</a> </td>
<td> <a href="http://studentdeng.github.io/atom.xml">http://studentdeng.github.io/atom.xml</a></td>
</tr>
<tr>
<td><a href="http://www.taofengping.com">Nico</a> </td>
<td> <a href="http://www.taofengping.com/rss.xml">http://www.taofengping.com/rss.xml</a></td>
</tr>
<tr>
<td><a href="http://hufeng825.github.io">阿峰的技术窝窝</a> </td>
<td> <a href="http://hufeng825.github.io/atom.xml">http://hufeng825.github.io/atom.xml</a></td>
</tr>
<tr>
<td><a href="http://answerhuang.duapp.com">answer_huang</a> </td>
<td> <a href="http://answerhuang.duapp.com/index.php/feed/">http://answerhuang.duapp.com/index.php/feed/</a></td>
</tr>
<tr>
<td><a href="http://webfrogs.me">webfrogs</a> </td>
<td> <a href="http://webfrogs.me/feed/">http://webfrogs.me/feed/</a></td>
</tr>
<tr>
<td><a href="http://joeyio.com">代码手工艺人</a> </td>
<td> <a href="http://joeyio.com/atom.xml">http://joeyio.com/atom.xml</a></td>
</tr>
<tr>
<td><a href="http://gracelancy.com">Lancy&rsquo;s Blog</a> </td>
<td> <a href="http://gracelancy.com/atom.xml">http://gracelancy.com/atom.xml</a></td>
</tr>
<tr>
<td><a href="http://www.imallen.com">I&rsquo;m Allen</a> </td>
<td> <a href="http://www.imallen.com/atom.xml">http://www.imallen.com/atom.xml</a></td>
</tr>
<tr>
<td><a href="http://imi.im/">Travis' Blog</a></td>
<td> <a href="http://imi.im/feed">http://imi.im/feed</a></td>
</tr>
<tr>
<td><a href="http://wangzz.github.io/">王中周的技术博客</a> </td>
<td><a href="http://wangzz.github.io/atom.xml">http://wangzz.github.io/atom.xml</a></td>
</tr>
<tr>
<td><a href="http://jiajun.org/">会写代码的猪</a></td>
<td><a href="http://gaosboy.com/feed/atom/">http://gaosboy.com/feed/atom/</a></td>
</tr>
<tr>
<td><a href="http://wangkewei.cnblogs.com/">克伟的博客</a></td>
<td><a href="http://feed.cnblogs.com/blog/u/23857/rss">http://feed.cnblogs.com/blog/u/23857/rss</a></td>
</tr>
<tr>
<td><a href="http://cnblogs.com/biosli">摇滚诗人</a></td>
<td><a href="http://feed.cnblogs.com/blog/u/35410/rss">http://feed.cnblogs.com/blog/u/35410/rss</a></td>
</tr>
<tr>
<td><a href="http://geeklu.com/">Luke&rsquo;s Homepage</a> </td>
<td> <a href="http://geeklu.com/feed/">http://geeklu.com/feed/</a></td>
</tr>
<tr>
<td><a href="http://iiiyu.com/">萧宸宇</a> </td>
<td> <a href="http://iiiyu.com/atom.xml">http://iiiyu.com/atom.xml</a></td>
</tr>
<tr>
<td><a href="http://www.heyuan110.com/">Yuan博客</a> </td>
<td> <a href="http://www.heyuan110.com/?feed=rss2">http://www.heyuan110.com/?feed=rss2</a></td>
</tr>
<tr>
<td><a href="http://shiningio.com/">Shining IO</a> </td>
<td> <a href="http://shiningio.com/atom.xml">http://shiningio.com/atom.xml</a></td>
</tr>
<tr>
<td><a href="http://www.yifeiyang.net/">YIFEIYANG&ndash;易飞扬的博客</a> </td>
<td> <a href="http://www.yifeiyang.net/feed">http://www.yifeiyang.net/feed</a></td>
</tr>
<tr>
<td><a href="http://koofrank.com/">KooFrank&rsquo;s Blog</a> </td>
<td> <a href="http://koofrank.com/rss">http://koofrank.com/rss</a></td>
</tr>
<tr>
<td><a href="http://helloitworks.com">hello it works</a> </td>
<td> <a href="http://helloitworks.com/feed">http://helloitworks.com/feed</a></td>
</tr>
<tr>
<td><a href="http://msching.github.io/">码农人生</a> </td>
<td> <a href="http://msching.github.io/atom.xml">http://msching.github.io/atom.xml</a></td>
</tr>
<tr>
<td><a href="http://yulingtianxia.com">玉令天下的Blog</a> </td>
<td> <a href="http://yulingtianxia.com/atom.xml">http://yulingtianxia.com/atom.xml</a></td>
</tr>
<tr>
<td><a href="http://www.hotobear.com/">不掏蜂窝的熊</a> </td>
<td> <a href="http://www.hotobear.com/?feed=rss2">http://www.hotobear.com/?feed=rss2</a></td>
</tr>
<tr>
<td><a href="https://andelf.github.io/">猫·仁波切</a> </td>
<td> <a href="https://andelf.github.io/atom.xml">https://andelf.github.io/atom.xml</a></td>
</tr>
<tr>
<td><a href="http://ivoryxiong.org/">煲仔饭</a> </td>
<td> <a href="http://ivoryxiong.org/feed.xml">http://ivoryxiong.org/feed.xml</a></td>
</tr>
<tr>
<td><a href="http://adad184.com">里脊串的开发随笔</a> </td>
<td> <a href="http://adad184.com/atom.xml">http://adad184.com/atom.xml</a></td>
</tr>
<tr>
<td><a href="http://al1020119.github.io/">iCocos</a> </td>
<td> <a href="http://al1020119.github.io/">http://al1020119.github.io/</a></td>
</tr>
</tbody>
</table>


<h4>物联网</h4>

<ul>
<li><a href="https://github.com/phodal/awesome-iot">awesome-iot</a> - 这份物联网学习参考大全太给力。从物联网协议、嵌入式系统、相关开源库、相关书籍、博客、学习笔记、标准应有尽有。</li>
</ul>


<hr />

<hr />

<h6>微信号：</h6>

<p>clpaial10201119（Q Q：2211523682）</p>

<h6>微博WB:</h6>

<p><a href="http://weibo.com/u/3288975567?is_hot=1">http://weibo.com/u/3288975567?is_hot=1</a></p>

<h6>gitHub：</h6>

<p><a href="https://github.com/al1020119">https://github.com/al1020119</a></p>

<h6>博客</h6>

<p><a href="http://al1020119.github.io/">http://al1020119.github.io/</a></p>

<hr />

<p><img src="http://al1020119.github.io/images/iCocosCoder.jpg" title="Caption" ></p>

<p><img src="http://al1020119.github.io/images/iCocosPublic.jpg" title="Caption" ></p>
]]></content>
  </entry>
  
  <entry>
    <title type="html"><![CDATA[玩转iOS10+Xcode8适配]]></title>
    <link href="http://al1020119.github.io/blog/2016/10/12/wan-zhuan-ios10-plus-xcode8gua-pei/"/>
    <updated>2016-10-12T11:34:34+08:00</updated>
    <id>http://al1020119.github.io/blog/2016/10/12/wan-zhuan-ios10-plus-xcode8gua-pei</id>
    <content type="html"><![CDATA[<p>最近因为公司App在iOS10上出现很多问题，结果花了一天时间适配了一下，其中也遇到了不少坑，有些网上直接有方法，但是有些却需要细心琢磨。这里整理了一下。</p>

<p>其中有两个比较麻烦的</p>

<ul>
<li><p>1：关于导航栏的适配</p>

<ul>
<li>当导航栏是透明或者半透明的实现，显示不正常，全白。</li>
</ul>
</li>
<li><p>2：关于tabBar的适配</p>

<ul>
<li>tabbar中第一个子控制器的Item重复出现</li>
</ul>
</li>
</ul>


<p>下面一个个整理了一下！</p>

<!--more-->


<h2>1.Xcode8运行项目之后，控制台打印了一堆东西;</h2>

<p>去除方法：选择Xcode ->Product ->Scheme -> Edit Scheme 或者按command + shift + &lt; 快捷键，</p>

<p>在弹出的窗口中Environment Variables 下添加 0S_ACTIVITY_MODE=disable</p>

<p><img src="http://al1020119.github.io/images/ios10shipei001.png" title="Caption" ></p>

<blockquote><p>注：真机调试不输出NSlog了，所以我真机调试的时候，把此处对号去除，就好了</p></blockquote>

<h5>最新Log方式：（会定位某各类，某个方法，某一行）</h5>

<pre><code>#ifdef DEBUG
#define iCocosLog(format, ...) printf("\n[%s] %s [第%d行] %s\n", __TIME__, __FUNCTION__, __LINE__, [[NSString stringWithFormat:format, ## __VA_ARGS__] UTF8String]);
#else
#define iCocosLog(format, ...)
#endif
</code></pre>

<h2>2.Xcode8 打开工程后，出现下图，苹果新特性</h2>

<p><img src="http://al1020119.github.io/images/ios10shipei002.png" title="Caption" ></p>

<p>我勾选了Automatically manage signing(需要在Xcode的偏好设置中，添加苹果账号)，并且选择配置了Team，就好了。</p>

<blockquote><p>注：或者另外一种方式  点击打开链接</p></blockquote>

<h2>3.用Xcode8 运行项目在真机上，打开相机相册功能，程序崩溃；</h2>

<p>解决办法：项目中访问了隐私数据，需要在info.plist中添加这些权限：</p>

<p>相机权限</p>

<pre><code>&lt;key&gt;NSCameraUsageDescription&lt;/key&gt;

&lt;string&gt;cameraDesciption&lt;/string&gt;
</code></pre>

<p>相册权限</p>

<pre><code>&lt;key&gt;NSPhotoLibraryUsageDescription&lt;/key&gt;

&lt;string&gt;photoLibraryDesciption&lt;/string&gt;
</code></pre>

<p>注：
在CODE上查看代码片派生到我的代码片</p>

<pre><code>&lt;!-- 相册 --&gt;   
&lt;key&gt;NSPhotoLibraryUsageDescription&lt;/key&gt;   
&lt;string&gt;App需要您的同意,才能访问相册&lt;/string&gt;   
&lt;!-- 相机 --&gt;   
&lt;key&gt;NSCameraUsageDescription&lt;/key&gt;   
&lt;string&gt;App需要您的同意,才能访问相机&lt;/string&gt;   
&lt;!-- 麦克风 --&gt;   
&lt;key&gt;NSMicrophoneUsageDescription&lt;/key&gt;   
&lt;string&gt;App需要您的同意,才能访问麦克风&lt;/string&gt;   
&lt;!-- 位置 --&gt;   
&lt;key&gt;NSLocationUsageDescription&lt;/key&gt;   
&lt;string&gt;App需要您的同意,才能访问位置&lt;/string&gt;   
&lt;!-- 在使用期间访问位置 --&gt;   
&lt;key&gt;NSLocationWhenInUseUsageDescription&lt;/key&gt;   
&lt;string&gt;App需要您的同意,才能在使用期间访问位置&lt;/string&gt;   
&lt;!-- 始终访问位置 --&gt;   
&lt;key&gt;NSLocationAlwaysUsageDescription&lt;/key&gt;   
&lt;string&gt;App需要您的同意,才能始终访问位置&lt;/string&gt;   
&lt;!-- 日历 --&gt;   
&lt;key&gt;NSCalendarsUsageDescription&lt;/key&gt;   
&lt;string&gt;App需要您的同意,才能访问日历&lt;/string&gt;   
&lt;!-- 提醒事项 --&gt;   
&lt;key&gt;NSRemindersUsageDescription&lt;/key&gt;   
&lt;string&gt;App需要您的同意,才能访问提醒事项&lt;/string&gt;   
&lt;!-- 运动与健身 --&gt;   
&lt;key&gt;NSMotionUsageDescription&lt;/key&gt; &lt;string&gt;App需要您的同意,才能访问运动与健身&lt;/string&gt;   
&lt;!-- 健康更新 --&gt;   
&lt;key&gt;NSHealthUpdateUsageDescription&lt;/key&gt;   
&lt;string&gt;App需要您的同意,才能访问健康更新 &lt;/string&gt;   
&lt;!-- 健康分享 --&gt;   
&lt;key&gt;NSHealthShareUsageDescription&lt;/key&gt;   
&lt;string&gt;App需要您的同意,才能访问健康分享&lt;/string&gt;   
&lt;!-- 蓝牙 --&gt;   
&lt;key&gt;NSBluetoothPeripheralUsageDescription&lt;/key&gt;   
&lt;string&gt;App需要您的同意,才能访问蓝牙&lt;/string&gt;   
&lt;!-- 媒体资料库 --&gt;   
&lt;key&gt;NSAppleMusicUsageDescription&lt;/key&gt;   
&lt;string&gt;App需要您的同意,才能访问媒体资料库&lt;/string&gt;  
</code></pre>

<p>如果没有用，需配置一下</p>

<p><img src="http://al1020119.github.io/images/ios10shipei003.png" title="Caption" ></p>

<blockquote><p>注意，添加的时候，末尾不要有空格，值得说明必须要要写不写也会崩溃</p></blockquote>

<p>我们需要打开info.plist文件添加相应权限的说明，否则程序在iOS10上会出现崩溃。</p>

<h2>4.字体变大，原有的fream需要适配</h2>

<p>经有的朋友提醒，发现程序内原来2个字的宽度是24，现在2个字需要27的宽度来显示了。。我只能试着一个个智能逐一排查!</p>

<ul>
<li>希望有解决办法的朋友，评论告我一下耶，谢谢啦</li>
</ul>


<h2>5.Nib问题：警告</h2>

<p>在CODE上查看代码片派生到我的代码片</p>

<pre><code>- (void)awakeFromNib {  
    // Initialization code  
}  
</code></pre>

<p>需要添加：
在CODE上查看代码片派生到我的代码片</p>

<pre><code>[super awakeFromNib];  
</code></pre>

<h2>6.UIApplication对象中openUrl被废弃</h2>

<p>在iOS 10以前，我们要想使用应用程序去打开一个网页或者进行跳转，直接使用[[UIApplication sharedApplication] openURL 方法就可以了，但是在iOS 10 已经被废弃了，因为使用这种方式，处理的结果我们不能拦截到也不能获取到，对于开发是非常不利的，在iOS 10全新的退出了</p>

<pre><code>[[UIApplication sharedApplication] openURL:nil options:nil completionHandler:nil];
</code></pre>

<p>有一个成功的回调block 可以进行监视。</p>

<blockquote><p>注：仍然可以用，只不过会出现警告</p></blockquote>

<h2>7.系统判断失效</h2>

<p>现在改用：
在CODE上查看代码片派生到我的代码片</p>

<pre><code>#define LIOS10_OR_LATER  ([[[UIDevice currentDevice]systemVersion]compare:@"10.0" options:NSNumericSearch] !=NSOrderedAscending)  
</code></pre>

<h2>8.代码注释不能用</h2>

<p>解决方法：</p>

<pre><code>打开终端，命令运行： sudo /usr/libexec/xpccachectl
</code></pre>

<p>然后必须重启电脑后生效</p>

<blockquote><p>Xcode8已经不能再使用第三方插件了，但是Xcode8已经完善了一部分第三方插件才能实现的功能（抹杀了第三方插件作者，掠夺别人的劳动成果），比如语法提示、代码注释。</p>

<p>Xcode8代码注释快捷键为 Command + Option + / 。</p></blockquote>

<h2>9.导航栏适配</h2>

<p>因为使用了"UINavigationBar+Awesome.h"这个框架，所以，最后找来找去，找到了这个框架的底层，修改代码发现既然可以。</p>

<pre><code>if (!self.overlay) {
    [self setBackgroundImage:[UIImage new] forBarMetrics:UIBarMetricsDefault];
    self.overlay = [[UIView alloc] initWithFrame:CGRectMake(0, 0, CGRectGetWidth(self.bounds), CGRectGetHeight(self.bounds) + 20)];
    self.overlay.userInteractionEnabled = NO;
    self.overlay.autoresizingMask = UIViewAutoresizingFlexibleWidth;    // Should not set `UIViewAutoresizingFlexibleHeight`
    [[self.subviews firstObject] insertSubview:self.overlay atIndex:0];
}
self.overlay.backgroundColor = backgroundColor;
</code></pre>

<h2>10.导航的图片不显示了,使用的是系统导航,怎么调整都不显示.</h2>

<p>解决问题
找到原因了,修改代码就比较容易了,你可以在添加视图时,将bgView指定到UIVisualEffectView,将新的视图添加到UIVisualEffectView上:</p>

<pre><code>for (UIView  * v in subs)
    {
        NSString * classname = NSStringFromClass([v class]);
        if ([classname isEqualToString:@"_UINavigationBarBackground"] || [classname isEqualToString:@"UINavigationBarBackground"])
        {

            bgview=v;
            break;
        }  else if ([classname isEqualToString:@"_UIBarBackground"]) {
            //适配iOS10导航
            for (UIView *vi in v.subviews) {

                NSString *viName = NSStringFromClass([vi class]);
                if ([viName isEqualToString:@"UIVisualEffectView"]) {

                    bgview = vi;
                    break;
                }
            }
        }
    }
</code></pre>

<p>也可以还添加到_UIBarBackground上,但是找到UIVisualEffectView,将其隐藏掉:</p>

<pre><code>if ([classname isEqualToString:@"_UINavigationBarBackground"] || [classname isEqualToString:@"UINavigationBarBackground"])
        {

            bgview=v;
            break;
        } else if ([classname isEqualToString:@"_UIBarBackground"]) {

            bgview = v;

            for (UIView *vi in v.subviews) {
                // 适配iOS10
                NSString *viName = NSStringFromClass([vi class]);
                if ([viName isEqualToString:@"UIVisualEffectView"]) {

                    vi.hidden = YES;
                    break;
                }
            }
        }
</code></pre>

<h2>11.Xcode7 8SB兼容问题</h2>

<p>控制器报如下错误：</p>

<pre><code>This version does not support documents saved in the Xcode 8 format. Open this document with Xcode 8.0 or later.
</code></pre>

<p>右键SB，选择Open As -> Source Code，并删除下面代码即可：</p>

<pre><code>&lt;capability name="documents saved in the Xcode 8 format" minToolsVersion="8.0"/&gt;
</code></pre>

<p><img src="http://al1020119.github.io/images/ios10shipei004.png" title="Caption" ></p>

<h2>12.推送</h2>

<p>如下图的部分，不要忘记打开。所有的推送平台，不管是极光还是什么的，要想收到推送，这个是必须打开的哟✌️</p>

<p><img src="http://al1020119.github.io/images/ios10shipei005.png" title="Caption" ></p>

<p>之后就应该可以收到推送了。另外，极光推送也推出新版本了，大家也可以更新下。</p>

<p>PS.苹果这次对推送做了很大的变化，希望大家多查阅查阅，处理推送的代理方法也变化了。</p>

<p>// 推送的代理</p>

<pre><code>[&lt;UNUserNotificationCenterDelegate&gt;]
</code></pre>

<p>iOS10收到通知不再是在</p>

<pre><code>[application: didReceiveRemoteNotification:]
</code></pre>

<p>方法去处理， iOS10推出新的代理方法，接收和处理</p>

<p>各类通知（本地或者远程）</p>

<pre><code>- (void)userNotificationCenter:(UNUserNotificationCenter *)center willPresentNotification:(UNNotification *)notification withCompletionHandler:(void (^)(UNNotificationPresentationOptions))completionHandler 
{ 
//应用在前台收到通知 NSLog(@"========%@", notification);
}


- (void)userNotificationCenter:(UNUserNotificationCenter *)center didReceiveNotificationResponse:(UNNotificationResponse *)response withCompletionHandler:(void (^)())completionHandler { 
//点击通知进入应用 NSLog(@"response:%@", response);
}
</code></pre>

<p>UserNotifications(用户通知)</p>

<pre><code>iOS 10 中将通知相关的 API 都统一了,苹果对这是做了重大改进，变的非常易用。

    iOS 9 以前的通知

在调用方法时，有些方法让人很难区分，容易写错方法，这让开发者有时候很苦恼。
应用在运行时和非运行时捕获通知的路径还不一致。
应用在前台时，是无法直接显示远程通知，还需要进一步处理。
已经发出的通知是不能更新的，内容发出时是不能改变的，并且只有简单文本展示方式，扩展性根本不是很好。

    iOS 10 开始的通知

所有相关通知被统一到了UserNotifications.framework框架中。
增加了撤销、更新、中途还可以修改通知的内容。
通知不在是简单的文本了，可以加入视频、图片，自定义通知的展示等等。
iOS 10相对之前的通知来说更加好用易于管理，并且进行了大规模优化，对于开发者来说是一件好事。
iOS 10开始对于权限问题进行了优化，申请权限就比较简单了(本地与远程通知集成在一个方法中)。
</code></pre>

<h2>13.代码及Api注意</h2>

<p>使用Xcode8之后，有些代码可能就编译不过去了，具体我就说说我碰到的问题。</p>

<p>1.UIWebView的代理方法：</p>

<blockquote><p>**注意要删除NSError前面的 nullable，否则报错。</p></blockquote>

<pre><code>- (void)webView:(UIWebView *)webView didFailLoadWithError:(nullable NSError *)error
{
    [self hideHud];
}
</code></pre>

<h2>14.Xib文件的注意事项</h2>

<p>使用Xcode8打开xib文件后，会出现下图的提示。</p>

<p><img src="http://al1020119.github.io/images/ios10shipei006.png" title="Caption" ></p>

<p>大家选择Choose Device即可。
之后大家会发现布局啊，frame乱了，只需要更新一下frame即可。如下图</p>

<p><img src="http://al1020119.github.io/images/ios10shipei007.png" title="Caption" ></p>

<pre><code>注意：如果按上面的步骤操作后，在用Xcode7打开Xib会报一下错误，
</code></pre>

<p><img src="http://al1020119.github.io/images/ios10shipei008.png" title="Caption" ></p>

<h5>解决办法：需要删除Xib里面</h5>

<pre><code>&lt;capability name="documents saved in the Xcode 8 format" minToolsVersion="8.0"/&gt;

这句话，以及把&lt; document &gt;中的toolsVersion和&lt; plugIn &gt;中的version改成你正常的xib文件中的值
，不过不建议这么做，在Xcode8出来后，希望大家都快速上手，全员更新。这就跟Xcode5到Xcode6一样，有变动，但是还是要尽早学习，尽快适应哟！
</code></pre>

<h2>15.UIRefreshControl</h2>

<p>在iOS 10 中, UIRefreshControl可以直接在UICollectionView和UITableView中使用,并且脱离了UITableViewController.现在RefreshControl是UIScrollView的一个属性.
    使用方法:</p>

<pre><code>//创建
 UIRefreshControl *refreshControl = [[UIRefreshControl alloc] init];
 refreshControl.tintColor = [UIColor redColor];
 refreshControl.attributedTitle = [[NSAttributedString alloc] initWithString:@"正在刷新"];
 [refreshControl addTarget:self action:@selector(loadData) forControlEvents:UIControlEventValueChanged];

 //开始和停止刷新
 [refreshControl beginRefreshing];
 [refreshControl endRefreshing];
</code></pre>

<p>也可以进去头文件查看</p>

<pre><code>#import

- (instancetype)init;

@property (nonatomic, readonly, getter=isRefreshing) BOOL refreshing;

@property (null_resettable, nonatomic, strong) UIColor *tintColor;
@property (nullable, nonatomic, strong) NSAttributedString *attributedTitle UI_APPEARANCE_SELECTOR;

// May be used to indicate to the refreshControl that an external event has initiated the refresh action
- (void)beginRefreshing NS_AVAILABLE_IOS(6_0);
// Must be explicitly called when the refreshing has completed
- (void)endRefreshing NS_AVAILABLE_IOS(6_0);
</code></pre>

<h2>16.UICollectionViewCell的的优化</h2>

<ul>
<li>在iOS 10 之前,UICollectionView上面如果有大量cell,当用户活动很快的时候,整个UICollectionView的卡顿会很明显,为什么会造成这样的问题,这里涉及到了iOS 系统的重用机制,当cell准备加载进屏幕的时候,整个cell都已经加载完成,等待在屏幕外面了,也就是整整一行cell都已经加载完毕,这就是造成卡顿的主要原因,专业术语叫做:掉帧.

<ul>
<li>要想让用户感觉不到卡顿,我们的app必须帧率达到60帧/秒,也就是说每帧16毫秒要刷新一次.</li>
</ul>
</li>
<li>iOS 10 之前UICollectionViewCell的生命周期是这样的:

<ul>
<li>用户滑动屏幕,屏幕外有一个cell准备加载进来,把cell从reusr队列拿出来,然后调用prepareForReuse方法,在这个方法里面,可以重置cell的状态,加载新的数据;</li>
<li>继续滑动,就会调用cellForItemAtIndexPath方法,在这个方法里面给cell赋值模型,然后返回给系统;</li>
<li>当cell马上进去屏幕的时候,就会调用willDisplayCell方法,在这个方法里面我们还可以修改cell,为进入屏幕做最后的准备工作;</li>
<li>执行完willDisplayCell方法后,cell就进去屏幕了.当cell完全离开屏幕以后,会调用didEndDisplayingCell方法.</li>
</ul>
</li>
<li>iOS 10 UICollectionViewCell的生命周期是这样的:

<ul>
<li>用户滑动屏幕,屏幕外有一个cell准备加载进来,把cell从reusr队列拿出来,然后调用prepareForReuse方法,在这里当cell还没有进去屏幕的时候,就已经提前调用这个方法了,对比之前的区别是之前是cell的上边缘马上进去屏幕的时候就会调用该方法,而iOS 10 提前到cell还在屏幕外面的时候就调用;</li>
<li>在cellForItemAtIndexPath中创建cell，填充数据，刷新状态等操作,相比于之前也提前了;</li>
<li>用户继续滑动的话,当cell马上就需要显示的时候我们再调用willDisplayCell方法,原则就是:何时需要显示,何时再去调用willDisplayCell方法;</li>
<li>当cell完全离开屏幕以后,会调用didEndDisplayingCell方法,跟之前一样,cell会进入重用队列.</li>
</ul>
</li>
<li>在iOS 10 之前,cell只能从重用队列里面取出,再走一遍生命周期,并调用cellForItemAtIndexPath创建或者生成一个cell.</li>
<li>在iOS 10 中,系统会cell保存一段时间,也就是说当用户把cell滑出屏幕以后,如果又滑动回来,cell不用再走一遍生命周期了,只需要调用willDisplayCell方法就可以重新出现在屏幕中了.</li>
<li>iOS 10 中,系统是一个一个加载cell的,二以前是一行一行加载的,这样就可以提升很多性能;</li>
<li><p>iOS 10 新增加的Pre-Fetching预加载</p>

<ul>
<li>这个是为了降低UICollectionViewCell在加载的时候所花费的时间,在 iOS 10 中,除了数据源协议和代理协议外,新增加了一个UICollectionViewDataSourcePrefetching协议,这个协议里面定义了两个</li>
</ul>
</li>
</ul>


<p>方法:</p>

<pre><code>- (void)collectionView:(UICollectionView *)collectionView prefetchItemsAtIndexPaths:(NSArray *)indexPaths NS_AVAILABLE_IOS(10_0);

- (void)collectionView:(UICollectionView *)collectionView cancelPrefetchingForItemsAtIndexPaths:(NSArray *)indexPaths  NS_AVAILABLE_IOS(10_0);
</code></pre>

<ul>
<li>在ColletionView prefetchItemsAt indexPaths这个方法是异步预加载数据的,当中的indexPaths数组是有序的,就是item接收数据的顺序;</li>
<li>CollectionView cancelPrefetcingForItemsAt indexPaths这个方法是可选的,可以用来处理在滑动中取消或者降低提前加载数据的优先级.</li>
</ul>


<blockquote><p>注意:这个协议并不能代替之前读取数据的方法,仅仅是辅助加载数据.</p></blockquote>

<p>  Pre-Fetching预加载对UITableViewCell同样适用.</p>

<h2>17.UITextField(好像作用并不大)</h2>

<p>在iOS 10 中,UITextField新增了textContentType字段,是UITextContentType类型,它是一个枚举,作用是可以指定输入框的类型,以便系统可以分析出用户的语义.是电话类型就建议一些电话,是地址类型就建议一些地址.可以在#import 文件中,查看textContentType字段,有以下可以选择的类型:</p>

<pre><code>UIKIT_EXTERN UITextContentType const UITextContentTypeName                      NS_AVAILABLE_IOS(10_0);
UIKIT_EXTERN UITextContentType const UITextContentTypeNamePrefix                NS_AVAILABLE_IOS(10_0);
UIKIT_EXTERN UITextContentType const UITextContentTypeGivenName                 NS_AVAILABLE_IOS(10_0);
UIKIT_EXTERN UITextContentType const UITextContentTypeMiddleName                NS_AVAILABLE_IOS(10_0);
UIKIT_EXTERN UITextContentType const UITextContentTypeFamilyName                NS_AVAILABLE_IOS(10_0);
UIKIT_EXTERN UITextContentType const UITextContentTypeNameSuffix                NS_AVAILABLE_IOS(10_0);
UIKIT_EXTERN UITextContentType const UITextContentTypeNickname                  NS_AVAILABLE_IOS(10_0);
UIKIT_EXTERN UITextContentType const UITextContentTypeJobTitle                  NS_AVAILABLE_IOS(10_0);
UIKIT_EXTERN UITextContentType const UITextContentTypeOrganizationName          NS_AVAILABLE_IOS(10_0);
UIKIT_EXTERN UITextContentType const UITextContentTypeLocation                  NS_AVAILABLE_IOS(10_0);
UIKIT_EXTERN UITextContentType const UITextContentTypeFullStreetAddress         NS_AVAILABLE_IOS(10_0);
UIKIT_EXTERN UITextContentType const UITextContentTypeStreetAddressLine1        NS_AVAILABLE_IOS(10_0);
UIKIT_EXTERN UITextContentType const UITextContentTypeStreetAddressLine2        NS_AVAILABLE_IOS(10_0);
UIKIT_EXTERN UITextContentType const UITextContentTypeAddressCity               NS_AVAILABLE_IOS(10_0);
UIKIT_EXTERN UITextContentType const UITextContentTypeAddressState              NS_AVAILABLE_IOS(10_0);
UIKIT_EXTERN UITextContentType const UITextContentTypeAddressCityAndState       NS_AVAILABLE_IOS(10_0);
UIKIT_EXTERN UITextContentType const UITextContentTypeSublocality               NS_AVAILABLE_IOS(10_0);
UIKIT_EXTERN UITextContentType const UITextContentTypeCountryName               NS_AVAILABLE_IOS(10_0);
UIKIT_EXTERN UITextContentType const UITextContentTypePostalCode                NS_AVAILABLE_IOS(10_0);
UIKIT_EXTERN UITextContentType const UITextContentTypeTelephoneNumber           NS_AVAILABLE_IOS(10_0);
UIKIT_EXTERN UITextContentType const UITextContentTypeEmailAddress              NS_AVAILABLE_IOS(10_0);
UIKIT_EXTERN UITextContentType const UITextContentTypeURL                       NS_AVAILABLE_IOS(10_0);
UIKIT_EXTERN UITextContentType const UITextContentTypeCreditCardNumber          NS_AVAILABLE_IOS(10_0);
</code></pre>

<h2>18.UIStatusBar的问题</h2>

<pre><code>在iOS10中,如果还使用以前设置UIStatusBar类型或者控制隐藏还是显示的方法,会报警告,方法过期
</code></pre>

<p>19970779-665271622c13eb6e</p>

<p>警告中提到从iOS9.0开始就弃用这两个方法了，需要用</p>

<pre><code>-[UIViewController preferredStatusBarstyle]

-[UIViewController preferredStatusBarHidden]来替换使用，那我们来看看新的替换方法。
</code></pre>

<p>新技能见下面</p>

<pre><code>#if UIKIT_DEFINE_AS_PROPERTIES
@property(nonatomic, readonly) UIStatusBarStyle preferredStatusBarStyle NS_AVAILABLE_IOS(7_0) __TVOS_PROHIBITED; // Defaults to UIStatusBarStyleDefault
@property(nonatomic, readonly) BOOL prefersStatusBarHidden NS_AVAILABLE_IOS(7_0) __TVOS_PROHIBITED; // Defaults to NO
// Override to return the type of animation that should be used for status bar changes for this view controller. This currently only affects changes to prefersStatusBarHidden.
@property(nonatomic, readonly) UIStatusBarAnimation preferredStatusBarUpdateAnimation NS_AVAILABLE_IOS(7_0) __TVOS_PROHIBITED; // Defaults to UIStatusBarAnimationFade
#else
- (UIStatusBarStyle)preferredStatusBarStyle NS_AVAILABLE_IOS(7_0) __TVOS_PROHIBITED; // Defaults to UIStatusBarStyleDefault
- (BOOL)prefersStatusBarHidden NS_AVAILABLE_IOS(7_0) __TVOS_PROHIBITED; // Defaults to NO
// Override to return the type of animation that should be used for status bar changes for this view controller. This currently only affects changes to prefersStatusBarHidden.
- (UIStatusBarAnimation)preferredStatusBarUpdateAnimation NS_AVAILABLE_IOS(7_0) __TVOS_PROHIBITED; // Defaults to UIStatusBarAnimationFade
#endif
</code></pre>

<p>上面这个新方法在UIViewController.h文件中，这说明什么？当然说明这是viewController的属性和方法了，只需要在viewController里调用修改即可</p>

<p>UIStatusBarStyle 和 prefersStatusBarHidden这两个属性是readonly readonly readonly也就是说我们如果调用下面 肯定是报错的：</p>

<pre><code>//这是错误的写法
self.preferredStatusBarStyle = UIStatusBarStyleDefault;和
self.prefersStatusBarHidden = YES;
</code></pre>

<p>正确的打开方式在viewController重写我们还没用的新的方法</p>

<pre><code>//这是正确的
- (BOOL)prefersStatusBarHidden{
    return YES;
}

- (UIStatusBarStyle)preferredStatusBarStyle{
    return UIStatusBarStyleDefault;
}
</code></pre>

<h2>19.插件取消</h2>

<p>Xcode8取消了三方插件的功能，好多教程破解可以继续使用，但是可能app上线可能会被拒。我们最喜爱的VVDocumenter-Xcode也不能使用了.</p>

<pre><code>看来大神都是谦虚的啊（啥时候能成为大神。我还是洗洗睡吧，梦里啥都有\^_^）
上面也提到了我们可以继续使用注释，快捷键（⌥ Option + ⌘ Command + / ）
</code></pre>

<h2>20.真彩色的显示</h2>

<p>真彩色的显示会根据光感应器来自动的调节达到特定环境下显示与性能的平衡效果,如果需要这个功能的话,可以在info.plist里配置(在Source Code模式下):</p>

<pre><code>UIWhitePointAdaptivityStyle
</code></pre>

<p>它有五种取值,分别是:</p>

<pre><code>UIWhitePointAdaptivityStyleStandard // 标准模式
UIWhitePointAdaptivityStyleReading // 阅读模式
UIWhitePointAdaptivityStylePhoto // 图片模式
UIWhitePointAdaptivityStyleVideo // 视频模式
UIWhitePointAdaptivityStyleStandard // 游戏模式
</code></pre>

<p>如果你的项目是游戏类的,就选择UIWhitePointAdaptivityStyleStandard这个模式,五种模式的显示效果是从上往下递减,也就是说如果你的项目是图片处理类的,你选择的是阅读模式,给选择太好的效果会影响性能.</p>

<h2>21.UIColor问题</h2>

<pre><code>官方文档中说:大多数core开头的图形框架和AVFoundation都提高了对扩展像素和宽色域色彩空间的支持.通过图形堆栈扩展这种方式比以往支持广色域的显示设备更加容易。现在对UIKit扩展可以在sRGB的色彩空间下工作，性能更好,也可以在更广泛的色域来搭配sRGB颜色.如果你的项目中是通过低级别的api自己实现图形处理的,建议使用sRGB,也就是说在项目中使用了RGB转化颜色的建议转换为使用sRGB,在UIColor类中新增了两个api:

+ (UIColor *)colorWithDisplayP3Red:(CGFloat)displayP3Red green:(CGFloat)green blue:(CGFloat)blue alpha:(CGFloat)alpha NS_AVAILABLE_IOS(10_0);
- (UIColor *)initWithDisplayP3Red:(CGFloat)displayP3Red green:(CGFloat)green blue:(CGFloat)blue alpha:(CGFloat)alpha NS_AVAILABLE_IOS(10_0);
</code></pre>

<p>我用新老方法测试两个方法在RGB相同的数值在表现上的区别看下图：</p>

<blockquote><p>可以看出下面的颜色（sRGB方法）比上面的颜色（RGB方法）颜色更深更明显。</p></blockquote>

<h2>22.系统版本判断方法失效</h2>

<h6>我们之前的系统版本方法如下</h6>

<p>当系统版本到iOS10.0的时候 9.0和10.0比较的话是降序而不是升序，这样会导致iOS10.0是最早的版本，这样后面要走的iOS10的方法可能都不会走而出现问题</p>

<pre><code>#define IOS9_OR_LATER ([[[UIDevice currentDevice] systemVersion] compare:@"9.0"] != NSOrderedAscending)

#define IOS8_OR_LATER ([[[UIDevice currentDevice] systemVersion] compare:@"8.0"] != NSOrderedAscending)

#define IOS7_OR_LATER ([[[UIDevice currentDevice] systemVersion] compare:@"7.0"] != NSOrderedAscending)

#define IOS6_OR_LATER ([[[UIDevice currentDevice] systemVersion] compare:@"6.0"] != NSOrderedAscending)
</code></pre>

<p>下面这样也不行它会永远返回NO,substringToIndex:1在iOS 10 会被检测成 iOS 1了,</p>

<pre><code>#define isiOS10 ([[[[UIDevice currentDevice] systemVersion] substringToIndex:1] intValue]&gt;=10)
1

#define isiOS10 ([[[[UIDevice currentDevice] systemVersion] substringToIndex:1] intValue]&gt;=10)
</code></pre>

<p>正确的打开方式应该是：</p>

<pre><code>#define IOS10_OR_LATER ([[[UIDevice currentDevice] systemVersion] floatValue] &gt;= 10.0)

#define IOS9_OR_LATER ([[[UIDevice currentDevice] systemVersion] floatValue] &gt;= 9.0)

#define IOS8_OR_LATER ([[[UIDevice currentDevice] systemVersion] floatValue] &gt;= 8.0)

#define IOS7_OR_LATER ([[[UIDevice currentDevice] systemVersion] floatValue] &gt;= 7.0)

#define IOS6_OR_LATER ([[[UIDevice currentDevice] systemVersion] floatValue] &gt;= 6.0)
</code></pre>

<h2>23.tabBarItem第一个重复出现</h2>

<p>这个问题实在没有找到好的方法解决。不过庆幸的是，公司决定将TabBar中的Item四个变成，既然好了，我就想不通。</p>

<p>如果你也遇到了这样的问题，或者已经解决了此问题，欢迎联系我，在此致谢！</p>

<hr />

<hr />

<h6>微信号：</h6>

<p>clpaial10201119（Q Q：2211523682）</p>

<h6>微博WB:</h6>

<p><a href="http://weibo.com/u/3288975567?is_hot=1">http://weibo.com/u/3288975567?is_hot=1</a></p>

<h6>gitHub：</h6>

<p><a href="https://github.com/al1020119">https://github.com/al1020119</a></p>

<h6>博客</h6>

<p><a href="http://al1020119.github.io/">http://al1020119.github.io/</a></p>

<hr />

<p><img src="http://al1020119.github.io/images/iCocosCoder.jpg" title="Caption" ></p>

<p><img src="http://al1020119.github.io/images/iCocosPublic.jpg" title="Caption" ></p>
]]></content>
  </entry>
  
  <entry>
    <title type="html"><![CDATA[最新书单]]></title>
    <link href="http://al1020119.github.io/blog/2016/10/01/zui-xin-shu-dan/"/>
    <updated>2016-10-01T13:30:57+08:00</updated>
    <id>http://al1020119.github.io/blog/2016/10/01/zui-xin-shu-dan</id>
    <content type="html"><![CDATA[<h2>2016年-2017年书单</h2>

<p>总结了一下，2016年，这一年来所看的书和2017年计划所要看的书，后面的文章中会给出相关介绍并且说明我为什么会选择这些，同时以后也会时常回顾这些东西。</p>

<p>如果遗漏或者增加的后面会继续补充。</p>

<!--more-->


<hr />

<h4>2016</h4>

<hr />

<h4>全力推荐：</h4>

<ul>
<li>内外兼修</li>
</ul>


<h4>程序员篇</h4>

<ul>
<li>程序员必备之路
 

<ul>
<li>剑指offer
 </li>
<li>大话设计模式
 </li>
<li>数据结构教程
 </li>
<li>算法设计与分析
 </li>
<li>算法导论
 <br/>
 </li>
</ul>
</li>
</ul>


<h4>iOS篇 </h4>

<ul>
<li> iOS底层与高级篇
 

<ul>
<li>Effective Objective-C 2.0
 </li>
<li>Objective-C高级编程
 </li>
<li>iOS开发网络高级编程
 </li>
<li>iOS开发数据库应用高级编程
 </li>
<li>精通iOS开发读
 </li>
<li>iOS逆向工程
 
 </li>
</ul>
</li>
</ul>


<p>总结：</p>

<ol>
<li><p>ios底层与高级相关</p></li>
<li><p>算法与数据结构相关</p></li>
</ol>


<hr />

<h4>2017</h4>

<hr />

<h4>后台篇</h4>

<p> </p>

<ul>
<li> PHP
 

<ul>
<li>PHP入门到精通
 </li>
<li>PHP和MYSQL WEB开发
 </li>
</ul>
</li>
</ul>


<h4>全栈篇</h4>

<ul>
<li>JavaScript
 

<ul>
<li><p>JavaScript权威指南</p></li>
<li><p>JavaScript高级程序设计</p></li>
</ul>
</li>
</ul>


<p>总结：</p>

<ol>
<li><p>PHP后台与网站相关</p></li>
<li><p>JS->H5,微信小程序相关</p></li>
</ol>


<blockquote><p>我相信 : 我们每天不是在学习，就是在学习路上！</p></blockquote>

<hr />

<hr />

<h6>微信号：</h6>

<p>clpaial10201119（Q Q：2211523682）</p>

<h6>微博WB:</h6>

<p><a href="http://weibo.com/u/3288975567?is_hot=1">http://weibo.com/u/3288975567?is_hot=1</a></p>

<h6>gitHub：</h6>

<p><a href="https://github.com/al1020119">https://github.com/al1020119</a></p>

<h6>博客</h6>

<p><a href="http://al1020119.github.io/">http://al1020119.github.io/</a></p>

<hr />

<p><img src="http://al1020119.github.io/images/iCocosCoder.jpg" title="Caption" ></p>

<p><img src="http://al1020119.github.io/images/iCocosPublic.jpg" title="Caption" ></p>
]]></content>
  </entry>
  
  <entry>
    <title type="html"><![CDATA[音视频编解码技术]]></title>
    <link href="http://al1020119.github.io/blog/2016/09/30/ios-yinshipjiema/"/>
    <updated>2016-09-30T18:16:05+08:00</updated>
    <id>http://al1020119.github.io/blog/2016/09/30/ios-yinshipjiema</id>
    <content type="html"><![CDATA[<h4>目录</h4>

<ol>
<li>音频编解码：AudioToolbox</li>
<li>视频编解码：VideoToolbox</li>
<li>总结</li>
</ol>


<h1>视频编解码：VideoToolbox</h1>

<h3>关于H264</h3>

<p>H.264是目前很流行的编码层视频压缩格式，目前项目中的协议层有rtmp与http，但是视频的编码层都是使用的H.264。
在熟悉H.264的过程中，为更好的了解H.264，尝试用VideoToolbox硬编码与硬解码H.264的原始码流。</p>

<h3>H.264组成</h3>

<pre><code>1、网络提取层 (Network Abstraction Layer，NAL)
2、视讯编码层 (Video Coding Layer，VCL)
</code></pre>

<!--more-->


<p>H.264由视讯编码层(Video Coding Layer，VCL)与网络提取层(Network Abstraction Layer，NAL)组成。
H.264包含一个内建的NAL网络协议适应层，藉由NAL来提供网络的状态，让VCL有更好的编译码弹性与纠错能力。</p>

<h3>视频相关的框架</h3>

<pre><code>AVKit
AVFoundation
Video Toolbox
Core Media
Core Video
</code></pre>

<p>其中的AVKit和AVFoudation、VideoToolbox都是使用硬编码和硬解码。</p>

<h3>VideoToolbox</h3>

<p>VideoToolbox是iOS8以后开放的硬编码与硬解码的API，一组用C语言写的函数。使用流程如下：</p>

<pre><code>1、-initVideoToolBox中调用VTCompressionSessionCreate创建编码session，然后调用VTSessionSetProperty设置参数，最后调用VTCompressionSessionPrepareToEncodeFrames开始编码；
2、开始视频录制，获取到摄像头的视频帧，传入-encode:，调用VTCompressionSessionEncodeFrame传入需要编码的视频帧，如果返回失败，调用VTCompressionSessionInvalidate销毁session，然后释放session；
3、每一帧视频编码完成后会调用预先设置的编码函数didCompressH264，如果是关键帧需要用CMSampleBufferGetFormatDescription获取CMFormatDescriptionRef，然后用
CMVideoFormatDescriptionGetH264ParameterSetAtIndex取得PPS和SPS；
最后把每一帧的所有NALU数据前四个字节变成0x00 00 00 01之后再写入文件；
4、调用VTCompressionSessionCompleteFrames完成编码，然后销毁session：VTCompressionSessionInvalidate，释放session。
</code></pre>

<h2>VideoToolbox编码H264实现</h2>

<p>创建session</p>

<pre><code>     int width = 480, height = 640;
     OSStatus status = VTCompressionSessionCreate(NULL, width, height, kCMVideoCodecType_H264, NULL, NULL, NULL, didCompressH264, (__bridge void *)(self),  &amp;EncodingSession);
</code></pre>

<p>设置session属性</p>

<pre><code>     // 设置实时编码输出（避免延迟）
     VTSessionSetProperty(EncodingSession, kVTCompressionPropertyKey_RealTime, kCFBooleanTrue);
     VTSessionSetProperty(EncodingSession, kVTCompressionPropertyKey_ProfileLevel, kVTProfileLevel_H264_Baseline_AutoLevel);
     // 设置关键帧（GOPsize)间隔
     int frameInterval = 10;
     CFNumberRef  frameIntervalRef = CFNumberCreate(kCFAllocatorDefault, kCFNumberIntType, &amp;frameInterval);
     VTSessionSetProperty(EncodingSession, kVTCompressionPropertyKey_MaxKeyFrameInterval, frameIntervalRef);
     // 设置期望帧率
     int fps = 10;
     CFNumberRef  fpsRef = CFNumberCreate(kCFAllocatorDefault, kCFNumberIntType, &amp;fps);
     VTSessionSetProperty(EncodingSession, kVTCompressionPropertyKey_ExpectedFrameRate, fpsRef); 
     //设置码率，上限，单位是bps
     int bitRate = width * height * 3 * 4 * 8;
     CFNumberRef bitRateRef = CFNumberCreate(kCFAllocatorDefault, kCFNumberSInt32Type, &amp;bitRate);
     VTSessionSetProperty(EncodingSession, kVTCompressionPropertyKey_AverageBitRate, bitRateRef);
     //设置码率，均值，单位是byte
     int bitRateLimit = width * height * 3 * 4;
     CFNumberRef bitRateLimitRef = CFNumberCreate(kCFAllocatorDefault, kCFNumberSInt32Type, &amp;bitRateLimit);
     VTSessionSetProperty(EncodingSession, kVTCompressionPropertyKey_DataRateLimits, bitRateLimitRef);
</code></pre>

<p>传入编码帧</p>

<pre><code> CVImageBufferRef imageBuffer = (CVImageBufferRef)CMSampleBufferGetImageBuffer(sampleBuffer);
 // 帧时间，如果不设置会导致时间轴过长。
 CMTime presentationTimeStamp = CMTimeMake(frameID++, 1000);
 VTEncodeInfoFlags flags;
 OSStatus statusCode = VTCompressionSessionEncodeFrame(EncodingSession,
                                                       imageBuffer,
                                                       presentationTimeStamp,
                                                       kCMTimeInvalid,
                                                       NULL, NULL, &amp;flags);
</code></pre>

<p>关键帧获取SPS和PPS</p>

<pre><code> bool keyframe = !CFDictionaryContainsKey( (CFArrayGetValueAtIndex(CMSampleBufferGetSampleAttachmentsArray(sampleBuffer, true), 0)), kCMSampleAttachmentKey_NotSync);
 // 判断当前帧是否为关键帧
 // 获取sps &amp; pps数据
 if (keyframe)
 {
     CMFormatDescriptionRef format = CMSampleBufferGetFormatDescription(sampleBuffer);
     size_t sparameterSetSize, sparameterSetCount;
     const uint8_t *sparameterSet;
     OSStatus statusCode = CMVideoFormatDescriptionGetH264ParameterSetAtIndex(format, 0, &amp;sparameterSet, &amp;sparameterSetSize, &amp;sparameterSetCount, 0 );
     if (statusCode == noErr)
     {
         // Found sps and now check for pps
         size_t pparameterSetSize, pparameterSetCount;
         const uint8_t *pparameterSet;
         OSStatus statusCode = CMVideoFormatDescriptionGetH264ParameterSetAtIndex(format, 1, &amp;pparameterSet, &amp;pparameterSetSize, &amp;pparameterSetCount, 0 );
         if (statusCode == noErr)
         {
             // Found pps
             NSData *sps = [NSData dataWithBytes:sparameterSet length:sparameterSetSize];
             NSData *pps = [NSData dataWithBytes:pparameterSet length:pparameterSetSize];
             if (encoder)
             {
                 [encoder gotSpsPps:sps pps:pps];
             }
         }
     }
 }
</code></pre>

<p>写入数据</p>

<pre><code> CMBlockBufferRef dataBuffer = CMSampleBufferGetDataBuffer(sampleBuffer);
 size_t length, totalLength;
 char *dataPointer;
 OSStatus statusCodeRet = CMBlockBufferGetDataPointer(dataBuffer, 0, &amp;length, &amp;totalLength, &amp;dataPointer);
 if (statusCodeRet == noErr) {
     size_t bufferOffset = 0;
     static const int AVCCHeaderLength = 4; // 返回的nalu数据前四个字节不是0001的startcode，而是大端模式的帧长度length

     // 循环获取nalu数据
     while (bufferOffset &lt; totalLength - AVCCHeaderLength) {
         uint32_t NALUnitLength = 0;
         // Read the NAL unit length
         memcpy(&amp;NALUnitLength, dataPointer + bufferOffset, AVCCHeaderLength);

         // 从大端转系统端
         NALUnitLength = CFSwapInt32BigToHost(NALUnitLength);

         NSData* data = [[NSData alloc] initWithBytes:(dataPointer + bufferOffset + AVCCHeaderLength) length:NALUnitLength];
         [encoder gotEncodedData:data isKeyFrame:keyframe];

         // Move to the next NAL unit in the block buffer
         bufferOffset += AVCCHeaderLength + NALUnitLength;
     }
 }
</code></pre>

<h2>VideoToolbox解码码H264实现</h2>

<p>核心思路</p>

<p>用NSInputStream读入原始H.264码流，用CADisplayLink控制显示速率，用NALU的前四个字节识别SPS和PPS并存储，当读入IDR帧的时候初始化VideoToolbox，并开始同步解码；解码得到的CVPixelBufferRef会传入OpenGL ES类进行解析渲染。
具体细节
1、把原始码流包装成CMSampleBuffer</p>

<p>1、替换头字节长度；</p>

<pre><code>         uint32_t nalSize = (uint32_t)(packetSize - 4);
         uint32_t *pNalSize = (uint32_t *)packetBuffer;
         *pNalSize = CFSwapInt32HostToBig(nalSize);
</code></pre>

<p>2、用CMBlockBuffer把NALUnit包装起来；</p>

<pre><code>     CMBlockBufferRef blockBuffer = NULL;
     OSStatus status  = CMBlockBufferCreateWithMemoryBlock(kCFAllocatorDefault,
                                                           (void*)packetBuffer, packetSize,
                                                           kCFAllocatorNull,
                                                           NULL, 0, packetSize,
                                                           0, &amp;blockBuffer);
</code></pre>

<p>3、把SPS和PPS包装成CMVideoFormatDescription；</p>

<pre><code>     const uint8_t* parameterSetPointers[2] = {mSPS, mPPS};
     const size_t parameterSetSizes[2] = {mSPSSize, mPPSSize};
     OSStatus status = CMVideoFormatDescriptionCreateFromH264ParameterSets(kCFAllocatorDefault,
                                                                                       2, //param count
                                                                                       parameterSetPointers,
                                                                                       parameterSetSizes,
                                                                                       4, //nal start code size
                                                                                       &amp;mFormatDescription);
</code></pre>

<p>4、添加CMTime时间；</p>

<pre><code>    （WWDC视频上说有，但是我在实现过程没有找到添加的地方，可能是我遗漏了）
</code></pre>

<p>5、创建CMSampleBuffer；</p>

<pre><code>         CMSampleBufferRef sampleBuffer = NULL;
         const size_t sampleSizeArray[] = {packetSize};
         status = CMSampleBufferCreateReady(kCFAllocatorDefault,
                                            blockBuffer,
                                            mFormatDescription,
                                            1, 0, NULL, 1, sampleSizeArray,
                                            &amp;sampleBuffer);
</code></pre>

<p>2、解码并显示</p>

<p>1、传入CMSampleBuffer</p>

<pre><code>             VTDecodeFrameFlags flags = 0;
             VTDecodeInfoFlags flagOut = 0;
             // 默认是同步操作。
             // 调用didDecompress，返回后再回调
             OSStatus decodeStatus = VTDecompressionSessionDecodeFrame(mDecodeSession,
                                                                       sampleBuffer,
                                                                       flags,
                                                                       &amp;outputPixelBuffer,
                                                                       &amp;flagOut);
</code></pre>

<p>2、回调didDecompress</p>

<pre><code>void didDecompress(void *decompressionOutputRefCon, void *sourceFrameRefCon, OSStatus status, VTDecodeInfoFlags infoFlags, CVImageBufferRef pixelBuffer, CMTime presentationTimeStamp, CMTime presentationDuration ){
 CVPixelBufferRef *outputPixelBuffer = (CVPixelBufferRef *)sourceFrameRefCon;
 *outputPixelBuffer = CVPixelBufferRetain(pixelBuffer);
}
</code></pre>

<p>3、显示解码的结果</p>

<pre><code>[self.mOpenGLView displayPixelBuffer:pixelBuffer];
</code></pre>

<p>仔细对比硬编码和硬解码的图像，会发现硬编码的图像被水平镜像过。</p>

<pre><code>当遇到IDR帧时，更合适的做法是通过
VTDecompressionSessionCanAcceptFormatDescription判断原来的session是否能接受新的SPS和PPS，如果不能再新建session。
</code></pre>

<h1>音频编解码：AudioToolbox</h1>

<h3>AAC高级音频编码</h3>

<p>AAC（Advanced Audio Coding），中文名：高级音频编码，出现于1997年，基于MPEG-2的音频编码技术。由Fraunhofer IIS、杜比实验室、AT&amp;T、Sony等公司共同开发，目的是取代MP3格式。</p>

<p>AAC音频格式有ADIF和ADTS：</p>

<pre><code>ADIF：Audio Data Interchange Format 音频数据交换格式。这种格式的特征是可以确定的找到这个音频数据的开始，不需进行在音频数据流中间开始的解码，即它的解码必须在明确定义的开始处进行。故这种格式常用在磁盘文件中。
ADTS：Audio Data Transport Stream 音频数据传输流。这种格式的特征是它是一个有同步字的比特流，解码可以在这个流中任何位置开始。它的特征类似于mp3数据流格式。
</code></pre>

<h3>AudioToolbox</h3>

<p>AudioToolbox这个库是C的接口，偏向于底层，用于在线流媒体音乐的播放，可以调用该库的相关接口自己封装一个在线播放器类，AudioStreamer是老外封装的一个播放器类</p>

<pre><code>    •   数据类型  
1.AudioFileStreamID             文件流  
2.AudioQueueRef                     播放队列   
3.AudioStreamBasicDescription   格式化音频数据  
4.AudioQueueBufferRef             数据缓冲  

    •   回调函数  
1.AudioFileStream_PacketsProc       解析音频数据回调  
2.AudioSessionInterruptionListener  音频会话被打断  
3.AudioQueueOutputCallback          一个AudioQueueBufferRef播放完  

    •   主要函数  
0.AudioSessionInitialize (NULL, NULL, AudioSessionInterruptionListener, self);  
初始化音频会话  

1.AudioFileStreamOpen(  
                        (void*)self,                            
                        &amp;AudioFileStreamPropertyListenerProc,   
                        &amp;AudioFileStreamPacketsProc,            
                        0,                                      
                        &amp;audio_file_stream);              
建立一个文件流AudioFileStreamID，传输解析的数据  

2.AudioFileStreamParseBytes(  
                          audio_file_stream,  
                          datalen,  
                          [data bytes],  
                          kAudioFileStreamProperty_FileFormat);   
解析音频数据  

3.AudioQueueNewOutput(&amp;audio_format, AudioQueueOutputCallback, (void*)self, [[NSRunLoop currentRunLoop] getCFRunLoop], kCFRunLoopCommonModes, 0, &amp;audio_queue);  
创建音频队列AudioQueueRef  

4.AudioQueueAllocateBuffer(queue, [data length], &amp;buffer);  
创建音频缓冲数据AudioQueueBufferRef  

5.AudioQueueEnqueueBuffer(queue, buffer, num_packets, packet_descriptions);  
把缓冲数据排队加入到AudioQueueRef等待播放  

6.AudioQueueStart(audio_queue, nil);    播放  
7.AudioQueueStop(audio_queue, true);  
 AudioQueuePause(audio_queue);          停止、暂停  

    •   断点续传  
1。在http请求头中设置数据的请求范围，请求头中都是key-value成对  
    key：Range           value:bytes=0-1000  
    [request setValue:range  forHTTPHeaderField:@"Range"];  
可以实现，a.网络断开后再连接能继续从原来的断点下载  
            b.可以实现播放进度可随便拉动  
</code></pre>

<h3>编码实现</h3>

<p>iOS上把PCM音频编码成AAC音频流</p>

<pre><code>1、设置编码器（codec），并开始录制；
2、收集到PCM数据，传给编码器；
3、编码完成回调callback，写入文件。
</code></pre>

<p>具体步骤
1、创建并配置AVCaptureSession</p>

<p>创建AVCaptureSession，然后找到音频的AVCaptureDevice，根据音频device创建输入并添加到session，最后添加output到session。</p>

<p>audioFileHandle是NSFileHandle，用户写入编码后的AAC音频到文件。
demo中，此段代码还包括Video的设置。为了缩短篇幅，去掉了video相关的配置。</p>

<pre><code>- (void)startCapture {
    self.mCaptureSession = [[AVCaptureSession alloc] init];
    mCaptureQueue = dispatch_get_global_queue(DISPATCH_QUEUE_PRIORITY_DEFAULT, 0);
    mEncodeQueue = dispatch_get_global_queue(DISPATCH_QUEUE_PRIORITY_DEFAULT, 0);

    AVCaptureDevice *audioDevice = [[AVCaptureDevice devicesWithMediaType:AVMediaTypeAudio] lastObject];
    self.mCaptureAudioDeviceInput = [[AVCaptureDeviceInput alloc] initWithDevice:audioDevice error:nil];
    if ([self.mCaptureSession canAddInput:self.mCaptureAudioDeviceInput]) {
        [self.mCaptureSession addInput:self.mCaptureAudioDeviceInput];
    }
    self.mCaptureAudioOutput = [[AVCaptureAudioDataOutput alloc] init];

    if ([self.mCaptureSession canAddOutput:self.mCaptureAudioOutput]) {
        [self.mCaptureSession addOutput:self.mCaptureAudioOutput];
    }
    [self.mCaptureAudioOutput setSampleBufferDelegate:self queue:mCaptureQueue];

    NSString *audioFile = [[NSSearchPathForDirectoriesInDomains(NSDocumentDirectory, NSUserDomainMask, YES) lastObject] stringByAppendingPathComponent:@"abc.aac"];
    [[NSFileManager defaultManager] removeItemAtPath:audioFile error:nil];
    [[NSFileManager defaultManager] createFileAtPath:audioFile contents:nil attributes:nil];
    audioFileHandle = [NSFileHandle fileHandleForWritingAtPath:audioFile];

    [self.mCaptureSession startRunning];
}
</code></pre>

<p>2、创建转换器</p>

<p>AudioStreamBasicDescription是输出流的结构体描述，
配置好outAudioStreamBasicDescription后，
根据AudioClassDescription（编码器），
调用AudioConverterNewSpecific创建转换器。</p>

<pre><code>/**
 *  设置编码参数
 *
 *  @param sampleBuffer 音频
 */
- (void) setupEncoderFromSampleBuffer:(CMSampleBufferRef)sampleBuffer {
    AudioStreamBasicDescription inAudioStreamBasicDescription = *CMAudioFormatDescriptionGetStreamBasicDescription((CMAudioFormatDescriptionRef)CMSampleBufferGetFormatDescription(sampleBuffer));

    AudioStreamBasicDescription outAudioStreamBasicDescription = {0}; // 初始化输出流的结构体描述为0. 很重要。
    outAudioStreamBasicDescription.mSampleRate = inAudioStreamBasicDescription.mSampleRate; // 音频流，在正常播放情况下的帧率。如果是压缩的格式，这个属性表示解压缩后的帧率。帧率不能为0。
    outAudioStreamBasicDescription.mFormatID = kAudioFormatMPEG4AAC; // 设置编码格式
    outAudioStreamBasicDescription.mFormatFlags = kMPEG4Object_AAC_LC; // 无损编码 ，0表示没有
    outAudioStreamBasicDescription.mBytesPerPacket = 0; // 每一个packet的音频数据大小。如果的动态大小，设置为0。动态大小的格式，需要用AudioStreamPacketDescription 来确定每个packet的大小。
    outAudioStreamBasicDescription.mFramesPerPacket = 1024; // 每个packet的帧数。如果是未压缩的音频数据，值是1。动态帧率格式，这个值是一个较大的固定数字，比如说AAC的1024。如果是动态大小帧数（比如Ogg格式）设置为0。
    outAudioStreamBasicDescription.mBytesPerFrame = 0; //  每帧的大小。每一帧的起始点到下一帧的起始点。如果是压缩格式，设置为0 。
    outAudioStreamBasicDescription.mChannelsPerFrame = 1; // 声道数
    outAudioStreamBasicDescription.mBitsPerChannel = 0; // 压缩格式设置为0
    outAudioStreamBasicDescription.mReserved = 0; // 8字节对齐，填0.
    AudioClassDescription *description = [self
                                          getAudioClassDescriptionWithType:kAudioFormatMPEG4AAC
                                          fromManufacturer:kAppleSoftwareAudioCodecManufacturer]; //软编

    OSStatus status = AudioConverterNewSpecific(&amp;inAudioStreamBasicDescription, &amp;outAudioStreamBasicDescription, 1, description, &amp;_audioConverter); // 创建转换器
    if (status != 0) {
        NSLog(@"setup converter: %d", (int)status);
    }
}
</code></pre>

<p>获取编码器的方法</p>

<pre><code>/**
 *  获取编解码器
 *
 *  @param type         编码格式
 *  @param manufacturer 软/硬编
 *
 编解码器（codec）指的是一个能够对一个信号或者一个数据流进行变换的设备或者程序。这里指的变换既包括将 信号或者数据流进行编码（通常是为了传输、存储或者加密）或者提取得到一个编码流的操作，也包括为了观察或者处理从这个编码流中恢复适合观察或操作的形式的操作。编解码器经常用在视频会议和流媒体等应用中。
 *  @return 指定编码器
 */
- (AudioClassDescription *)getAudioClassDescriptionWithType:(UInt32)type
                                           fromManufacturer:(UInt32)manufacturer
{
    static AudioClassDescription desc;

    UInt32 encoderSpecifier = type;
    OSStatus st;

    UInt32 size;
    st = AudioFormatGetPropertyInfo(kAudioFormatProperty_Encoders,
                                    sizeof(encoderSpecifier),
                                    &amp;encoderSpecifier,
                                    &amp;size);
    if (st) {
        NSLog(@"error getting audio format propery info: %d", (int)(st));
        return nil;
    }

    unsigned int count = size / sizeof(AudioClassDescription);
    AudioClassDescription descriptions[count];
    st = AudioFormatGetProperty(kAudioFormatProperty_Encoders,
                                sizeof(encoderSpecifier),
                                &amp;encoderSpecifier,
                                &amp;size,
                                descriptions);
    if (st) {
        NSLog(@"error getting audio format propery: %d", (int)(st));
        return nil;
    }

    for (unsigned int i = 0; i &lt; count; i++) {
        if ((type == descriptions[i].mSubType) &amp;&amp;
            (manufacturer == descriptions[i].mManufacturer)) {
            memcpy(&amp;desc, &amp;(descriptions[i]), sizeof(desc));
            return &amp;desc;
        }
    }

    return nil;
}
</code></pre>

<p>3、获取到PCM数据并传入编码器</p>

<p>用CMSampleBufferGetDataBuffer获取到CMSampleBufferRef里面的CMBlockBufferRef，再通过CMBlockBufferGetDataPointer获取到<em>pcmBufferSize和</em>pcmBuffer；
调用AudioConverterFillComplexBuffer传入数据，并在callBack函数调用填充buffer的方法。</p>

<pre><code>    CMBlockBufferRef blockBuffer = CMSampleBufferGetDataBuffer(sampleBuffer);
    CFRetain(blockBuffer);
    OSStatus status = CMBlockBufferGetDataPointer(blockBuffer, 0, NULL, &amp;_pcmBufferSize, &amp;_pcmBuffer);
    NSError *error = nil;
    if (status != kCMBlockBufferNoErr) {
        error = [NSError errorWithDomain:NSOSStatusErrorDomain code:status userInfo:nil];
    }
    memset(_aacBuffer, 0, _aacBufferSize);

    AudioBufferList outAudioBufferList = {0};
    outAudioBufferList.mNumberBuffers = 1;
    outAudioBufferList.mBuffers[0].mNumberChannels = 1;
    outAudioBufferList.mBuffers[0].mDataByteSize = (int)_aacBufferSize;
    outAudioBufferList.mBuffers[0].mData = _aacBuffer;
    AudioStreamPacketDescription *outPacketDescription = NULL;
    UInt32 ioOutputDataPacketSize = 1;
    // Converts data supplied by an input callback function, supporting non-interleaved and packetized formats.
    // Produces a buffer list of output data from an AudioConverter. The supplied input callback function is called whenever necessary.
    status = AudioConverterFillComplexBuffer(_audioConverter, inInputDataProc, (__bridge void *)(self), &amp;ioOutputDataPacketSize, &amp;outAudioBufferList, outPacketDescription);
</code></pre>

<p>Callback函数</p>

<pre><code>/**
 *  A callback function that supplies audio data to convert. This callback is invoked repeatedly as the converter is ready for new input data.

 */
OSStatus inInputDataProc(AudioConverterRef inAudioConverter, UInt32 *ioNumberDataPackets, AudioBufferList *ioData, AudioStreamPacketDescription **outDataPacketDescription, void *inUserData)
{
    AACEncoder *encoder = (__bridge AACEncoder *)(inUserData);
    UInt32 requestedPackets = *ioNumberDataPackets;

    size_t copiedSamples = [encoder copyPCMSamplesIntoBuffer:ioData];
    if (copiedSamples &lt; requestedPackets) {
        //PCM 缓冲区还没满
        *ioNumberDataPackets = 0;
        return -1;
    }
    *ioNumberDataPackets = 1;

    return noErr;
}

/**
 *  填充PCM到缓冲区
 */
- (size_t) copyPCMSamplesIntoBuffer:(AudioBufferList*)ioData {
    size_t originalBufferSize = _pcmBufferSize;
    if (!originalBufferSize) {
        return 0;
    }
    ioData-&gt;mBuffers[0].mData = _pcmBuffer;
    ioData-&gt;mBuffers[0].mDataByteSize = (int)_pcmBufferSize;
    _pcmBuffer = NULL;
    _pcmBufferSize = 0;
    return originalBufferSize;
}
</code></pre>

<p>4、得到rawAAC码流，添加ADTS头，并写入文件</p>

<p>AudioConverterFillComplexBuffer返回的是AAC原始码流，需要在AAC每帧添加ADTS头，调用adtsDataForPacketLength方法生成，最后把数据写入audioFileHandle的文件。</p>

<pre><code>    if (status == 0) {
        NSData *rawAAC = [NSData dataWithBytes:outAudioBufferList.mBuffers[0].mData length:outAudioBufferList.mBuffers[0].mDataByteSize];
        NSData *adtsHeader = [self adtsDataForPacketLength:rawAAC.length];
        NSMutableData *fullData = [NSMutableData dataWithData:adtsHeader];
        [fullData appendData:rawAAC];
        data = fullData;
    } else {
        error = [NSError errorWithDomain:NSOSStatusErrorDomain code:status userInfo:nil];
    }
    if (completionBlock) {
        dispatch_async(_callbackQueue, ^{
            completionBlock(data, error);
        });
    }
</code></pre>

<p>网上的ADTS头生成方法</p>

<pre><code>/**
 *  Add ADTS header at the beginning of each and every AAC packet.
 *  This is needed as MediaCodec encoder generates a packet of raw
 *  AAC data.
 *
 *  Note the packetLen must count in the ADTS header itself.
 *  See: http://wiki.multimedia.cx/index.php?title=ADTS
 *  Also: http://wiki.multimedia.cx/index.php?title=MPEG-4_Audio#Channel_Configurations
 **/
- (NSData*) adtsDataForPacketLength:(NSUInteger)packetLength {
    int adtsLength = 7;
    char *packet = malloc(sizeof(char) * adtsLength);
    // Variables Recycled by addADTStoPacket
    int profile = 2;  //AAC LC
    //39=MediaCodecInfo.CodecProfileLevel.AACObjectELD;
    int freqIdx = 4;  //44.1KHz
    int chanCfg = 1;  //MPEG-4 Audio Channel Configuration. 1 Channel front-center
    NSUInteger fullLength = adtsLength + packetLength;
    // fill in ADTS data
    packet[0] = (char)0xFF; // 11111111     = syncword
    packet[1] = (char)0xF9; // 1111 1 00 1  = syncword MPEG-2 Layer CRC
    packet[2] = (char)(((profile-1)&lt;&lt;6) + (freqIdx&lt;&lt;2) +(chanCfg&gt;&gt;2));
    packet[3] = (char)(((chanCfg&amp;3)&lt;&lt;6) + (fullLength&gt;&gt;11));
    packet[4] = (char)((fullLength&amp;0x7FF) &gt;&gt; 3);
    packet[5] = (char)(((fullLength&amp;7)&lt;&lt;5) + 0x1F);
    packet[6] = (char)0xFC;
    NSData *data = [NSData dataWithBytesNoCopy:packet length:adtsLength freeWhenDone:YES];
    return data;
}
</code></pre>

<h3>播放ACC</h3>

<p>在iOS设备上播放音频，可以使用AVAudioPlayer（AVFoundation框架内），但是不支持流式播放。</p>

<p>本文尝试两种播放方式：</p>

<pre><code>使用AudioServicesPlaySystemSound（音频小于等于30s）；
使用Audio Queue Services音频队列；
</code></pre>

<p>1、使用AudioServicesPlaySystemSound</p>

<pre><code>AudioServicesCreateSystemSoundID创建系统声音
AudioServicesAddSystemSoundCompletion设置回调
AudioServicesPlaySystemSound开始播放

- (void)onClick:(UIButton *)button {
    [self.mButton setHidden:YES];
    NSURL *audioURL=[[NSBundle mainBundle] URLForResource:@"abc" withExtension:@"aac"];
    SystemSoundID soundID;
    //Creates a system sound object.
    AudioServicesCreateSystemSoundID((__bridge CFURLRef)(audioURL), &amp;soundID);
    //Registers a callback function that is invoked when a specified system sound finishes playing.
    AudioServicesAddSystemSoundCompletion(soundID, NULL, NULL, &amp;playCallback, (__bridge void * _Nullable)(self));
    //    AudioServicesPlayAlertSound(soundID);
    AudioServicesPlaySystemSound(soundID);
}
- (void)onPlayCallback {
    [self.mButton setHidden:NO];
}
</code></pre>

<p>以下是API的限制</p>

<pre><code>    No longer than 30 seconds in duration
    In linear PCM or IMA4 (IMA/ADPCM) format
    Packaged in a .caf, .aif, or .wav file

虽然AAC音频不在支持列表里面，但是经过测试，播放是可以的。
</code></pre>

<p>2、使用Audio Queue Services音频队列</p>

<p>Audio Queue Services的播放步骤如下：</p>

<pre><code>1，给buffer填充数据，并把buffer放入就绪的buffer queue；
2，应用通知队列开始播放；
3、队列播放第一个填充的buffer；
4、队列返回已经播放完毕的buffer，并开始播放下面一个填充好的buffer；
5、队列调用之前设置的回调函数，填充播放完毕的buffer；
6、回调函数中把buffer填充完毕，并放入buffer queue中。
</code></pre>

<h6>遇到的问题</h6>

<p>问题1：malloc错误</p>

<pre><code>malloc: *** error for object 0x154e58498: incorrect checksum for freed object - object was probably modified after being freed.
Set a breakpoint in malloc_error_break to debug.
</code></pre>

<p>问题2：selector调用错误</p>

<pre><code>Method cache corrupted. This may be a message to an invalid object, or a memory error somewhere else.
objc[12730]: receiver 0x13fe1d4f0, SEL 0x10004e2d8, isa 0x100051828, cache 0x100051838, buckets 0x13fd86650, mask 0x7, occupied 0x1
objc[12730]: receiver 112 bytes, buckets 128 bytes
objc[12730]: selector 'fillBuffer:'
objc[12730]: isa 'AACPlayer'
objc[12730]: Method cache corrupted.
</code></pre>

<p>这两个问题是出现在AudioQueueAllocateBuffer方法和fillBuffer的调用，而且是时而正常，时而崩溃。
先查看参数是否正确，通过xcode的debug工具，我们可以看到以下的数据：</p>

<pre><code>(AudioStreamBasicDescription) $0 = {
  mSampleRate = 44100
  mFormatID = 1633772320
  mFormatFlags = 0
  mBytesPerPacket = 0
  mFramesPerPacket = 1024
  mBytesPerFrame = 0
  mChannelsPerFrame = 1
  mBitsPerChannel = 0
  mReserved = 0
}
maxSize = 768
packetNums = 85
(mStartOffset = 0, mVariableFramesInPacket = 0, mDataByteSize = 23)
</code></pre>

<p>AudioStreamBasicDescription的参数很熟悉，因为就是我们上一篇的编码所设置的参数。
AudioQueueAllocateBuffer的参数audioQueue、buffer_size、audioBuffers都很正常，暂时排除存在问题的可能性。</p>

<pre><code>fillBuffer方法中，有AudioFileReadPackets和AudioQueueEnqueueBuffer两个方法。AudioQueueEnqueueBuffer是把buffer放入到AudioQueue，参数检查没有问题。初步判断是AudioFileReadPackets存在问题。
</code></pre>

<p>通过多次调试，发现AudioFileReadPackets在偶然情况下回返回-60的情况，这时会导致崩溃。
通过google查到-60对应的是kAudioFilePositionError，回来检查AudioFileReadPackets的参数，发现参数没有初始化，每次调用的参数都不同。
查API文档知道AudioFileReadPackets的参数除了audioFileID和cache、packet长度，均为传入参数，参数是否初始化并不会影响。至此，fillBuffer方法的线索断了。
回顾了一下整体的流程，决定从malloc错误入手，在so上找到以下解释。</p>

<pre><code>    you are freeing an object twice,
    you are freeing a pointer that was never allocated
    you are writing through an invalid pointer which previously pointed to an object which was already freed
</code></pre>

<p>内存访问越界，怎么会和selector调用错误扯上关系？百思不得其解。</p>

<p>最后，几经波折终于找到罪魁祸首。就是以下这行代码：</p>

<pre><code>audioStreamPacketDescrption = malloc(sizeof(audioStreamPacketDescrption) * packetNums);
</code></pre>

<p>当我打过一次audioStreamPacketDescrption，再打AudioStreamPacketDescrption的时候，Xcode会自动索引为audioStreamPacketDescrption，导致sizeof会计算出不同的大小。</p>

<pre><code>PS：按理说对一个结构体的类和结构体的实例进行sizeof，应该是一样的大小（不算动态分配）。
这个并没有错，可是为了方便我把audioStreamPacketDescrption定义成指针了！
</code></pre>

<p>两个教训：</p>

<pre><code>1、不要起和类名一样的变量；
2、指针和实例的区别要从名字即可分清；
</code></pre>

<h2>总结</h2>

<h6>合并H264+ACC=MP4：</h6>

<pre><code>ffmpeg -i abc.h264 -i abc.aac -vcodec copy -f mp4 abc.mp4
</code></pre>

<h6>点播的核心思路：<a href="http://www.jianshu.com/p/39a1a8e78675">实现地址</a></h6>

<pre><code>用FFmpeg把H.264和AAC码流封装成mp4格式再打包成TS流，把生成的ts和m3u8文件放到Nginx的服务器目录下，用Safari访问对应的m3u8文件实现HLS的点播。
安装Homebrow-&gt;安装Nginx-&gt;安装FFmpeg-&gt;打包ts流并放入服务器==&gt;直播和推流
</code></pre>

<h6>推流的核心思路:<a href="http://www.jianshu.com/p/ba5045da282c">实现地址</a>(LFLiveKit)</h6>

<pre><code>配置Nginx以支持HLS的推流与拉流，iOS系统使用LFLiveKit推流，OS X系统使用FFmpeg推流，拉流端可以使用Safari浏览器或者VLC播放器。

配置Nginx，支持http协议拉流-&gt;配置Nginx，支持rtmp协议推流-&gt;重启Nginx-&gt;OS X系统推流-&gt;iOS系统推流-&gt;Safari浏览器拉流-&gt;VLC播放器拉流
</code></pre>

<h6>相关常识</h6>

<ul>
<li>采集视频源和音频源的数据，视频采用H264编码，音频采用AAC编码</li>
<li>视频和音频数据使用FFmpeg封装为MPEG-TS包和MP4文件</li>
<li>使用FFmpeg推流(LFLiveKit)</li>
<li>使用拉流ijkPlayer</li>
</ul>


<hr />

<hr />

<h6>微信号：</h6>

<p>clpaial10201119（Q Q：2211523682）</p>

<h6>微博WB:</h6>

<p><a href="http://weibo.com/u/3288975567?is_hot=1">http://weibo.com/u/3288975567?is_hot=1</a></p>

<h6>gitHub：</h6>

<p><a href="https://github.com/al1020119">https://github.com/al1020119</a></p>

<h6>博客</h6>

<p><a href="http://al1020119.github.io/">http://al1020119.github.io/</a></p>

<hr />

<p><img src="http://al1020119.github.io/images/iCocosCoder.jpg" title="Caption" ></p>

<p><img src="http://al1020119.github.io/images/iCocosPublic.jpg" title="Caption" ></p>
]]></content>
  </entry>
  
  <entry>
    <title type="html"><![CDATA[MVVM简单实战篇]]></title>
    <link href="http://al1020119.github.io/blog/2016/09/28/mvvmjian-dan-shi-zhan-pian/"/>
    <updated>2016-09-28T19:00:45+08:00</updated>
    <id>http://al1020119.github.io/blog/2016/09/28/mvvmjian-dan-shi-zhan-pian</id>
    <content type="html"><![CDATA[<h4>前言</h4>

<p>由于之前一直使用MVC，而且在慢慢的开发中确实发现了不少关于MVC中存在的缺陷问题，前段时间试着使用MVVM在项目中去实战一下，发现缺点用着挺爽，他不想MVP那么复杂，也不会像MVC那么高耦合。</p>

<pre><code>所以我打算以后再项目应用中尽量使用MVVM，这里只是简单的整理了一下代码！
</code></pre>

<p>M:Model中定义对应的模型属性</p>

<pre><code>@property (nonatomic, copy) NSString *movieName;

@property (nonatomic, copy) NSString *movieTime;

@property (nonatomic, copy) NSString *movieDetail;

@property (nonatomic, strong) NSURL *movieURL;
</code></pre>

<!--more-->


<p>VM：ViewModel中定义对应的逻辑+数据+回调+代理方法</p>

<pre><code>#import "iCocosModel.h"

typedef void(^resultSuccessBlock)(id resultData);
typedef void(^resultErrorBlock)(id resultError);

@interface iCocosViewModel : NSObject

- (void)getMoviesData;

- (void)moviesDetailWithPublicModel:(iCocosModel *)model withViewController:(UIViewController *)controller;


@property (nonatomic, copy) resultSuccessBlock successBlcok;

@property (nonatomic, copy) resultErrorBlock errorBlcok;


@end
</code></pre>

<p>实现对应的方法</p>

<pre><code>#import "iCocosDetailController.h"

@implementation iCocosViewModel

- (void)getMoviesData
{
    AFHTTPSessionManager *manager = [AFHTTPSessionManager manager];

    NSString *url = @"https://api.douban.com/v2/movie/coming_soon";

    [manager GET:url parameters:nil progress:^(NSProgress * _Nonnull downloadProgress) {

    } success:^(NSURLSessionDataTask * _Nonnull task, id  _Nullable responseObject) {

        NSArray *subjects = responseObject[@"subjects"];
        NSMutableArray *modelArr = [NSMutableArray arrayWithCapacity:subjects.count];
        for (NSDictionary *subject in subjects) {
            iCocosModel *model = [[iCocosModel alloc] init];
            model.movieName = subject[@"title"];
            model.movieTime = subject[@"year"];

            NSString *urlStr = subject[@"images"][@"medium"];
            model.movieURL = [NSURL URLWithString:urlStr];
            model.movieDetail = subject[@"alt"];
            [modelArr addObject:model];
        }
        _successBlcok(modelArr);


    } failure:^(NSURLSessionDataTask * _Nullable task, NSError * _Nonnull error) {

    }];
}

- (void)moviesDetailWithPublicModel:(iCocosModel *)model withViewController:(UIViewController *)controller
{
    iCocosDetailController *detailVC = [[iCocosDetailController alloc] init];
    detailVC.url = model.movieDetail;
    [controller.navigationController pushViewController:detailVC animated:YES];
}

@end
</code></pre>

<p>V:View+Controller包括视图和控制器</p>

<p>View视图和MVC一样，用模型属性给控件赋值</p>

<pre><code>#import "iCocosModel.h"

@interface iCocosViewCell : UITableViewCell

@property (nonatomic, strong) iCocosModel *model;

@end
</code></pre>

<p>View的实现</p>

<pre><code>#import "iCocosViewCell.h"
#import &lt;UIImageView+AFNetworking.h&gt;

@interface iCocosViewCell ()

@property (nonatomic,strong) UILabel *nameLabel;
@property (nonatomic,strong) UILabel *yearLabel;
@property (nonatomic,strong) UIImageView *imgView;

@end


@implementation iCocosViewCell

- (instancetype)initWithStyle:(UITableViewCellStyle)style reuseIdentifier:(NSString *)reuseIdentifier{
    self = [super initWithStyle:style reuseIdentifier:reuseIdentifier];
    if (self) {
        _imgView = [[UIImageView alloc] initWithFrame:CGRectMake(15, 10, 40, 60)];
        [self.contentView addSubview:_imgView];

        _nameLabel = [[UILabel alloc] initWithFrame:CGRectMake(70, 10, 200, 20)];
        [self.contentView addSubview:_nameLabel];

        _yearLabel = [[UILabel alloc] initWithFrame:CGRectMake(70, 50, 100, 20)];
        _yearLabel.textColor = [UIColor lightGrayColor];
        _yearLabel.font = [UIFont systemFontOfSize:14];
        [self.contentView addSubview:_yearLabel];
    }
    return self;
}

- (void)setModel:(iCocosModel *)model
{
    _model = model;

    _nameLabel.text = _model.movieName;
    _yearLabel.text = _model.movieTime;
    [_imgView setImage:model.movieURL];
}

@end
</code></pre>

<hr />

<hr />

<h6>微信号：</h6>

<p>clpaial10201119（Q Q：2211523682）</p>

<h6>微博WB:</h6>

<p><a href="http://weibo.com/u/3288975567?is_hot=1">http://weibo.com/u/3288975567?is_hot=1</a></p>

<h6>gitHub：</h6>

<p><a href="https://github.com/al1020119">https://github.com/al1020119</a></p>

<h6>博客</h6>

<p><a href="http://al1020119.github.io/">http://al1020119.github.io/</a></p>

<hr />

<p><img src="http://al1020119.github.io/images/iCocosCoder.jpg" title="Caption" ></p>

<p><img src="http://al1020119.github.io/images/iCocosPublic.jpg" title="Caption" ></p>
]]></content>
  </entry>
  
  <entry>
    <title type="html"><![CDATA[直播-原理篇]]></title>
    <link href="http://al1020119.github.io/blog/2016/09/15/zhi-bo-yuan-li-pian/"/>
    <updated>2016-09-15T14:42:49+08:00</updated>
    <id>http://al1020119.github.io/blog/2016/09/15/zhi-bo-yuan-li-pian</id>
    <content type="html"><![CDATA[<p>前言</p>

<p>本系列文章引自一个朋友（讲师）的精华：<a href="http://www.jianshu.com/users/b09c3959ab3b/latest_articles">袁峥Seemygo</a></p>

<h2>一、个人见解（直播难与易）</h2>

<p>直播难：个人认为要想把直播从零开始做出来，绝对是牛逼中的牛逼，大牛中的大牛，因为直播中运用到的技术难点非常之多，视频/音频处理，图形处理，视频/音频压缩，CDN分发，即时通讯等技术，每一个技术都够你学几年的。</p>

<!--more-->


<p></p>

<p>直播易：已经有各个领域的大牛，封装好了许多牛逼的框架，我们只需要用别人写好的框架，就能快速的搭建一个直播app，也就是传说中的站在大牛肩膀上编程。</p>

<h2>二、了解直播</h2>

<p>热门直播产品</p>

<p>映客，斗鱼，熊猫，虎牙，花椒等等
直播效果图</p>

<p><img src="http://al1020119.github.io/images/zhiboyuanli001.png" title="Caption" >
1.一个完整直播app功能(来自落影loyinglin分享)</p>

<pre><code>1、聊天
    私聊、聊天室、点亮、推送、黑名单等;

2、礼物
    普通礼物、豪华礼物、红包、排行榜、第三方充值、内购、礼物动态更新、提现等；

3、直播列表
    关注、热门、最新、分类直播用户列表等；

4、自己直播
    录制、推流、解码、播放、美颜、心跳、后台切换、主播对管理员操作、管理员对用户等；

5、房间逻辑
    创建房间、进入房间、退出房间、关闭房间、切换房间、房间管理员设置、房间用户列表等；

6、用户逻辑
    普通登陆、第三方登陆、注册、搜索、修改个人信息、关注列表、粉丝列表、忘记密码、查看个人信息、收入榜、关注和取关、检索等；

7、观看直播
    聊天信息、滚屏弹幕、礼物显示、加载界面等；

8、统计
    APP业务统计、第三方统计等；

9、超管
    禁播、隐藏、审核等；
</code></pre>

<p>2.一个完整直播app原理</p>

<p>直播原理：把主播录制的视频，推送到服务器，在由服务器分发给观众观看。</p>

<p>直播环节：推流端（采集、美颜处理、编码、推流）、服务端处理（转码、录制、截图、鉴黄）、播放器（拉流、解码、渲染）、互动系统（聊天室、礼物系统、赞）
3.一个完整直播app实现流程</p>

<p>1.采集、2.滤镜处理、3.编码、4.推流、5.CDN分发、6.拉流、7.解码、8.播放、9.聊天互动</p>

<p><img src="http://al1020119.github.io/images/zhiboyuanli002.png" title="Caption" >
4.一个完整直播app架构</p>

<p><img src="http://al1020119.github.io/images/zhiboyuanli003.png" title="Caption" >
5.一个完整直播app技术点</p>

<p><img src="http://al1020119.github.io/images/zhiboyuanli004.png" title="Caption" ></p>

<h2>三、了解流媒体（直播需要用到流媒体）</h2>

<pre><code>流媒体开发:网络层(socket或st)负责传输，协议层(rtmp或hls)负责网络打包，封装层(flv、ts)负责编解码数据的封装，编码层(h.264和aac)负责图像，音频压缩。
帧:每帧代表一幅静止的图像
GOP:（Group of Pictures）画面组，一个GOP就是一组连续的画面，每个画面都是一帧，一个GOP就是很多帧的集合
    直播的数据，其实是一组图片，包括I帧、P帧、B帧，当用户第一次观看的时候，会寻找I帧，而播放器会到服务器寻找到最近的I帧反馈给用户。因此，GOP Cache增加了端到端延迟，因为它必须要拿到最近的I帧
    GOP Cache的长度越长，画面质量越好
码率：图片进行压缩后每秒显示的数据量。
帧率：每秒显示的图片数。影响画面流畅度，与画面流畅度成正比：帧率越大，画面越流畅；帧率越小，画面越有跳动感。
    由于人类眼睛的特殊生理结构，如果所看画面之帧率高于16的时候，就会认为是连贯的，此现象称之为视觉暂留。并且当帧速达到一定数值后，再增长的话，人眼也不容易察觉到有明显的流畅度提升了。
分辨率：(矩形)图片的长度和宽度，即图片的尺寸
压缩前的每秒数据量:帧率X分辨率(单位应该是若干个字节)
压缩比:压缩前的每秒数据量/码率 （对于同一个视频源并采用同一种视频编码算法，则：压缩比越高，画面质量越差。）　

视频文件格式：文件的后缀，比如.wmv,.mov,.mp4,.mp3,.avi,
    主要用处，根据文件格式，系统会自动判断用什么软件打开,
    注意: 随意修改文件格式，对文件的本身不会造成太大的影响，比如把avi改成mp4,文件还是avi.

视频封装格式：一种储存视频信息的容器，流式封装可以有TS、FLV等，索引式的封装有MP4,MOV,AVI等，
    主要作用：一个视频文件往往会包含图像和音频，还有一些配置信息(如图像和音频的关联，如何解码它们等)：这些内容需要按照一定的规则组织、封装起来.
    注意：会发现封装格式跟文件格式一样，因为一般视频文件格式的后缀名即采用相应的视频封装格式的名称,所以视频文件格式就是视频封装格式。
视频封装格式和视频压缩编码标准：就好像项目工程和编程语言，封装格式就是一个项目的工程，视频编码方式就是编程语言，一个项目工程可以用不同语言开发。
</code></pre>

<h2>四、直播基础知识介绍：</h2>

<h4>1.采集视频、音频</h4>

<ul>
<li><p>1.1 采集视频、音频编码框架 *</p>

<p>  AVFoundation:AVFoundation是用来播放和创建实时的视听媒体数据的框架，同时提供Objective-C接口来操作这些视听数据，比如编辑，旋转，重编码</p></li>
<li><p>1.2 视频、音频硬件设备 *</p>

<p>  CCD:图像传感器： 用于图像采集和处理的过程，把图像转换成电信号。
  拾音器:声音传感器： 用于声音采集和处理的过程，把声音转换成电信号。
  音频采样数据:一般都是PCM格式
  视频采样数据: 一般都是YUV,或RGB格式，采集到的原始音视频的体积是非常大的，需要经过压缩技术处理来提高传输效率</p></li>
</ul>


<h4>2.视频处理（美颜，水印）</h4>

<pre><code>视频处理原理:因为视频最终也是通过GPU，一帧一帧渲染到屏幕上的，所以我们可以利用OpenGL ES，对视频帧进行各种加工，从而视频各种不同的效果，就好像一个水龙头流出的水，经过若干节管道，然后流向不同的目标
    现在的各种美颜和视频添加特效的app都是利用GPUImage这个框架实现的,.
</code></pre>

<ul>
<li><p>视频处理框架 *</p>

<p>  GPUImage : GPUImage是一个基于OpenGL ES的一个强大的图像/视频处理框架,封装好了各种滤镜同时也可以编写自定义的滤镜,其本身内置了多达120多种常见的滤镜效果。
  OpenGL:OpenGL（全写Open Graphics Library）是个定义了一个跨编程语言、跨平台的编程接口的规格，它用于三维图象（二维的亦可）。OpenGL是个专业的图形程序接口，是一个功能强大，调用方便的底层图形库。
  OpenGL ES:OpenGL ES (OpenGL for Embedded Systems) 是 OpenGL三维图形 API 的子集，针对手机、PDA和游戏主机等嵌入式设备而设计。</p></li>
</ul>


<h4>3.视频编码解码</h4>

<ul>
<li><p>3.1 视频编码框架 *</p>

<p>  FFmpeg:是一个跨平台的开源视频框架,能实现如视频编码,解码,转码,串流,播放等丰富的功能。其支持的视频格式以及播放协议非常丰富,几乎包含了所有音视频编解码、封装格式以及播放协议。
      -Libswresample:可以对音频进行重采样,rematrixing 以及转换采样格式等操 作。
      -Libavcodec:提供了一个通用的编解码框架,包含了许多视频,音频,字幕流 等编码/解码器。
      -Libavformat:用于对视频进行封装/解封装。
      -Libavutil:包含一些共用的函数,如随机数生成,数据结构,数学运算等。
      -Libpostproc:用于进行视频的一些后期处理。
      -Libswscale:用于视频图像缩放,颜色空间转换等。
      -Libavfilter:提供滤镜功能。
  X264:把视频原数据YUV编码压缩成H.264格式
  VideoToolbox:苹果自带的视频硬解码和硬编码API，但是在iOS8之后才开放。
  AudioToolbox:苹果自带的音频硬解码和硬编码API</p></li>
<li><p>3.2 视频编码技术 *</p>

<p>  视频压缩编码标准：对视频进行压缩(视频编码)或者解压缩（视频解码）的编码技术,比如MPEG，H.264,这些视频编码技术是压缩编码视频的</p>

<pre><code>  主要作用:是将视频像素数据压缩成为视频码流，从而降低视频的数据量。如果视频不经过压缩编码的话，体积通常是非常大的，一部电影可能就要上百G的空间。
  注意:最影响视频质量的是其视频编码数据和音频编码数据，跟封装格式没有多大关系
</code></pre>

<p>  MPEG:一种视频压缩方式，它采用了帧间压缩，仅存储连续帧之间有差别的地方 ，从而达到较大的压缩比</p></li>
</ul>


<p> H.264/AVC:一种视频压缩方式,采用事先预测和与MPEG中的P-B帧一样的帧预测方法压缩，它可以根据需要产生适合网络情况传输的视频流,还有更高的压缩比，有更好的图象质量</p>

<pre><code>    注意1:如果是从单个画面清晰度比较，MPEG4有优势；从动作连贯性上的清晰度，H.264有优势
    注意2:由于264的算法更加复杂，程序实现烦琐，运行它需要更多的处理器和内存资源。因此，运行264对系统要求是比较高的。
    注意3:由于264的实现更加灵活，它把一些实现留给了厂商自己去实现，虽然这样给实现带来了很多好处，但是不同产品之间互通成了很大的问题，造成了通过A公司的编码器编出的数据，必须通过A公司的解码器去解这样尴尬的事情
</code></pre>

<p>H.265/HEVC:一种视频压缩方式,基于H.264，保留原来的某些技术，同时对一些相关的技术加以改进，以改善码流、编码质量、延时和算法复杂度之间的关系，达到最优化设置。</p>

<pre><code>    H.265 是一种更为高效的编码标准，能够在同等画质效果下将内容的体积压缩得更小，传输时更快更省带宽
    I帧:(关键帧)保留一副完整的画面，解码时只需要本帧数据就可以完成（因为包含完整画面）
P帧:(差别帧)保留这一帧跟之前帧的差别，解码时需要用之前缓存的画面叠加上本帧定义的差别，生成最终画面。（P帧没有完整画面数据，只有与前一帧的画面差别的数据）
B帧:(双向差别帧)保留的是本帧与前后帧的差别，解码B帧，不仅要取得之前的缓存画面，还要解码之后的画面，通过前后画面的与本帧数据的叠加取得最终的画面。B帧压缩率高，但是解码时CPU会比较累
帧内（Intraframe）压缩:当压缩一帧图像时，仅考虑本帧的数据而不考虑相邻帧之间的冗余信息,帧内一般采用有损压缩算法
帧间（Interframe）压缩:时间压缩（Temporal compression），它通过比较时间轴上不同帧之间的数据进行压缩。帧间压缩一般是无损的
muxing（合成）：将视频流、音频流甚至是字幕流封装到一个文件中(容器格式（FLV，TS）)，作为一个信号进行传输。
</code></pre>

<ul>
<li><p>3.3 音频编码技术 *</p>

<p>  AAC，mp3：这些属于音频编码技术,压缩音频用</p></li>
<li><p>3.4码率控制 *</p>

<p>  多码率:观众所处的网络情况是非常复杂的，有可能是WiFi，有可能4G、3G、甚至2G，那么怎么满足多方需求呢？多搞几条线路，根据当前网络环境自定义码率。
      列如：常常看见视频播放软件中的1024，720，高清，标清，流畅等，指的就是各种码率。</p></li>
<li><p>3.5 视频封装格式 *</p>

<p>  TS : 一种流媒体封装格式，流媒体封装有一个好处，就是不需要加载索引再播放，大大减少了首次载入的延迟，如果片子比较长，mp4文件的索引相当大，影响用户体验
      为什么要用TS:这是因为两个TS片段可以无缝拼接，播放器能连续播放</p>

<p>  FLV: 一种流媒体封装格式,由于它形成的文件极小、加载速度极快，使得网络观看视频文件成为可能,因此FLV格式成为了当今主流视频格式</p></li>
</ul>


<h4>4.推流</h4>

<ul>
<li>4.1 数据传输框架 *</li>
</ul>


<p>librtmp:用来传输RTMP协议格式的数据</p>

<ul>
<li><p>4.2 流媒体数据传输协议 *</p>

<p>  RTMP:实时消息传输协议,Adobe Systems公司为Flash播放器和服务器之间音频、视频和数据传输开发的开放协议，因为是开放协议所以都可以使用了。
      RTMP协议用于对象、视频、音频的传输。
      这个协议建立在TCP协议或者轮询HTTP协议之上。
      RTMP协议就像一个用来装数据包的容器，这些数据可以是FLV中的视音频数据。一个单一的连接可以通过不同的通道传输多路网络流，这些通道中的包都是按照固定大小的包传输的</p>

<p>  chunk:消息包</p></li>
</ul>


<h4>5.流媒体服务器</h4>

<ul>
<li><p>5.1常用服务器 *</p>

<p>  SRS：一款国人开发的优秀开源流媒体服务器系统
  BMS:也是一款流媒体服务器系统，但不开源，是SRS的商业版，比SRS功能更多
  nginx:免费开源web服务器，常用来配置流媒体服务器。</p></li>
<li><p>5.2数据分发 *</p>

<p>  CDN：(Content Delivery Network)，即内容分发网络,将网站的内容发布到最接近用户的网络”边缘”，使用户可以就近取得所需的内容，解决 Internet网络拥挤的状况，提高用户访问网站的响应速度.
      CDN：代理服务器，相当于一个中介。
      CDN工作原理：比如请求流媒体数据
          1.上传流媒体数据到服务器（源站）
          2.源站存储流媒体数据
          3.客户端播放流媒体，向CDN请求编码后的流媒体数据
          4.CDN的服务器响应请求，若节点上没有该流媒体数据存在，则向源站继续请求流媒体数据；若节点上已经缓存了该视频文件，则跳到第6步。
          5.源站响应CDN的请求，将流媒体分发到相应的CDN节点上
          6.CDN将流媒体数据发送到客户端
  回源：当有用户访问某一个URL的时候，如果被解析到的那个CDN节点没有缓存响应的内容，或者是缓存已经到期，就会回源站去获取搜索。如果没有人访问，那么CDN节点不会主动去源站拿.
  带宽:在固定的时间可传输的数据总量，
      比如64位、800MHz的前端总线，它的数据传输率就等于64bit×800MHz÷8(Byte)=6.4GB/s
  负载均衡: 由多台服务器以对称的方式组成一个服务器集合，每台服务器都具有等价的地位，都可以单独对外提供服务而无须其他服务器的辅助.
      通过某种负载分担技术，将外部发送来的请求均匀分配到对称结构中的某一台服务器上，而接收到请求的服务器独立地回应客户的请求。
      均衡负载能够平均分配客户请求到服务器列阵，籍此提供快速获取重要数据，解决大量并发访问服务问题。
      这种群集技术可以用最少的投资获得接近于大型主机的性能。
  QoS（带宽管理）:限制每一个组群的带宽，让有限的带宽发挥最大的效用</p></li>
</ul>


<h4>6.拉流</h4>

<pre><code>直播协议选择：
    即时性要求较高或有互动需求的可以采用RTMP,RTSP
    对于有回放或跨平台需求的，推荐使用HLS
直播协议对比 :
</code></pre>

<p><img src="http://al1020119.github.io/images/zhiboyuanli005.png" title="Caption" ></p>

<pre><code>HLS:由Apple公司定义的用于实时流传输的协议,HLS基于HTTP协议实现，传输内容包括两部分，一是M3U8描述文件，二是TS媒体文件。可实现流媒体的直播和点播，主要应用在iOS系统
    HLS是以点播的技术方式来实现直播
    HLS是自适应码率流播，客户端会根据网络状况自动选择不同码率的视频流，条件允许的情况下使用高码率，网络繁忙的时候使用低码率，并且自动在二者间随意切
    换。这对移动设备网络状况不稳定的情况下保障流畅播放非常有帮助。
    实现方法是服务器端提供多码率视频流，并且在列表文件中注明，播放器根据播放进度和下载速度自动调整。
HLS与RTMP对比:HLS主要是延时比较大，RTMP主要优势在于延时低
    HLS协议的小切片方式会生成大量的文件，存储或处理这些文件会造成大量资源浪费
    相比使用RTSP协议的好处在于，一旦切分完成，之后的分发过程完全不需要额外使用任何专门软件，普通的网络服务器即可，大大降低了CDN边缘服务器的配置要求，可以使用任何现成的CDN,而一般服务器很少支持RTSP。
HTTP-FLV:基于HTTP协议流式的传输媒体内容。
    相对于RTMP，HTTP更简单和广为人知，内容延迟同样可以做到1~3秒，打开速度更快，因为HTTP本身没有复杂的状态交互。所以从延迟角度来看，HTTP-FLV要优于RTMP。
RTSP:实时流传输协议,定义了一对多应用程序如何有效地通过IP网络传送多媒体数据.
RTP:实时传输协议,RTP是建立在UDP协议上的，常与RTCP一起使用，其本身并没有提供按时发送机制或其它服务质量（QoS）保证，它依赖于低层服务去实现这一过程。
RTCP:RTP的配套协议,主要功能是为RTP所提供的服务质量（QoS）提供反馈，收集相关媒体连接的统计信息，例如传输字节数，传输分组数，丢失分组数，单向和双向网络延迟等等。
</code></pre>

<h4>7.解码</h4>

<ul>
<li><p>7.1 解封装 *</p>

<p>  demuxing（分离）：从视频流、音频流，字幕流合成的文件(容器格式（FLV，TS）)中， 分解出视频、音频或字幕，各自进行解码。</p></li>
<li><p>7.2 音频编码框架 *</p>

<p>  fdk_aac:音频编码解码框架，PCM音频数据和AAC音频数据互转</p></li>
<li><p>7.3 解码介绍 *</p>

<p>  硬解码：用GPU来解码，减少CPU运算
      　优点：播放流畅、低功耗，解码速度快，
      　　 * 缺点：兼容不好
  软解码：用CPU来解码
      优点：兼容好
      　　 * 缺点：加大CPU负担，耗电增加、没有硬解码流畅，解码速度相对慢</p></li>
</ul>


<h4>8.播放</h4>

<pre><code>ijkplayer:一个基于FFmpeg的开源Android/iOS视频播放器
    API易于集成；
    编译配置可裁剪，方便控制安装包大小；
    支持硬件加速解码，更加省电
    简单易用，指定拉流URL，自动解码播放.
</code></pre>

<h4>9.聊天互动</h4>

<pre><code>IM:(InstantMessaging)即时通讯:是一个实时通信系统，允许两人或多人使用网络实时的传递文字消息、文件、语音与视频交流.
    IM在直播系统中的主要作用是实现观众与主播、观众与观众之间的文字互动.
    * 第三方SDK *
腾讯云：腾讯提供的即时通讯SDK，可作为直播的聊天室
融云：一个比较常用的即时通讯SDK，可作为直播的聊天室
</code></pre>

<h2>五、如何快速的开发一个完整的iOS直播app</h2>

<h4>1、利用第三方直播SDK快速的开发</h4>

<p>七牛云:七牛直播云是专为直播平台打造的全球化直播流服务和一站式实现SDK端到端直播场景的企业级直播云服务平台.</p>

<ul>
<li> 熊猫TV,龙珠TV等直播平台都是用的七牛云</li>
</ul>


<p>网易视频云：基于专业的跨平台视频编解码技术和大规模视频内容分发网络，提供稳定流畅、低延时、高并发的实时音视频服务，可将视频直播无缝对接到自身App.</p>

<h4>2、第三方SDK公司为什么要提供SDK给我们？</h4>

<pre><code>希望把我们的产品和它绑在一条船上，更加的依赖它。
技术生钱，帮养一大批牛B的程序员
</code></pre>

<h4>3、直播功能：自研还是使用第三方直播SDK开发？</h4>

<p>第三方SDK开发: 对于一个初创团队来讲，自研直播不管在技术门槛、CDN、带宽上都是有很大的门槛的，而且需要耗费大量的时间才能做出成品，不利于拉投资。</p>

<p>自研：公司直播平台大，从长远看，自研可以节省成本，技术成面比直接用SDK可控多了。</p>

<h6>4.第三方SDK好处</h6>

<pre><code>降低成本
    使用好的第三方企业服务，将不用再花高价请猎头去挖昂贵的大牛，也不用去安抚大牛们个性化的脾气
提升效率
    第三方服务的专注与代码集成所带来的方便，所花费的时间可能仅仅是1-2个小时，节约近99%的时间，足够换取更多的时间去和竞争对手斗智斗勇，增加更大的成功可能性
降低风险
    借助专业的第三方服务，由于它的快速、专业、稳定等特点，能够极大地加强产品的竞争能力（优质服务、研发速度等），缩短试错时间，必将是创业中保命的手段之一
专业的事，找专业的人来做
    第三方服务最少是10-20人的团队专注地解决同一个问题，做同一件事情。第三方服务所带来的支持效果，绝不是通过1-2个人处理所能对比的，难道不是吗
</code></pre>

<p>结束语</p>

<p>后续还会有讲解视频采集，美颜，聊天室，礼物系统等更多功能，敬请关注！！！</p>

<hr />

<hr />

<h6>微信号：</h6>

<p>clpaial10201119（Q Q：2211523682）</p>

<h6>微博WB:</h6>

<p><a href="http://weibo.com/u/3288975567?is_hot=1">http://weibo.com/u/3288975567?is_hot=1</a></p>

<h6>gitHub：</h6>

<p><a href="https://github.com/al1020119">https://github.com/al1020119</a></p>

<h6>博客</h6>

<p><a href="http://al1020119.github.io/">http://al1020119.github.io/</a></p>

<hr />

<p><img src="http://al1020119.github.io/images/iCocosCoder.jpg" title="Caption" ></p>

<p><img src="http://al1020119.github.io/images/iCocosPublic.jpg" title="Caption" ></p>
]]></content>
  </entry>
  
  <entry>
    <title type="html"><![CDATA[直播-iJKPlayer]]></title>
    <link href="http://al1020119.github.io/blog/2016/09/10/zhi-bo-ijkplayer/"/>
    <updated>2016-09-10T14:42:37+08:00</updated>
    <id>http://al1020119.github.io/blog/2016/09/10/zhi-bo-ijkplayer</id>
    <content type="html"><![CDATA[<p>demo:<a href="https://github.com/al1020119/iCocosIJKPlayer">iCocosIJKPlayer</a></p>

<p>网上讨论比较多并且支持Android/iOS的项目</p>

<pre><code>Vitamio
IJKPlayer
</code></pre>

<p>首先说下Vitamio目前可以拿到的版本是4.20，商业使用需要付费。</p>

<p>这里只介绍IJKPlayer，为什么？用了你就知道了！</p>

<!--more-->


<p>ijkplayer 是一款做视频直播的框架, 基于ffmpeg, 支持 Android 和 iOS, 网上也有很多集成说明, 但是个人觉得还是不够详细, 在这里详细的讲一下在 iOS 中如何集成ijkplayer, 即便以前从没有接触过, 按着下面做也可以集成成功!</p>

<p><a href="https://github.com/Bilibili/ijkplayer">ijkPlayer下载地址</a></p>

<p><a href="http://blog.csdn.net/zc639143029/article/details/51191886">ijkPlayer详解</a></p>

<p>必备条件:</p>

<pre><code># install homebrew, git, yasm
ruby -e "$(curl -fsSL https://raw.githubusercontent.com/Homebrew/install/master/install)"
brew install git
brew install yasm
</code></pre>

<h3>一. 下载ijkplayer</h3>

<p><a href="https://github.com/Bilibili/ijkplayer">ijkplayer下载地址</a></p>

<p>下载完成后解压, 解压后文件夹内部目录如下图:</p>

<p><img src="http://al1020119.github.io/images/ijkplayer001.png" title="Caption" ></p>

<h3>二. 编译 ijkplayer</h3>

<p>说是编译 ijkplayer, 其实是编译 ffmpeg, 在这里我们已经下载好了ijkplayer, 所以 github 上README.md中的Build iOS那一步中有一些步骤是不需要的.</p>

<p>下面开始一步一步编译:</p>

<ol>
<li>打开终端, cd 到jkplayer-master文件夹中, 也就是下载完解压后的文件夹, 如下图:</li>
</ol>


<p><img src="http://al1020119.github.io/images/ijkplayer002.png" title="Caption" >
2. 执行命令行./init-ios.sh, 这一步是去下载 ffmpeg 的, 时间会久一点, 耐心等一下.如下图:</p>
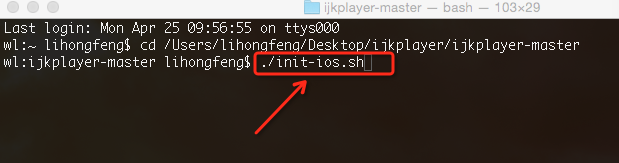
<p><img src="http://al1020119.github.io/images/ijkplayer003.png" title="Caption" >
3. 在第2步中下载完成后, 执行cd ios, 也就是进入到 ios目录中, 如下图:</p>
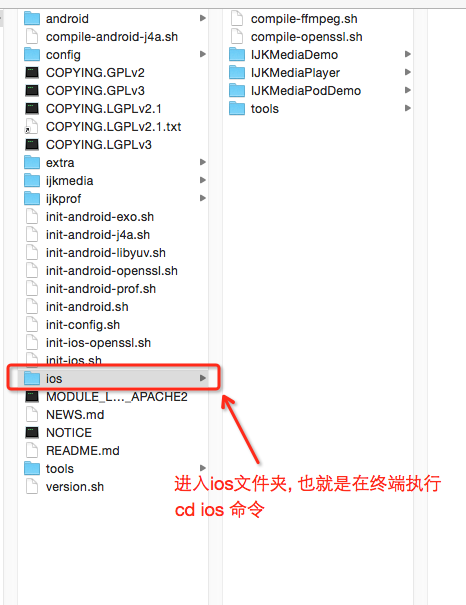
<p><img src="http://al1020119.github.io/images/ijkplayer004.png" title="Caption" >
4. 进入 ios 文件夹后, 在终端依次执行./compile-ffmpeg.sh clean和./compile-ffmpeg.sh all命令, 编译 ffmpeg, 也就是README.md中这两步, 如下图:</p>
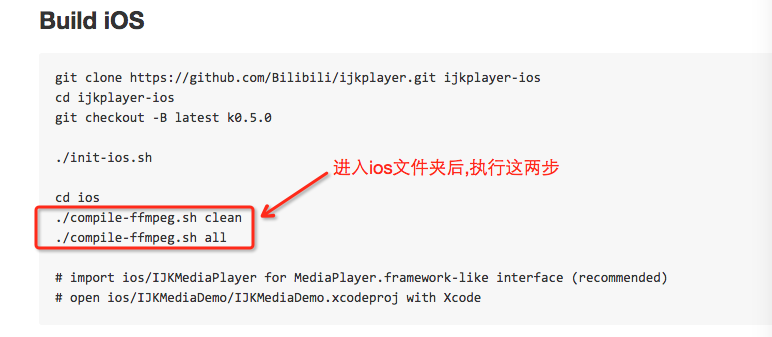
<p><img src="http://al1020119.github.io/images/ijkplayer005.png" title="Caption" >
编译时间较久, 耐心等待一下.</p>

<pre><code>./init-ios.sh
cd ios
./compile-ffmpeg.sh clean
./compile-ffmpeg.sh all
</code></pre>

<h3>三. 打包IJKMediaFramework.framework框架</h3>

<p>集成 ijkplayer 有两种方法: 一种方法是按照IJKMediaDemo工程中那样, 直接导入工程IJKMediaPlayer.xcodeproj, 在这里不做介绍, 如下图:</p>

<p><img src="http://al1020119.github.io/images/ijkplayer006.png" title="Caption" >
第二种集成方法是把 ijkplayer 打包成framework导入工程中使用. 下面开始介绍如何打包IJKMediaFramework.framework, 按下面步骤开始一步一步做:</p>
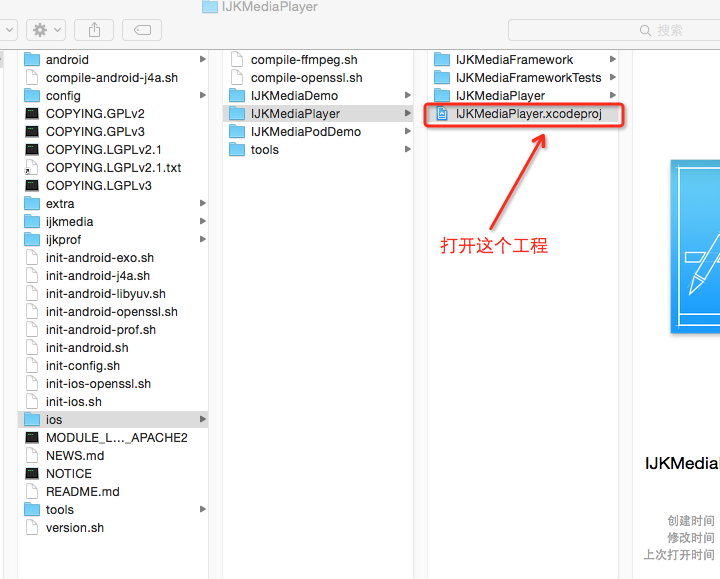
<ol>
<li>首先打开工程IJKMediaPlayer.xcodeproj, 位置如下图:</li>
</ol>


<p><img src="http://al1020119.github.io/images/ijkplayer007.png" title="Caption" >
打开后是这样的, 如下图:</p>

<p><img src="http://al1020119.github.io/images/ijkplayer008.png" title="Caption" >
2. 工程打开后设置工程的 scheme, 具体步骤如下图:</p>

<p><img src="http://al1020119.github.io/images/ijkplayer009.png" title="Caption" >
<img src="http://al1020119.github.io/images/ijkplayer010.png" title="Caption" >
3. 设置好 scheme 后, 分别选择真机和模拟器进行编译, 编译完成后, 进入 Finder, 如下图:</p>
<p><img src="http://al1020119.github.io/images/ijkplayer011.png" title="Caption" >
进入 Finder 后, 可以看到有真机和模拟器两个版本的编译结果, 如下图:</p>
<p><img src="http://al1020119.github.io/images/ijkplayer012.png" title="Caption" >
下面开始合并真机和模拟器版本的 framework, 注意不要合并错了, 合并的是这个文件, 如下图:</p>
<p><img src="http://al1020119.github.io/images/ijkplayer013.png" title="Caption" >
打开终端, 进行合并, 命令行具体格式为:</p>

<p>lipo -create &ldquo;真机版本路径&rdquo; &ldquo;模拟器版本路径&rdquo; -output &ldquo;合并后的文件路径&rdquo;</p>

<p>合并后如下图:</p>

<p><img src="http://al1020119.github.io/images/ijkplayer014.png" title="Caption" >
下面很重要, 需要用合并后的IJKMediaFramework把原来的IJKMediaFramework替换掉, 如下图, 希望你能看懂:</p>
<p><img src="http://al1020119.github.io/images/ijkplayer015.png" title="Caption" >
上图中的1、2两步完成后, 绿色框住的那个IJKMediaFramework.framework文件就是我们需要的框架了, 可以复制出来, 稍后我们需要导入工程使用.</p>
<h3>四. iOS工程中集成ijkplayer</h3>

<p>新建工程, 导入合并后的IJKMediaFramework.framework以及相关依赖框架以及相关依赖框架,如下图:</p>

<p><img src="http://al1020119.github.io/images/ijkplayer016.png" title="Caption" >
导入框架后, 在ViewController.m进行测试, 首先导入IJKMediaFramework.h头文件, 编译看有没有错, 如果没有错说明集成成功.</p>

<p>接着开始在ViewController.m文件中使用IJKMediaFramework框架进行测试使用, 写一个简单的直播视频进行测试, 在这里看一下运行后的结果, 后面会放上 Demo 供下载.</p>

<p><img src="http://al1020119.github.io/images/ijkplayer0017.png" title="Caption" ></p>

<p><img src="http://al1020119.github.io/images/ijkplayer018.png" title="Caption" ></p>

<pre><code>为苦于各种奇怪原因而无法玩耍的小伙伴们提供了包装了ijkplayer的pod，仅供测试体验。
1.基于ijkplayer 5737ccc提交制作成的framework，需要注意的是需要iOS8+。
2.如果使用ijkplayer过程中遇到BUG什么的，可以移步去ijkplayer作者的GitHub上提issue或者PR。
哦对了，地址在这里https://coding.net/u/shirokuma/p/IJKMediaLibrary/git，因framework超过100MB无法传到GitHub上，就放到Coding上了。祝各位玩的愉快！
</code></pre>

<p>项目源码：（在集成或者使用之前请细细品读，也许你会发现不一样的乐趣）</p>

<pre><code>//
//  ViewController.m
//  iCocosIjkPlayer
//
//  Created by tqy on 16/8/8.
//  Copyright © 2016年 iCocos. All rights reserved.
//

#import "ViewController.h"

#import &lt;IJKMediaFramework/IJKMediaFramework.h&gt;

@interface ViewController ()

@property (nonatomic, strong) NSURL *url;

@property (nonatomic, retain) id&lt;IJKMediaPlayback&gt; player;

@property (nonatomic, weak) UIView *PlayerView;

@end

@implementation ViewController

- (void)viewDidLoad {
    [super viewDidLoad];


    //网络视频
    //    self.url = [NSURL URLWithString:@"https://clips.vorwaerts-gmbh.de/big_buck_bunny.mp4"];
    //    _player = [[IJKAVMoviePlayerController alloc] initWithContentURL:self.url];

    //直播视频
    self.url = [NSURL URLWithString:@"http://live.hkstv.hk.lxdns.com/live/hks/playlist.m3u8"];
    _player = [[IJKFFMoviePlayerController alloc] initWithContentURL:self.url withOptions:nil];

    UIView *playerView = [self.player view];

    UIView *displayView = [[UIView alloc] initWithFrame:CGRectMake(0, 50, self.view.bounds.size.width, 180)];
    self.PlayerView = displayView;
    self.PlayerView.backgroundColor = [UIColor blackColor];
    [self.view addSubview:self.PlayerView];

    playerView.frame = self.PlayerView.bounds;
    playerView.autoresizingMask = UIViewAutoresizingFlexibleWidth | UIViewAutoresizingFlexibleHeight;

    [self.PlayerView insertSubview:playerView atIndex:1];
    [_player setScalingMode:IJKMPMovieScalingModeAspectFill];
    [self installMovieNotificationObservers];

}

-(void)viewWillAppear:(BOOL)animated{
    if (![self.player isPlaying]) {
        [self.player prepareToPlay];
    }
}

#pragma Selector func

- (void)loadStateDidChange:(NSNotification*)notification {
    IJKMPMovieLoadState loadState = _player.loadState;

    if ((loadState &amp; IJKMPMovieLoadStatePlaythroughOK) != 0) {
        NSLog(@"LoadStateDidChange: IJKMovieLoadStatePlayThroughOK: %d\n",(int)loadState);
    }else if ((loadState &amp; IJKMPMovieLoadStateStalled) != 0) {
        NSLog(@"loadStateDidChange: IJKMPMovieLoadStateStalled: %d\n", (int)loadState);
    } else {
        NSLog(@"loadStateDidChange: ???: %d\n", (int)loadState);
    }
}

- (void)moviePlayBackFinish:(NSNotification*)notification {
    int reason =[[[notification userInfo] valueForKey:IJKMPMoviePlayerPlaybackDidFinishReasonUserInfoKey] intValue];
    switch (reason) {
        case IJKMPMovieFinishReasonPlaybackEnded:
            NSLog(@"playbackStateDidChange: IJKMPMovieFinishReasonPlaybackEnded: %d\n", reason);
            break;

        case IJKMPMovieFinishReasonUserExited:
            NSLog(@"playbackStateDidChange: IJKMPMovieFinishReasonUserExited: %d\n", reason);
            break;

        case IJKMPMovieFinishReasonPlaybackError:
            NSLog(@"playbackStateDidChange: IJKMPMovieFinishReasonPlaybackError: %d\n", reason);
            break;

        default:
            NSLog(@"playbackPlayBackDidFinish: ???: %d\n", reason);
            break;
    }
}

- (void)mediaIsPreparedToPlayDidChange:(NSNotification*)notification {
    NSLog(@"mediaIsPrepareToPlayDidChange\n");
}

- (void)moviePlayBackStateDidChange:(NSNotification*)notification {
    switch (_player.playbackState) {
        case IJKMPMoviePlaybackStateStopped:
            NSLog(@"IJKMPMoviePlayBackStateDidChange %d: stoped", (int)_player.playbackState);
            break;

        case IJKMPMoviePlaybackStatePlaying:
            NSLog(@"IJKMPMoviePlayBackStateDidChange %d: playing", (int)_player.playbackState);
            break;

        case IJKMPMoviePlaybackStatePaused:
            NSLog(@"IJKMPMoviePlayBackStateDidChange %d: paused", (int)_player.playbackState);
            break;

        case IJKMPMoviePlaybackStateInterrupted:
            NSLog(@"IJKMPMoviePlayBackStateDidChange %d: interrupted", (int)_player.playbackState);
            break;

        case IJKMPMoviePlaybackStateSeekingForward:
        case IJKMPMoviePlaybackStateSeekingBackward: {
            NSLog(@"IJKMPMoviePlayBackStateDidChange %d: seeking", (int)_player.playbackState);
            break;
        }

        default: {
            NSLog(@"IJKMPMoviePlayBackStateDidChange %d: unknown", (int)_player.playbackState);
            break;
        }
    }
}

#pragma Install Notifiacation

- (void)installMovieNotificationObservers {
    [[NSNotificationCenter defaultCenter] addObserver:self
                                             selector:@selector(loadStateDidChange:)
                                                 name:IJKMPMoviePlayerLoadStateDidChangeNotification
                                               object:_player];
    [[NSNotificationCenter defaultCenter] addObserver:self
                                             selector:@selector(moviePlayBackFinish:)
                                                 name:IJKMPMoviePlayerPlaybackDidFinishNotification
                                               object:_player];

    [[NSNotificationCenter defaultCenter] addObserver:self
                                             selector:@selector(mediaIsPreparedToPlayDidChange:)
                                                 name:IJKMPMediaPlaybackIsPreparedToPlayDidChangeNotification
                                               object:_player];

    [[NSNotificationCenter defaultCenter] addObserver:self
                                             selector:@selector(moviePlayBackStateDidChange:)
                                                 name:IJKMPMoviePlayerPlaybackStateDidChangeNotification
                                               object:_player];

}

- (void)removeMovieNotificationObservers {
    [[NSNotificationCenter defaultCenter] removeObserver:self
                                                    name:IJKMPMoviePlayerLoadStateDidChangeNotification
                                                  object:_player];
    [[NSNotificationCenter defaultCenter] removeObserver:self
                                                    name:IJKMPMoviePlayerPlaybackDidFinishNotification
                                                  object:_player];
    [[NSNotificationCenter defaultCenter] removeObserver:self
                                                    name:IJKMPMediaPlaybackIsPreparedToPlayDidChangeNotification
                                                  object:_player];
    [[NSNotificationCenter defaultCenter] removeObserver:self
                                                    name:IJKMPMoviePlayerPlaybackStateDidChangeNotification
                                                  object:_player];

}


- (IBAction)play_btn:(id)sender {

    if (![self.player isPlaying]) {
        [self.player play];
    }else{
        [self.player pause];
    }
}

@end
</code></pre>

<hr />

<hr />

<h6>微信号：</h6>

<p>clpaial10201119（Q Q：2211523682）</p>

<h6>微博WB:</h6>

<p><a href="http://weibo.com/u/3288975567?is_hot=1">http://weibo.com/u/3288975567?is_hot=1</a></p>

<h6>gitHub：</h6>

<p><a href="https://github.com/al1020119">https://github.com/al1020119</a></p>

<h6>博客</h6>

<p><a href="http://al1020119.github.io/">http://al1020119.github.io/</a></p>

<hr />

<p><img src="http://al1020119.github.io/images/iCocosCoder.jpg" title="Caption" ></p>

<p><img src="http://al1020119.github.io/images/iCocosPublic.jpg" title="Caption" ></p>
]]></content>
  </entry>
  
  <entry>
    <title type="html"><![CDATA[直播-H264-ACC-FLV😂总结]]></title>
    <link href="http://al1020119.github.io/blog/2016/09/08/yuan-li-zong-jie-h264-acc-flv/"/>
    <updated>2016-09-08T14:42:11+08:00</updated>
    <id>http://al1020119.github.io/blog/2016/09/08/yuan-li-zong-jie-h264-acc-flv</id>
    <content type="html"><![CDATA[<p>H.264原理</p>

<pre><code>H.264原始码流（又称为“裸流”）是由一个一个的NALU组成的。他们的结构如下图所示。

其中每个NALU之间通过startcode（起始码）进行分隔，起始码分成两种：0x000001（3Byte）或者0x00000001（4Byte）。如果NALU对应的Slice为一帧的开始就用0x00000001，否则就用0x000001。

H.264码流解析的步骤就是首先从码流中搜索0x000001和0x00000001，分离出NALU；然后再分析NALU的各个字段。本文的程序即实现了上述的两个步骤。
</code></pre>

<!--more-->


<p>ACC原理</p>

<pre><code>AAC原始码流（又称为“裸流”）是由一个一个的ADTS frame组成的。他们的结构如下图所示。

其中每个ADTS frame之间通过syncword（同步字）进行分隔。同步字为0xFFF（二进制“111111111111”）。AAC码流解析的步骤就是首先从码流中搜索0x0FFF，分离出ADTS frame；然后再分析ADTS frame的首部各个字段。本文的程序即实现了上述的两个步骤。
</code></pre>

<p>FLV原理</p>

<pre><code>FLV封装格式是由一个FLV Header文件头和一个一个的Tag组成的。Tag中包含了音频数据以及视频数据。FLV的结构如下图所示。


有关FLV的格式本文不再做记录。可以参考文章《视音频编解码学习工程：FLV封装格式分析器》。本文的程序实现了FLV中的FLV Header和Tag的解析，并可以分离出其中的音频流。
</code></pre>

<hr />

<hr />

<h6>微信号：</h6>

<p>clpaial10201119（Q Q：2211523682）</p>

<h6>微博WB:</h6>

<p><a href="http://weibo.com/u/3288975567?is_hot=1">http://weibo.com/u/3288975567?is_hot=1</a></p>

<h6>gitHub：</h6>

<p><a href="https://github.com/al1020119">https://github.com/al1020119</a></p>

<h6>博客</h6>

<p><a href="http://al1020119.github.io/">http://al1020119.github.io/</a></p>

<hr />

<p><img src="http://al1020119.github.io/images/iCocosCoder.jpg" title="Caption" ></p>

<p><img src="http://al1020119.github.io/images/iCocosPublic.jpg" title="Caption" ></p>
]]></content>
  </entry>
  
</feed>