The mosquito, despite it’s tiny size of only around 2.5 milligrams is one of summer’s biggest irritations! With over 3500 species known to exist, these annoying little pests are simply a fact of life which is why the mosquito-repellent industry is worth a whopping $200 million annually. Unfortunately the majority of sprays, fogs, and other products designed to ward off the inevitable swarms of tiny flying bloodsuckers during their active breeding months (female mosquitoes only bite when they are preparing to lay eggs) are usually more dangerous than the insect bites they are designed to prevent.
Save yourself from mosquitoes and toxic chemicals by making your own homemade mosquito-repelling incense using a handful of all-natural ingredients which tiny flying bloodsuckers loathe.
A Little Incense Information
Before we get started, it may be helpful to arm yourself with a little background on incense in both its traditional and modern forms.
There are three types of incense:
Combustible Incense includes sticks and cones, as well as the ever popular “mosquito coil” – a spiral-shaped repellent product which contains pyrethrum powder and various synthetic chemicals. When burned, the mosquito coil produces a fog which drives away biting insects. During the 12 hours it takes to burn down an entire coil, this product fills the air with toxic particulate equivalent to the smoke of 75 – 100 cigarettes. A burning mosquito coil also emits airborne formaldehyde.
Loose Incense is made by combining ground-up natural ingredients such as herbs, resins, and woods. The mixture is then heated or burned using a flammable material like charcoal or makko powder (Machilus thunbergii, aka Japanese Bay.) This is the easiest form of incense to create, thus it is the one we will be focusing on in the following guide.
Pellet Incense is made in much the same way as loose incense, but with the addition of a binding agent such as dried fruit or resin. The mixture is rolled into pea-sized balls which require around 2 – 4 weeks to dry plus an optional but recommended aging time of up to 1 year. (Since you’re reading this guide, we’re going to assume that your mosquito problem needs immediate attention. Therefore we will shelf the pellet method for a later date!)
Gather Your Tools…
There are a handful of items which are essential to successfully making your own incense. These include:
Mortar & Pestle
For pulverizing your ingredients, the mortar and pestle is a must-have. While some people recommend using a textured set for easier grinding of tough materials, I use this mortar & pestle by Milton Brook as it is much much easier to remove sticky resin from the smooth ceramic surfaces.
Alternately, you may want to use a burr grinder for preparing tougher woody-materials. Unlike blade-grinders (food processors, blenders, etc) a burr grinder employs two rotating abrasive surfaces to efficiently pulverize hard materials into a consistent and uniform particle size without scorching them. Should you decide to purchase a burr grinder, I highly recommend the De’Longhi brand. (I purchased my De’longhi DCG59 on December 28, 2004 and have used it to grind coffee almost every morning since. It still works just as perfectly today as it did over 10 years ago!) For another option which offers top-notch quality with a slightly smaller price tag, try this manual grinder by Grosche.
 Small Bowls
You will want at least 4 small bowls (like these) for holding individual ingredients prior to the mixing step.
Measuring Spoons or Gram Scale
For measuring out ingredients, a gram scale can be used for pre-ground materials while spoons are good for powdered ingredients.
Wax Paper or Other Protective Covering
Use these to protect your work surface from stains and/or stuck-on resin.
Makko Powder or Charcoal
Makko, a mildly fragrant light brown powder, is finely ground bark from the Japanese Bay tree (Machilus thunbergii) and is a popular staple for both making combustible incense and burning loose incense via makko trails which is described at the end of our guide. (Alternately, you can use sandalwood powder for the same purpose.)
Charcoal is another popular material for burning loose incense. This method is a little easier than using the makko trail. However, the makko powder smells much better, in my opinion.
White Ash
White Ash is the recommended base for burning incense via makko trail or charcoal.
A Loose Incense Burner
Burners for use with charcoal are generally made of metal with a screen over the top to prevent large objects from falling onto the hot coal while still allowing incense smoke to escape.
Small Tongs
You will need a pair of these for safely handling heated charcoal.
… And Your Ingredients
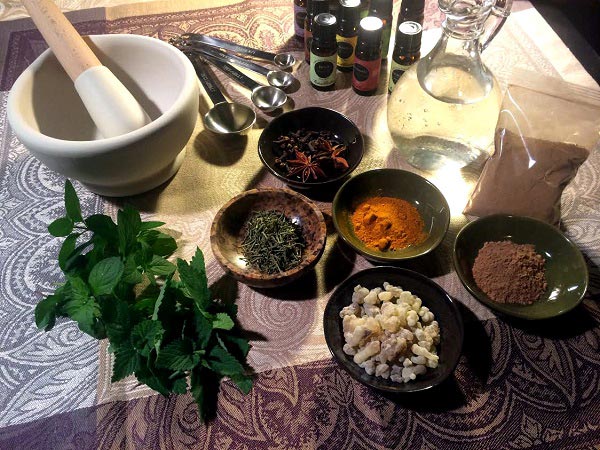
 Whole Dried Cloves
There are quite a few herbs which are known for their mosquito-repelling properties. The one which I have found to have the greatest effect against my local population of these pests is clove, therefore I am using it as the main ingredient in this guide. Other plants reported to be highly offensive to mosquitoes include Lemon Balm, Catmint, Marigold, Basil, Lavender, Peppermint, Rosemary, and Citronella Grass (aka Lemongrass, not to be confused with the widely-commercially-available yet completely ineffective “Mosquito Plant!”)
I use whole cloves instead of pre-ground clove powder because the former retains a higher natural oil content.
Dried Rosemary
Again, this is a nice pungent herb with a slowly-dissipating fragrant oil. Use whole rosemary leaves to get the most oil out of your ingredient.
Dried Star Anise
While this one isn’t on my list of mosquito-repelling herbs, I like the way star anise melds with the combined scents of clove and rosemary.
Frankincense Resin
Frankincense is a general insect repellent and provides a nice base oil to stabilize the other ingredients. Frankincense resin may be purchased here. Also, it is important to note that this resin should be frozen prior to working as this makes it much easier to grind in the mortar and pestle.
Making Your Incense
Now that you have your ingredients, measure out 2 parts dried clove, 1 part dried rosemary, 1 part dried star anise, and 2 parts pre-frozen frankincense resin into their own separate dishes. (If using spoons instead of a gram scale, measure approximate amounts before grinding and precise amounts afterward.)
Put the small bowl of resin back into the freezer until you are ready to grind it.
Prepare The Ingredients…
Grind your cloves using either mortar and pestle or burr grinder then deposit the herb back into its individual dish. Repeat this with the star anise and rosemary. If you used the mortar and pestle method to grind your herbs, you’ll want to clean it out before starting the resin.
Now it’s time to grind your resin. This process is messy. No matter how careful you are, chunks of resin will fly everywhere during this step. Some people recommend using an electric grinder or food processor here, however I would not. Resin is sticky and the hotter it gets, the stickier it becomes. If you use an automatic grinder, be prepared to throw it away when you are finished as cleaning it out will be a nightmare.
That said, when you start working the frozen resin in your mortar, tap the pestle over the pieces until they are fairly well broken up.
Then put the mortar full of resin back into the freezer. Spend about five minutes tidying up your work area or cleaning up pieces of stray frankincense. Take the resin out of the freezer and start grinding. When it becomes apparent that you are no longer making progress, put it back in for another five minutes. (I had to do this several times before I had my resin ground finely enough to incorporate with the rest of my ingredients.)
Once the resin is ground up into tiny pieces, carefully deposit it back into its individual small bowl.
 …Then Combine Them
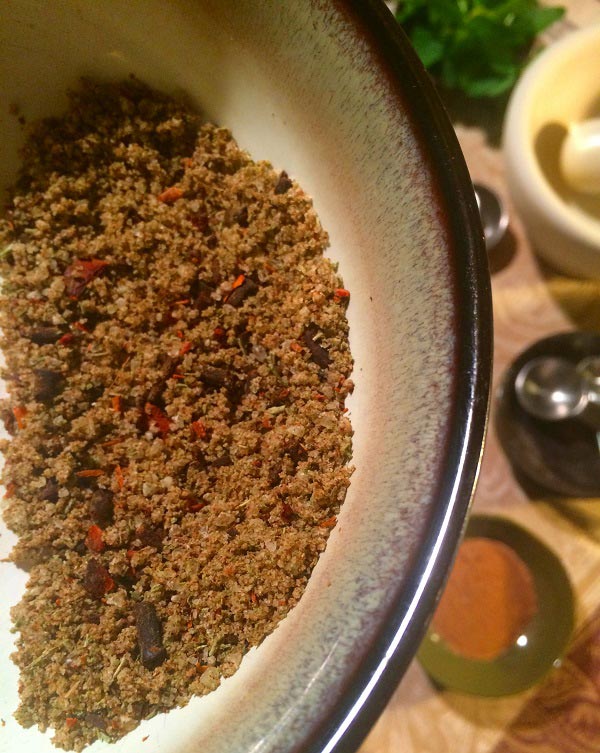
Now that you have your ingredients prepared, it’s time to mix them together. In your mortar, combine 2 parts ground cloves, 1 part star anise, and 1 part rosemary. Give them another go with the pestle until they’re well incorporated. Now add about 2 parts resin to the mix and grind them all together one more time.
(Your pestle hand may be getting pretty tired at this point, but we’re in the home-stretch so bear with me!)
Once everything is mixed up really well, you’ll want to seal up your incense and let it sit at least overnight before burning. This will give the oils time to meld together and make the incense smell really good (to you, not the mosquitoes.)
Clean Your Mortar & Pestle
You’ll want to do this as soon as possible after you finish making your incense lest the resin become a permanent resident there!
I cleaned my mortar and pestle with a mild dish soap and scrubby sponge to get the majority of the sticky resin residue off of my tools. That didn’t work very well. Then I had the idea to hit both mortar and pestle with coconut oil. After a bit of light scrubbing plus some minor scraping with my thumbnail, all of the residue wiped right off. (Coconut oil, I love you so much!)
How To Burn Loose Incense
If you’re using the makko trail method, you’ll want to fill your bowl almost to the top with ash and compacting it by tapping the bottom of the bowl. Then, with either your fingertip (or a small rounded object of similar diameter) make a shallow depression or “trail” in the ash. Fill this with makko powder and press lightly again so the powder lines the trail. Light one end of the powder trail, gently sprinkle your incense over the top of the makko, and laugh while the mosquitoes flee in disgust!
For the charcoal burning method, fill your burner almost to the top with ash and compact it by tapping the bottom of the bowl. Place the burner on a heat-proof surface (such as a trivet.) Place the charcoal on top of the ash and light it using a mini torch or similar device. You’ll know it’s ready to go when a fine coating of grey ash appears on the surface of the coal. Sprinkle loose incense directly on top of the heated charcoal then kick back and enjoy the sweet herbal aromas while nearby mosquitoes fly away dazed and confused.
So you’ve ordered your ingredients. Now what do you do in the mean time to deal with those irritating little bloodsuckers? Arm yourself with these 13 Natural Ways To Keep Mosquitoes Away. (Because too much is just enough with it comes to mosquito control!)