Easy How to Draw an Abstract Face Tutorial and Coloring Page
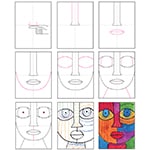
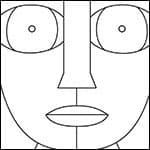
Below you’ll find an easy step-by-step tutorial for how to draw an Abstract Face and an Abstract Face Coloring Page. Scroll down to see more ideas for how to finish it.
Abstract Face Painting
If your students seem to be drawing smaller and smaller every day, and erasing their paper like crazy while they are at it, try this abstract face drawing project. The tutorial instructs that lines must touch the edge of the paper so everyone will have a drawing that fills the entire sheet. That means there are all kinds of closed spaces that can have pattern added, and lots of different colors on top.
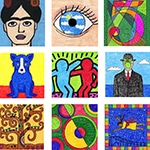
You don’t have to create it with crayons and watercolor (although that is my favorite combo), you could finish it with markers or tempera (scroll down to see some examples). The point is that it will force students to make an unconventional drawing, and most likely result in something very different from their usual approach to drawing a face.
This was one of my all time favorite classroom projects, and worked as well for 5th graders as it did for kinders.
Abstract Face Project Instructions
Join “The Daily Draw” below to get this free tutorial!
Abstract Face Coloring Page
Materials to Draw an Abstract Face
- Watercolor paper
- Sharpie marker, chisel tip
- Pencil
- Eraser
- Crayons
- Liquid watercolor paint
Directions
Time needed: 1 hour
Draw and Paint an Abstract Face in 9 easy steps
- Make guidelines. Draw the nose.
- Extend the two sides to the top of the paper.
- Draw a simple mouth.
- Draw the chin.
- Draw four curved lines for the eyes.
- Finish the inside of each eye. Add a neck.
- Add center of eyes. Draw vertical lines above and below the mouth.
- Trace with black marker. Add lines with crayons.
- Paint over all with watercolor paints.


