Showing posts with label games mat. Show all posts

Monday, 31 March 2025

Lidl Games Mat

 It's the time of year when Lidl have their Artificial Grass Mat Wargames Mat in stock again.  These are great value, £7.99 for a 1m x 2m fine textured playing surface.  I picked up an extra one to which I'm going to add some roads.

 The original mat has appeared in several of my games reports.


Lidl do have some really weird stuff.  This was just next to the grass mats.  I can't say that I've ever really had a problem with Pine Martens nibbling our electrical cables here in rural Norfolk...

Friday, 11 September 2020

2020 Summer of Scenery - Part 5: Teddy-bear Fur Games Mat

Enthused by a few posts on some terrain making groupd on Facebook, I thought I'd have a go at making a teddy-bear fur terrain mat.  Initial outlay was about £10 for 2 metres of fur fabric from a local craft and material shop plus £7 for a hair trimmer from Asda (rather than risk damaging the one used for our own hair).  Further materials to appear in a later instalment include brown acrylic caulk for £1, clear silicon sealant for £2 plus various paints which I already have.

Hair clipper £8 from Asda.

The first task was to decide on the terrain features that I wanted.  I'd seen a nice effect created using clear silicon sealant to create a flowing river that could still be rolled up for storage, so a stream across the mat is one feature I want.

Vehicle and 15mm figure for scale.

I also wanted a road and some smaller pathways (or maybe drainage ditches) through the fields.  These were easily trimmed down to create the initial layout.  The road runs the length of the mat with a couple of side roads to add interest and create strategic junctions which can act as scenario objectives.  A ford across the river can also be a scenario objective.  The roads and tracks will be created using brown acrylic caulk the same as I used on my other games mats.

Reasonable height grass for 15mm figures and still traversable for vehicles.

I've seen a lot of videos where the fur needs to be severely trimmed because it's so long to start with but mine is a pretty good size for what I want with no alteration.  I've just trimmed slightly here and there to give a more undulating level to the grass but it probably didn't even need that.

Trimming the tracks.

Road running L-R, stream will run top to bottom just right of centre.

Road plus footpaths and/or drainage ditches.

Next up will be the painstaking process of painting with a comb...

Friday, 8 November 2013

Desert terrain mat additions

 This is how I store my terrain mat, rolled up in a cardboard tube.


A large mat wraps around the tube, my desert map fits inside.


It needs a couple of minutes for the edges to relax and lie flat after you unroll it!


Desert buildings have had their bases repainted and palm trees have been finished.


The mat is very resilient and extremely flexible.


Because it's so thin, the frame sealant layer doesn't crack or flake and the stretchy leatherette allows you to position small objects under the mat to vary the shape of the terrain.


Thursday, 24 October 2013

How to make a desert terrain mat

 Being very pleased with my desert terrain mat experiment, I decided to embark upon the real thing as soon as possible.  Luckily a couple of days off work were coming up and I had some partially free weekends so could get going quite quickly.

My desert terrain experiment.
First, the materials:
Leatherette - faux-leather rubberised fabric in a pale creamy colour, £6 for one metre from "Fabric Warehouse" in Norwich (fantastic shop, I've bought quite a few bits of stuff fro model making projects from there)
Brown frame sealant - about £1 a cartridge from the DIY section of several local bargain shops, I used 2 cartridges on this project.  Mine was made by 151 who do a lot of cut price DIY adhesives for very good prices.
Emulsion paint tester pots - various brown/sand colours from Wilkinsons, £1 a pot.
Car washing sponge - £1 for a pack of 3 from the local bargain shop.
Cocktail sticks, paint brushes, pallette, brush cleaning rags and other odds and ends
Old credit card or similar sized plastic card
Coffee stirring stick
Masking tape
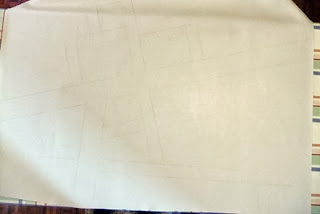
The leatherette, approx 3½ x 4½ feet in size.

I started by creating my main road.  A straight road cuts the mat in half lengthways, slightly angled to create a little more interest.  A t-junction will provide a focal point for any settlement or perhaps for game objectives.  For this main road I used a thin layer of frame sealant, smoothed into a uniform surface using an old plastic card.  The width of a standard credit card seems about right for a 2-lane road.

The roadmaker tool.  Wide edge does main roads.
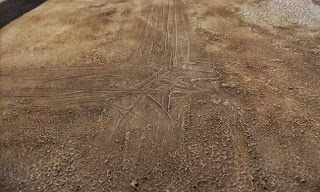
A network of smaller track form a grid that spreads out from the main road.  This is the width of the narrow edge of the card and has tyre-ruts sculpted in by dragging the coffee stick forks of the "roadmaker" tool along the tracks.  All I've done is cut a couple of bits of coffee-stirrer and masking taped it to the card. Remember to check their position against some of your wheeled vehicles so that the tyre-marks are the correct width apart!

Narrow edge does smaller tracks.
The tracks will be painted to match the main desert surface - more on this later...

Coffee-stirrer attachment creates tyre-ruts.
I used the rough tracks to delineate a number of different sized areas into which I can drop my desert buildings.  Those tracks that don't run off the edge of the mat just peter out, they don't end abruptly.

Basic road and track layout completed.
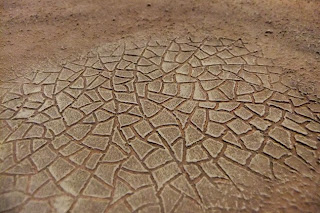
Next task is to create the cracked surface areas of desert, these are salt pans or dried up pools from the last rainy season.  A 2-4 inch diameter area is coated with the frame sealant and the cracks are sculpted in with a cocktail stick, wiping it frequently to remove the build-up of sealant on the tip.  I've found that the key is to create several large curving lines that mark out big areas, then add more curving lines to divide them in half, then divide the smaller areas in half and so on...  This creates a fairly random lot of shapes that are hopefully of similar size and have been formed in the same way that the mud will have dried and cracked in real life.

Parched desert surface - pattern sculpted with a cocktail stick.
The road surface was left to dry for a couple of hours before I added manhole covers.  This allows the surface to skin over so that (with luck) you can press the pin-badge former in without it sticking.

Pin badge back to press into road to make manhole cover.
Once the roads, tracks and cracked areas were done, the rest of the mat was textured.  Working on patches about 1 foot square at a time, a layer of sealant was squirted on, smeared around and smoothed over using fingers, then textured with a sponge.  I used a fairly fine-textured sponge, pressing it (not too hard!) into the sealant then pulling it straight off to leave a pattern of small, rough peaks.  This was repeated several times on each area until the desired appearance had been obtained, blending it into the edges of the tracks, roads and cracked areas.

Additional texturing completed including cracked desert patches.

Detail of cracked desert textureand surrounding rough sponged area.

Manhole cover created using pin badge back.
A medium brown (Wilkinson's "Nutmeg Spice") was sponged over the entire mat, then patches of lighter brown (Wilko "Coffee") dabbed on while it was still damp.  Sponging while the base coat is still damp helps blend the edges of the different shades together so the transition isn't too abrupt.

Main painting and highlighting completed.
The road was brush painted using Wilko "Supernova" black.  It will get a drybrush of dark grey at some point so that it looks more used.  It isn't as shiny as it appears here, that was just the lighting when I took the photograph!

Same cracked desert area as shown above, now with paint!
All of the desert areas were highlighted using Wilko "Safari Sand" which really brings out the texture of the surface, be it tyre-tracks, cracked earth or just rough desert.
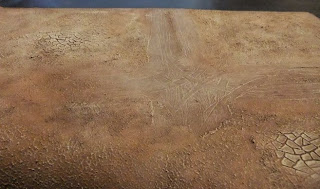
Base colour is mid-brown with lighter brown patches sponged on.
Now I'm wondering whether I should have got a more yellow brown colour, the "Safari Sand" is quite a creamy colour rather than a traditional desert yellow!

When base coat has dried, sand colour drybrushed over whole surface.
The dirt tracks have deliberately been painted the same colours as the rest of the desert.  The theory is that they can be used to outline areas into which scenery can be placed - buildings, chemical tanks, supply dumps etc.  When the scenery is in place, it channels the eye along the tracks and they become more obvious to the eye.  If they aren't needed then they just blend in to the overall desert so that you barely notice them.

Sand colour helps pick out the dirt tracks.

Dirt tracks can be used to create urban area if desired.

Large salt pan.

Now I need to finish my palm trees!
The final touch will be to repaint the bases of all my desert buildings (and those palm trees!) so that they match this new games mat, but I'm waiting until I've decided on whether a more yellow desert colour is needed.  I suppose the current colours are quite similar to the dusty brown/yellow/grey that you see in Afghanistan.

Sunday, 29 September 2013

Desert terrain mat trials

When I play desert-set games, I tend to use an old blanket as the playing surface.  I've been thinking that it would be nice to have a less fluffy playing surface so I've experimented with an offcut of leatherette from my previous games mat, testing textures and paints.

The test section, approx 10x10"
Brown frame sealant was smeared all over the leatherette to provide a fairly smooth starting surface.  The long side of an old cashcard gives a road of the correct width and is rigid enough to cut a swathe through the sealant.  The narrower edge of the card creates the thinner track to the right.

Cracked desert surface.
 I used a cocktail stick to sculpt in an area of cracked desert surface - perhaps part of an old river bed or a salt marsh.  The rest of the surface was finished with a sponge to give a rough, sandy texture.
 
Quick paint job.
I've used the usual Wilko tester pots.  After trying out different combinations I think I'll be using coffee brown as the base colour with a mottled application of safari sand sponged on while it's still wet.  The slightly darker Nutmeg Spice brown has been used on the cracked area to give greater depth to the cracks.  The road is Supernova black.  The smaller track is Earthy Hue but this hasn't really worked so I'll probably just paint it in the normal base colours.

Cracked desert surface with paint.
When I tried to add manhole covers to my previous experimental games mat, I failed.  The tie pin clip I used just peeled off the sealant, leaving a bare patch of the leatherette.  This time I waited until the sealant had skinned over and was almost set.  The tie pin back was pressed in fairly hard but still didn't stick to the surface and I'm quite pleased with the end result.  If I add a dash of something lighter like earthy hue to the supernova black, I can get a bit more contrast between the covers and the road surface.

Man-hole cover in road surface.
I think it looks pretty good (apart from that track on the right) so when I have a full weekend free I'll probably have a bash at doing a whole games mat.

With a few bits of scenery etc.

Monday, 26 November 2012

Games Mat - update

 I've finished the first few stages on my games mat.  I've also produced a small test square (20x20cm or 8x8 inches) to experiment with a few techniques.  One of the first things I've done is try setting objects into the sealant so see what sort of texture they leave when I remove them after the sealant has dried.

Back of a tie pin / pin badge - should look like a man-hole cover!
I textured the rest of the surface with a sponge and dragged my large aluminium ruler across one side to produce a roadway.

Plastic cross-stitch mesh.
 After 24 hours I carefully removed the items.  The mesh left a nice texture behind.  The pin back pulled the sealant off with it, so I'll class that one as a failure!  I tried again but it pulled the sealant off again, I think it has too much texture in comparison to the base fabric.  The mesh is good because it's quite a chunky, very smooth polythene plastic so the sealant doesn't stick to it.

The dried test piece (the crinkling flattens out without any real difficulty).
I painted using Wilkinson's tester pots.  Java Bean is a good dark brown base colour, Nutmeg Spice a lighter colour that gives a mottled appearance when sponged on while the  base is still wet.  Flintstone for the concrete hard standing.  The road is black acrylic which dried to an odd, slightly shiny texture which attracts dust, fluff and stray hairs exceedingly well!

Base coat.
One dried I gave a drybrush of coffee brown and urban jungle green.  The river was painted using inscribe acrylics.  It didn't come out quite right, but this was a test anyway so I'm not too worried.

Almost finished...
 I'm quite pleased how some of the experiment have turned out.  The road works well, though the ruler is only wide enough for a single vehicle width.  I'll need a thicker plasticard template to use if I make a large games mat featuring roads.  I already knew the tyre tracks worked.  The mesh surface gives a slightly off texture but I quite like it, rather like widely spaced concrete sets.  It will certainly do to add interest if I make an urban games mat.


The entrance to an IMEC mining site.
 Ensuring an even thickness of sealant is clearly important when using the mesh!  Only a very thin layer is required - too thick and it comes up through the holes.

Hard standing

Tyre tracks through the mud.

Tarmac road and man-hole.

The standard sponged texture.
 I've completed the texturing on the entire 6 x 4 foot mat and have also given it a coat of Java Bean so my next task it to start highlighting and mottling the surface with other colours.