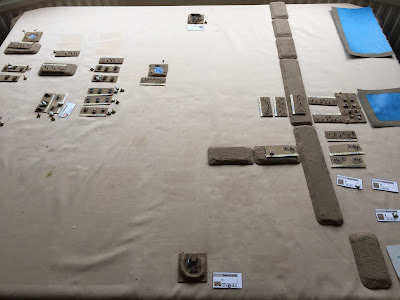
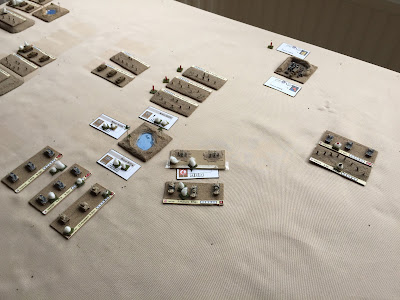
Showing posts with label 1/300th. Show all posts

Friday, 15 November 2019

Contact:Wait Out - Desert WW2 Take 2


After the somewhat abortive test of CWO in the desert with Nick I decided to run another scenario - paying closer attention to gun ranges this time.

Each element represented a Troop, so there was about a Tank Regiment/Bn on each side. I'd reduced the number of cover categories and rebased the to hit/spot rules, and also simplified the penetration calculation (and made it penetration not save).


The game played a lot better this time, with the roughly equally matched sides exchanging a couple of squadrons each before I called a halt. The British Crusaders were just completing a flanking move round the hill, but the freshest Panzer Kompanie had gone to intercept.

Much as I love the look of WW2 Desert I'm not sure it actually wargames well - just armour heavy and a lack of cover, or a slogging match like El Alamein. Back to Normandy for a while I think...


Remnants of the central squadrons exchanging blows

The British flanking move about to be stoppered

Crusaders on the attack

Matlidas brewing up!

Thursday, 2 May 2019

Sabresquadron Playtest


As mentioned in the last of the CWO posts I decided to use the second half of the scenario to test Sabresquadron which I picked up at Salute, and which has been on my list for a while.


In the scenario there was a Brit platoon and supporting Chieftain in each of the central village and the southern wood. The village was attacked first by the T64s which took out the Chieftain for no loss, and then assaulted by the BMP platoon, the troops dismounting about 300m out. One section got wiped out on the way in, and the Brits kept the second one suppressed. But with no real A/T it reached the stage where the Soviets could just stand-off and blast the village with HE from the BMPs, or call in the 2S1s.

Against the wood it was a similar story. BMP Saggers took out the FV438 Swingfire team in an outlying farm, but then a BMP copped it from the Chieftain. Several misses on both sides til a T64 spared from the assault on the village drove across and took the Chieftain out. Remaining BMP sections deployed and went into the attack, and after a couple of rounds the facing Brit section was toast and I called game over.


It's odd, originally from what I'd seen I thought that Sabresquadron was going to be too complex (those huge data lists at the back?), but the core rules are very simple - possibly too simple for me. Now there are lots of rules for lots of special cases, special weapons, special scenarios and situations and so on, but it does strike me that the core rule set is missing some real essentials - decent spotting (a unit is visible as long as within a range and/or dependent on basic cover and if moved/fired, no roll), any form of suppression, and some impact of cover on to-hit (cover only comes in as a DM on whether a soft target is KO'd). The ranges seem over long for smaller weapons (e.g. SMG 4" vs SLR 12", x3 difference whereas its more like 25/50m vs 300m to my recollection), but movement distances seem huge (and complicated with the inches-per-step and steps-per-move calculation) . Add to that it's strict IGO-UGO (not even any overwatch) so you can motor your troops across the ground and fire before any enemy gets the chance to respond.

Oh, and not sure about the rules for tactical nukes as pretty much game over if they start to fly, quite apart from the ethical/moral side of including WMDs.

All-in-all then not a ruleset for me. There might be some nice colour bits lurking in there (drones and EW covered, but not sure well, and didn't try the pathfinder bit) but will have a better read in slow time.

Anyway only one quick play, but back to CWO for me.


Friday, 26 April 2019

Combat Wait Out: Development Playtest #3 (last)


The last session of the CWO playtest was on the assault rules. Never quite been sure of them and they've changed more often than more or less anything else, but think they're about right now.

2 Pl BAOR is dug in at Repelen (top left) with 2 Pl 311MIR attacking from the front (top right), supported by 3Pl 311MIR on the flank (bottom centre).

3Pl managed to destroy 3rd Section 2Pl from sustained suppressive fire. The lead BMP stuck out in the "open" had some lucky escapes from two Milan fired from its flank off screen.


2Pl 311MIR closed, taking damage and suppression as the troops ran across the "open" ground, but their supporting BMPs kept suppressive fire up against 1 and 2 Sections, 1 Section in Repelen itself taking the most damage.


As the two sides finally came to blows the first round was inconclusive, as was the second. But the attrition built up, with first one of the Soviet sections falling back (top right), and then finally the two remaining British sections (bottom left), leaving the Soviets to occupy the village. With that I decided to call the playtest to an end.

At first I thought the melee rules were not aggressive enough, but with each turn being only a minute or so, then 3-4 minutes of full-on combat  to clear the weakened platoon from the hamlet and wood seems not bad, and it was by attrition and the platoon slipping away once the position was untenable, so not bad I think.

So overall I'm really happy with this latest iteration of CWO, and I think there are only a few tweaks needed to make it ideal (for me!). The next test of it will be WW2 North Africa, and then some time in the autumn I'll try and do an all-arms MRR attack against a BAOR BattleGroup. And of course I've now got some 10mm Moderns to try it out with too!

However this table, which remember started life as Adwalton Moor in 20mm, is still not finished as I picked up Sabre Squadron at Salute so I'm going to keep this scenario running, but with the fight out from Repelen onto the third line of the BAOR defence run on Sabre Squadron.

Thursday, 11 April 2019

Combat Wait Out: Development Playtest #2


The CWO playtest is progressing well. Shots were exchanged between the Chieftains and T64s, the T64 ERA saving at least one shot. With one Chieftain lost for no T64s (but lots of suppression/button-down) the Troop decided to pull back to their #2 positions. The recce Scimitar did manage to take out one of advancing BMPs although its troops escaped.

One the left Russian flank the 3rd BMP Platoon pushed well forward, flanking and eventually killing the second Scimitar, and then pushed on and caught the MFC unawares and took him out, the FOO wisely deciding to withdraw. Pushing further forward the Platoon came under Carl Gustav fire from the British #1 Platoon, but the fast moving BMP was hard to hit. The BMP replied with 75mm rounds into the wood which caused 2 damage points (section can take 5). The Milan team also now had a theoretical sight-line to the BMP, but cover and dips meant it couldn't get a good lock. With #1 Platoon engaged to its flank the Soviet 2nd BMP Platoon broke cover from the forward villages and pushed on towards their front.

The game now gives a good opportunity to test out the infantry and ATGW rules.

3rd BMP Platoon passes the burning MFC Spartan. Suppressed 1st UK Platoon in the distance.

2nd BMP  Platoon breaks cover in front of 1st UK Platoon


The T64s reach the tree-line recently vacated by the Chieftain Troop


Thursday, 4 April 2019

Combat Wait Out: Development Playtest #1

A lone T64 dashes forward


The development playtest of Combat Wait Out (CWO) finally got underway - see my design notes for background.

The setting was a bit ad-hoc, a British Combat Team (Company Gp) holding out against the early elements of a Soviet MRR deploying from the march. The terrain was started by just throwing my new 4cm green hex cloth over the Adwalton Moor terrain, and then adding villages and features based on typical (by Google Earth) Estonian terrain (more fun than NGP, and if I move to 10mm then I'm going to base it around a 2020/2025 Baltic conflict).


The Brits all started on blinds. The Soviet m/c crew headed up the central road to the hamlet of Adenstedt where a first burst from the Scimitar MG missed them, but the second got them. The BRDMs scurried for cover in Shelem and awaited the CRP. The Scimitar engaged and took out the lead BMP emerging from Sehlem, and the rest of the CRP also took cover back in Sehlem. The FSE (rest of the BMP company plus arty, mortars and a platoon of T64s) then crept on. In fact I decided they crept too slowly so I upped the "dash" speed (which is itself varied by N  x Fate Dice).

BMP burns on the highway, platoon mates disordered, and the Gunners drop short!


The Scimitar and Chieftain lining Almstedt Wood started to engage the T64s and BMPs at long range, but to no avail. The FOO then called in an SP70 strike on Sehlem which dropped short (Gunners living up to their name), and failed to get a second Fire Mission in when Sunray got on the net. The Soviets responded in kind, their FOO having got up onto the hill S of Harbarnsen and called in the 2S1s against Almstedt Wood, slightly off target but enough coverage to take out the Scimitar. The Chieftain finally took out the lead T64 despite it having dashed forwards twice to close the range (taking on a camouflaged Chieftain in a wood at 1400m whilst moving at speed cross country was never going to be too easy). The Brit FOO got another Fire Mission, this time was more or less on target and took out one BMP and Neutralised one of the T64s which was close to the town and in the beaten zone. That's it so far.

British (near) and Soviet (far) stonks reduce visibility

I've been tweaking and rewriting the rules each day, and I must admit I think they are playing pretty well now. One big change was I started with die roll then DMs as having + = good and roll-high always seems sensible, but I noticed that the way I prefer to play is to have a target number, apply TMs to that ( so _ = good), and then roll, so I've rewritten everything accordingly. D10 is giving about the right range of numbers, and all the results so far seem narratively correct. If anything spots/hits seem slightly too hard, but with the design I can just change the TN by one to adjust. The DM/TM selection (whilst more than many would like) also seems right to me. The whole indirect fire bit with requests, target deviation (fate dice) and direction (D6 on hex!), beaten zone (basic 7 hex cluster), smoke for 1 turn each in each, and central hex turned to mush) also working well, and have finally simplified the IDF "to hit" table which still showed touches of WRG 1st Edition (and still does).

The fight for Almstedt Wood, Chieftain and T64 firing but not yet hitting.

One other enhancement was to turn the activation cards into reference cards for their units - so the Platoon card shows the firing stats for the Sections under its command, plus HQ, and any orbat notes. This gets away from the "hunting for cards" issue I mentioned previously, looks nice, and there is still a reference sheet to look up the target's armour!

Example Activation and Information Cards


Will update after some more playing, particularly with GWs and suppression, and maybe air.


Tuesday, 29 May 2018

Rommel Test Game

End Turn 6
In the first few Turns the British and Germans were getting stuck into a tank tit-for-tat on the (British) left flank, whilst on the right the Brits had eliminated the Italian forward positions and encircled the Germans holed-up in Sollum on the coast.
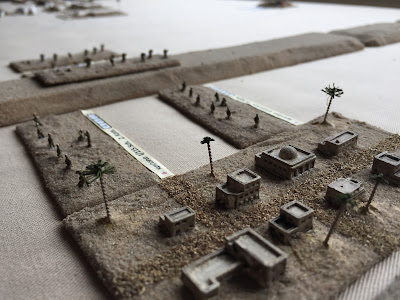
Sollum under seige


Turns 7/8 saw more of the same, with the tank battle seeing most units down to their last step - with a slight advantage to the Germans as they were getting +1 hit on each combat due to their superior tanks.

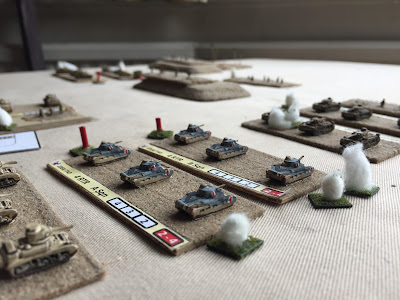
The Matildas go forward
At the end of Turn 8 an extra battalion or so of Kampfgruppe  Esebeck arrive. With no breakthrough on the L the British commander does a re-plan. Sollum is bound to fall, so for victory he just needs to take and hold the oasis as well. So all forces on the L are pulled back to defend the oasis. The Coast Bn which was in reserve on the R flank is road moved up to help, and as soon as Sollum falls those troops will also be moved up.

So the next few turns sees the British enact the plan and von Esebeck start to try and take the oasis, with other units providing a supporting role.

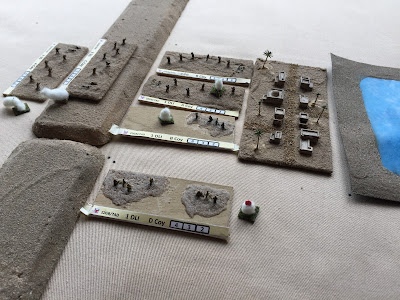
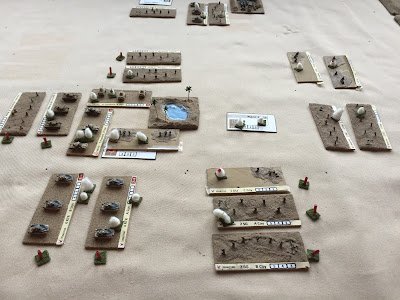
Sollum Falls, ~ Turn 11

As the battle around the oasis develops the British suddenly notice that the German gun line and supply depot is right in front of them and unprotected, so a "Jock Column" of a Matilda Sqn and Inf Coy is sent forward to reek havoc. They take out the Italian battery, but the German one escapes. They then camp out on the supply point, eating loots of sauerkraut and rendering all German units "isolated". In practical terms that just means they can't use a road move, so it stops any of their more distant units coming to the aid of the oasis fight.

"Jock Column" at right heading for the vulnerable depot and gun line
With the Coast Bn unlikely to hold the Brits thought they had a plan, with the Germans taking the oasis on Turn 14, the Brits retaking it on Turn 15 with the relatively fresh 1 SG just released from Sollum, and then reserving enough dice to hold it during Turn 16.

As it was the Coast Bn held on during Turn 14, and were then relieved in place by 1 SG. There was also a certain amount of gamesmanship with a Tank Sqn being left on the oasis so as to avoid Tank Shock.

So it came down to Turn 16, and the Germans making  literally the last throws of the dice to take the oasis. The Brits expected the Tactic that moves a unit out, and so had a dice ready for "quick reaction" to replace it , but instead the Germans played "no tactics", so all the Brit dice were useless and the Germans called down Reserve Arty and airstrikes to try and dislodge the Brits. Luckily on Turn 15 the brits has played prepare positions, so when the Germans scored 5 hits, 2 went on the prepared positions, 1 wiped out on the armour unit, but the SG companies were able to absorb a hit each  - so the oasis held and the Brits won.

The final battle


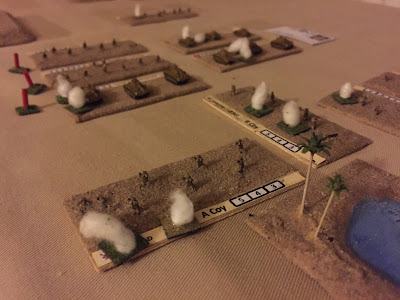
In the failing light (literally!) the heroic A & B Coy Scots Gds hold on!

Thoughts on Rommel

So, game over, and I don't think that my views changed a lot. A like what Sam Mustafa tries to do, in this and Blucher, and generally how he does it - you certainly can't fault the production quality - but there is always something that just doesn't gel for me. In Rommel I think its that it has the SAGA problem, it becomes more about how you muster your dice to achieve events and tactics that have no direct on-board presence than it is about moving the "toys" around. I really did feel that I could have played this SPI for no loss of interest, and actually for improved playability and usability. I also didn't particularly think the big squares worked for me, movement and actions were too coarse - even though I've found the 10cm hexes to work fine. There is also huge scope for gamesmanship I think, such as the anti-tank-shock example above (maybe that just good tactics) and also that in the attack on Sollum although I had a Bn on each flank I always attacked with 2 coy from one side and 1 coy from the other so as to get the "flank" advantage. If Sam really wanted to have a more grand tactical/strategic game I think we needed to the focus even higher, so Bn units to make table and events/tactics seem more equal.

Unfortunately I can't see myself racing to play it again - I think that Blitzkrieg Commander is still closer to what I want - so I may be rebasing all my new desert units after their first outing, or try them as-is on 4cm hex. I've promised myself a professional desert hex cloth, and then when BKC4 comes out we'll give it all a whirl again!


Wednesday, 18 April 2018

Rommel Test Game - STARTEX


Been a bit quiet here of late what with work, a book deadline on 30 April and various domestic issues which have seen my physical space for wargaming shrink a bit (hence smaller table above!)

But I have now got the Rommel introductory adventure of Op Brevity underway. Allies attacking from bottom, with objectives being the two oases and the port. The Axis have low grade Italians deployed forward, a German Kampfgruppe on the back line, and another due to come on at Turn 8.

In the first "turn" (i.e Allied then Axis turn) the Brits pushed an armoured thrust into the desert on the R flank, the Germans came out to meet them, but the Brits came off the better and the German's bounced off with the higher casualties.


In right-centre there was a British infantry assault against the Italians on the hills. It failed but at lest one Italian unit only has 1 HP left.


On the right the coastal force engaged the Italians forward of the port. Again Italians damaged but not eliminated.


End of Turn 2
Impressions so far ... not wonderful I'm afraid. The use of the Ops Dice and the range of Events and Tactics make it quite Saga like, you seem to spend more time worrying about dice allocation decisions and choosing a tactic to use than you do actually playing a "real" tactic on the table. Also the fact that tactics should be simultaneously revealed makes it not ideal for solo play.

In terms of game tactics you really need overwhelming force so you can eliminate a unit in one go, and that needs a combination of multiple units, ideally a flank attack, and the deployment of some good Ops Dice tactics. So it may become a case of orchestrating a set-piece or two each turn - which in some way may not be too unrealistic. We'll see.

Ops boards at the end of Turn 2. Whether to reset and draw 3, or just draw 6 but have filled tactics I can see being a big decision.


Thursday, 29 March 2018

IABSM Test Game: Turns 18 - 23 ENDEX


View from 3 Pl. 1Pl attacking from right to left

Well that ended quickly. 3Pl provided a mediocre fire-base as they couldn't really see the target - certainly not after the smoke went down. 1Pl started moving though the open orchard but started taking casualties from the German Zug. 3 Pl started laying smoke late, but the wind was pushing it back towards 3Pl, so they couldn't adjust well to cover the rear of the building (off image to left above).

1 Pl (centre top) raked by fire on leaving the orchard by Germans at upper left

As a result as 1Pl emerged they were due to edge of table too much in line with the German defence (especially as the reserve Gruppe had moved to close the back-door), and not obscured by the smoke. In one round the reserve Gruppe inflicted 3 hits on each unit, which added to the 3 they already had reduced each section to 2 men, and so no longer effective. With only 3Pl left, and that a bit battered, and the German Zug more or less untouched and in a strong defensive position the Company Commander decided to call it a day. Game over.

Overall not bad. Quite a realistic result, I remember being taught that a good MG position is a Platoon attack target, the Germans had 2 of them, plus the two platoons which are each Coy attack targets, so trying to do this with one unreinforced company was always going to be a tall order!

What I liked about IASBM:

  • The blinds - but is the CoC patrol phase better?
  • The very simple modifiers
  • Spotting
  • The mortar and smoke mechanism
  • The variable movement
  • The tea break card
  • Card based activation
  • Bucket of dice - becoming a convert
And playing at 1:1 figure to ground scale. But 6mm is just too small for 1:1 men, and looking forward to using the new 10mm figures and happy to have only a ~2:1 error ratio.

What I liked less:

  • Suppression seemed secondary to damage, not the other way around
  • Shock and damage didn't seem to achieve much different, in this game damage dominated
  • Big Men rarely got the change to use their range of actions (since a small game?)
  • Not sure that every Pl needs a Big Man, if the Pl activates as a unit anyway - gets confusing
  • The damage table - you have to look everything up

I think overall CWC/BKC is closer to what I want, but neither is ideal so may be back to writing my onw, but more influenced by IABSM/CWC than WRG!


Wednesday, 28 March 2018

IABSM Test Game - Turns 13- 17


The British attack finally goes in. 3 Pl is providing the smoke and firebase, everyone else is going right flank, bags of smoke, with 2 Pl left and 1 Pl right.

2Pl realise too late that making a full 2-3 activation move to reach the enemy will lose them dice in the melee, so they stop short in the smoke to await the next turn. 1 Pl has swung nicely wide and sends 2 & 3 Sections against the Gruppe lining the hedge ( a flank guard recently moved up), whilst 1 Section goes in against the rear of the dug-in  MG42.

2 & 3 Sections get surprisingly bounced, but inflict a fair amount of damage. A Sect also has a tough time and takes 2 rounds to get the MG42 team (well 1 man) to retreat.

Next turn 2Pl finally goes in, and again take a lot of damage from assaulting the emplaced infantry head on. 2 & 3 Sections are going against the Gruppe lining the hedge, and 1 Section against the weak Gruppe in the house.

1 Section gets bounced - unsurprisingly, but 2 & 3 manage to secure their objective and the German Gruppe is reduce to 1 man, pulls back, and loses it's Big Man.


In the next turn the smoke finally clears.


2 Pl activates first and sends 2 Sect left against the building and 3 Sect right against 1 Pl's opponent. Despite their losses 3 Sect wins out, but 2 Sect is repulsed - although only one man is left in the building (and only 1 shock so OK!). 3 Pl then activates it and pours in all its firepower, which ends up being far more effective than earlier in the game (was I doing something wrong?) and kills the brave bloke!


1 Pl and 2/3 Sections recover in the Orchard whilst 3 Sect/2Pl finishes their work, right

The 3Pl firebase and target house

A quick regroup and then its time to turn the British focus on the 2nd German Zug, still on a blind in the other house the other side of the T junction. 1 Pl is just about battleworthy (2 men down per section, so only 2 activations each). 2Pl has lost one section and has quite 2 weakened, so they'll join with 3 Pl (which has lost 1/2 section) to provide the firebase. It might be nice to swop 1 & 3 but 1 is in a better position to go right flanking and get right behind any German emplacements. 2Pl can also provide 3Pl with its smoke for the screen.


The next objective - the remaining German Zug, still on blind!

Overall this phase went quite nicely. Juggling men lost and shock seems a pain at times for no real benefit. Also I ended up with quite a few units at 2-3 men, so that meant they had no actions, so could only sit and be assaulted - so I decided to just remove them from the table if they weren't in a good defensive position. I also forgot about the 2" mortar rapid HE fire in the assault - I think that might be needed as its now a pretty even match for the last fight and the Germans can hole up in the buildings if they want. Could be a close run thing which is about right given the ratios.

Aim to finish this week so I can clear the decks for Easter and Rommel.


Friday, 16 March 2018

8th Army Armour off the bench!

11th Hussars Honeys

The British armour for Rommel is mounted, labelled and off the work-bench. Also some of the scenery items. Last big tasks are the infantry and hills, and then time for a game!

The latest batch - just waiting for the Matildas - Caunter takes longer!

Crusaders of 7th Hussars - fond memories of the Airfix 1/72nd kit!

Grants of 2RTR - far nicer than the Lee!

An oasis - scenery only, and the "budget" palm trees

Supply base - one for each side


Thursday, 15 March 2018

IABSM Test Game - Turns 8 - 12


After about another turns of damage which forced 1 Section of 3 Pl to withdraw under the "loss of bottle" rule (and down to 3 men!) the Platoon Commander finally managed to get the 2" mortar to lay a smoke screen in front of the German position.


At the same time 1 Pl (still on blind) and 2 Pl started to swing right behind 3 Pl ready to launch a right-flanking, bags of smoke assault.


1 Pl in position, 2Pl almost there. The screen is now fully stoked so has 4 turns left, and the German Zug 2 commander has brought up his reserve Gruppe to cover his left flank in expectation of a British assault.

Should be time to test the hand0-to-hand rules next time.

In other news, almost finished all the North Africa armour, and its the West Midlands Military Show this weekend!