How to Create a REST API using Java Spring Boot?
Last Updated :
21 Jan, 2025
Representational State Transfer (REST) is a software architectural style that defines a set of constraints for creating web services. RESTful web services allow systems to access and manipulate web resources through a uniform and predefined set of stateless operations. Unlike SOAP, which exposes its own set of operations, RESTful web services rely on simple HTTP methods such as GET, POST, PUT, and DELETE.
In this article, we will create a simple REST API using Spring Boot to manage employees, including adding employees to a list and retrieving the list of employees.
Why Spring Boot?
Spring Boot is built on top of Spring Framework, simplifying project setup and configuration. It provides default configurations to avoid boilerplate code and is ideal for beginners looking to work with Spring.
Steps to Create a REST API
Step 1: Define the Employee Entity
Create a class to represent the Employee entity.
Java
package com.example.demo;

// Employee entity class
public class Employee {

    private Integer id;
    private String firstName;
    private String lastName;
    private String email;

    // Default constructor
    public Employee() {}

    // Parameterized constructor
    public Employee(Integer id, String firstName, String lastName, String email) {
        this.id = id;
        this.firstName = firstName;
        this.lastName = lastName;
        this.email = email;
    }

    // Getters and Setters
    public Integer getId() {
        return id;
    }

    public void setId(Integer id) {
        this.id = id;
    }

    public String getFirstName() {
        return firstName;
    }

    public void setFirstName(String firstName) {
        this.firstName = firstName;
    }

    public String getLastName() {
        return lastName;
    }

    public void setLastName(String lastName) {
        this.lastName = lastName;
    }

    public String getEmail() {
        return email;
    }

    public void setEmail(String email) {
        this.email = email;
    }

    @Override
    public String toString() {
        return "Employee [id=" + id + ", firstName=" + firstName +
                ", lastName=" + lastName + ", email=" + email + "]";
    }
}
Step 2: Create a Storage Class
Create a class to hold a list of employees.
Java
package com.example.demo;

import java.util.ArrayList;
import java.util.List;

// Storage class for employees
public class Employees {

    private List<Employee> employeeList;

    // Get the employee list (initialize if null)
    public List<Employee> getEmployeeList() {
        if (employeeList == null) {
            employeeList = new ArrayList<>();
        }
        return employeeList;
    }

    public void setEmployeeList(List<Employee> employeeList) {
        this.employeeList = employeeList;
    }
}
Step 3: Create the DAO Class
The DAO class will handle adding and retrieving employees.
Java
package com.example.demo;

import org.springframework.stereotype.Repository;

@Repository
public class EmployeeDAO {

    private static Employees employees = new Employees();

    static {
        // Initialize with sample employees
        employees.getEmployeeList()
          .add(new Employee(1, "Prem", "Tiwari", "prem@gmail.com"));
        employees.getEmployeeList()
          .add(new Employee(2, "Vikash", "Kumar", "vikash@gmail.com"));
        employees.getEmployeeList()
          .add(new Employee(3, "Ritesh", "Ojha", "ritesh@gmail.com"));
    }

    // Retrieve all employees
    public Employees getAllEmployees() {
        return employees;
    }

    // Add an employee
    public void addEmployee(Employee employee) {
        employees.getEmployeeList().add(employee);
    }
}
Step 4: Create the Controller
The controller contains the REST API endpoints.
Java
package com.example.demo;

import org.springframework.beans.factory.annotation.Autowired;
import org.springframework.http.ResponseEntity;
import org.springframework.web.bind.annotation.*;
import org.springframework.web.servlet.support.ServletUriComponentsBuilder;

import java.net.URI;

// REST Controller for managing employees
@RestController
@RequestMapping("/employees")
public class EmployeeController {

    @Autowired
    private EmployeeDAO employeeDao;

    // GET endpoint to fetch all employees
    @GetMapping("/")
    public Employees getEmployees() {
        return employeeDao.getAllEmployees();
    }

    // POST endpoint to add a new employee
    @PostMapping("/")
    public ResponseEntity<Object>
      addEmployee(@RequestBody Employee employee) {

        // Generate ID for the new employee
        Integer id = employeeDao.getAllEmployees()
          .getEmployeeList().size() + 1;
        employee.setId(id);

        // Add employee to the list
        employeeDao.addEmployee(employee);

        // Build location URI for the new employee
        URI location = ServletUriComponentsBuilder
          .fromCurrentRequest()
                .path("/{id}")
                .buildAndExpand(employee.getId())
                .toUri();

        return ResponseEntity.created(location).build();
    }
}
Step 5: Run the Application
Run the application as a Spring Boot app. Ensure you have the following dependencies in your pom.xml:
<dependencies>
<dependency>
<groupId>org.springframework.boot</groupId>
<artifactId>spring-boot-starter-web</artifactId>
</dependency>
</dependencies>
Testing the API
Now we can test the API using tools like Postman or a web browser.
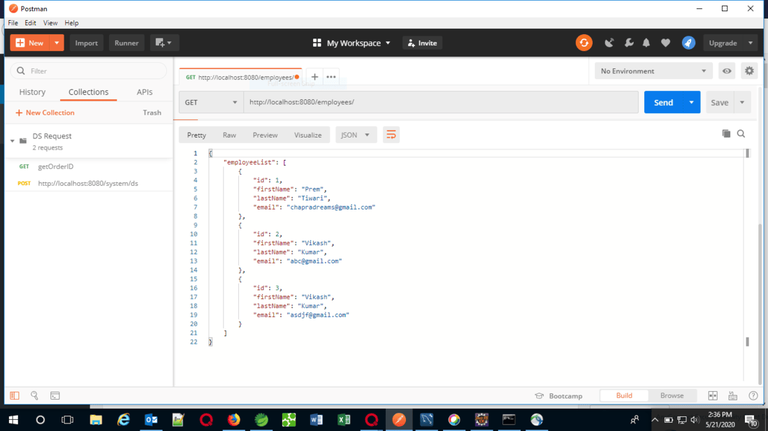
GET Request: Fetch all employees
URL: http://localhost:8080/employees/
Response:
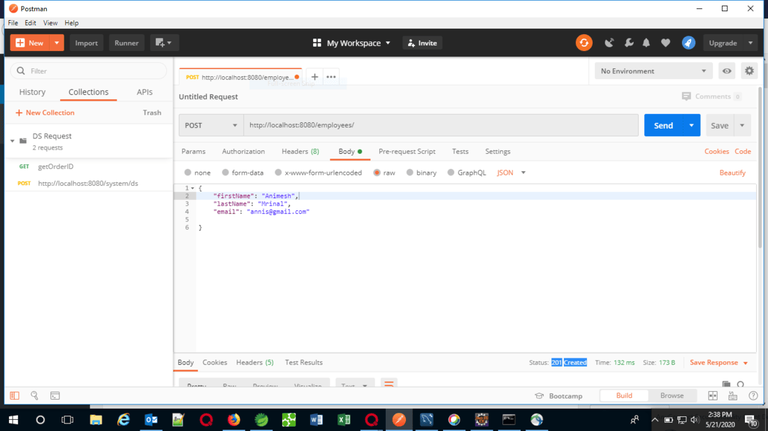
POST Request: Add a new employee
Response:
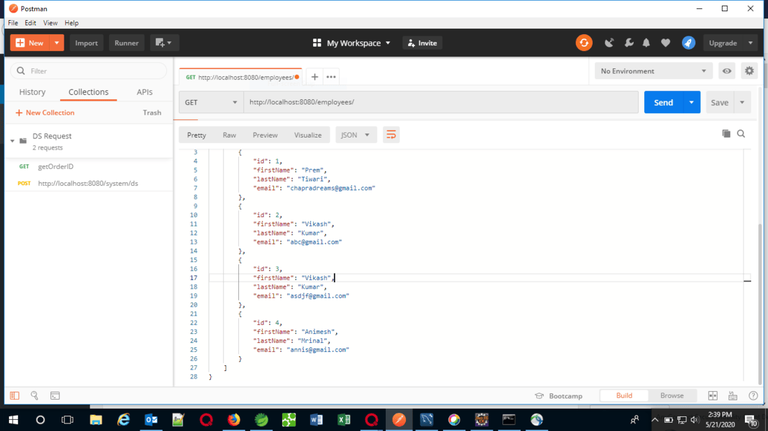
Again hitting the GET request after performing the POST request:
This concludes creating a REST API using Spring Boot. Now we have a fully functioning API to manage employees.