Showing posts with label Zulu 28mm. Show all posts

Tuesday, 11 June 2024

Isandlwana - the refight - 28mm wargame

 Evening All

Last night we took the opportunity to refight my Isandlwana scenario which was last fought over seven years ago in the old shed. A lot has changed since then , not least of which I have so many more Zulus painted (almost 1000 at last count), and as such it only seems right to share this with the larger readership and on the various forums.

Aside from the number of Zulus available I have also upgraded the terrain and tweaked the scenario rules. To all intents and purposes this is a new scenario and I felt it played much better and even gave a chance for the British to rewrite the history books.

The original post can be found HERE

The table for this game was L shaped with the two long edges each 15ft long. In the corner of the L lay the mountain top with the British cam nestled in its foothills.

Full table (game has started with Zulus advancing)


The British companies (6) were strung out as per history away from the camp, and Durnford's horse division lay in the Donga to the east. A lone Rocket battery occupied the gap between the Donga and the camp.


British Order of Battle

Number 2 Column -
Number 2 Column -
Commanded by Durnford 9+
11 Battery 7th Brigade R.A. - 3x 9pdr Rockets.
One Rocket Units


Sikhali Horse
One Unit Sikhali (Small Unit)
Edendale Troop - 50 men.
Hlubi's Troop - 50 men.

Two Unit Boers (Small Unit)

Number 3 Column commanded by Colonel Glyn
Commanded by Glyn 9+
N Battery 5th Brigade R.A. - 2x 7pdr Guns

Two Artillery Battery
1/24th - 5 companies - 415 men.

5 units British Infantry
2/24th - 1 company and detachment - 180 men.

1 unit British Infantry
1/3rd Natal Native Contingent - 2 companies - 200 men
N/a
2/3rd Natal Native Contingent - 2 companies - 200 men
N/a
No.1 Squadron Mounted Infantry - 27 men.
Natal Mounted Police - 34 men.
Natal Carbineers - 29 men.
Newcastle Mounted Rifles - 17 men.
Buffalo Border Guard - 8 men.

Unit of Natal Mounted Police (Small)
Unit Mounted Infantry (Small)

(For game purposes this will be transferred to Number 2 Column)


 Notes: 

All Units have a local commander with a rating of 8+ thereby allowing each unit to act independently

All British regular units have the drilled ability ie they can make one order regardless of whether successful or not

All British regulars have the steady & stubborn ability

All Units have finite ammunition - if the unit rolls more 1's than 6's a firing pip is lost, Resupply can be made by runners to ammo wagons (two in camp)

Once British units have been shaken they may NOT rally. They can continue to fight but at a disadvantage.

Zulu Forces

Zulu Units and their approximate strengths.
Whilst searching for unit descriptions of the Zulu Army I discovered that an Impi is just a generic term for an Army/Regiments. Regiments were actually called IButho’s and these were made up of several units called Amaviyo’s.  Amaviyos ranged in size from fifty to three hundred men. The Amaviyo will become my standard warband and each warband will represent 300 warriors.

Zulu Forces (actual Deployment)
Right Horn


Regiment
Number of Men
Warbands
uDududu
1500
5
iMbube
500
2
iSangqu
1500
5

Left Horn


Regiment
Number of Men
Warbands
uVe
2000
7
iNgobamakhosi
6000
20

Centre


Regiment
Number of Men
Warbands
uNokhenke
2000
7
uKhandempemvu
2500
8
uMbonambi -
2000
8

The Zulus have a total of 52 units in play which gives them a 4 to 1 numerical advantage
 
Once a regiment has lost more than half its strength the regiment must retire. Zulu units may NOT rally once shaken

Cards for all of the Zulu Regiments were produced to aid identification of the units.


The Zulu player will receive one commander for each regiment. These are all +8 commanders.

Zulu units all have the initiative ability that allows them to move forward one move provided they have not been ordered.


All the Zulu units were standard warband units as described in the book  with no differention between married and unmarried units.

The Battle started with the Zulus bringing on 50% of each regiments forces (the remainder would join in turn 2) This was done so we could get them all on the table !!

As expected the rocket battery was quickly overrun in the first turn and the left horn swept into Durnford's horse in the Donga. Some of the mounted units got away, other weren't so lucky


The Zulu centre and right horn make their appearance...


The Donga was the scene of fierce action as the mounted units tried (badly) to make a fighting retreat. Had they been mounted they could have evaded the restless natives.


More Zulus appear on the field. It looked epic.


The hordes began to rush forward. Some desultory fire from the camp failed to hinder their progress.


The centre and right horn began to mass their attack against the besieged redcoats.


As the fight progressed the Zulu commanders taunted the defence....


 By now the Zulus had swarmed across the Donga eliminating 50% of Durnfords force. The Sikhali horse put up a brave stand but fell to the sharpened assegais


The British edged their way backwards to the camp. Hoping to trade distance for time.


The British prepared their volley fire..... 


A lone unit of Boers is forced to flee....


The Zulus crashed in and the line held, driving back the first wave.


But no sooner could they draw breath more Zulus were rushing forward.


As the Battle reached its climax the British had delivered withering fire on three of the opposing Zulu regiments forcing them to retire from the field.


With all three Zulu forces closing in the British were starting to falter. To begin with the British left collapsed as two companies succumbed to the spears


The right of the camp held firm and delivered more punishing fire on the Zulu force


Again the Zulus charged and again they were driven back.


But it was all too late - the loss of the British Left gave the Zulus the opportunity to hit units in the flank


By now the Zulu left horn had closed in for the spoils. Bouyed by their victory in the Donga they came steaming into the camp.


It was alost over...


The Zulu forces flooded into the camp


A gallant stand by the last two companies of redcoats. The King's Colour held aloft in the dying moments of battle.

A Zulu victory but at what price?


The British had managed to drive off just under 30% of the Zulu force. Was their a chance they could have done better? Possibly if the dice gods had been kind but this was not going to be their day.


More soon

Thursday, 6 April 2023

A Hasty Retreat from Zululand - a 28mm wargame

Good Afternoon All

Monday night saw the return to the Anglo Zulu War for an entirely ficticious battle titled 'A Hasty Retreat from Zululand'. 

In terms of background the players were informed that following the defeat at Isandlwhana the Commander of the 6th column (did not exist) Sir Reginald Smythe elected to return to the safety from where he had come. Fearing that his column might suffer the same treatment as his compatriots forces he turned around his force and march straight out of Zululand.

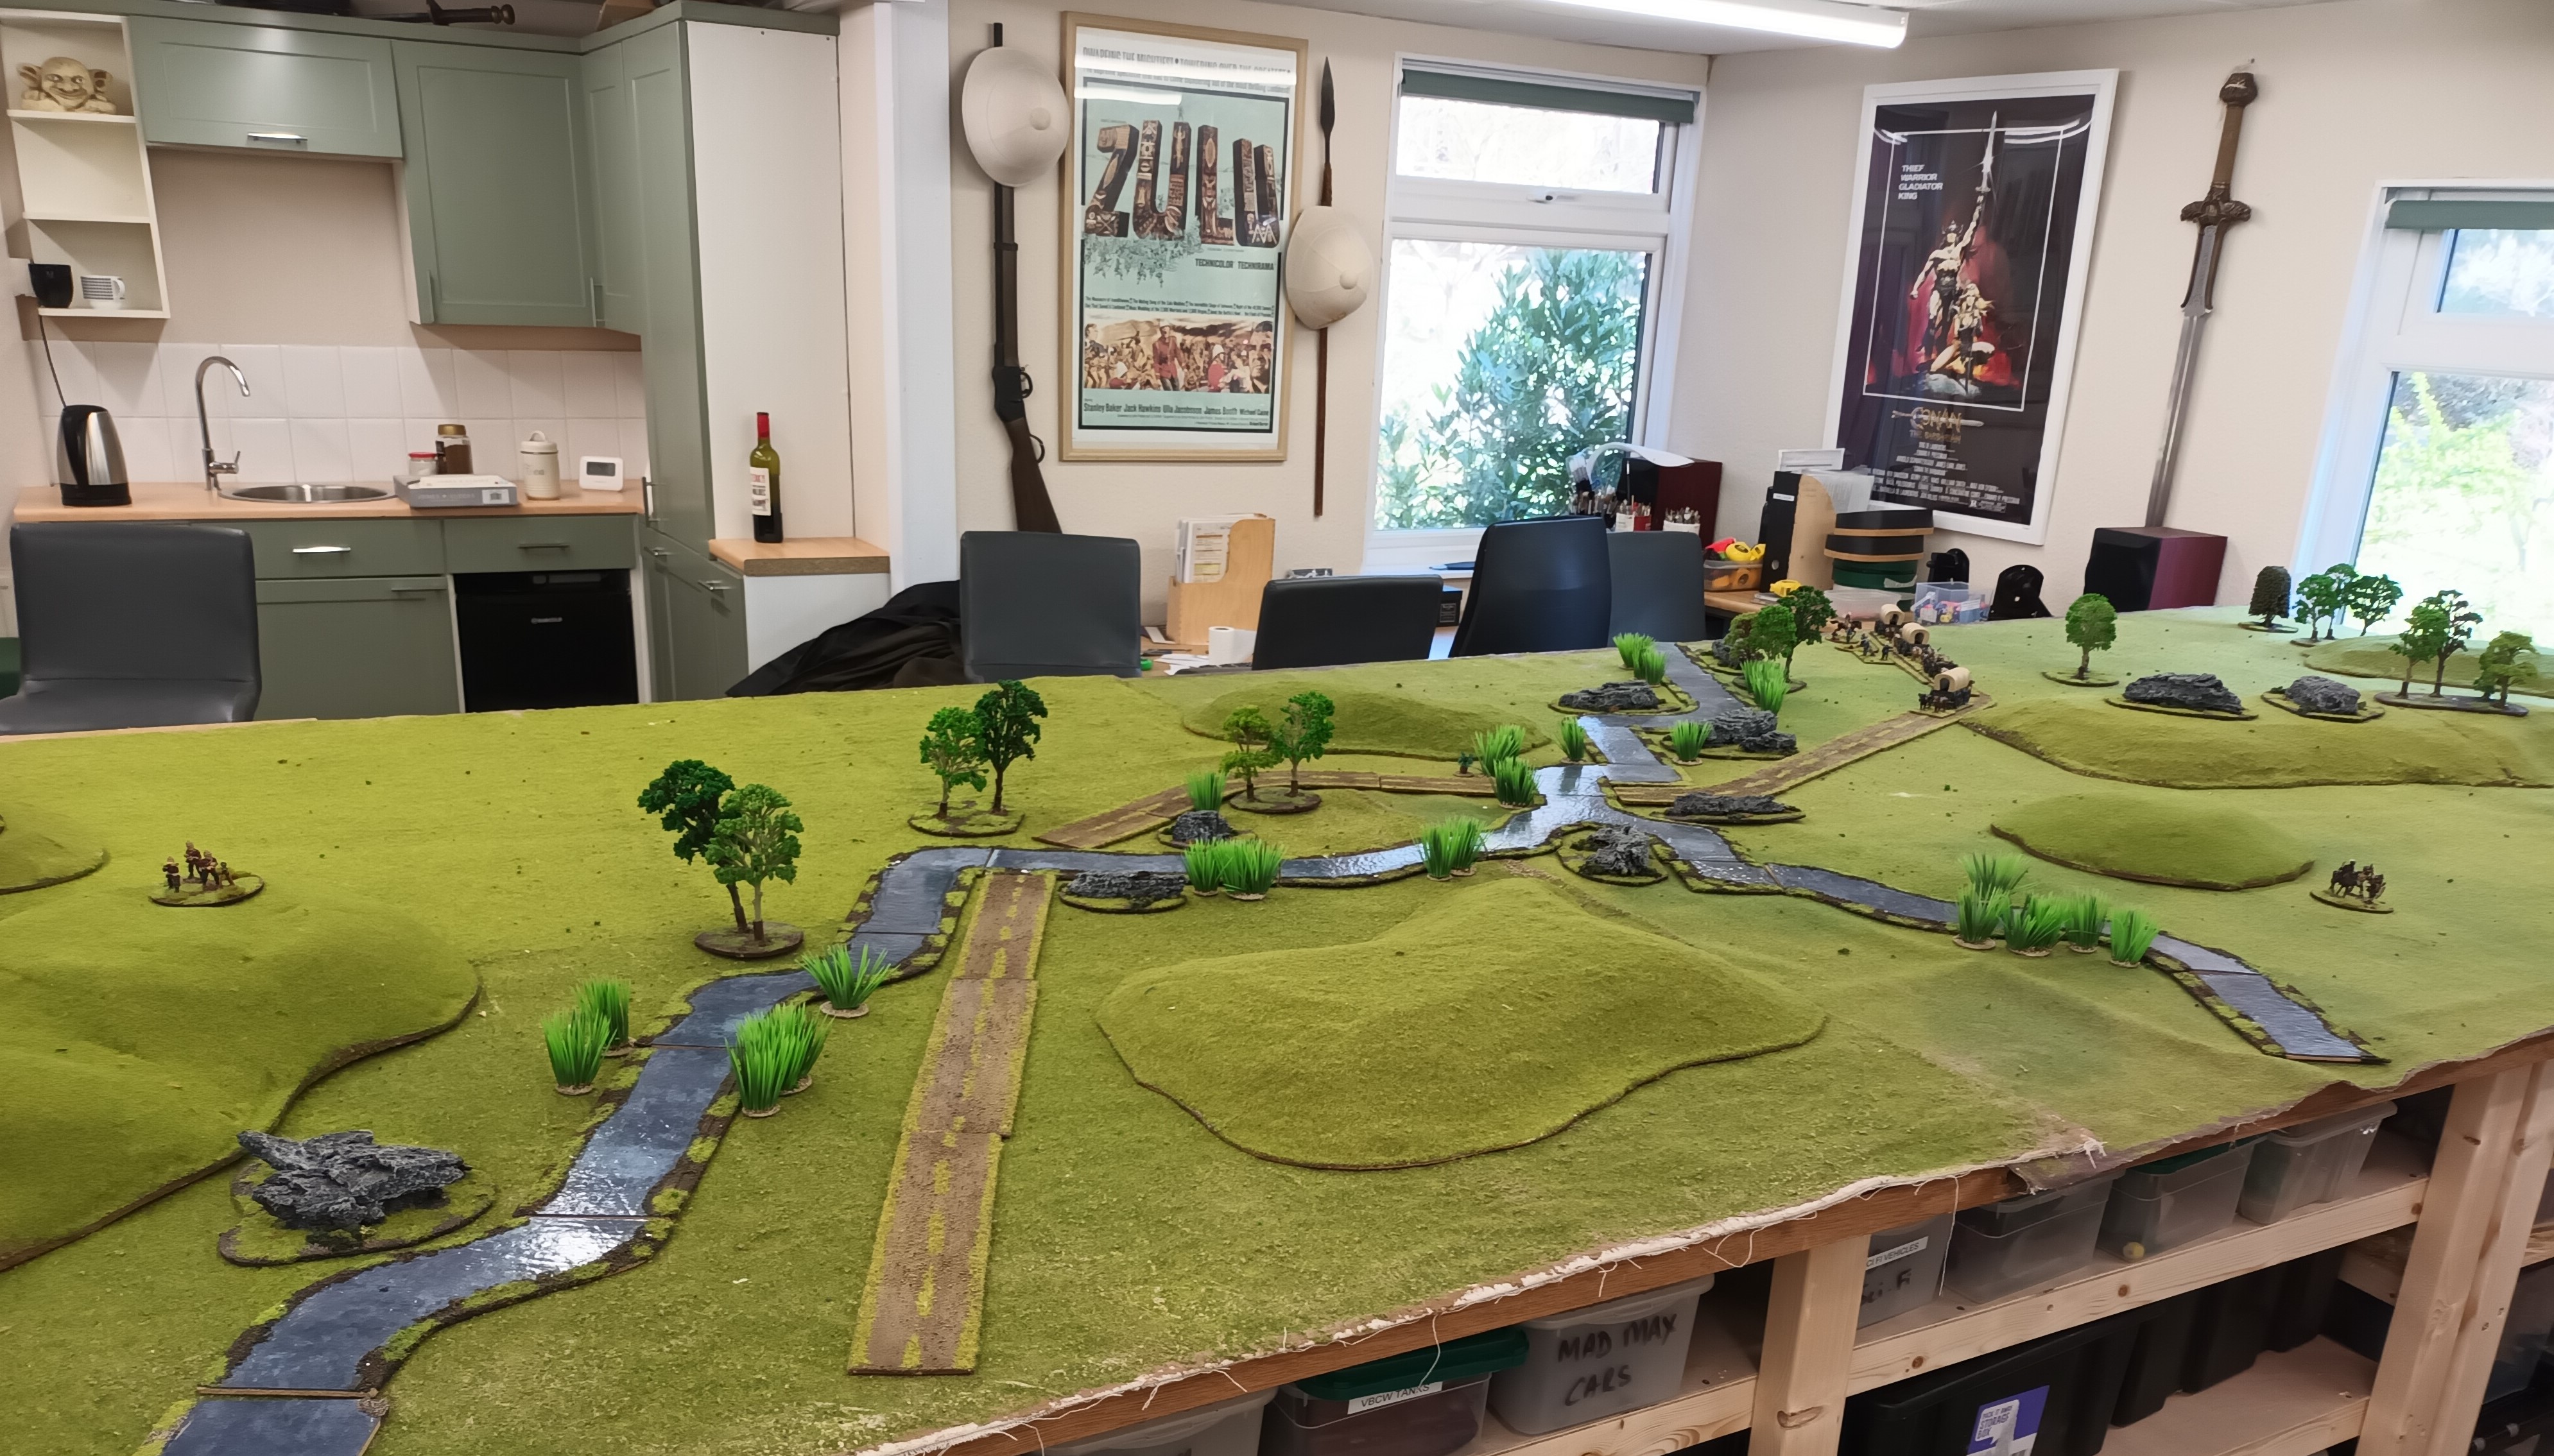
The Crossings of the Easyane (rather appropriately the Zulu poster is in the background)

In the confusion of this sudden retreat his forces became spread out across the veldt and only began to converge when they neared the crossings of the Easyane Rive.  The British forces comprised of

Infantry Force 1 - Commanded by Captain James Pringle (CR 9)

2 x Companies of British Infantry (standard BP units)

Infantry Force 2 - Commanded by Captain Harry Styles (CR9)

2 x Companies of British Infantry (standard BP units)

Cavalry Force 1 - Commanded by Major Timothy Nesbitt (CR9)

1 x Lancer Unit (standard BP)

1 x Sikhali Horse (sml unit)

1 x Natal Police (sml unit)

1 x RHA Horse Battety

Cavalry Force 2 commanded by Pieter van Engels (CR9)

1 x Boer Infantry Unit (mounted std unit)

1 x Mounted Infantry Unit (small unit)

1 x RHA horse Battery

Naval Forces Defending Fords commanded by Lieutenant Gerald Trump (CR9)

1 x Royal Marine unit (sml)

1 x Royal Naval Sailors (sml)

1 x Gatling Gun

Wagon Train commanded by Captain John Black (Cr8)

4 x Ox drawn wagons

1 x Rocket Battery (in wagons but can be deployed)


Notes on Wagons - Each wagon has a stamina of 3 and morale save of 4+ - when shaken wagon is destroyed. Wagons may move once per turn at 6" or the wagon train commander can roll for orders - a failure means wagons don't move. A blunder means one wagon has lost a wheel and is lost from game. Wagons may only move on tracks. At ford a wagon gets stuck on a 6 (d6 roll) - this causes a disorder and wagon must reroll again next turn 

The British Force has no break but any unit driven off the table is lost permanently.

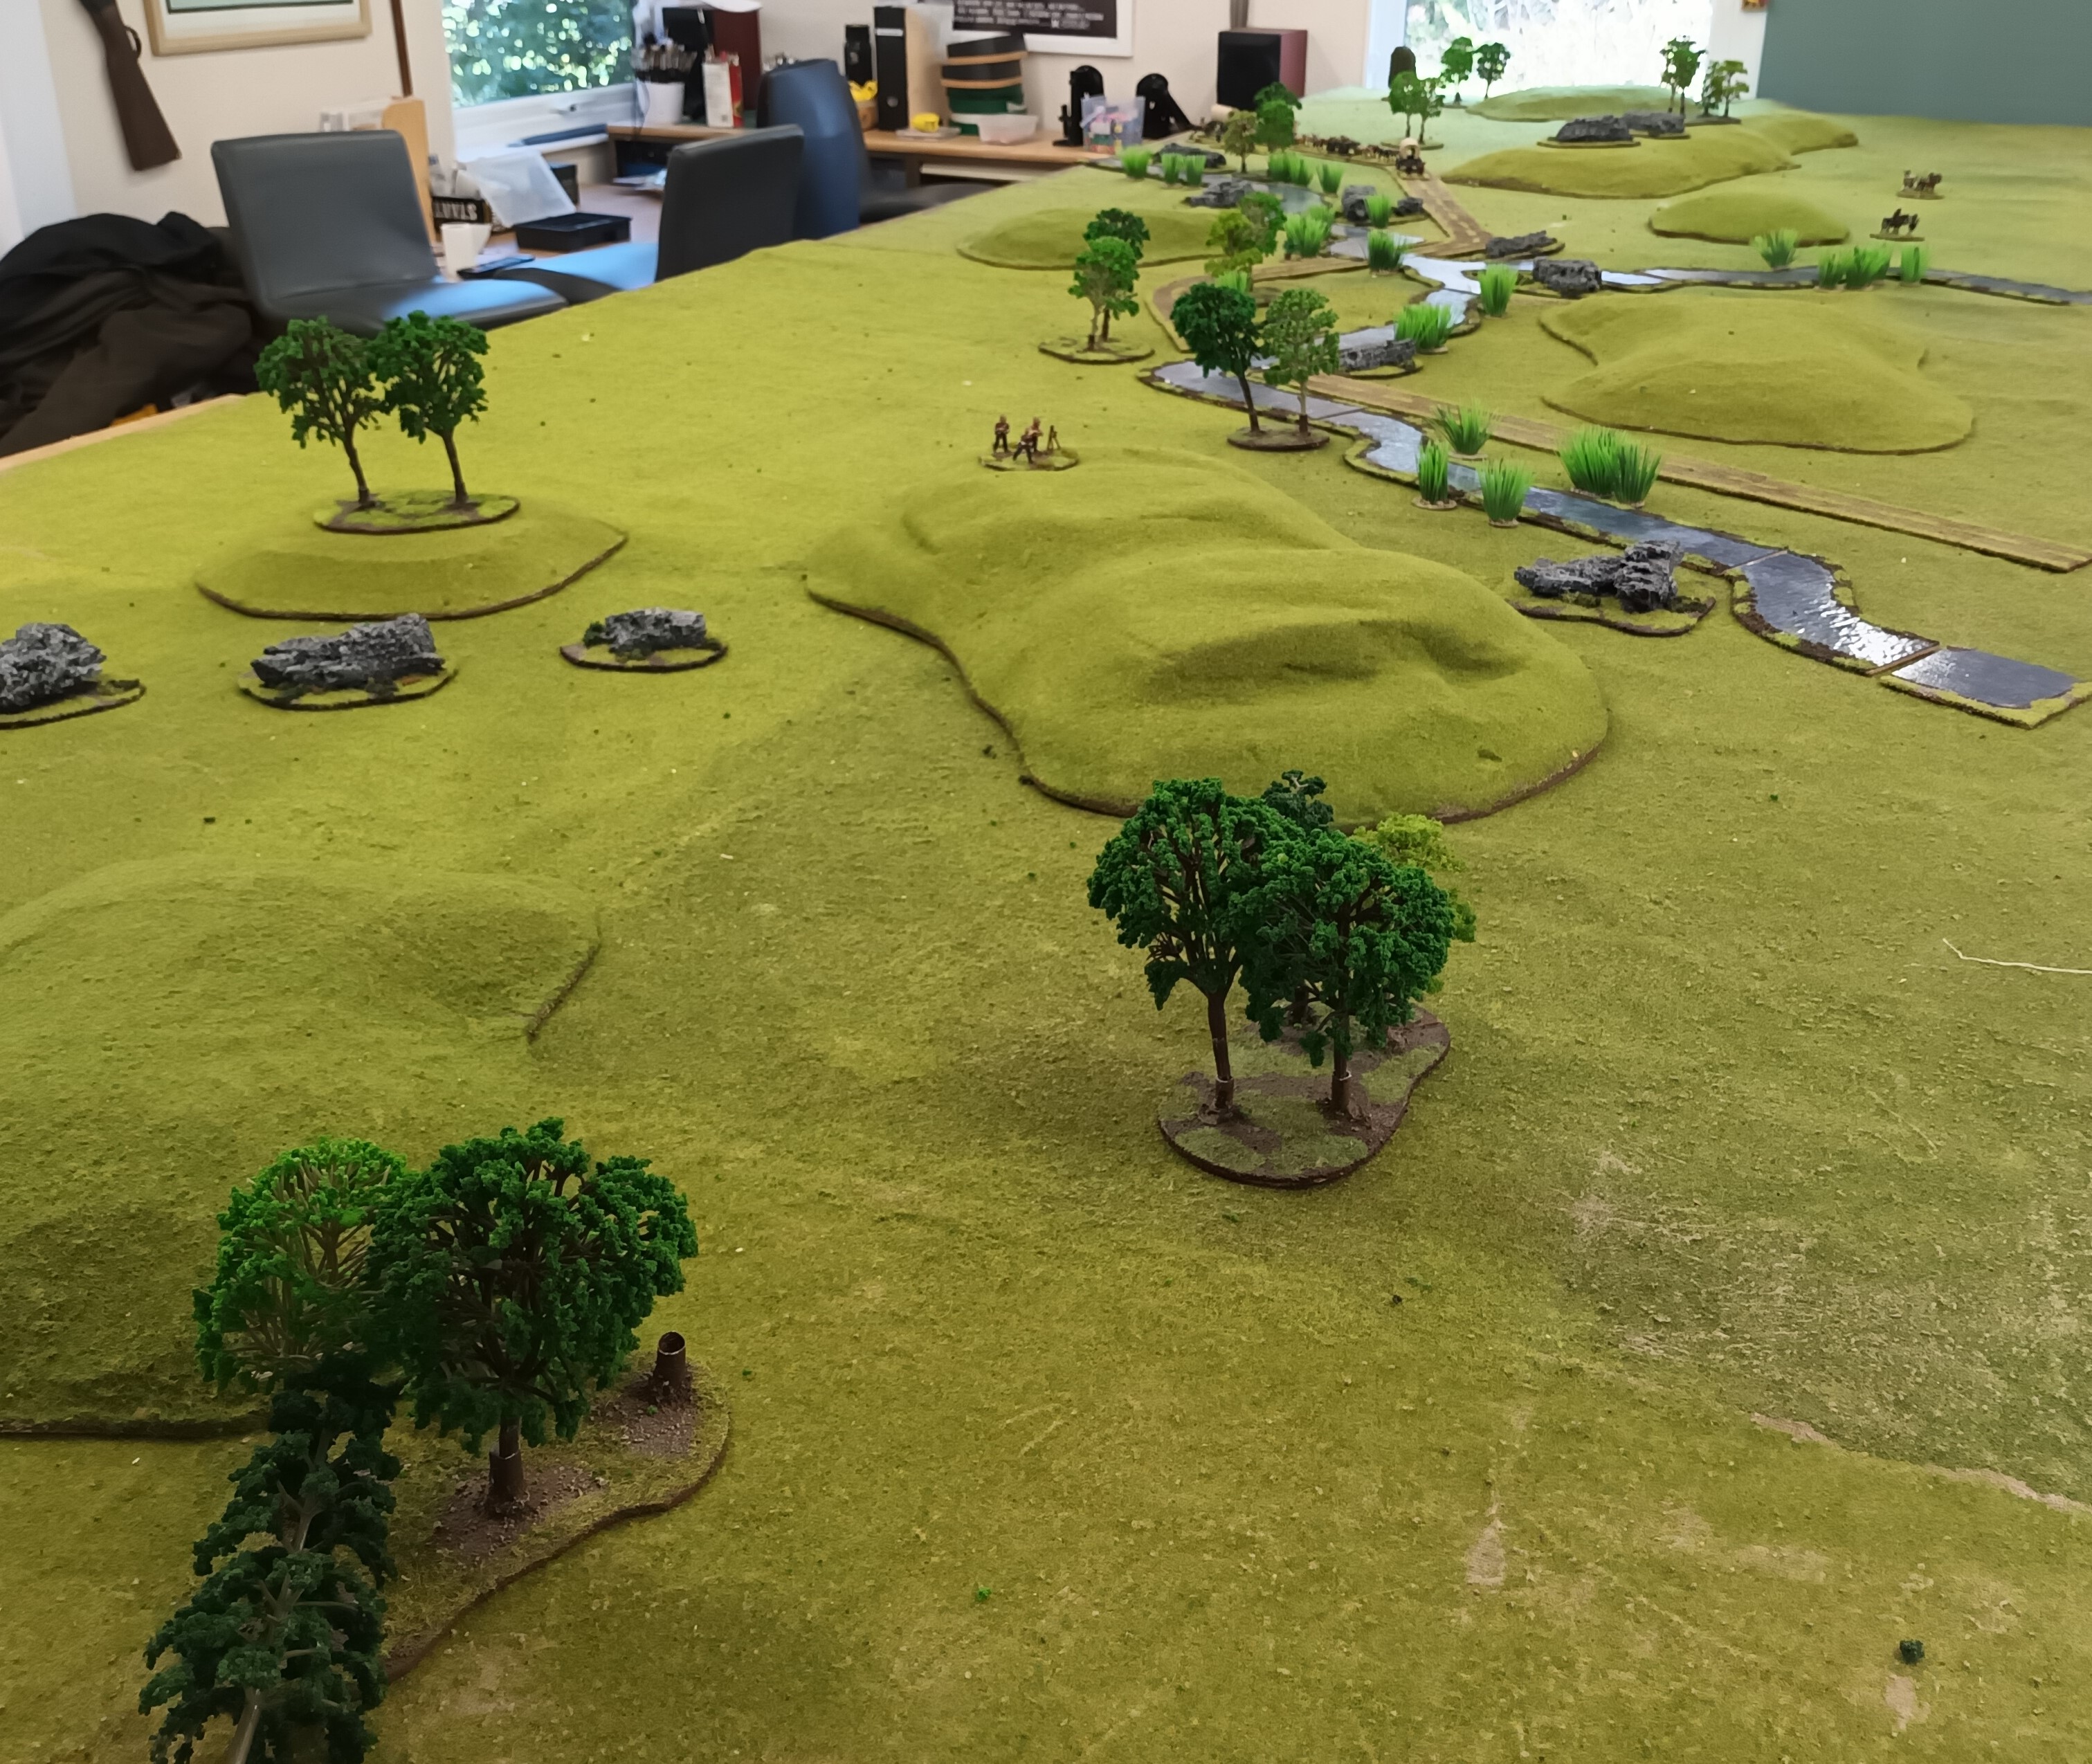
Looking across the 17ft table - Zulus enter from the right

Unbeknownst to Colonel Smythe is the fact that a Zulus impi has already crossed the Easyane river and has set a classic ambush on the retreating allied forces. Commanded by Prince Inyasi (ficticious cousin to the Zulu King) the Zulus want to inflict a bloody nose on the invaders and most importantly capture/destroy their supplies.

The Zulu Forces are quite simple

6 War parties each consisting of five warbands - the sum total of 30 units. These are all regular warriors with the bloodthirsty trait. Each War party has its own commander (CR8). Prince Inyasi has a Command Rating of 8.

Objectives of the Game

The British win if they rout the Zulu army (achieving 16 units shaken or routed at any time), the Zulus win if they destroy all the wagons.


The game started with the Naval forces deployed in three redoubts at the fords and the Wagon train entering at the road. Attached to the wagon train is a rocket battery.


At the end of turn one we had determined by dier rolls that the wagon would be screened by the Boers and Mounted Infantry. The Centre of the British would be the Line cavalry and Sikhali horse with unfortunately the Infantry deployed on the right wing.


The Zulus entered from turn 2. In the picture below the cavalry are beginning to screen the wagon train by taking the high ground from approaching Zulus.


The Zulu right wing advanced rapidly quickly driving off the Boer cavalry. A few placed rifle shots dropped a few of the native chaps.


The Zulus surged forward forcing the rest of the cavalry to fall back.


By now the Zulu centre had surged forward and quickly overran the jammed gatling gun (don't they always !!). The war party then turned its attention to the plucky sailors of the naval contingent.

More Zulus were dropped but the second redoubt was quickly despatched.


Across the field the Zulus charged forward. The Rightwing washing their spears in the hapless advanced heliograph party. (This was added as set dressing and served no role in the game - but it made the Zulu commanders happy)


By now the British line were beginning to deploy in the centre ready to receive the Zulu onslaught


Across the field the mounted skirmish troops had been driven back and were now launching their first attack on the wagon train - five hits inflicted on the poor oxen. Five saves !! The Zulus had failed even wound the first wagon. Many cheers across the allied side of the table.


Despite leaving the wagons to defend for themselves the mounted troops were still playing their cat and mouse game with the advancing Zulus. Each turn more Zulus were dropped and key units disordered.


Over at the ford all redoubts had been takern but the Zulus were now taking some bloody punishment from the British redcoats


At this point the Zulu left wing was positioned top charge the thin red line.


More Zulus poured forward (The table held about 60% of my Zulu units)


The British line in the distance looked incredibly fragile to the Zulu commander


Even more Zulus entered the fray at the ford


Back at the Wagon train the first cart had been destroyed but the Zulus had to deal with a new threat. Both the artillery and rocket batteries were opening fire. Rockets in black powder have a nasty habit of either misfiring or hitting friendlies - in this game the Rocket battery did a stirling job - hitting Zulus every round it fired. Not only did this cause tremendous disruption but also serious casualties. 


The second wagon was destroyed leaving the Zulus with two to go and having only lost about six units they looked good for a victory.


With their spears held aloft they charged across the table...


Crashing into the British troops - this was bloody, messy and brutal. Despite taking serious casualties the line held and more Zulus were consigned to the Allied victory pool.


A fierce melee erupted across the hill in the centre - this was tense. Casualties mounted on both sides


As the firefights and melees concluded a tally was made. The Zulus had two wagons to destroy but their break point had been reached. A victory for the British but only just !!

A cracking game and one enjoyed by all - a big thank you to Glen, Vince, Mark, Sven and Tony for participating.


More soon