Napoleonic, WSS & ECW wargaming, with a load of old Hooptedoodle on this & that


Showing posts with label Solo Wargaming. Show all posts

Monday, 11 November 2024

Sieges: Testing - Episode #3


The 3rd Parallel at work

Righto - got into the bombardment, the Allies started knocking a hole in the curtain wall. I think that in the real WSS the French garrison would have surrendered by now, but in the interests of testing most of the rules I have pushed it on.

Some interesting bits and pieces along the way; since the changes in the artillery rules, the only decent strategy the defenders had against sapping was to use lots of Trench Raids, which is entertaining, and they did pretty well - they were a major nuisance, they killed some sappers, and supporting infantry, and they eliminated one of the Allied guns [they didn't take the thing away, they spiked it].

The Allies found out that their spy (code name Heinrich) was of good quality, so they directed him to have a go at damaging the town's flour store, and he did it so successfully that the garrison commander lost 8 turns of food, and the situation started looking critical. The French Governor took some of the steps available to him to make the rations go further:

(a) he reduced the standard rations, which added 10% to the number of turns in store

(b) he requisitioned extra food from the civilians, which added a further 10%, but also reduced the Local Support rating by 1 [LS is a measure of the citizens' loyalty to the garrison]

(c) he ordered the slaughtering of all the horses in the town (except his own, naturally), which added 3 turns to the food store, but reduced LS by another 1.

There were things he could do beyond these measures, but the LS was now down to -1, which is getting close to open rebellion in the town; it only required another bad Event Card, or a heavy bombardment of mortar shells, and the citizens might just open the gates to the enemy. He already had a situation where one quarter of his available infantry was required to police the townsfolk. So he was running out of food, the enemy were battering his walls, he was in danger of being overthrown by the citizens and the morale score was not great, but we'll get to that.

 
Getting towards the end game - the surviving Allied 24pdrs were moved up on to the glacis, and started knocking a breach in the wall. The pile of stone damage chips indicates that the tally is currently 33 (I think), and it takes 40 hits to bring a wall like that down - the brave French sappers in Team F, watching from above the breach, are unable to do anything beyond maybe building some barricades behind it.

 
You will observe that there are a few fires brewing in the town, that the two remaining French guns are damaged, and thus unable to use the Continuous Fire option (they are marginal on powder by this stage anyway), and the Allied 24pdr on this end of the big battery is out of action, since it started Continuous Fire, and promptly blew it's vent (which is very unpleasant, as you may know). This is one of the downsides of this option. You will also observe that the Local Support level is at -1, on a scale of +3 to -3

 
While all this is going on, the Allies still have plenty of powder to keep the field artillery and the mortars bombarding from the 2nd Parallel. The Allies also have a further 4 battalions behind the lines, off the table, to help out in the event of a storm

 
A couple of aerial views of the heart of the siege, at the time when it became obvious that the French had little choice but to ask for terms (in fact they should probably have asked before this)


The French are down to 9 morale points - a viable breach would drop this by a further 3, to say nothing of any further hits, and another deduction if the Local Support drops further

 
Part of the boneyard  - the French have lost 2 of their big fortress guns and a mortar, the Allies had a 24pdr cannon eliminated in a Trench Raid, and there are 2 groups of Allied sappers out of action


Sunday, 24 September 2023

WSS: Battle of Oberglauheim - set up

 Over the next few days I am going to fight the battle of Oberglauheim. Today and tomorrow the intention is that I should use it as a scenario to work on my beta-test solo version of Corporal John. On Tuesday (if I'm spared) the plan is to engage an actual opponent via the wonders of Zoom. Exciting.

Enthusiasts will observe that this is very similar to Blenheim - not quite, but similar. I mean, you know I have to attempt this. It is specifically not Blenheim, to keep the I-Think-You'll-Find Brigade at arm's length. I have reduced the ground scale to about 2/3 and the numbers of units to 1/4. If it were Blenheim, the big blue section of the terrain would be a bend in the Danube.

Yes, I realise this is a log jam; my understanding is that this was a feature of the actual battle [of Oberglauheim, naturally], and I wish to see what happens. There will be more on this topic shortly.

 
Initial situation, seen from behind the Allied left flank

 
...from behind the Allied right...

 
...from behind the French left...

...and from behind the French right, with a bit of Danube and the village of Blindheim in the foreground


One of my favourite terrain features - please do not disturb the swans

 
Although they are the defending side, the French have a small advantage in numbers; they have also been busy digging some defences around the villages of Blindheim...

 
...and Oberglauheim [note that Anne Hathaway's cottage has been imported into Bavaria for the delight of the British troops]. Marshal Marsin is on the pale horse.
 
 
The French defensive position looks as though they will take some beating, but there are flaws - for a start, they have a big infantry reserve crammed in behind Blindheim - this will be tricky to bring into action

 
Lord Cutts ready with the big British infantry attack on the left flank

 
Here's a rare sighting of some blue-unformed Hessen-Kassel troops, in the Allied centre


Sunday, 23 January 2022

Sieges: Getting Organised (a Bit...)

 For a while I've been intending to take advantage of the strange world of Covid limitations and do some solo work on getting the hang of Vauban's Wars. Siege games are, by definition, very dependant on all sorts of fancy scenery and hardware, and it is always very easy to find assorted reasons why this is not the ideal time to have a go. Well, that's long enough.

I now plan to have a solo bash at a Napoleonic siege game, so I'm scratching around trying to collect all the bits and pieces I need. Some of this is trivial work, to be honest, it's just a question of getting down to it.

Today I have a case in point. The starting set-up for my proposed training game requires the British to have a couple of heavy mortars. Now I have odd bits of artillery around the place, and I have some spare soldiers, so it was a simple matter to put together the required mortar battery from some old Hinton Hunt gunners and a couple of very scruffy Hinchliffe mortars I got as a make-weight in an eBay parcel. Here they are - not beautiful, but absolutely fine - cross them off the to-do list. Ready for duty.


There is a new approach evident here - previously I put a lot of effort into making up smart siege trains for the French and the British in the Peninsula. I now also have pieces for a proposed Spanish train, including some fortress guns, and I'm starting to collect items for WSS sieges. My new approach is that I shall paint the ordnance pieces in nondescript colours wherever possible, and make up crews of various nations who can "borrow" spare kit as needed. This is the first such - the scabrous mortars here are simply BluTacked onto the bases, so they can be loaned out to another army, in a different period if required, or they can even be replaced by more beautiful examples if the dreaded Creeping Elegance ever catches up with my siege projects.

Anyway, enough said. I retouched and based these chaps (ex Eric Knowles gunners, by the way) while listening to the Crystal Palace vs Liverpool game on the radio. Easy peasy. The British now have siege cannons, mortars (both heavy and Coehorn), various howitzers and sappers. I even have some new, specially sized and based units of foot, rescued from spares boxes for duty on sieges. And still the wonder grew.

I'll put some notes here on the starting set-up for my Vauban's Wars solo game in a day or two.

Monday, 24 September 2018

Senior Debutante - Battle of Santiago Martir 1809

Marshal Victor and his young men decide what to do first
At the end of last week and over the weekend we had a family visitor staying with us; my mother's half-sister, my aunt, in fact, who is 83 and lives in far-off Somerset.

To put this into context, she is a very tough egg indeed. She travels a lot, drives over to France to visit her brother a couple of times a year, and has destroyed all her former hill-walking colleagues, who have all given up trying to keep pace with her. She was on her way home from a tour of the Highlands - particularly castles and the battlefield at Culloden - and took the opportunity to visit us, and thus to visit my mother, who is in a local care home.

Recently, I sent my aunt some pictures of my miniature Battle of Marston Moor, and she was so fascinated that she asked if it would be possible to invite someone in while she was visiting, to put on another wargame, so she could witness it at first hand. Hmmm. I thought long and hard about this, being pretty certain that there would be a very short queue indeed of people volunteering to come out here simply to demonstrate a wargame for my elderly aunt. I decided the best thing to do would be to stage what would in effect be a collaborative solo game - she and I would play out a game together to see what happened. Saturday morning was pencilled in for the occasion.

I dreamed up a fictitious but credible action from Central Spain in Spring 1809, and we used a cut-down version of Commands & Colors:Napoleonics which I have used successfully in the past for very large games. Our game was sort of medium-sized. Everything went well - we had about half an hour's discussion of the situation and the rules, then the game played to a conclusion in just over 90 minutes. The French won easily, which is as it should be, and my aunt thinks that wargames are fantastic. Does anyone know of a more unlikely debutante at a wargame?

The battle takes place somewhere between Madrid and Cuenca. The initial Spanish defensive set-up was decided by a couple of dice rolls, to select from a variety of possibilities. There were a few surprising choices made as a result - choosing to set up in front of a river seemed questionable, but it gave us a nice vigorous game. The Spanish troops included a proportion of Milicias Provinciales, who were kept to the rear, and (because they are colourful and excellent fun on the battlefield, and they don't get out much) a force of guerrilleros led by the dodgy-looking Don Pedro de Gentusa.

The narrative, very briefly, is that General Cuesta has sent forward an advance guard under the Conde de Belvedere, to deny the French the crossing over the Rio Mezquino at Santiago Martir. There are a good bridge and a couple of fords; wagons and artillery cannot use the fords, so the French will save a lot of time if they can capture the bridge. Bonus Victory Points (VPs) are available to the French for possession of any part of the town, the bridge and for each ford. The French will not gain VPs for the elimination of any of the guerrillero units. 9 points wins the day.

The French are commanded by Marshal Victor, Duc de Belluno (or "General Perrin" as he is known here), and he has brought forward his own advance guard in attempt to secure the river crossing. Imagine his disappointment when he arrives and learns that Belvedere is already there...

Victor has the infantry divisions of Leval (Germans) and Sebastiani (French) from IV Corps, and some cavalry from the Reserve under La Tour-Mauburg. Belvedere has the divisions of Del Parque and Portago and a brigade of cavalry under Ramos de Silva, plus Gentusa's fragile irregulars.

Victor has 15000 infantry, 1000 cavalry and 16 guns; Belvedere has 10400 infantry, 1000 cavalry and 12 guns, plus about 1600 irregulars, whom he sticks behind his left flank, to help out if everything else collapses...

General view at the start, from behind French right flank. Note that Belvedere (far side of
the table) defended his right flank strongly (the river behind that right flank is unfordable!)
to keep the French away from the little town, and was persuaded by the initial dice rolls to place
 his left flank on the wrong side of the river (he explained that the idea was that he could retire
them over the fords if necessary...). The fords can be spotted as a rather lighter blue in the river,
beyond the little wood.
Same moment, this time from behind the Spanish right. The troops behind the ridge in the
foreground are the Provincial Militia regiments of Cordoba and Granada, who were kept pretty
much out of sight.
Looking along the Spanish line. The division commanders (just identifiable by the white
edging to the bases) were both wounded during the day. The river this side (downstream)
of the bridge is unfordable, so the troops on this flank are in an uncomfortable situation.
 
Along the French line, from their left. The infantry on this side are Sebastiani's division,
Leval's Germans at the far end.
The Spanish centre - grenadiers in the town. The Walloon Guards and some of the best
of the line infantry on the far side of the road, in front of the fords. Victor decided that
a direct attack on the town would be costly...
...so he commenced a demonstration against the (stronger) Spanish right flank, to
discourage Belvedere from shifting any troops to support his left...
...where a major fire-fight commenced, which resulted in a big panic in the Spanish
army. The Walloon Guards were eliminated very quickly, General Del Parque was
wounded and captured, and the defenders on the Spanish left melted away.
At this point, the French only had to march forward; taking possession of the two fords would
be enough to get up to 9 VPs and win the day
Cometh the hour - nothing left on this flank but to send forward some of the guerrilleros,
to keep the French off the fords while reinforcements came from the town. They surprised
Leval's Confederation troops with the accuracy and weight of their musketry, but they didn't
last long...
...and Leval himself took one ford with the 2nd battalion of the 2nd Nassau. Just 1 VP
needed - get more infantry on the second ford (where are the light infantry when you need
them?). At this point Don Pedro himself brought up another unit of irregulars, but the game
ended suddenly...
...and it came in an unexpected way. The Lanceros de Carmona advanced to help delay the
French advance, but they took fire and, though they lost no men, they were forced to fall back.
On the French turn, the lancers took more fire, this time from the converged voltigeurs of Chassé's brigade
in the wood; again, they suffered no hits, but they did receive two "retreat flag" results. Without
support, and with no Leader present, they were obliged to retreat for both the flag rolls. Spanish
regulars have to retreat 2 hexes for each flag, and 1 hex movement forced the lanceros back into
the corner of the table - they couldn't cross the river at this point, so they had to take 3 loss counters
 in lieu of the extra retreat. The unit is only 3 "bases" strong, so 3 losses eliminated it. That was the 9th
VP - game over.
Here's a general view of the vanished Spanish left flank. Surmising beyond the technical end
of the game, the French now had the fords, and were able to cross the river, which would make
things very sticky indeed for the rest of the Spanish army. The boys in the town might make a
run for it over the bridge, or might fight on. Or, of course, they might surrender...
Here's the end of the game from another angle. The Spanish right flank, out of the picture to
 the left of the town, would now be cut off, and would mostly become prisoners, I think.
This photo gives us a rare glimpse of the Conde de Belvedere, with the yellow base-edging,
near the bridge, next to the beaker of red loss counters. We agreed that the Conde would have
a very fast horse (certainly it had been resting throughout the action), and he would be able to
go to report in person to Cuesta on what had happened to the advance guard. 


Monday, 22 May 2017

Another Solo Campaign? - Looking at Boardgames...

GMT's "Wellington"
In the last few years I have played out a couple of solo campaigns - one set in the Peninsular War, one in an unknown part of Lancashire and Cumbria during the ECW. I enjoyed them both - I mean really enjoyed them - there is nothing like a campaign to throw up interesting, assymetric miniatures battles, or hopeless defences, or tricky withdrawals, or games of a size and a format that normally I would not consider - might not even think of. Also, of course, as a solo player I need not worry about the one-sided nature of many of the resulting actions.

I documented these campaigns quite thoroughly, and still get a lot of fun and interest out of revisiting the narratives and the photos.

The mechanisms for supply and map-moving are always tricky - and then there's intelligence - despite my best endeavours, I didn't get either of these campaigns quite right - too much admin overhead, and the map systems forced the action into the same areas too frequently. For the ECW I used a map based on a customised set of The Perfect Captain's famous Battlefinder cards - it worked OK, but only just OK. For the Peninsula I used a map derived from Don Alexander's monumental (and terrifying) boardgame, War to the Death.

I have been thinking about a return to the Peninsula, later this year. I have been reading about the use of proprietary boardgames to provide the campaign framework - an obvious enough solution. One big advantage is that, apart from handling the logistics, the boardgame has its own inbuilt battle mechanisms, which you can use as defaults, so you can place whichever bits of the campaign you wish on the tabletop for the toys to fight out.

A number of sources were enthusiastic about the Pacific Rim game, Wellington's War, to manage a Peninsular campaign. I have never seen this game - I've read reviews, and seen pictures, and I was once quite excited about it, but there was a strange period of a few years when it was always just about to be published, during which I lost interest. It is very expensive, and I am unlikely to rush to buy such a thing unless I am convinced that it is worth the cost. I mean worth it to me (and I can be very difficult, I admit it).

It did get me thinking about two games which I own already, though I have not attempted to play either of them seriously. Firstly, I have the aforementioned 
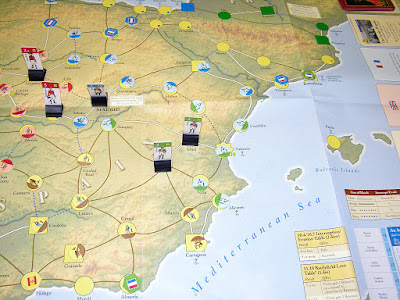
War to the Death, which is so fantastically complex that I shall just reject it out of hand as a campaign driver. However, I also have GMT's Wellington, which is a smaller brother of their Napoleonic Wars and uses many of the same mechanics. In fact I also have the Napoleonic Wars game - and I haven't played that either (this is getting embarrassing...). The NW game has a replacement, de-luxe folding board, which is a major enhancement. At the time I bought Wellington, that was due to get an upgraded board as well - I don't care for the flimsy paper jobs, especially if the game is going to lie around for some weeks while I fight a campaign. However, GMT decided not to go ahead with that, for some reason, and the game has sat in its box at the back of my big walk-in cupboard for a long time, still unpunched, still waiting for the posh map which will never come.


I fetched it out at the weekend, and have been re-reading the rules in odd moments for a couple of days. It does seem a bit complicated, but the kit includes a Play Book, which walks through some detailed game-play examples, and that looks pretty good. Time permitting, I hope to set up a demo game and walk through the Play Book examples, to see how it goes. Customer reviews I've seen sometimes make reference to the game's being rather hectically interactive, which suggests it might be a dead duck for solo play. I don't normally do hectic anyway.

So what? Well, I just wondered if anyone had experience of the Wellington game (it doesn't have hexes, by the way...) and/or had any views about its suitability as the driver for a campaign. I'm not committed to using it, but it is lying in the cupboard...

Or should I splash out on Wellington's War? - or do you have good experience with some other boardgame for this purpose? All thoughts and suggestions welcome!

Friday, 2 September 2016

Battle of Montgomery - 18th Sept 1644 - Another Really Bad Day for Lord John

Lord John, just checking that those chaps over by the river are the Other
Lot - his groom is saying nothing...
Well, since the hoped-for guest general is still missing, presumed to be on vacation, Max No-Mates decided to go it alone, and the battle has duly been fought this evening, to the aforementioned hybrid C&C-cum-allsorts rules.

The game lasted about one and a half hours, and I have a sad bit of news for all my Royalist readers - Lord John Byron blew it once again. The real battle swung in the balance for a little while, before the King's men collapsed; my version of it went the same way, but it was never very close...

I started the action at the point where the Parliamentarians have realised that they are outnumbered, and therefore in a bit of trouble, so they decide they must sit tight, while Lord Byron launches his men into a glorious attack, keeping a little reserve back to watch over the siegeworks at Montgomery Castle (and taking personal command of this reserve, naturally).

The activation rules allow spare activation counters to be hoarded (to a maximum of 5), and Byron's best bet would have been to advance slowly and steadily, keep his forces organised and the supports close at hand, and save up a little cache of extra counters to help out in moments of stress, later. He didn't get very good activation dice, that is for sure, but a slower advance would have been a sound idea - the Parliamentarians were not in a position to do much beyond standing and waiting. 5 Victory Points was all that were needed, and the Royalists had scope for gaining an extra 2 if they captured the Salt Bridge, the only Roundhead retreat across the River Camlad (or Kemlett, as John Speed's map says).

The Royalist attack gets moving, concentrating (historically) on the better ground on their right.

Meldrum does a bit of shuffling, to get his defence organised.

General view of the start of the attack - the rough ground is in the Y of the roads, far left.

Meldrum is ready, and salting away spare activation counters for later use.

So they stand and wait...

With the counter cache accumulating.

And the Royalists get nearer...

...and nearer...[really milking this]...

...and by the time they make contact Byron's second line is starting to get out of touch.

Of course, a cavalry fight broke out on the flank.

At last, Meldrum's foot got off what had to be a decisive musket volley - dreadful!
- they hit nothing at all in their big moment! - this was a high point for
the Royalists - things really looked quite promising.

But when the troops got into melee combat, the Parlies did very well indeed.

The cavalry battle was nasty, but Wm Fairfax with the Parliamentarian
horse gradually got the best of it, and also forced Michael Ernle's RoF into
Stand of Pikes (hedgehog, whatever).

Lord John suddenly has a vision.

And now we have it, as the combined cavalry of Myddleton's Brigade and the
Derbyshire Horse swept into Robert Broughton's Foot, coming up in support
- the Reaction Test required Broughton's lot [Class 3] to roll a 3 to get
themselves into Stand of Pikes, but they failed, leaving them unformed and
pretty much helpless. They took heavy losses and were forced to retreat 4 hexes,
which effectively put them out of action for the rest of the day. 

Now Myddleton's horse crashed on into Henry Warren's Foot, which was
also wrecked, Warren himself being captured
 

Suddenly very short of troops, Byron sent up the remainder of his Horse, but
the day was lost. Michael Ernle's regiment, still in Stand of Pikes, was destroyed
by musketry, and surrendered. The 5 VPs were accomplished. 

Situation at the end, seen from behind the Parliamentarian position.

Sir John Meldrum - job done - no celebration and certainly no hat-waving.
He has to get back to running the Siege of Liverpool in the morning.
Overall losses - Meldrum's Parliamentarian Army numbered about 1500 horse and 1500 foot; they lost about 400 horse, 200 foot. Byron's Royalist Army had about 1500 horse and 3000 foot; they lost about 700 horse, 2200 foot, and Col Henry Warren was wounded and taken prisoner. OOBs can be found in the earlier "preamble" post, here.

The real battle ended with the broken Royalist force being pursued right off the field, to the south, which is where they suffered most of their loss (500 killed and 1500 prisoners, I believe, overwhelmingly from the Foot). This evening's version did not continue to play out the pursuit, but I have a simple dice system to simulate the situation at the end of the day. This reflects the state of the respective armies - in particular the balance of effective cavalry remaining. In this action, the Parliament army held the field, with moderate initial losses and the troops still fairly fresh, while the Royalist cavalry was not in a desperate state, but was battered. The system is crude but works OK - the winning side roll 1D6 for each base lost (red "loss" counter - I don't remove actual bases) - any base which rolls 4, 5 or 6 can return to the ranks in the morning - they were just lost somewhere in the general excitement; the bases on the losing side are only rescued by a 6 - those that avoided death and capture are heading homewards, thank you very much.

In my game, poor old Byron should have advanced more carefully, keeping his force better co-ordinated, storing up extra activation counters wherever possible and using his greater numbers of foot to gain superiority in a focused area. He would also have done well to keep his shakier units (Class 3 - yellow markers) out of the front line - this was probably compromised, both in the game and in the real battle, by the fact that the senior officers in the Foot (notably Ernle) were from the Shrewsbury garrison, so the most jaundiced troops were to the fore. There were two particular occasions where lack of enthusiasm caused problems: part of Tom Tyldesley's horse were forced to take the necessary double retreat as the result of a reverse in the cavalry skirmish, which removed them from the action, and - especially -  Broughton's foot failed the reaction test needed to redeploy when attacked by Myddleton's horse, were badly beaten and ran a long way from the action, leaving Myddleton's men to continue to roll up the Royalist left.

In an action of this size there are few second chances - when the day starts to swing one way, lack of fresh reserves and lack of opportunity to withdraw damaged units are decisive - and quickly. The real Battle of Montgomery lasted about an hour - my version must have been fairly similar. Without the Homeric narrative of the rally of the Cheshire Foot and the Yorkshire Horse, the story is simple enough - the King's troops attacked, it did not go well for them and they retreated from the field, losing a great many in killed and captured on the retreat.