Showing posts with label Battle Report. Show all posts

Wednesday, June 19, 2013

Napoleonic AAR - Black Powder Blast

Present! Fire!
Hello again to the followers of the Analogue Hobbies Blog!  I was fortunate to host Curt in my neck of the Canadian Prairies last week.  In addition to fun food and wine we were able to throw down some really great gaming.   For old times' sake we had a game of Epic 40k during the Fawcett Avenue Conscripts' regular get-together.  Then on Saturday night Curt was kind enough to put his stunning 28mm French Napoleonics on to the table to challenge my stubborn, charming and poorly-led Austrians and run a game of Black Powder.

Austrian line before battle is joined
French commanders Byron and Bill get instructions from Curt and scheme to overload the Austrian flank
Attack columns anyone?
We did not busy ourselves with undue application of background.  It was the 1809 campaign.  A French force was looking to open the way forward by knocking an Austrian blocking force out of the way.  The road to Eggmuhl? Teugen-Hausen? Aspern-Essling? Raab? Wagram? Why worry about it? Sometimes it is fun to just throw down and play, even in a period as "serious" as Napoleonics.  The French would have eight turns to break the Austrians. That was that!
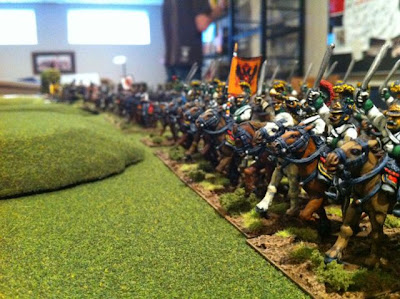
Austrian dragoons at the far left of the Austrian line
The French advance, led by infantry on their left
French officers blunder their way forward...
To determine victory Curt adjusted the victory conditions process somewhat. The army break point would be determined by the removal of various units through battle, as usual, but we applied the Army Morale feature from Sam Mustafa's "Maurice", where the effect of this would be somewhat random.  An excellent mechanic that fit well with the scenario.

We also tilted the initiative mechanic on its head - it would be harder to maneuver near the enemy, not easier, so free initiative moves were limited to units at least 24" away from the enemy, not within 12" of the enemy.

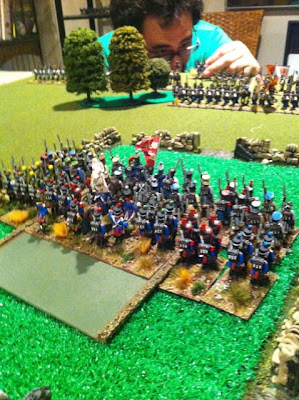
A dire and ominous concentration of French troops assault along the flank of the table

Another view of the French assault.  Behind the lines, Cam contemplates just how small Dallas' chance for success is...
The French force consisted of six battalions of infantry, a regiment of Carbiniers, a regiment of Cuirassiers and an artillery battery.  The Austrians met them with a similar force - six battalions of infantry, a regiment of Cuirassiers and a regiment of Dragoons.  They would face off along the opposing long edges of a 5' x 8' table.

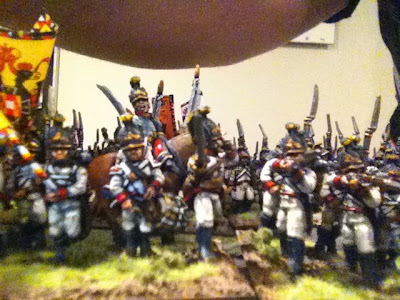
Curt's 28mm French are a sight to see on the table!

The extreme right of the Austrian line - Dallas holds out...

Some Hungarians in Dallas' brigade hold out under heavy French pressure
To further reflect the national attributes of the forces involved, the French troops were rated as "Superbly Drilled", meaning they could always count on some kind of action even in the event of a flubbed command roll by an officer (although they could not charge on their own).  The Austrians had some command penalties to reflect the indecisive nature of their command structure, but their battalions were large and ready to accept some abuse in stoic defence of the Holy Roman Empire!

The assault is joined! Dallas' infantry goes down fighting...

My artillery battery provided limited support to the Austrian line...but made the C-in-C feel better....

Mike's assault in the centre moves ahead
Byron and Bill took command of the French, while the Austrian command, true to the flavour of the period, was a touch top-heavy, with Dallas taking command of an infantry brigade on the right, Mike F. taking command of an infantry brigade in the centre, and visiting Conscript Cam leading the cavalry brigade on the Austrian left, while I played the role of Austrian C-in-C, with direct control of the artillery (and a pressing concern for a lute I may have left in Vienna).

Dallas' right is broken

Dallas' remaining troops under pressure.  The French gun on the left is about to unlimber...
The French, being the squeezers they are, overloaded their infantry toward the Austrian right.  Dallas looked a little forlorn as his thin spread of three infantry battalions faced five french battalions, supported by artillery, racing to crush his men.  His troops held on grimly, with Dallas hot-rolling numerous saving throws to hold back the French.  Ultimately, in a slight departure from Hapsburg character, he sent his right-most battalion directly forward into the advancing French, thinking it was better to go down in flames charging rather than waiting for the inevitable.

Curt's stunning French Carbiniers

When you roll like this, you will never, ever charge....
Dallas' troops held out for a long time (considering what he was facing), but at the end of the day it ended in tears, and over the space of three turns two of his battalions were routed.  His stand was prolonged by the French command's tendency to roll blunders, slowing their advance through some random, awkward movements.  Dallas also hit hard with his musketry, and my desultory artillery fire added a little support.

French Cuirassiers run over the Austrian dragoons
On the left flank we braced for an epic cavalry clash.  In between bouts of Hapsburg vapours, I was careful to remind Cam on multiple occasions that the fate of our whole stand depended on his horsemen.  Cam was thankful for the pressure (he may have referred to it as "pre-blame", I can't exactly recall) but he embraced the role with a suitably Austrian vigour.

Victorious French heavy cavalry threaten the Austrian left flank
And the results were...very Austrian...a prolonged standoff, extended by multiple failed command rolls, multiple failed "Follow Me!" attempts...it was really something!! For several turns, the four regiments stood there nose to nose, waiting for someone - anyone! - to get a damn charge roll off the ground.  In the end I was successful first - but only via a blunder!!!
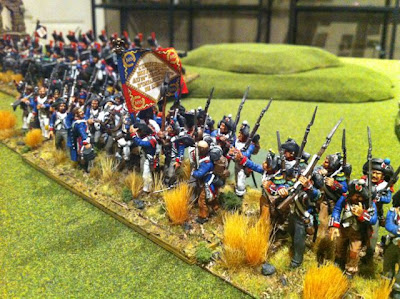
This lone French battalion held the French centre
But once unleashed, it was a hard core battle!  Cam's Austrian heavy cavalry were able to break the French Carbiniers after two rounds of hard fighting.  It did not go so well for the Dragoons, who proved to be little more than a speed bump for Napoleon's Cuirassiers.

Mike rolls out against the Austrian centre
In trouble on the left, and in trouble on the right.  It was pretty dire....but in the centre - wow! Mike's Austrian infantry brigade steadily and methodically shredded the French battalions in front of them.  He did so well he was able to advance forward into the middle of the French line, threatening the flank of the French infantry blocks on the Austrian right, and safe from the dreaded French cavalry on the left.

Mike's three battalions had solid momentum
The Austrian high command was jazzed about the possibilities of this advance, but in true, cautious, conservative fashion, we withdrew.  Remember those army morale rules we mentioned? Well, we rolled high when checking for the demise of each Austrian unit lost to that point, and rolling high is bad.  Our army morale broken, the Austrians ceded the field, leaving the French a little bloodied and a little baffled...

The French centre faces disaster...those Carbiniers at the top of the photo are already beaten....
It was great fun to play Black Powder again, but in the Napoleonic context it is easy to see the numerous irritations - saving throws from artillery, aaarrrrgh so stupid! - which motivated Curt and his crew to develop their own variant for the period.

Mike's successful assault moves to threaten the French main thrust, just visible to the right
Nonetheless, the game looked awesome, the company was great, and it was a real thrill to get my Austrian lads on to the table against Curt's stunning French troops.

Only Austrians would maneuver to this point, and then fall back...
I want to thank Curt again for putting on the game - he had done a presentation at a conference that morning, made it back to my place just in time to get the game set up and then helped us bludgeon our rusty way through the game.  That takes a lot of energy, and it was greatly appreciated!  Thanks very much dude.  I look forward to the next game!

Friday, March 15, 2013

Guest Post from Greg - AAR - 28mm WWI in Greyscale 'Encounter on the Yser' using 'Through the Mud & The Blood'

Wait, is that WWI stuff in greyscale? Yes, yes it is.
Hello again to the folks at the Analogue Hobbies blog. I am happy to document via this guest post a very special game that took place recently in Winnipeg.  Curt had to pop into the River City for business, so we took advantage and he ran a game for us with his 28mm WWI greyscale stuff. 


Those of you who have been following Curt's blog will have seen his incredible work on this project - and it has finally made it through to the game phase! Let me assure you the sense of occasion was palpable!

The Entente's objective - the canal locks
German Uhlan detachment scout things out.
Fawcett Ave Conscript "founding director" Curt was always a master of rolling out new, awesome projects. They were common back on Fawcett Avenue when he lived in Winnipeg. Although he now resides a few hours down the highway, he has not lost his penchant or passion for very unique, very ambitious and very compelling hobby projects that look really f***ing cool. Who else could convince me to paint 40-man 28mm Napoleonic infantry battalions?


German Uhlans charge the Belgian 'armoured' car
The Belgian Minerva bogged down with gun jammed...
The Uhlans close assault the hapless Minerva
Lone survivor of the Uhlans' crazy charge.
I lack the coolness or cultural depth to explain Curt's motivations and inspirations for this undertaking, but the photos you see in this post speak for themselves - and Curt articulated it very well when he first introduced it on this blog - see here. Curt is not one for half-measures with his projects, and he went whole-hog on this one. Troops, terrain, everything. Bottom line is that we got to have an awesome game, one the group will certainly remember for a while.

Most maneuvering early in the game is with blinds - you can see the Entente ones taking position, while sinister Kaiser-loving blinds move up from the opposite table edge at the top of the photo
A view of the blinds from the German side
We played using "Through The Mud And The Blood" rules.  The scenario was set in October 1914, during the closing stages of the early phase of WWI - armies on both sides were  trying to outflank the other, driving towards the sea.  Belgium, desperate to hold the Germans back, began to flood its own countryside in order to slow them down.  The scenario imagined and encounter between the leading elements of both sides but with slightly different goals - the Germans were out to capture a bridge over a Belgian canal so they could try and turn the Allies flank, while the Allied troops were out to blow open a canal gate to accelerate the flooding.  These mutually exclusive objectives would lead to carnage on the table...

German HMG team deployed in a shell crater.
Dallas, Frederick, Dave and Mike F would play the German side.  Kevin H and Byron M joined me on the Allied side. Curt ran the scenario with his customary meticulous attention to detail and well-developed, multi-layered plot.  The card-driven rules system seemed to lend itself well to narrative development as well as engagement in the game.  We would maneuver using blinds at first, which would be revealed either through spotting, or if they decided to shoot or take a similarly unmissable step that would single them out.  Cards determined if reinforcements came, and provided the chance for any revealed characters to add some extra oomph to attempted actions.

French troops occupy the buildings in the village - the flash of colour represents an officer
Another View of the French position with a Belgian HMG in support.
The rules revolved around the idea of "big men" - in this case unit leaders.  They are ranked at a certain level, with higher ranked leaders able to order more troops, or add more "oomph" to attempted actions.  The units themselves had two actions once activated, and could be either firing, moving, doing activities or any combination thereof. 

Some jocks occupy the woods to the front - that would not work out well for them...
The scenario imagined the ground already covered with mud, shell holes from earlier fighting, and a layer of water from the Belgian inundation   So it was SLOW going.  Both sides slogged through the mud, being reinforced as the cards allowed.

Germans move toward the village
Early on the Belgian Minerva "armoured car" made an appearance, as did the remnants of a German Uhlan unit.  The machine gun on the Minerva jammed and so the German cavalry, seeing an opportunity, managed to charge the armoured car, succeeding in knocking it out! A quintessential early WWI encounter.  A French HMG deployed nearby ensured the Uhlans would not live to brag about it, however.

Germans take cover in a church grave yard
Another view of the German advance - Highlanders in the distance
Eventually it became clear that we on the Allied side would not be able to make it to our objective - too much mud, too many Germans!  I managed to set a French squad up in the ruins of the village while the Germans advanced along both sides of the canal.  Byron set a squad of hard hitting Highlanders in a forward defensive position in a shattered wood, while Kevin drove his Belgian infantry and dog-led HMGs toward the locks.

Germans under fire in the ruins of a church - the "bullet impact" markers represent shock on the unit
Both sides ultimately contacted (I was needling/nagging everyone to drop the blinds and "reveal" themselves) and soon the battle was joined. My French troops and Byron's jocks were driven back by the weight of German fire, but eventually settled into defensive positions that the Germans could not unlock.  Kevin led the Belgians in a brave and futile advance/charge up the village side of the canal, but the weight of German fire was too much.

Kevin H leads the Belgians in a brave charge...
The charge goes pear-shaped, and the Belgians are driven back
In the end the battle was a draw.  The Germans got nowhere near the bridge, and we, after the failed Belgian charge, were nowhere near the canal gates.  Both sides stuck in the slow going, confused battle, fighting to a draw with serious losses on both sides...sounds like WWI to me.

Highlanders have fallen back to a better defensive position, supported by the French HMG
These photos really don't do Curt's WWI project justice.  I encourage you to check out his blog for more pictures of the various stuff he has painted (examples here and here).  His figures and models look unreal when you see them up close.  Just contemplating all of that relativity for the different gradients etc. makes my head hurt, but Curt has pulled it off.  It's really something, a totally cool and unique game! It was just great to have the chance to play with these awesome figures and terrain.  And as I mentioned earlier, these photos just don't reflect how frigging cool this stuff is up close and live on the table.

French troops, supported by Belgian HMG team
Thanks again to Curt for running such a magnificent game, and to the large number of Fawcett gamers who came out to play.  I hope Curt can visit Winnipeg again soon!  Thanks also to Dave V for helping with the photos for this blog post.  All the best to the Analogue Hobbies Painting challengers as the finish line nears - except for the people chasing me for 10th place...

Monday, October 8, 2012

Wargaming Against the Weather: Outdoor Naval Wargaming

'Sorry Curt, I can't really hear you from the howling wind and my pulled-down touque. Did you say something about someone looking like a dork?'
Sylvain again here. (With unwarranted photos and editorial comments from Curt.)

Not long ago, I presented some newly painted 1:1200 ships on this blog, along with some crazy plans to play outside. I came up with an hypothetical scenario: 

7 December 1941 - Because their crews were involved in a bar fight the week before, the Admiral decided to send at sea the USS Colorado and the USS Arizona, for a gunnery practice involving lots of healthy drilling. However, after a day at sea, the two battleships stumbled upon two Japanese battleships, part of the Japanese Fleet sent to attack Pearl Harbour.

AMERICANS: USS Colorado, USS Arizona
With their slower units, the Americans know they are in trouble. The American player's objective is to inflict damage to both Japanese ships in order to slow them down and then try to escape in order to participate in the defense of Pearl Harbour.


JAPANESE: IJN Ise, IJN Kongo
Banzai! The goal of operation Tora Tora Tora is to eliminate as many American capital ships as possible. The Japanese player wins by sinking at least one American ship and then escaping.


All the models are from Superior Models.

After a week of being harassed, Curt and Peter kindly agreed to give the game a try. The weather was as to be expected for the season, but a little challenging for wargaming: cloudy, about +8C, very (VERY) windy.

Peter: 'Right, and who's idea was this again?'
Admiral Peter, of the US Navy, in command of the USS Colorado and the USS Arizona, about to spot the Japanese intruders.You can read his report of the game here.

Curt: 'F*ck, its cold! This is not the South Pacific, its the bloody Murmansk Run!'
Kaigun Taisho "Kaato" (Japanese pronunciation of Curt), maneuvering the IJN Kongo toward Pearl Harbour. He is holding a turning gage, formerly known as a paper plate.


This picture gives a sense of the firing distances. Ships were firing at 20', and they were about 40' apart. Hits happened at about 30', which is about 12,000 yards. "Real" naval engagement, according to what I have read, would take place at about 18,000 yards (45' at this scale).

Sylvain cutting quite the dash in his wargaming toolbelt - Ooh, TRES sexy!

Peter rangefinding with his... iPhone... obviously the Americans have a leg-up in gunnery technology.
Shells from the Colorado are getting dangerously close to the Kongo. Captain Peter proved to be very effective at guessing range. On the following turn, the Colorado scored a hit on the Kongo while the Ise hit the Colorado in return. Both ships lost a main turret.


Kongo's fire ranging in on one of the American battlewagons.
A hit! A palpable hit!

Peter running madly after a turn gauge being blown away in the wind. I'm sure there's a song somewhere in there...
Sylvain is having waaay too much fun with his monster tape measure.
Curt's Kongo getting 'bracketed' by American fire. Ouch!
Bullseye! Guessing the exact range, directly onto a a ship's base translates in 2 hits. The Kongo, at this point, had lost a main turret, half the secondary armament, AA guns and was crawling at a speed of 14 knots. The Japanese commander decided at this point that bombarding Pearl Harbour with battleships might not be worth that much trouble after all and decided to rendez-vous with the main fleet. Admiral Yamamoto, a little busy right now, might not find the time to read the battle report before a few days. The American ships, hearing bomb explosions in the distance, decided to head back home to see what was happening.


Because of the heavy wind, there was no way to keep the "splashes" upright. The wind even knocked down my tool box full of playing equipment!

Playing in this crazy weather felt like a combination of cross country skiing, paragliding and wargaming. Afterward, Curt and Sarah treated us with delicious hot tea and pie.

How to describe this kind of gaming experience? "Different" comes to mind. It really gives a feeling of how distant modern dreadnoughts were when exchanging shells. Using "distance evaluation" replaces the luck of the dice with the evaluating skill of the players. There might not be another game before next spring, so I will have plenty of time to make some adjustments.